


Jeff I indu
-
Posts
86 -
Joined
-
Last visited
Everything posted by Jeff I indu
-
49 chrysler royal timing chain cover 6 cyl.
Jeff I indu replied to Jeff I indu's topic in P15-D24 Forum
You are right. I buffed the crank end with emery cloth and cleaned the inside of the hub the best I could but it took a big hammer.to get it back on. I then had to file the edges of the hub to get the pulley to slide back on the hub. It's running fine now. Hindsight maybe I could have heated the hub in some hot water before installing it but it's done now Jeff -
49 chrysler royal timing chain cover 6 cyl.
Jeff I indu replied to Jeff I indu's topic in P15-D24 Forum
All done, I did order a speedy sleeve, sam, great idea and thanks for the part number. It fit just like your picture showed. I thought about using the pvc to center the housing but decided to just use my hub. On my car the balancer, pulley and crank hub all separate. Loosely installed the timing chain bolts and used the hub to center everything before tightening all the timing cover bolts.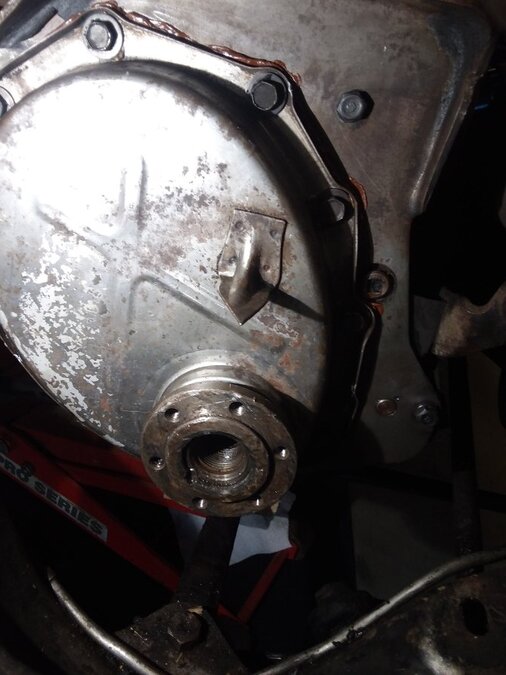
-
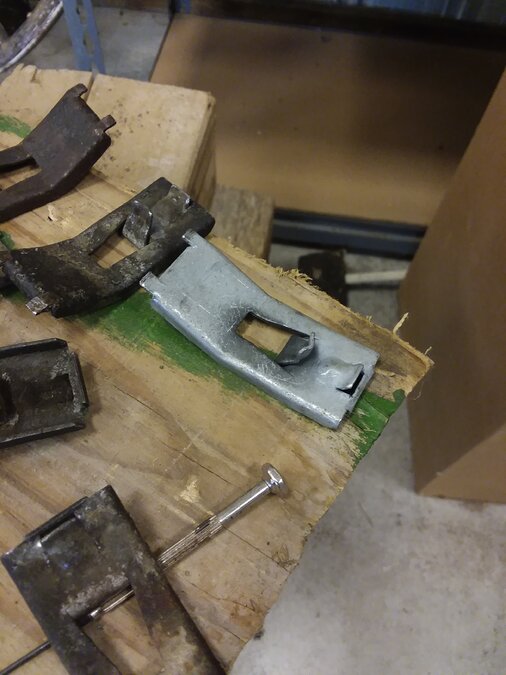
I just went through this in my 49 royal. The rocker moulding was not attached when I bought it. Definitely there should be a place under the car for what you call a weird clip. I found the boltsand washers still in the body. My clips are a different style. Had a body shop help me. They bolted the front down first and then beat down on the rocker moulding clips to get them to pop into the rectangular cutouts in the body. The back bolt was the last to tighten. Yours are different and straight. I dont see a locking tab on yours. I had a few of the tabs broken and bought so me extras on Ebay. Really should pop into the body somehow to hold it tight. Not sure how yours clips would lock?? Jeff
-
49 chrysler royal timing chain cover 6 cyl.
Jeff I indu replied to Jeff I indu's topic in P15-D24 Forum
Andy, I'm not sure because I've never done one but think mine had 6 bolts instead of 6 rivets to hold it together. After staring at it for the past hour I think once I unbolt the 6 bolts then the pulley will be free. It may not even be pressed into the crank. I may only have to pull the hub and the pulley will fall out. I see what you mean about wedging a piece of wood to lock it. Got a 3/4 in drive set and will bust it out tomorrow. After learning the hard way with chrysler lug nuts it's good to know up front that the big nut is standard thread. Book just doesn't give details. Jeff -
49 chrysler royal timing chain cover 6 cyl.
Jeff I indu replied to Jeff I indu's topic in P15-D24 Forum
Hello, Got it apart today and soaking pulley and nut with pb blaster until tomorrow. I assume the 6 hub bolts come off first. Then the big nut. I assume it backs off counterclockwise as normal. Is the hub and pulley come off as one unit or does it separate? If it separates do I need to mark it or are they both keyed to only go back on one way.I have it sitting at DC right now on the timing marker. The book does not provide details. It appears the seal has been leaking for a long time Thanks Jeff .
-
49 chrysler royal timing chain cover 6 cyl.
Jeff I indu replied to Jeff I indu's topic in P15-D24 Forum
DJK So is special tool C-522 really just a sleeve that slides over the crank end to mimic the pulley hub? Puts pressure on the lips of the seal to help center the timing chain cover while you tighten it? Then when you install the pulley you know the seal is already centered? A piece of pvc will do the same job of centering seal? 2 in ID maybe? What is the duct tape used for? Again I have not started this job yet. Just trying to line up the tools I will need Thanks Jeff -
49 chrysler royal timing chain cover 6 cyl.
Jeff I indu replied to Jeff I indu's topic in P15-D24 Forum
Sam, I assume you mean if the old seal has worn a groove on the crankshaft end that I can still feel with a fingernail after buffing with a strip of crocus cloth then i should use a speedy sleeve? Or does the pulley have a hub that the seal rides on? Either way i will check it out once removed I am hoping it is leaking due to being 71 years old and now using a thinner oil. Knuckleharley, you are right. I have done many timing chains without special tools, just never on anything this old, therefore I ask questions before I start. -
49 chrysler royal timing chain cover 6 cyl.
Jeff I indu replied to Jeff I indu's topic in P15-D24 Forum
Makes sense to me. Whenever I see use special tool xxxx I always wonder if it is really special. I have gear pullers, harmonic balancer pullers and steering wheel pullers. I dont have a deep well socket that big but will cross that bridge when I get to it. When reinstalling it makes sense to let the seal center on the crank before tightening. I dont know what tool 522 is unless it is like a speedy sleeve and spreads the new seal with pressure to center it correctly. But it seems strange to spread the seal flange for fear of stretching it.I would hope that modern seals ride firmly on the crank hub and center without the need for a special tool. But still need to order the parts and pull the radiator. Once I start the job it will probably all make sense. I just wanted to understand if there is really anything special about the special tools specified that would stop me from doing this job correctly Thanks for the response Jeff -
I've put about 400 miles on the car in the past few weeks. I now have a leak at the seal on the timing case cover. No surprise. The car mostly sat for the past 35 years and I switched to shell rotella 10w30 oil. My shop manual lists the camshaft and chain case cover removal as a single procedure. I believe I only need to drain and remove the radiator to gain access. The book says to use puller C-355 to remove the crankshaft pulley. I assume the pulley is held to the crank with a single bolt and then I can use a gear puller?? Or does it have threaded holes and I can use a steering wheel type puller? Just want to have the proper puller in hand before I start. Once I have the cover off knocking out and installing the new seal should not be a problem. But then the book says to reinstall the cover just enough to hold it in place and use special tool C-522 holding it in place by crankshaft starting jaw. Tighten starting jaw with fingers only. Tighten chain case cover screws. As chain case cover screws are being tightened and gasket compressed tighten starting jaw but maintaining a slight tension between seal and centering tool. Then remove special tool and install. Crankshaft starting jaw tightening it to 108 foot pounds minimum torque. Not sure what tool C-522 is or if I really need it. Also not sure what crankshaft starting jaw is also. My experience is that the new seal should slide over the lightly oiled crankshaft end, then tighten the cover bolts and reinstall and tighten the pulley. Can someone who has done this clarify the need for the special tools and define what crankshaft starting jaw is? Thanks in advance Jeff
-
A most recent pic, and the story...Share your old Mopar!
Jeff I indu replied to keithb7's topic in P15-D24 Forum
Mine is still 6v also. When I show the car to friends or family I just reach in the window and tap the key and it fires right up and idles smooth. They cant believe it. The new sparkplugs, distributor cap and wired made a huge difference. I actually bought a set of points at the same time but decided not to install them as I was afraid I would make it worse. -
A most recent pic, and the story...Share your old Mopar!
Jeff I indu replied to keithb7's topic in P15-D24 Forum
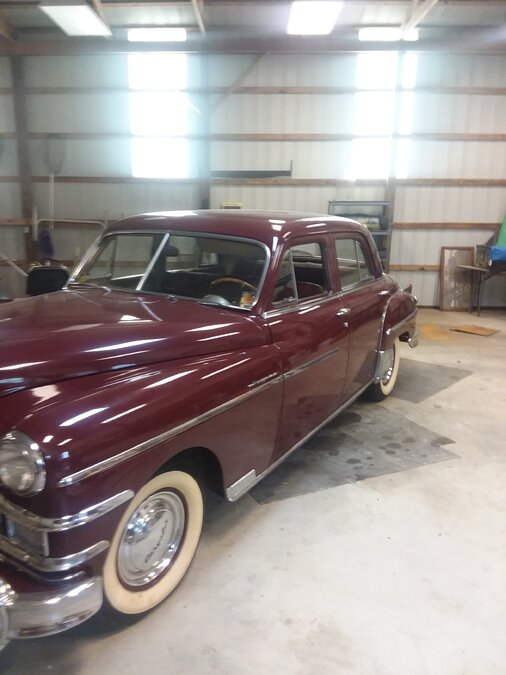
49 chrysler royal. Bought it at auction last October. It was painted in 1984 and put away for 35 years. Started but brake pedal went to floor. Replaced master cylinder, wheel cylinders, brakes lines etc. Also new champion radiator with new rubber everything. Plugs, spark plug wires, all new fluids etc. Finally got all my electrical issues figured out. Headlights, turn signals, brake lights now all work as they should. Got tags and insurance 4 weeks ago and have already put a few hundred miles on it. More this upcoming weekend. Only issues were running out of gas my first time out due to a gas guage showing full and shorting out the starter relay due to pressure washing it. Both my fault and this forum helped me out a lot. Interior is totally original and well worn. I plan on starting working on the interior this winter after putting a few hundred more miles on her. Gets lots of looks Jeff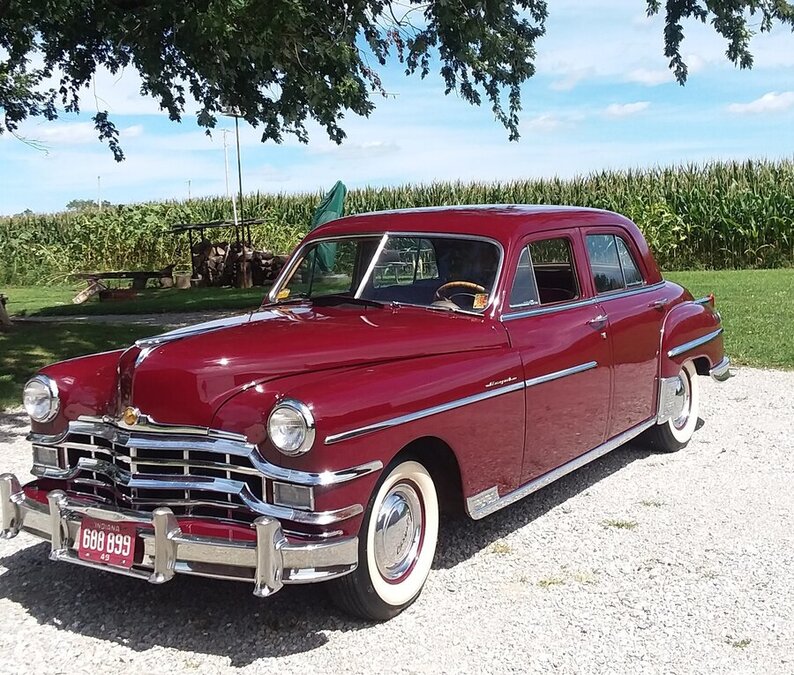
-
Guys, I will advise the outcome. It's in the mail. Since 99% of the chrome is already gone there is nothing to hide. The majority of the surface is as smooth as it appears in the picture. I already advised them that there are 2 small pits in the bottom lip that should be filled. But all who gave me estimates advised that until they have the piece in hand it is subject to change. I am hoping for the best. The original rock guard was accidently run over by the previous owner. This one is a Ebay purchase. I cant explain the almost total lack of chrome without more pitting but that's how it appears to me. There is zero chrome appearing in the picture. Only less than 1 square inch left on bottom lip. Jeff
-
Thanks for all the suggestions. Prices are all over the board. I sent the same picture and description to several chrome refinishers. 12 inch X 8 inch and described as pot metal. 2 small pits on the bottom lip. Several dont do small jobs so didn't waste my time with them. Paul's did not respond to my quote request at all. Smittys chrome said they could do it for $125. Highline plating quoted 235 to 325. Cambridge quoted $350. D.G. custom chrome in cincinnati would not quote until they see it but he was talking at least a couple hundred dollars over the phone. Got a quote from St. Louis Plating for $100 today. Talked to them on the phone and as long as it is as described he feels he can do it for $100 plus return shipping. So I will be sending it off tomorrow to St. Louis. If it comes back looking brand new I will be very happy. If it has a few minor flaws I will still be happy. My other side rock shield is not perfect, it has some pitting, but definitely not bad enough to justify rechroming. So worse case is they match Jeff
-
I am looking to rechrome my rock shield. I just sent pictures to Paul's Chrome and Smittys Chrome for estimates. Both places popped up on my phone and I dont know anything about them. Just wondering if anyone has dealt with either of them or if you have favorable dealings with someone else. I am close to cincinnati, louisville and indianapolis if anyone has had a good experience with a chrome refinisher in these areas Thanks Jeff
-
Dont know yet. I'm having it detailed sept 2nd and they have all the little brushes and tools. The guy at napa that mixed it said that the program gives a rating that gives an accuracy rating for the match on a scale of one to four with one being great and 4 being not so great. The rating was around 1.5 and he said it was suitable for spraying and blending into surrounding areas. For my purposes of filling some chips I expect it to suit my purpose. First time I have tried this color match with napa but my local body shop said this is the service they would use Jeff
-
I just had a pint mixed up this morning at my local NAPA paint shop to touch up a few chips. They could could not reference the two digit chrysler paint code or the ditzler code I found on the internet. They ended up using a spectrograph thing that was gun shaped. Held it directly on the paint for about 30 seconds and it gave them the info to mix me a pint. Pint is the smallest quantity they can do. 32 dollars plus tax Jeff
-
Yes, ordered the starter solinoid relay off ebay for 90 dollars delivered and put it on yesterday. Bench tested it, worked perfect and no issues. Installed it and cranked it several times yesterday with no problem and drove it for 50 miles today with no issues. As always thanks for all the advise and direction on this site and I wont be pressure washing this engine again Jeff
-
Yes, exactly.
-
Hickory Took another look and probed with a test light. I see no loose wires. However this time I did notice that when I have a hot wire on the small ignition post and pushed lightly on top of the contacts they did jump together. When you remove the hot wire from the small post the spring pulls them back apart. Reattach the hot wire and the contacts will not touch without a gentle push down. It's as if the coil in the relay does not have the strength to pull the contacts together without a little help. Still thinking I got it wet and something bad happened to the relay Picture shows where I bent the bottom contact a bit, hooked up the hot wire and gave the top contact a push. Then they stuck together but nothing happened. But if I hit the hot wire on the bottom contact,(top in the picture) pinion kicks out and starter spins as it should Jeff

-
Just grounded the upper left to the battery as well as using a jumper cable from the battery to the ear of the starter. Nothing happens. I am thinking the starter relay is bad since when I hit a hot wire to the lower contact the solinoid engages and the starter spins. Manually touching the contacts together does nothing. I did pressure wash the engine last week and know I hit the starter/solinoid hard. There was still moisture under the solinoid cover when I inspected today. Maybe fried the little coil In the relay. At least that is what I am now suspecting. I see them on Ebay for about 90 bucks. I wont be pressure washing this engine again. Jeff
-
Hickory Did what you said and bent the contacts a little closer and still nothing. Pushed the contacts manually and nothing. However when I hit the lower contact with power the solinoid energized and it kicked out and the starter turned as it should. But going to go back out and ground the upper right terminal per 50mech and see what happens. I did not have it grounded at all today so maybe that's the missing piece Jeff
-
This problem is intermittent. Saturday it failed to start at least 10 times. Got some alligator clips and wire and went out Sunday to work on it. Fired right up. Drove it down the road and it shifted fine. Started in the garage at least 10 more times on sunday without issue. Today the starter would not start. Did as dodgeb4ya said and grounded the upper left terminal while applying a hot jumper to the upper right. Still nothing. Verified with a idiot light my hot wire was hot and the ground verified. Crossed the two big lugs at the bottom and the starter turnd but gear does not kick out. So I pulled the starter and cleaned and inspected it. I removed the solinoid cover and I did find moisture and gunk from pressure washing it. Pulled the starter cover back a inch and inspected it. There are commuter bar is shiny with some light scratches on it. The brushes I would say are worn but didn't measure their length. Hooked a old battery cable up to the main lug and used a jumper cable to the ear of the starter. Used a hot wire to the upper right terminal and still nothing. Crossed the two bottom lugs and the starter spins but the pinion does not kick out. Seems like I need to get the contacts in the solinoid to close. If bad brushes or grounding issue why does the starter turn when I cross the two bottom lugs? Book says if points still do not close when starting switch key is turned (in this case my hot wire) defective wiring in ground circuit, poor brush condition in generator or a faulty relay coil is indicated. Since the starter turns when I cross the two main lugs would that mean the brushs and ground circuit are functioning and the relay coil in the solinoid is not functioning? Or maybe its time to take it to a rebuild shop where they can test the commutator bar and replace the brushes.

-
Took it for a drive last night once it finally started. Fluidrive transmission shifted normally for about a mile. Then after a stop it would no longer shift into the high range. Brought it home and parked it in the garage. Today tried turning the key a few times and nothing. I believe both problems are related as the shift is controlled by the electric solenoid on the transmission and I obviously have a electrical break somewhere. Tomorrow I plan on pulling the starter and checking all my contacts. To bench test the starter out of the car I assume I can use a pair of jumper cables. Positive side of battery and clip anywhere on the starter to ground. Negative side of battery to lower right terminal as it is in the car. Then use a hot jumper to upper right terminal of solenoid to mimic the ignition switch key being turned to the start position. Initially I would expect the solenoid to not work and after inspection, cleaning or whatever i find that it will operate as normal. Is this the proper way to bench test the starter out of the car? I am hoping my shifting issue will disappear once I get the starter working properly again Jeff
-
Just turned the key and it fired right up. I dont know. I did pressure wash it a few days ago and maybe it's just moisture trapped in the solenoid. Going to drive it a few miles, then park it in the garage. Over the next few days I will see if it is intermittent or something that requires replacement. Maybe clean all my connections tomorrow. Thank for advice Jeff
-
Jumped them, starter spins but does not engage. The solenoid is not kicking out. Any options? If I pull the starter tomorrow morning, can the solenoid be taken apart and cleaned/ dried? Just not used to this type of starter. Haven't seen a solenoid on a starter since I was a kid and I am 61 now Jeff


