woodscavenger Posted October 17, 2008 Report Posted October 17, 2008 I bought a gasket set from Vintage PW. It is 4 piece. The front and back are thick cork for the recessed curves. The sides are a thinner fiberous gasket. The cork ends stick up above the level of the oil pan edge by about 1/4-1/2 inch on each side. The side gaskets would overlap the cork if the cork edges were not standing so proud. Do I trim the cork and/or the side gaskets? Should I trim the cork down low enough to lay the side gasket over top? What is the best way to seal them? The parts guy said thin coat of oil then black RTV in the corners where the pieces meet. Quote
Don Coatney Posted October 17, 2008 Report Posted October 17, 2008 Do not trim the end pieces. I used gasket cement on one side only for the side pieces. No cement on the end pieces. This allowes you to remove the pan and re-use the gasket. Quote
woodscavenger Posted October 17, 2008 Author Report Posted October 17, 2008 Mine looks similar except the side gaskets are thinner. I can see from the photo that like mine when the side gasket butts up against the front gasket the holes do not line up. How do you correct that? So am I correct to assume that as I bolt up the pan that the evenly spaced pressure with compress that overhang part of the gasket evenly? To me it looks like as I put it up there it will get bent or cracked. Quote
Dodgeb4ya Posted October 18, 2008 Report Posted October 18, 2008 The (4) ends of the oil pan side rail gaskets should be positioned on top of the curved shape oil pan end gaskets that poke up 3/8" above the pan flange surface-then the gasket bolt holes line up. I push in 2 very small pins at each gasket corner to help hold the gaskets tightly together while the pan is bolted up to the block. The pins stay in place permanently. I install 4- 2" long studs at the oil pan corner bolt holes to help guide and hold the gaskets in place too. You can also use thin sewing needle thread to hold the pan gaskets in place along the side rails of the pan. Guide studs are best to use. Use silicone sealer at the corner end junctions of the pan rail side to end gaskets and sealer on pan to gasket- pan side only. Leave block side dry. Helps keep the gasket from squishing-sliding out of position! Bob Quote
grey beard Posted January 10, 2009 Report Posted January 10, 2009 After your pan is completely cleaned - use a wire wheel on the gasket surfaces and make them shiny clean - put gasket cement of your choice on the two side pan rails. Let this tack up and place the two long thin side gaskets on the cement surface. Now drop all of your cleaned pan bolts through the gasket to get completely lined up as it should be. Set this aside to set up for a day or two. When you are ready to install the pan, remove the bolts and install the two thicker end pieces into their respective slots. Center them so that each end sticks up the same amount. Put a dab of silicone cement on each side of each tab that sitcks up. Now isntall your pan, getting whatever bolts started you are able. As you begin to tighten the few bolts that are started, get the remainder in place as well. Now go around the entire pan, snugging each bolt just a little. As you go around the pan for the second and third times you will feel the bolts you already tightened feel a little looser. Continue to tighten each bolt a little more as you continue going around the pan several more times. What you want is no tight bolts - just a tight pan that doesn't leak. Final torque will be about 20-25 ft. pounds at the very most. Quote
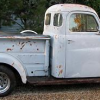
Tom Skinner Posted January 10, 2009 Report Posted January 10, 2009 Don, My Gasket (The Side Pieces) and ends all ran "wild". That is to say my end pieces ran 3/8" up past pan edges and the sides over the end Gasket edges as well. I see in your picture your sides stop at where your ends run past the end pieces by 3/8". My pan drips oil after every ride, just a drip or so. I just bolted mine up with all ends running past "wild" thier respective points. Maybe thats why mine leaks. I have always done this wrong, I guess. I bought a new gasket, should I try again just like your picture, or does yours leak a little oil after every drive also? Tom Skinner PS. Thanks for the great picture of the right way to do it, I have owned 1948 Chryslers (2) for 36 years and have never installed an oil pan gasket correctly yet. They have always dripped a little oil because of my crappy install habits. Quote
Don Coatney Posted January 10, 2009 Report Posted January 10, 2009 I have parked my car over this same piece of cardboard for about 3 years now. I can live with the leaks I have. Quote
Tom Skinner Posted January 10, 2009 Report Posted January 10, 2009 Don, Thanks! Mine leaks a tad more but not much more it is very tolerable. I changed my Oil Pan Gasket when I did my Clutch job last year and needed to change out my Rear Seal when I had the Bell Housing Pan down, and Oil Pan off it made it easy to reach. I think I'll wait until Ineed in there again to change the Gasket again. Tom Quote
Fluid drive Posted January 12, 2009 Report Posted January 12, 2009 One more hint that may help any of you who want to install a pan set. Use a couple studs in the block skirt run up into place finger tight to help you line things up as you raise the pan into position. That will greatly relieve the strain of trying to hold the pan up and compress those cork end gaskets enough to start the pan bolts. Did anyone mention that the flanges should be straightened too? Any where there are distorted holes from over tightening . I typically use some washers under the heads of the bolts for a little better job of tightening with out puckering the pan around those holes. Always liked those 8 cyl. chryslers and '36 vintage desoto&chry. sixes because the pan skirt is flat without those cork end gaskets. Quote

Recommended Posts
Join the conversation
You can post now and register later. If you have an account, sign in now to post with your account.