


Jim Gaspard
-
Posts
423 -
Joined
-
Last visited
Content Type
Links Directory
Profiles
Articles
Forums
Downloads
Store
Gallery
Blogs
Events
Classifieds
Posts posted by Jim Gaspard
-
-
John, where is your brother's resto, Longview too? There aren't too many running Pilothouses in these neck of the woods, or Texas for that matter, at least that we know of. I believe I got a steering wheel from Carl of Plano several years ago too. We haven't heard from him in a long time.
-
If that radio in the Spokane B3 is the holy grail 610-T, then someone is going to be a lucky winner at that price. Some guys here would pay that for the radio alone.
-
Short of obtaining a copy of your build sheet from Chrysler, and picking out certain features that were unique to the 1951 & 1952 B'3s versus 1953 B4's, you can look at your engine cast date on driver's side (starboard). Assuming you have original engine in your truck the cast date will give you a good estimate give or take a few months as to when the engine was paired with the cab & suspension. A late 1952 cast date could very well had ended up in a 1953 model B4. The build sheet will be the definitive answer to your question, but as I found out you need to privide Chrysler Museum with a copy of your title with truck in your name, someting I will not do until I finish my restoration sometime this decade.
-
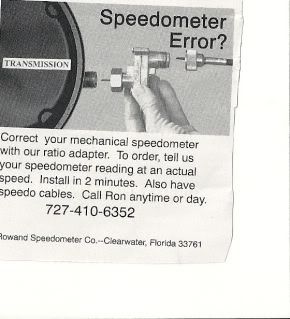
Came across this in September's Goodguys mag. The gear adapter may be the answer for changing our rear differential gears and keeping your speedometer true.
-
Hey welcome! Another Pilothouse in the Lone Star state. There may be someone closer, but I'm in Dallas and have two B3B's, one an assembled driver and one just starting to go back together. You're welcome to ask questions, or come see the driver as a guide to how it all fits together.
-
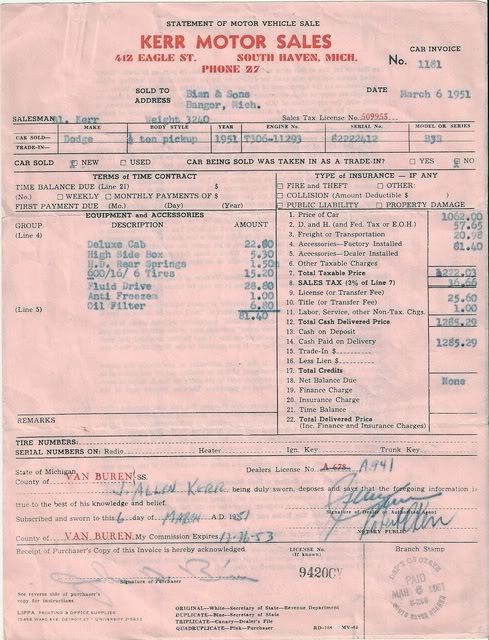
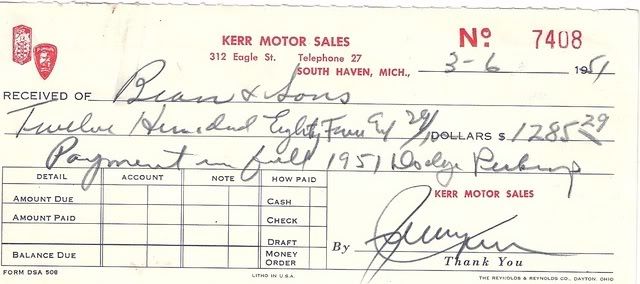
I picked this B3B invoice up several years ago. It was a cash deal, too with Paid Receipt. $81.40 for all the extras boggles my mind. If you're in Michigan with a B3B high-bed half ton, deluxe cab, fluid drive, #82222412, get in touch.
-
My freebie is a Carter YF 4378 S.
-
Mario, I have a Carter carb off my B3C parts truck. It has a cracked neck, but may be good for parts. It does not look like yours but maybe the floats are interchangeable. If interested send me your address and I'll drop it in the mail.
-
Make sure that your in-line gas filter is not clogged. Check your line and gas pump before overhauling your carb.
-
Good looking metal, deluxe cab and one of the best undamaged grills we've seen in a long time. It has the optional air scoop which should give you some good natural air conditioning. Good luck. Looking forward to seeing your progress.
-
Donor tanks from Pilothouse trucks are the only source for exact replacement I'm aware of, and the condition of many of these is suspect. After months of searching for a new tank, I resorted to taking mine to an old school radiator shop. They dipped it to remove all the internal and external rust, then soldered the holes and painted the interior with a special coating used in aircraft tanks. Kind of pricey ($250 each) but I have a safe conscious that it will not be rusting from within and clogging my fuel lines. There are also Re-Nu shops in major cities (see Hemmings) that specialize in renovating tanks, but again they are kind of pricey also. There are also some D-I Y kits available for under $100. Add gas tanks to the long list of after market resto parts we would to see for our trucks. Good luck.
-
This thread with Reg's photo shows the difference between the internal bypass and external bypass gaskets. Generally speaking B1's and B2's were external bypass and B3's incorporated the internal bypass design. I have a an early production B3 (1951) and a late production B3 (1952) and they are both internal bypass.
http://www430.pair.com/p15d24/mopar_forum/showthread.php?t=6119&highlight=internal+bypass
Since your engine is apparently external bypass, you can probably trim off the protrusion part of the gasket.
-
I bought my RI harness three years ago for my frame-of project but decided to install it in my Driver for the same reason, too brittle and unraveling wires. The install went pretty quickly over a weekend but haven't been able to get my B3 started yet. I believe my problem is grounding related but haven't been able to track down exactly the problem despite plenty of advice from Forum members. When it doesn't work all you do is second-guess every step made installing the harness.
So, my advice in hindsight. Go slow. Run a test on each wire to make sure you have a complete circuit. Make sure you have good metal to metal contact when reattaching to those old terminals. Check and recheck each connection to the included diagrams which are very accurate. Also attach your headlight wiring from the bulb side of the bucket and make sure you have two pliable rubber replacement grommets where the wire passes through the bucket on the way to the terminals at each side of the radiator. As you know each section of color wires is individually wrapped and packed with a point to point diagram, so just take one piece at a time. Getting under the dash is probably the most cramped being on your back in a tight space between the seat and the pedals but its do-able. Don't rush, you only want to do this once. You should be good for another 50 years. Good luck.
-
That's a major road trip for a 48. Are we talking America's backroads, or interstates with the bad boys? What was your average speed and how far did you average each day?
-
Lot's of chebbys and furds in our Dallas burb parade. I was on foot again ........but maybe next year.


-
The high beam indicator light is at the bottom of your speedometer guage. If it doesn't light up when you hit your high beam switch in the floorboard, the bulb may be burned out and can be easily changed if you are either young or a contortionist.
-
Well,this weekend is our much celebrated 4th of July for USA Forum members. For many of us it's the day we live for to proudly parade our Pilothouse trucks with family and friends. Alas, I'll still be pulling a hand-wagon with my two grandkids, my B3's are not road worthy yet, but someday.......! Take plenty of pictures and let us all see your patriotic truck on the 4th.
-
I replied and added you to my friends list. I've never understood how exactly the message board works, but there is a box to check to send e-mails anyway if you're not on a friends list. To me, everyone on the forum I consider a friend, well, maybe save one or two who are walking the fence. I'll send photo options this weekend. Happy 4th.
-
Hank, I believe Eric was talking about my drivers side visor that I offered to Dollydodge. Mine did clean up with some buffing but obviously not chrome like Eric's. I have a couple of extra driver's side visors so I would be happy to make a loaner. If I get the passenger side, I will also make it a loaner, but if not maybe someone else will. Here's mine cleaned up a bit.
-
That's strange. There is no wear on the outer flange of the flywheel so the marks should not be worn down. Unless the flywheel has been replaced with some generic wheel, the marks should be under several coats of paint. Marks are not that deep so it would be easy for them to be filled in over time.
-
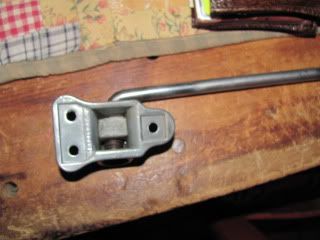
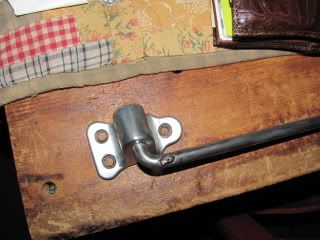
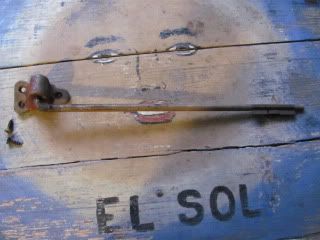
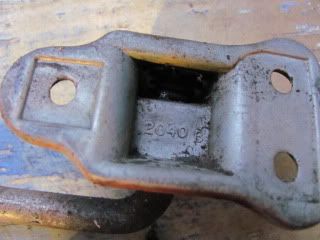
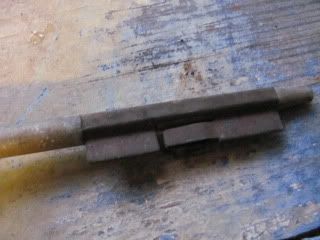
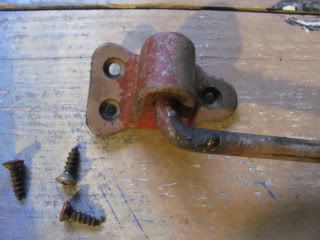
Jake: I believe the board is similar or identical to plain brown particle board found at Lowes or Home Depot.
Dolly: I don't think the brackets are steel or iron, some kind of pot metal. The bracket is not rusted, but is more like a patina from its age. They are partially painted red from my parts truck. I think they will buff out to be more shiny and if you want I will buff tonight and reshoot a photo. The rod does appear to be steel.
-
I've removed two steering columns on my B3's restore (both column shift) and reinstalled one. The process is fairly simple as long as you're able to remove the floor pans and get the steering wheel off. After 50 plus years that steering wheel can be stubborn (whole other story - go to Search), but once its off, removal of the column is just attacking strategic bolts and nuts. The engine compartment access is a little tight but if you put the truck up on blocks there will be ample room to manuever. Take before pictures and document your steps for the reverse install. Keep us posted.
-
Here you go!
-
Welcome to the Pilothouse Forum. All sheet metal, cab and engine compartment parts on the B1C (3/4 ton - 116 inch wheelbase)) should be interchangeable to the B1B (1/2 ton - 108 inch wheelbase) except drive shaft, running boards, frame, rear suspension and bed floor/sides. Wheels on 3/4 ton are probably 15 inch while 1/2 ton's are usually 16 inch diameter. Good luck on your restore.
Pilothouse parts in East Tx
in Mopar Flathead Truck Forum
Posted
Click on his name and send him an e-mail. The Craigslist posting has been deleted so he may have sold it, but he responded to my email several days ago.