Charles Furman
-
Posts
221 -
Joined
-
Last visited
-
Days Won
1
Everything posted by Charles Furman
-
1949 Dodge B1B Woodie Makeover
Charles Furman replied to Charles Furman's topic in Mopar Flathead Truck Forum
4/4/14 Update I picked up the rear-end today and took it out to the shop. The wheels are now painted to match the body. Now that all the frame painting is done in the front, stuff is going back in for good. I am particularly pleased with how the A/C plumbing is going up inside the fender,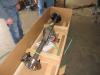
-
1949 Dodge B1B Woodie Makeover
Charles Furman replied to Charles Furman's topic in Mopar Flathead Truck Forum
John-T-53 Everything that I am not doing myself is being done by a couple of brothers, Chad and Dave Everett, at there shop in Fallbrook, CA. They do everything (metal fabrication, wiring, paint, exhaust systems, etc), In fact the only thing that they aren't set up to do is upholstery and woodworking. This is a relatively small shop and these guys do excellent work, as you can see. The other part that is cool is that they let me do all the work I can right in their shop using their tools. That's a lot different from the places that have a chain across the shop with a sign saying "employees only" It took me almost a year to find these guys, and I looked into a lot of shops. I am so glad I took the time to find these guys. -
1949 Dodge B1B Woodie Makeover
Charles Furman replied to Charles Furman's topic in Mopar Flathead Truck Forum
ruff48kr - All B1 Series (48-49) pickups used the same tank bracket. I might be able to help you out, so send me an email to charlesfurman@att.net. The fuel tank is already sold, but I don't think the guy needs the bracket. Here is the AC unit I am using. It's a Vintage Air unit I got through Summit Racing Equipment. VTA-671400-VUZ Air Conditioning, Gen IV Magnum, Heat & Cool, 26 in. Length, 10.5 in. Height, 10.5 in. Depth, Kit (Mfr. #: 671400-VUZ) -
1949 Dodge B1B Woodie Makeover
Charles Furman replied to Charles Furman's topic in Mopar Flathead Truck Forum
Now that all the fabrication and fitting work is completed on the front half of the truck, we pulled everything out and did some painting.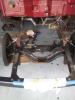

-
1949 Dodge B1B Woodie Makeover
Charles Furman replied to Charles Furman's topic in Mopar Flathead Truck Forum
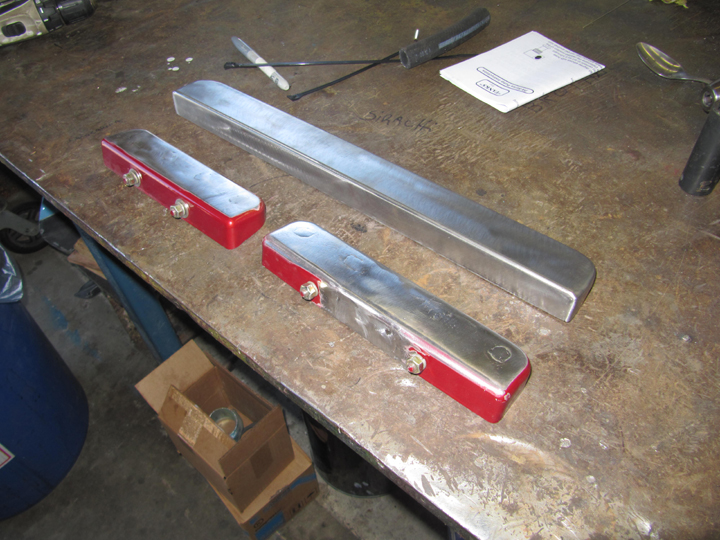
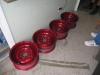
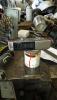
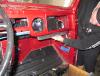
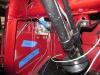
3/21/14 Update I am using the stock under dash heater control panel to house the air conditioning vents, ac/heater/defroster controls, and the fresh air vent which we were able to retain. I'm using one stock panel for the drivers side A/C vent and there will be a starter button mounted on it also (pictured below on paint can). The panel that will sit under the center of the dash and house two A/C vents is a stock panel that we stretched about two inches (no picture yet), the passenger side panel is a custom made replica which will house passenger side A/C vent, the A/C/heater/defroster controls, and the fresh air vent cable (pictured below). There is a picture below of what the new floor pan is going to look like. It's not quite complete, but you get the idea. The hole to access the master cylinder is in place and we still have to cut the access hole for the battery box. I am really happy how it is coming out. The entire floor board will be relatively flat. Remember, I had a floor shifter and a floor mount e-brake before. Now my honey can slide over and I may even be able to cop a feel now and then. I'll might have to buy a suicide knob. The final picture is of the new wheel. Just picked them up from the Wheelsmith in Corona, CA this morning. They have the stock centers with new 7 inch rims, so they are 16x7 and my stock hubcaps will fit right on. I plan to paint them to match the body which is the look I had when I had the full body colored beauty rings on it before.

-
I have all the stock front brake parts (drums, shoes, cylinders, hoses, springs, etc) that were removed from my B1B when I converted to disk brakes using a kit. The parts had less that 500 miles on them when they were removed and have been stored in a dry box. I have a fellow member who is considering buying all of these parts as a package. Neither he or I know what a fair price would be, so I am asking for you thoughts. I'm not trying to make a killing on the deal, and he isn't trying to steal them. Thanks in advance for any input.
-
Trailer hitch receiver
Charles Furman replied to Charles Furman's topic in Mopar Flathead Truck Forum
Thanks for all the input. Gerald, I really like the hitch you had built. I think I might copy that design. Gene, I hadn't considered the insurance issue relative to towing a trailer. Actually, I don't insure this truck as a collector or antique vehicle anyway because I drive it all the time and don't like the restrictions of collector or antique insurance. -
What would Pilot House Owners do?
Charles Furman replied to TrampSteer's topic in Mopar Flathead Truck Forum
One more example of why this forum is so valuable. What a great group.- 44 replies
-
- 1
-

-
- B4B
- Pilot house
- (and 3 more)
-
1949 Dodge B1B Woodie Makeover
Charles Furman replied to Charles Furman's topic in Mopar Flathead Truck Forum
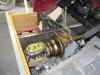
3-7-14 Update - Not a lot of real sexy stuff happening in the past few days, but here are a few new pictures. One is of the new gas tank which is built to fit between the frame rails where the spare tire used to go. Once we get all the mounting brackets ready, the tank will get the filler spout installed and then it will get cleaned up and painted. It looks like it will hold about 24 gallons. The other picture is of the computer which is mounted under the dash on the brace located above the steering column. The picture is taken through the hole where the radio mounts in the dash. The next big things to go in will be a Currie 3.73 to 1 rear-end with disk brakes and the dual exhaust system.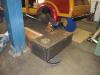
-
Has anyone put a trailer hitch receiver on a pilothouse truck. I'm looking for something I can use to pull a small vintage trailer. I hope to find a really clean installation, so if anyone has any pictures I would love to see them. Thanks
-
Unless you are locked in on the totally stock look and feel, I would highly recommend going with a radial ply tire. For the last 10 years, I have had 16 inch wheels on my 49 1/2 ton Pilothouse truck with 225/75R16 Cooper tires. They fill up the wheel well nicely and ride much better than the stock 600x16 bias ply tires.
-
1949 Dodge B1B Woodie Makeover
Charles Furman replied to Charles Furman's topic in Mopar Flathead Truck Forum
I'm sure I'll be needing something else before this project is complete,and it's great to know I got a fabulous support group here for ideas, knowledge, and, of course, parts. I know I said earlier in this thread that I have been researching and planning this project for a long time, but I forgot how long it has actually been. I bought the steering column and shift lever from John back in 2012 and I got the passenger side mirror bracket from Reg well before that. It has been a long road which makes it feel so good to see it finally coming together. As I think back on it, I've been following this forum for at least 13 years. When I first joined it was Gerald (GTK), Don Coatney, Blue Skies and a few others who were leading the way and teaching the rest of us. Now, I am seeing some of us who learned from them beginning to help others. And so it goes. Thanks again for your support. I am truly honored to be a part of this great vintage Mopar community. Attached is a rendition of my 1949 Dodge Pilothouse Woodie with some "Hemi" attitude.
-
1949 Dodge B1B Woodie Makeover
Charles Furman replied to Charles Furman's topic in Mopar Flathead Truck Forum
John, Yep, that's the 1950 Pilothouse 3-on-the-tree column I got from you. Actually, a lot of guys on this Pilothouse forum have parts on this truck. For example, the small stock exterior passenger side mirror bracket that I got from Reg Evans is going on during this upgrade. By the way, I seem to recall that I agreed to send you the original bracket without the shift notch when I took out the old column. Well the old bracket is now out, do you still want it? If so, send me your mailing address to charlesfurman@att.net and i'll send it to you. Charles -
1949 Dodge B1B Woodie Makeover
Charles Furman replied to Charles Furman's topic in Mopar Flathead Truck Forum
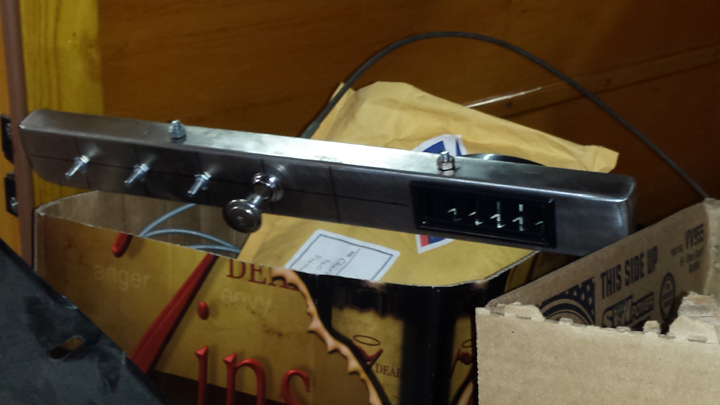
Today's update is about the use of the stock and modified heater control panels. I am going to use the stock heater panel along with a modified panel and a new version we fabricated to accommodate the air conditioning vents and all of the miscellaneous switches and knobs that won't fit in the holes next to the ignition switch in the dashboard. The stock panel will go on the drivers side and will contain one air conditioning vent and the new starter button. The enlarged stock panel will go in the center and will contain two air conditioning vents, and the new longer panel go on the passengers side and it will contain all the air/heater/defroster controls, the fresh air vent cable, and one air conditioning vent. I have attached a couple of pictures of the modifications that are in progress and one showing where the new longer panel will go.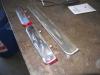
-
I use a plastic putty knife. The kind you might use for chalking. I just shove it under the hubcap and twist it. Doesn't hurt the powder coat on the wheel or the hubcap.
-
1949 Dodge B1B Woodie Makeover
Charles Furman replied to Charles Furman's topic in Mopar Flathead Truck Forum
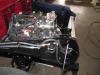
Here's a little more info: Engine - Chrysler 5.7L Hemi engine as was used in 2006-2009 1500 Ram truck (new) Transmission - Chrysler 545RFE 5 speed automatic overdrive (new) Wheels - 16x7 (new hoops with stock centers) Tires - 245/70R16 (not sure what brand yet) Radiator - Dodge Charger (new) When this project is completed, I plan to post a list of all the parts used and their sources. -
1949 Dodge B1B Woodie Makeover
Charles Furman replied to Charles Furman's topic in Mopar Flathead Truck Forum
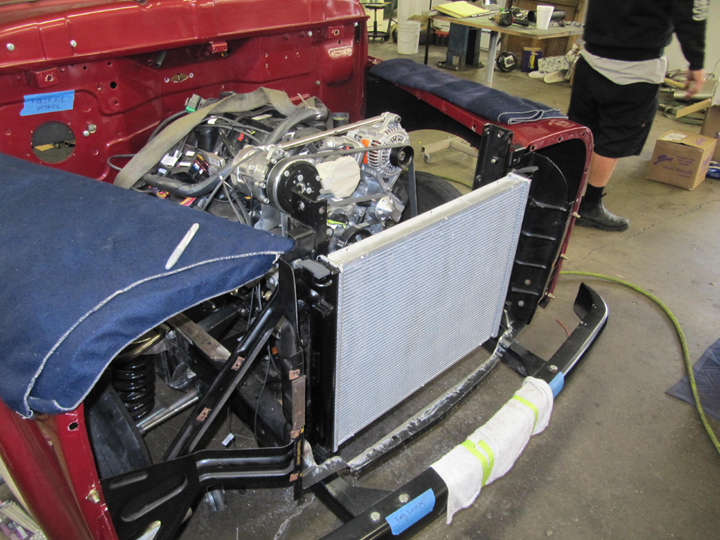
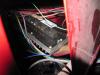
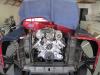
Updates for today (2/28), Modern headlight switch is in. I still have to do some work to get the stock knob and bezel to fit, but it will work out. The wiring is coming along. We pulled the wheels today to take to the wheel shop, I am going to keep the stock 16" centers and have new 7" or 8" hoops put on the 4 wheels that will be on the ground. I don't want the rims any wider than I really need, so I am open for your thoughts on that. I am going to keep one wheel stock, so it will fit in the woodie under the third seat. The new fuse panel is in. The new radiator is mounted. We were able to fabricate the mounting brackets to accommodate a new stock Dodge Charger radiator. It should work fine. I am going place the new gas tank between the frame rails behind the rear axle where the spare used to be. The way it looks now, I think we can do a real clean installation of a 22-24 gallon tank. Here's a couple of pictures of the fuse panel and the radiator..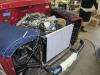
-
1949 Dodge B1B Woodie Makeover
Charles Furman replied to Charles Furman's topic in Mopar Flathead Truck Forum
Hank, As noted in the link TodFitch posted, Woodies on the Wharf in Santa Cruz is on June 21st, but there is also a large woodie meet coming up closer to you in Dana Point on April 12th. Doheny Wood is held at Doheny State Beach. I am pretty sure there will be two or three Pilothouse woodies there. Since my red Dodge will probably not be ready by then, I may drive my 4x4 Dodge B1B Woodie up there. Charles -
1949 Dodge B1B Woodie Makeover
Charles Furman replied to Charles Furman's topic in Mopar Flathead Truck Forum
Tom, Unless something unforseen happens, my wife and I plan to drive the woodie to Santa Cruz. I look forward to seeing you. -
1949 Dodge B1B Woodie Makeover
Charles Furman replied to Charles Furman's topic in Mopar Flathead Truck Forum
And here's the last of the bunch from 2/21/14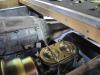
-
1949 Dodge B1B Woodie Makeover
Charles Furman replied to Charles Furman's topic in Mopar Flathead Truck Forum
Here's a few more pictures from 2/21/14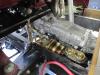
-
1949 Dodge B1B Woodie Makeover
Charles Furman replied to Charles Furman's topic in Mopar Flathead Truck Forum
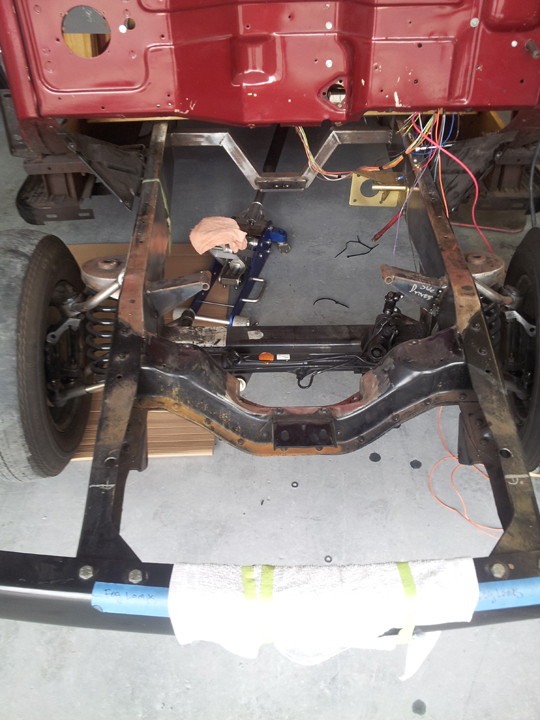
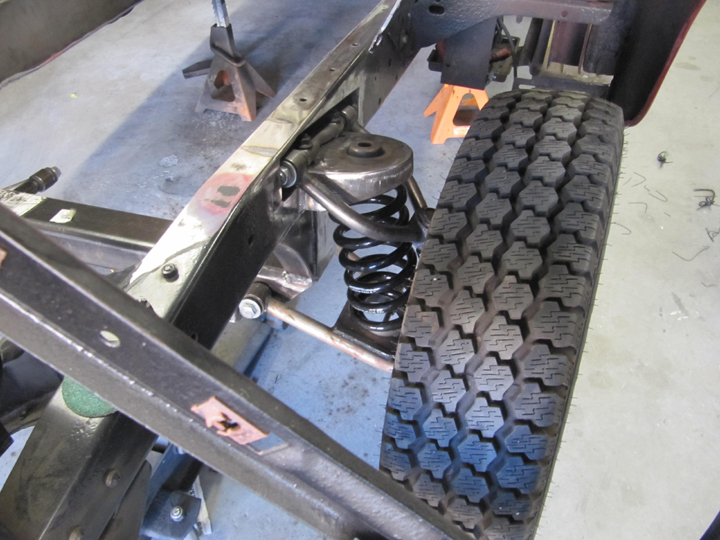
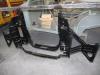
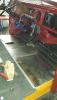
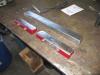
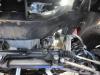
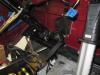
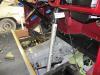
Here are some more pictures I took on 2/21/14. Motor and transmission are now mounted in the truck. Master cylinder is going in. Steering column and shift lever are going in and steering linkage is fitted to the rack and pinion unit. Gas pedal is mounted. Vintage Air unit is installed. We we able to save the cowell vent which will remain totally operational and we saved the fresh air vent which feed air from the intake at the radiator thru a hose into the firewall.. It's amazing how much room there is in these trucks. The firewall will stay untouched and we were able to use the stock floor panels without any problem. We did have to redo the cross-member to support the transmission. Looks like I can only attach 3 pictures here so I'll post a couple more messages with the rest.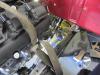
-
Anyone help a poor Limey get some rear shackles??
Charles Furman replied to TrOjAnUK's topic in Mopar Flathead Truck Forum
Email Dodge Central and ask them. If they don't fit, simply cancel your order. I got all my stuff from Rare Parts in Stockton, and I think these guys are the real deal when it comes to suspension parts. -
1949 Dodge B1B Woodie Makeover
Charles Furman replied to Charles Furman's topic in Mopar Flathead Truck Forum
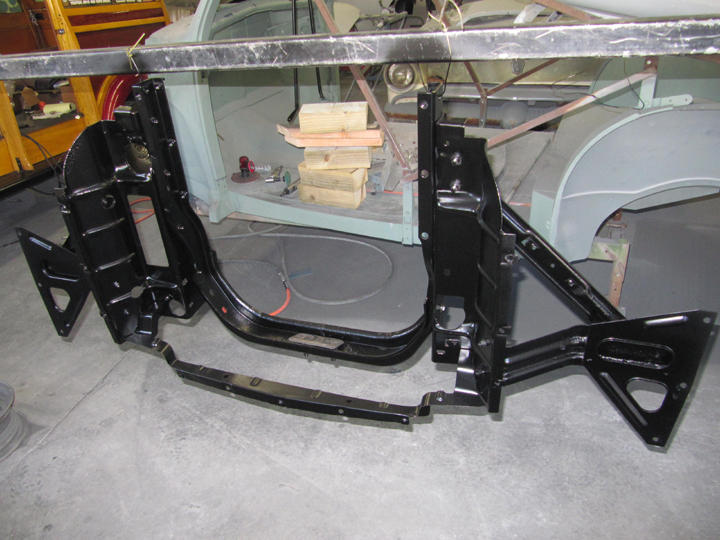
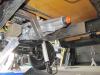
We are using 1/8th inch plate steel for boxing the frame. -
1949 Dodge B1B Woodie Makeover
Charles Furman replied to Charles Furman's topic in Mopar Flathead Truck Forum
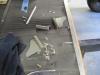
The saga continues. Here's a couple more pictures from yesterday. Shown in one of the pictures is the sleeve/gusset that will provide the horizontal strengthening for the cross-member that was referenced a couple of posts back. They just haven't been welded in place yet.