

Mezz
-
Posts
43 -
Joined
-
Last visited
-
Days Won
1
Everything posted by Mezz
-
So you have some idea of what you're looking for, this is the clip for 49 Chrysler. Plymouth probably used something close to this:

-
It mounts on the steering column, very cool! Never seen one of those before.
-
Well, I don't know if they made any that weren't Imperials, but they made at least one Imperial. I've never seen another. All of the Crown Imperials were C30's, I think the LWB bodies were custom though.

-
Ha! Sure, I'm in Garden City on Long Island.
-
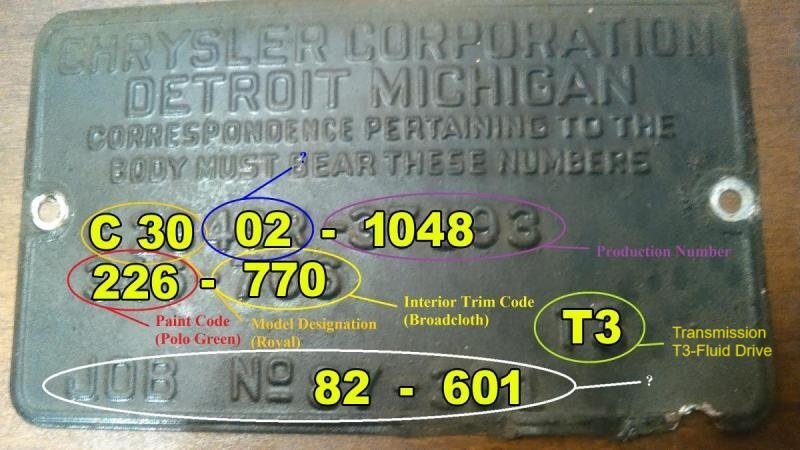
Thanks for assembling all of that info, Chry41, I've had a lot of fun looking up the plates of my cars. Just for fun, have you ever seen a plate with this additional info? Its from a 41 crown imperial with a divider window. I've seen other imperial plates, the only other one I've seen with this extra info also had the divider glass so I'm guessing that at least some of it has something to do with a second upholstery code?

-
Welcome to the forum, nice car!
-
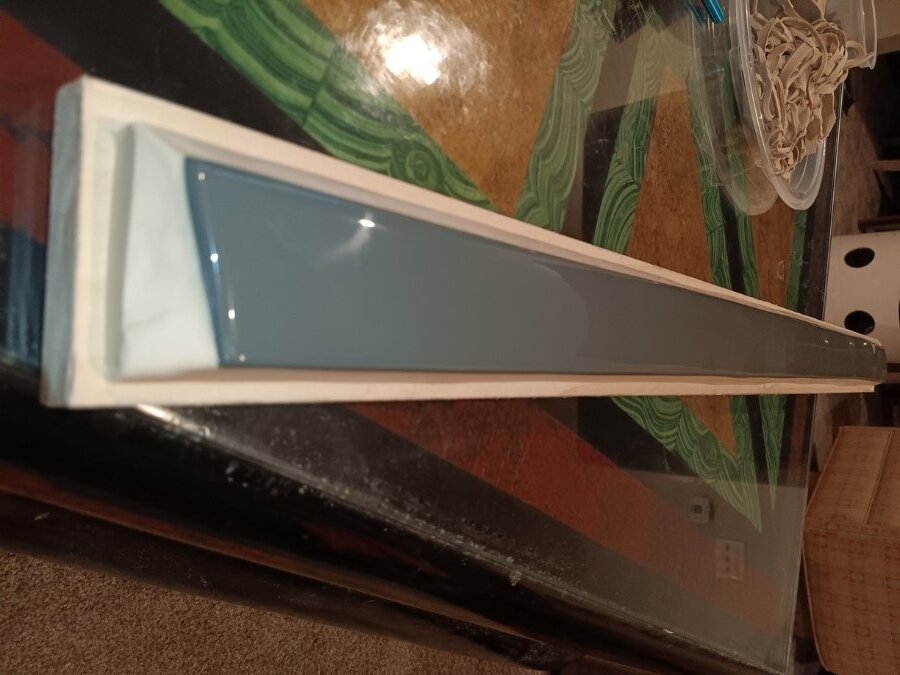
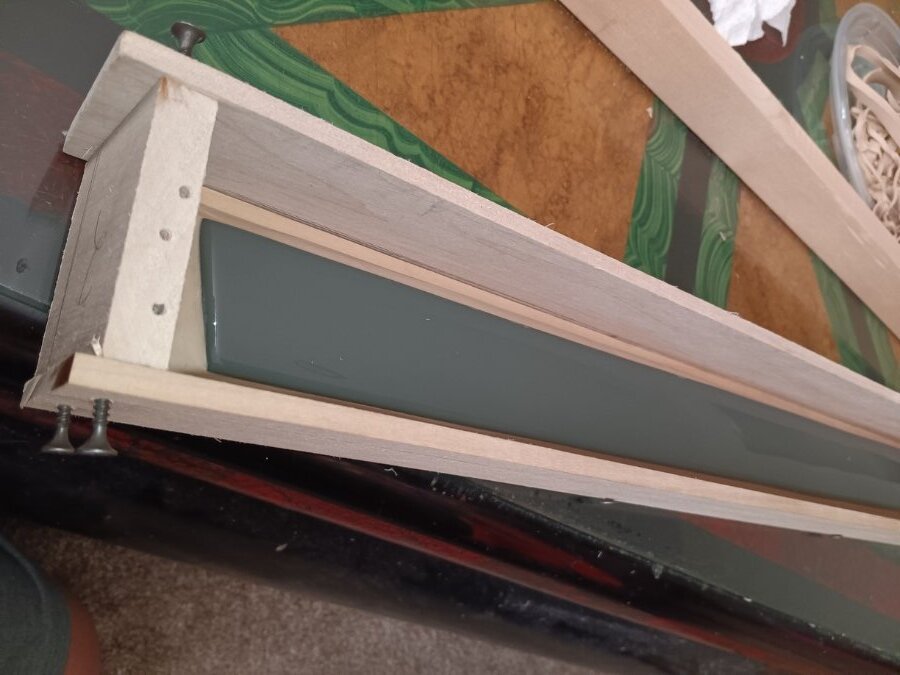
Thanks very much for the compliments, guys! The main reason I started tinkering with this is I have a town sedan and a 2-door sedan that I wanted to make sets for, and I dream of doing a convertible some day. I would be interested in making a set, or pieces, to sell, but I still haven't finished the door strips yet. Once I have a full set of molds that's a distinct possibility. The door strips are different between models, too, so it'll take more than one mold. I am, however, going to cast the first half of the mold of the first of my prototypes of the long door piece today! Not sure if it's the left or right that I'm making now, but either one will work for both of my cars and the convertible. My second prototype will complete the set for coupes (which need a left and a right). The -door sedans have the posts closer together so I'll have to make one of those separately, but it would work for the front and back doors (but not the rear vent window). I'm still not sure what, or if, I'll use this wood grained set for yet, my first priority is actually to finish the 'blue sparkle' set I started several years ago. This is what my town sedan is wearing now. I really like this set because it's cast in blue, not painted, and the sparkles give it some depth: Oh, and second picture is the door strip I'm about to make a mold of. it's set in clay on a wood board. And 3rd pic is the with the sides added to complete the mold box. And one correction, to ensure my mold box didn't have any leaks I hit the bottom and sides with Flex Seal, so I won't be able to pour the silicon until tomorrow.
-
This is the best description I ever found but it doesn't identify everything, and I know some tags have other number groupings on them. I think the 02 is the # of doors, my town sedan has 4TW in that spot.
-

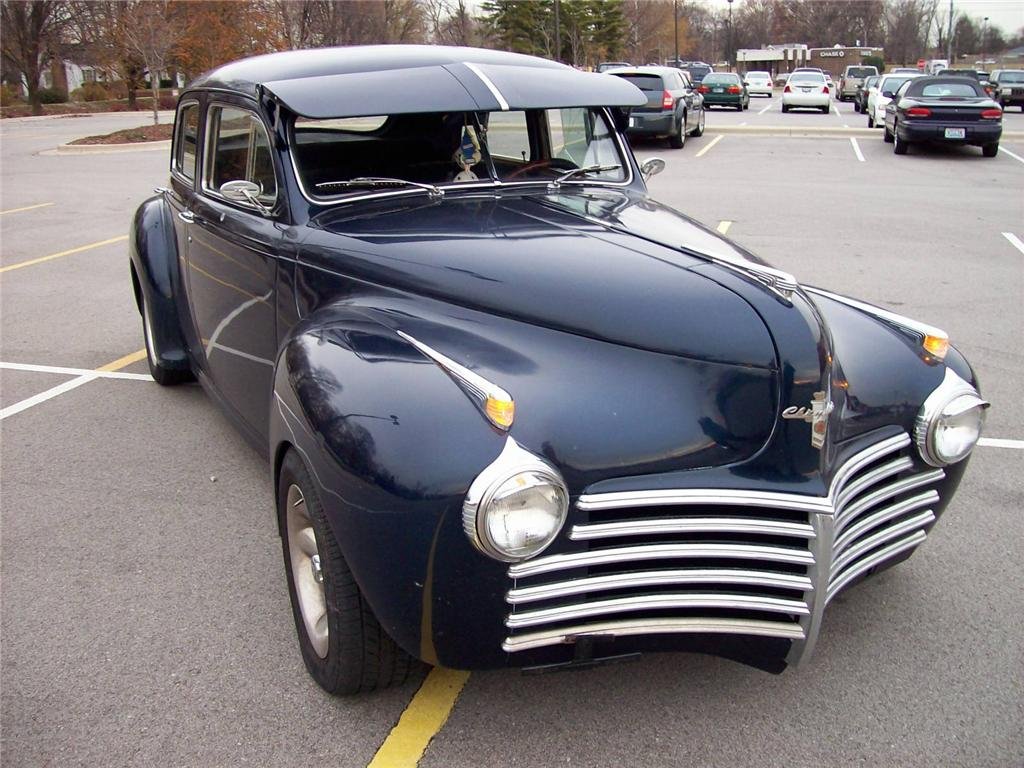
It's not a Plymouth or Dodge but it is a Chrysler
Mezz replied to joecoozie's topic in P15-D24 Forum
Think I need that tee shirt, too! -
I've gotten pretty good results making plastic parts by making silicon molds from originals. Even beat up originals can work, but you have to have something to start with. I haven't messed with 3d printing yet but it's probably the way to go if you don't have anything to start with.
-
It's not a Plymouth or Dodge but it is a Chrysler
Mezz replied to joecoozie's topic in P15-D24 Forum
Nice find, those woody wagons are really cool and unusual! My dad and I restored one a few years back, might still have some parts around, if you find you need something feel free to message me. I can also post pictures if you need to see how something is supposed to look. -
You might be able to use a 1/2" length of thin 3/4" aluminum pipe and hammer dents into it.
-
Help identify parts: Dash Clock? Window garnish trim?
Mezz replied to bacelaw's topic in P15-D24 Forum
Thats definitely a 41 Chrysler clock, 42 had a different background. And that looks like a 41 Chrysler wiper setup, which I think is the same from 41 - 48 Chrysler. I think they used that motor in other Mopars, too. To confirm, the wiper motor for my 41 has 6v-EWH-4001 stamped on the metal plate - face down in your picture. No idea what those other parts are, if they're plastic I'm sure they're hard to come by. I could make new ones from those if there's any demand for them. Actually, the motor looks like my '41 but not sure about the arms and bracket. Don't have one in front of me but it doesn't look wide enough. -
Very nice, that looks really great! Looks really tight too, did you have to do anything special to stretch it out so it would fit?
-
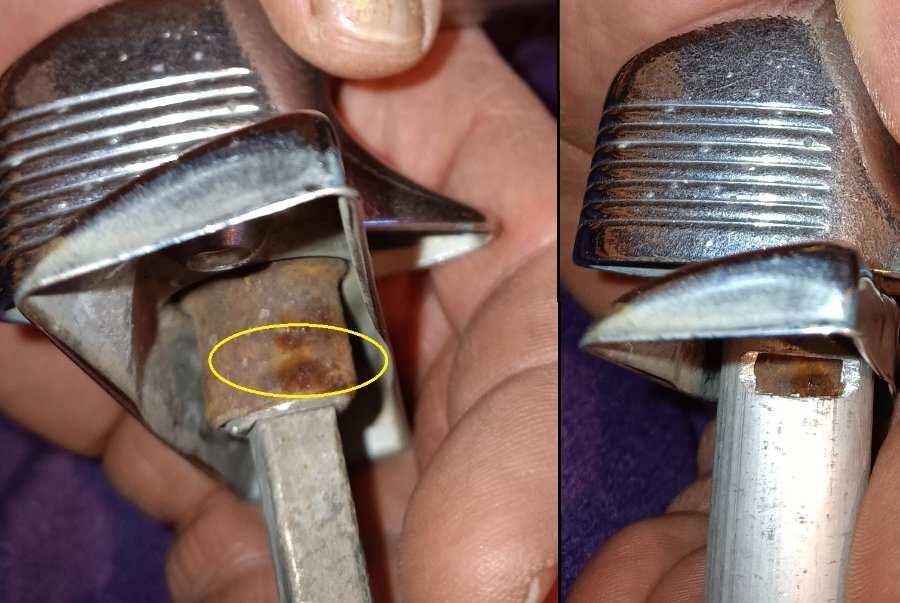
Here's a picture that shows the dent. I also made a tool to help reattach to the new handle, its just a 3/4" aluminum pipe with a window cut in it. If you can find someone who trusts you completely, have them hold it together while you hammer a new dent into it.
-
You have a small 'tin cup' on the shaft with a dent - on the inside side, at the base of the handle? That dent corresponds to a dent in the shaft which holds it in place. I usually try to grab it with a wrench and twist it, but I've also used a dremmel tool to drill out the dent. if you dremmel it, use the other side of the cup when you go to re-crimp it on the new handle. I'd post a pic but don't have a handle handy... Hope the description helps!
-
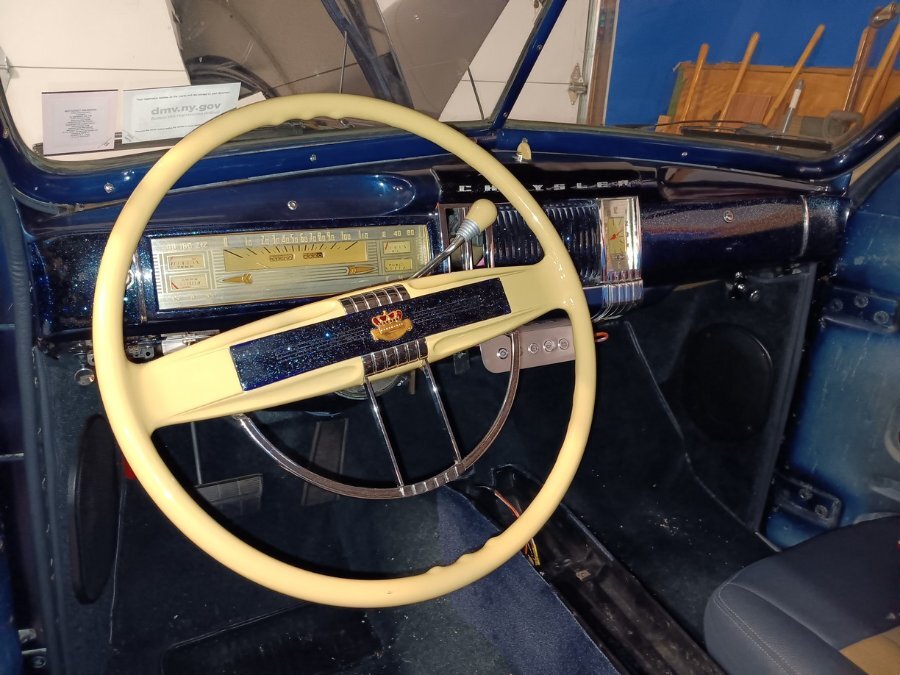
It's my dads car, 20,000ish miles. All original except for, of all things, the glove box door. Go figure, lol! Saw that picture in the ad and had to post, it's almost a dead ringer. And the drawing doesn't do it justice, it's a good looking car! You're welcome to pm me about it, but don't want to go off topic.
-
That looks oddly familiar! There's at least one still roaming around the states...

-
Very cool, I love these huge limos. Especially with the jump seats, really rare!
-
Ahhh, so you know the deal! I don't have a pressure pot, I do have a vaccuum tank though. The theory is that if I vacuum degas the mold rubber, and degas the plastic before pouring it, I can, and have, survived pretty well without it.
-
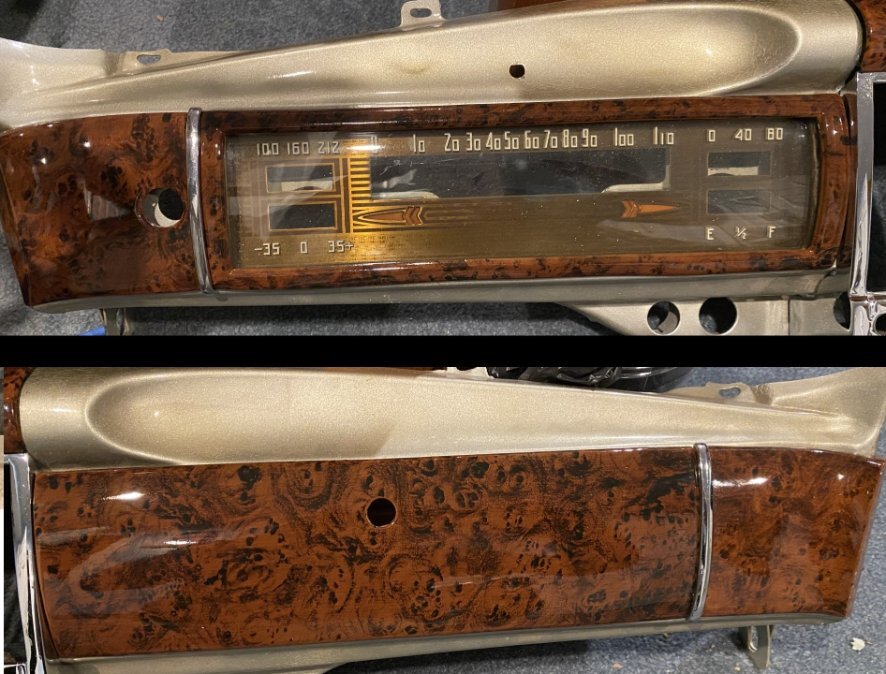
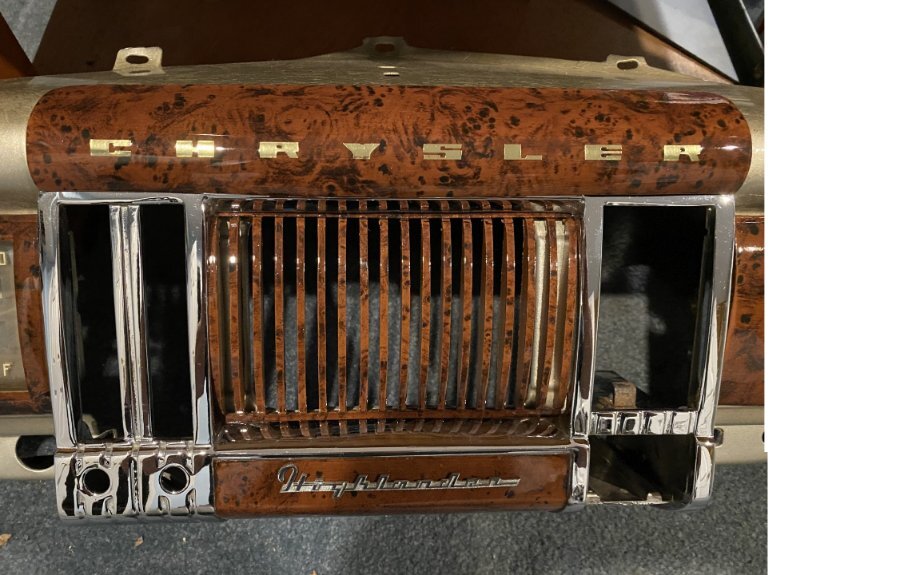
Good questions, thanks! I'm happy to go into more detail and I'll get some in progress pics as I continue to make more. These are two completely separate and distinct processes. I started out several years ago just trying to solve the glove box door issue, then onto the gauge surround, and one thing led to another and I wound up doing all the dash pieces. I only started thinking about woodgraining a couple of weeks ago. To make the set above, 5 of the 6 pieces were test pieces I cast years ago, the gauge surround was the only one I had to make fresh. I was thinking about ordering the woodgraining stuff piecemeal but once I started adding up all I needed just to get stated it made sense to bite the bullet and get a kit. I got their midrange set that came with one 6" roller and one large pattern stamping sheet. Its a bit pricy but given I can make multiple sets of plastic it made sense to me\for me. For the mold making, here's a good video of a Smooth-On guy making a parking light lens. The overall shape of that lens is a pretty good analog for the dash end pieces. I'll go into more detail and will add some more pics, but theres a certain football game on TV today that needs to be watched! How To Make a Replacement Car Lens Using Crystal Clear 202 (smooth-on.com)
-
Thanks guys! Haven't grained any of the garnishing yet, wanted to see if I could pull off the plastic part first. Heres what I've got for the doors so far. The long strips are one-off prototypes, I still need to make a mold of them...

-
Just finished this set of 41 Chrysler plastic this past weekend and was So happy with how it came out that I had to post it. It looks better in person than the pictures can show, the shine on that clearcoat is amazing! My first try at woodgraining came out really good, nod to Grain It Technologies, but what's really cool about this set is...all of these pieces are copies, made from silicon molds, and cast in my basement. Nod to Smooth-on for the mold making and casting part of the project. I'm probably jumping the gun a bit by calling this a 'set' since I haven't quite finished the door strips yet, but I'm working on it...
- 20 replies
-
- 12
-

-
that spring alone won't do it, you'll need that connecting wire too, do your hinges have those 2 small holes for that connecting wire to go to? Maybe someone's got a used pair that would work. I might have a pair but won't be able to put my hands on it for a couple of weeks.
-
Well, ours has both. I would think that's a lot of hood for that small spring alone.

