curtisw
Members-
Posts
17 -
Joined
-
Last visited
Reputation
7 NeutralProfile Information
-
My Project Cars
1950 Plymouth Business Coupe
Converted
-
Location
Oregon
-
Interests
Etc
Recent Profile Visitors
The recent visitors block is disabled and is not being shown to other users.
-
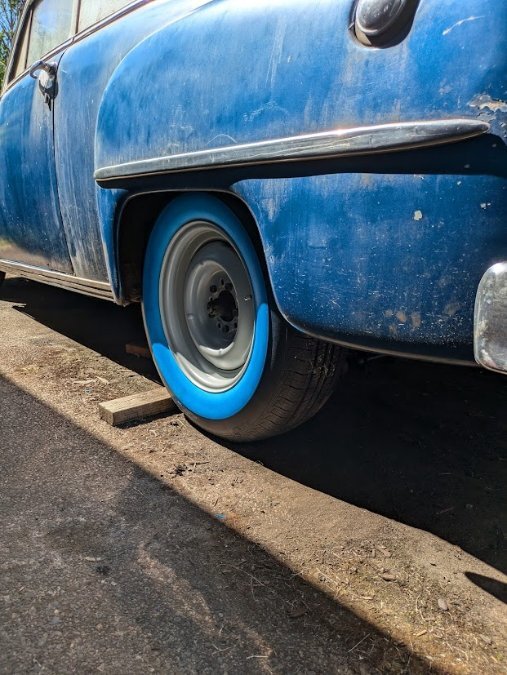
Here's a few pics of the Summit gennie wheels on the car (in the driveway). Tires are Diamondback radials 205/75R/15. There's plenty of clearance around the wheel wells. I'm using a 1/4" spacer in the front to accommodate the Scarebird front disc kit. The stock wheels fit with a 1/4" spacer as well.
-
Positive ground system?? Don’t want the pain it comes with…
curtisw replied to BayArea48Deluxe's topic in P15-D24 Forum
A lot of folks switch to 12V negative ground to use aftermarket accessories and get brighter lights. But a 6V positive ground system in good condition works just fine. -
I got these from Summit: https://www.summitracing.com/parts/WVI-14-5612334 15x6 wheels with 3.75" backspacing and Diamondback radials. The tires aren't mounted yet but I'll grab a picture in the next few days.
-
Just to close this thread, I bought some countersunk allen head bolts from McMaster Carr and then slightly countersunk the existing holes. This allows the stock and aftermarket wheels to sit flat against the drum. My new wheels are multi-bolt pattern which helped.
-
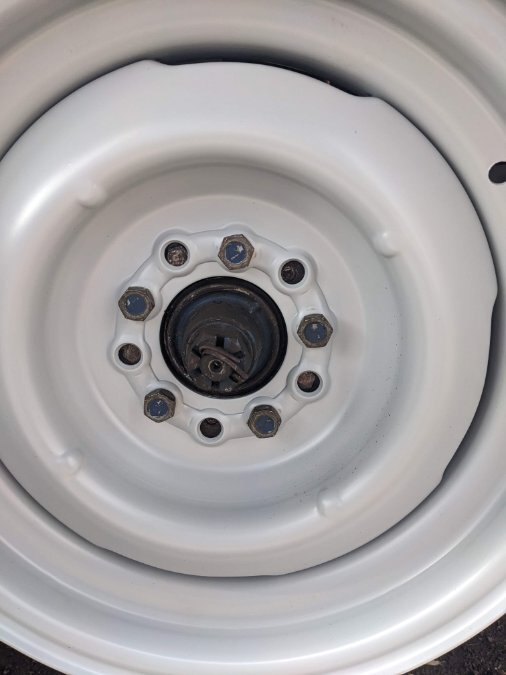
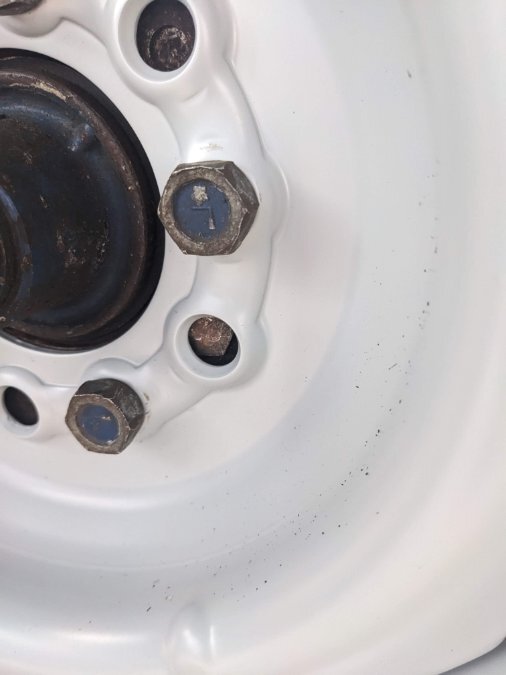
I don't have one with the drum, but here's one with the drum off. I can see in the photo the remnants of the old rivets (I guess?), so someone must've drilled and tapped three of the five holes. Funny I didn't notice that when I was working on the brakes. I need to replace one of the bolts since it's rounded off. Maybe I can find a countersunk or button-style bolt that will work with the new wheels. The current bolts have a shorter head to allow the stock wheel to fit flush. Maybe they were ground down? The original wheels are ok but need cleaned up. I have a Scarebird disc brake kit on the front, hence the new wheels.
-
Thanks, searching the forum I saw lots of mentions of "rivets" but these aren't rivets, they're bolts. You slip the drum onto the rear axle, install three bolts which hold the drum to the rotating axle, then install the wheel and wheel bolts. I agree about the wheel sitting flat against the drum...curious if others have run into this issue. I assume the car (50 Plymouth Business Coupe) is 100% stock, maybe not?
-
Hi all, I'm mocking up some Wheel Vintiques steel wheels on the back of my 1950 Plymouth with the stock brakes. I noticed that the stock wheels have a dimple to accommodate the three bolts that attach the drum to the rear axle. The new wheels are multi-bolt pattern but the holes don't line up exactly. I'm wondering if this will be an issue as long as the wheels are torqued appropriately? I've attached a few pictures.
-
Just in case anyone will find this useful, as I was confused when I replaced the tank on my 1950 Plymouth last year. I ordered a replacement from MoparPro on eBay (free shipping). My original tank was out of the car when I got it but I had the old line and the extra-long fitting like diben shows. But I kept reading about this mysterious "ferrule" that I needed as well. I couldn't find it in my garage, I assumed it fell out when the previous owner removed the tank. I emailed MoparPro and asked if I needed the ferrule on the replacement tank and they said I did. But I couldn't get the new hard line threaded with the old fitting nor with the ferrule; there wasn't enough thread depth to catch on the new tank. I can't remember exactly what I did, but I think I bubble flared the line and used a regular brake line fitting from my pile 'o parts and it is working fine. If you look at the old fitting, it looks like it almost has a bubble flare on the end. There seems to be some confusion about which years used the ferrule, it seems like 49+ did not use the ferrule and used the extra-long fitting.
-
Just to clarify, the Scarebird kit uses OEM rotors, calipers, pads, and hoses. You can get all that stuff at NAPA. Not all disc brake kits do, though.
-
I hear you, and that's what I was planning to do until I saw how much I'd have to cut out of the floor. My two cents: the build quality on the Wilwood unit is excellent and you can buy rebuild kits for them. I'd put more trust in their product than a reman master m/c from an auto parts store, or a reman stock m/c.
-
This is exactly what I'm planning to do with my Scarebird kit. A cheaper dual M/C can fit but you'll need to cut the floor. The extra $100 for the Wilwood unit is worth the price.
-
I recently replaced my 50 Plymouth tank with a new unit from Mopar Pro. My original line had an extra long fitting and no ferrule. Mopar Pro told me I needed the ferrule. Turns out you either need a regular inverted flare fitting plus the ferrule, or the longer fitting. It seems like some cars came with no ferrule and the longer fitting. I couldn't get the longer fitting to bite with the ferrule installed. I ran a new line with an inverted flare fitting and the ferrule and it worked great with no leaks and no pipe dope or sealant required.
-
I recently rebuilt my Carter BB by soaking it in straight Simple Green, per Mike's Carbs where I got the rebuilt kit. Everything seems fine but I didn't soak it very long.
-
I'm halfway done installing the Scarebird kit w/hubs on my '50 Plymouth. I don't really care about the track width but did have trouble getting the castle nut on far enough to insert the cotter pin. I bought a Dorman kit based on one of your old posts I found, which should solve the problem. I assume this means the track width increased by a tiny bit, assuming the same wheels and tires? The stock wheels just barely rub the calipers with a 1/4" spacer, so I guess I'm going to get new wheels (need new tires too). I don't really want to bother with grinding calipers and definitely do not want to try grinding the wheels.
-
Success. I got the driver's side lock cylinder rekeyed, reinstalled, and it's all working great. The driver's side appears to only lock with the key from the outside, and the passenger side locks using the door handle from the inside. Both unlock from outside using the key. My repop owner's manual describes this as a "new" feature: never lock your keys in your car


