-
Posts
62 -
Joined
-
Last visited
-
Days Won
1
Content Type
Links Directory
Profiles
Articles
Forums
Downloads
Store
Gallery
Blogs
Events
Everything posted by Wood and Steel
-
I'm a little embarrassed to have to ask, but where is the flasher located, and how would one go about testing it?
-
The mystery oil seems to have really helped. I'm planning on doing a carb rebuild and valve job when I get the chance, but it's running well enough for cruising around town now. There's definitely a short in the ignition system somewhere. I get a little shock every time I adjust the distributor. I've replaced the cap, wires, and coil but that hasn't fixed it. Further investigation required.
-
I'm having trouble traking down an issue with what I think are the stock turn signals on my '51. The car sat for a couple of years, but they were working fine before it sat. Right now the respective rear light comes on when I flip the switch, but they don't blink. The front lights aren't lighting at all. The indicator light on the dash isn't lighting up either, but oddly enough, the light around the key comes on when I flip the switch. The ground checks good on all of them. I have the wiring schematic for the car, but I'm not sure what controls the blinking, or how to test it. Is this a common issue that develops from sitting?
-
Hi everyone. I have a '51 Plymouth that sat for a couple of years while I was working on the body, and now that I have it back on the road again, it's running pretty rough. I'm new to older engines in general, and while I have a fundamental understanding of how they work (thanks to YouTube and other resource), I'm having a hard time diagnosing the problem. Symptoms: Running rough, almost sounds like a bit of a gallop, getting worse as it gets up to temperature. The Timing mark bounces when using a timing light. Vacuum gauge doesn't quite hold steady. Hopefully you can see it in the video. Seems to be more smooth when under medium load, such as going up a slight incline. What I've tried so far: Changed dis. cap, and coil. (I was getting bit of a shock when adjusting advance before) Checked timing with light. Mark doesn't hold stable, as mentioned above. Checked vacuum. Also doesn't hold stable, but does stay between ~17-20, dropping when it cuts out a bit. Checked Dwell and rpm. Both check within spec. Adjusted air fuel screw using vacuum gauge. (disconnected vacuum advance, gauge hooked to manifold). Vacuum drops and stalls the engine if I turn to far clockwise, but I see nor hear any change regardless of how much I turn counter clockwise. Other info: The plugs, wirers, and points are a couple of years old, but all of the other wiring is pretty crispy. The spark plug wells are pretty rusty from sitting. I'm planning on swapping heads in the spring. Can still run 55mph just fine, with an occasional stutter. 6v The engine is out of a '56 The video and audio attached were poorly captured, but I didn't check them before I put the car away. It might be a little easier to hear the issue in the audio file, but there is some unfortune crushing of leaves, and a speaker pop when I got the phone too close. I think you can still hear the cadence though. I can get better video and audio if that would help. I might even be able to show the timing mark if I drag a 12v battery over to the car. 02.07.2023_1432PM.aac
-
My '51 Cranbrook has a turn signal indicator on the lower left, and a headlight indicator on the lower right (looking at the dash from the front). The turn signal light is green, headlight is red. I assume it's original, but I don't know for sure.
-
Are you sure? It looks like real wood to me, but I've been wrong before. I haven't seen one in person yet, but there is one for sale somewhat locally.
-
That does look pretty dang good. Did you paint the steering wheel too? What paint did you use? Mine is looking pretty shabby.
-
I'm just a steward of the car. It's mine for now, not forever. If I end up swapping them, the original can easily be put back. Also, I just really like real woodgrain.
-
Just took this one a few days ago. Just got her back on the road. First trip with it in a couple of years.
-
I'm kicking around the idea of swapping the dash in my '51 Plymouth Cranbrook with one from a '50. I'm a bit torn about the idea. I like to keep the car as original as possible, but I've never been a very big fan of the fake woodgrain on the '51. Would a '50 dash bolt right in, or would it require modification?
-
It definitely shouldn't be at the top of the list, but bring a spare hubcap if you have one. I took a 1000 mile roundtrip a couple years ago, and lost one the second day. It ruined a lot of great pictures of the car!
-
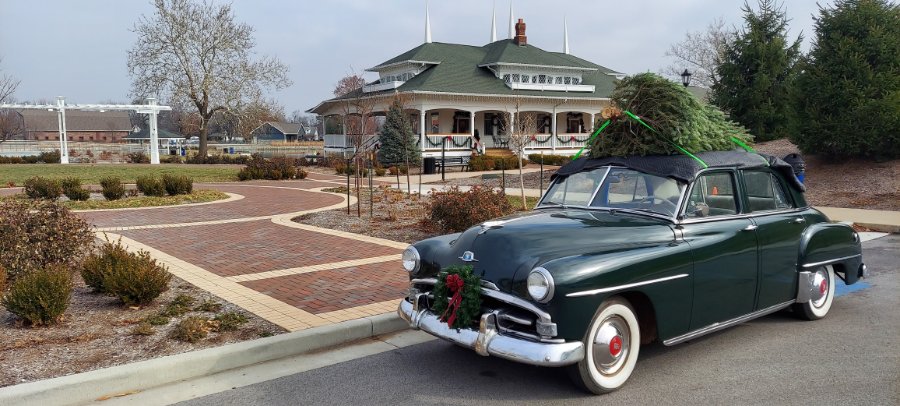
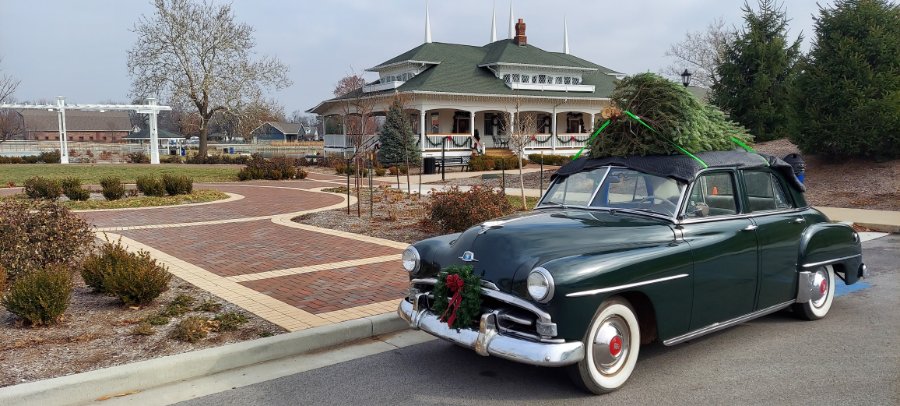
I'm not sure I've posted the full story here before (and I'm not going to bother doing so now), but I'll give a quick synopsis. Two or three years ago, my '51 Plymouth was side swiped by an un-insured teenager. I took it to a local classic hotrod shop to do the body work. They did a terrible job and charged me 1K for it. I decided to strip everything they did, and fix it myself. That gave me the idea that I should just paint it too. Youtube gave me some bad ideas, and I decided to try the foam roller paintjob to save a buck. If you've ever thought about trying it: don't. Anyway, after an untold number of hours sanding, painting, sanding, and painting again, I finally finished it. I'm still missing a little trim, she's running a bit rough after sitting, but today we were able to pick up a Christmas tree! Seeing all the smiles as we drove by made everything worth it! It's good to be enjoying her again. Happy holidays to you all ! Further Questions are bound to follow, and I'm grateful for such a knowledgeable and helpful forum.
- 2 replies
-
- 11
-

-
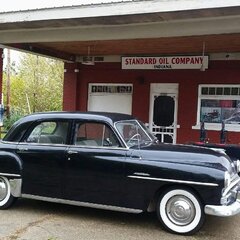
How to install windshield trim and rocker panels?
Wood and Steel replied to Wood and Steel's topic in P15-D24 Forum
Well, that sounds like a pain. Would I even be able to do so without tearing up the old gasket? -

How to install windshield trim and rocker panels?
Wood and Steel replied to Wood and Steel's topic in P15-D24 Forum
I've got the rocker trim on, but I'm still having a heck of a time with the trim around the top/sides of the windshields. There's got to be a trick to this. -
Hi all! I finally got my '51 Plymouth painted and I'm trying to get the trim back on in time to pick up a Christmas tree this weekend. It's all going pretty well, but I'm having a hard time with the front/rear windshield trim, and the rocker panel trim. It looks like the windshield trim goes into a channel on one edge, but I don't see what holds the other edge down. The rocker panel trim I can't figure out at all. Any tips would be greatly appreciated! Pictures to follow once it's done! Edit: I forgot to mention, the clips are still on the rocker panel, I just can't figure out how they work. I took it all apart two or three years ago.
-
I did try the roll and tip method on a spare panel, but had no luck. I did complain, but it did no good. Lesson learned. ALWAYS INSPECT THE WORK BE FOR YOU PAY! Thanks for all of the great responses! I posted about this on a few different forums, and this is by far the kindest and most helpful! I probably should have given more information on my process, and less about my life story. I painted a year ago, so my memory might be a bit fuzzy, but as I recall, I cross hatch sanded the whole car (Not sure that's the right term. I used an X pattern) with 60 grit on an 8" block held horizontally and small square soft block where necessary. Some of the car got sanded to bare metal, but not most of it. I did two coats of Rustoleum marine primer, sanding between coats. Followed by 5-6 coats of the marine topside mixed with hardener, Penetrol, and mineral spirits. 24 hours between coats. I sanded between every coat with increasingly finer grit, as youtube recommended, finishing with (I think) 320. The final coat is what you see in the top picture, where the orange peel was hiding the ripples. After the final coat, I progressively sanded up to 2000 with the aforementioned block. It looked flat until I started cutting it. I've only done the cut on part of the trunk and part of the rear fender, but they both came out looking the same. I don't have good accesses to a garage or an air compressor, so all of the sanding was done by hand, stripping paint and body work included. I'm so tired of sanding, but I'm afraid a longer block and few more coats is what it would need to look decent. Is there an easy way out that would still look good that I'm not thinking of? Even if I just cut the rest of the car as it is, I feel like it would take me weeks, so I'm dreading sanding and painting more.
-
Hi everyone. A couple of years ago, my '51 Plymouth got side swiped pretty bad by an uninsured driver while parked in front of my house. I got quotes from several different body shops around town. They all seemed to agree that the repair would be obvious compared to the 70's era repaint that was showing it's age, and to repaint the whole car would cost quite a bit more than I paid for it just two years prior. I decided the best economical option was to have someone that specializes in classic cars repair the damage (I wanted to make sure it was done well), scuff the rest of the car myself, and have Maaco shoot the whole car. The professional I took it to charged $1000 to repair the damage from the accident. I didn't look over the work very well when I picked it up, but after inspecting it at home, I realized how bad of a job they did. There was no way it would look decent with paint on it. In the hole already, I decided I had to strip off their repairs and fix it myself. It took quite a while, but I got the car looking pretty good for an amateur. Not wanting to risk spending more money for a result I wasn't happy with, I started researching how to paint it myself. That's when I stumbled upon the infamous Rustoleum roll on job... I don't need a show car. As long as it looks decent, I'm happy. Since I use it as a near daily driver, I loved the idea of being able to repair any future damage myself. It seemed dirt cheap, and although time consuming, not very difficult. Not to mention I thought it would be fun to tell people I rolled it. I rolled on 5 or 6 coats of Rustoleum marine topside and it came out looking pretty decent, aside from the orange peel. Here it is before sanding: I busted out the sanding blocks and started going at it. I sanded to 2000 grit and started the cut. It was shining up nicely. That's when it became obvious... There's a waviness to the paint. Almost like some idiot tried painting it with a 4" foam roller. It's hard to see in pictures, but here's a couple of videos that showed it a bit (You may need to change the quality to 1080p): So now I'm not sure what to do. I'm pretty exasperated at this point, and really just want my car back. I have way, way too many hours into this, but I don't want it to look terrible. What are my options? Is there any way I can get it flat without stripping all of the paint? Am I better off taking it to a professional at this point?
-
That would be appreciated. It definitely seemed wrong to me.
-
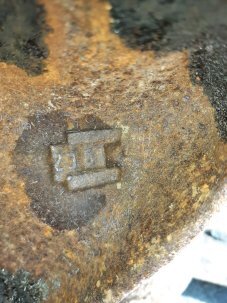
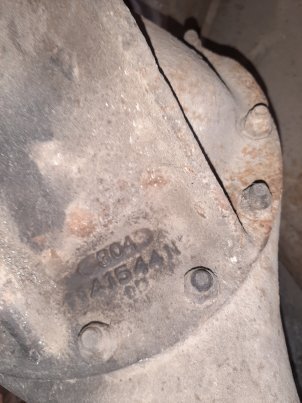
Hi everyone, I recently picked up a drivetrain out of a '53 Plymouth, mostly for the OD transmission, but I'm a bit confused by the differential. As far as I can tell, it reads 2.38. From my research, I'm not seeing that as an option on a '53. It made me wonder what was on my '51 Plymouth, as I've never bothered to look. The engine is out of a '57; not sure of the rest of the drivetrain. It looks like it says 3.04 to me, which I also can't find as an option. Any idea what I might have? I don't know much about gear ratios, so what would be the better option paired with an R10 for relaxed Sunday driving/road-tripping ?
-
The wiring on my '51 Plymouth are pretty dang crunchy, and I think it's time for a rewire. I have the schematic with the correct gauges and colors, but I'm not sure how many feet of wire to get. I found a pdf that someone made for a B1B that had the lengths. Is there anything like that for an early 50's sedan? Would it be similar enough to the truck that I could just order some extra and call it good?
-
I'm going to pick up an R10 next weekend. If you still need an answer by then, I'll let you know.
-
I did today, actually. He accepted $1000 . I'll go pick it up next weekend and see what I have. Thanks everyone for the advice!
-
Unfortunately by the time they started offering the overdrive transmission there aren't many body or interior parts that would fit my '51, if I'm not mistaken. Otherwise I would absolutely do that.
-
I feel like I should add some more details. He's wanting $700 for the transmission, or $1400 for all of it. $1400 is nearly 40% of what I paid for a pretty decent looking, driving car, so it's hard for me to justify. From what I've been reading, $700 for the tranny isn't terrible, but it's not a steal either. How much of an improvement in mpg could one expect? How much might it add in value if I ever decide to sell it? How can I quantify getting to tell people about such a cool piece of engineering history? I'm not looking to make money off the parts, but is there a scenario in which they could pay for themselves if my car currently runs and drive fine? Or would it make more sense to save the money and track down a part if something breaks in the future?
-
I've been looking for an overdrive transmission for a little while, and I finally found one somewhat near me. The guy offered me the entire drivetrain with it for $1400, but I can't decide if that's worth it to have around for spare parts. It was running when he pulled it for a V8 swap 8 years ago, but he said it does need some work. It includes: "good radiator, fan, complete engine, flywheel, clutch housing and clutch, t/o bearing and linkage, transmission and all the electrical that makes it work,, driveshaft, complete rear axle, clutch/brake/master cylinder assembly and linkage, front suspension complete, and probably more." It's off a '53, and mine is a '51 with a '57 engine. Am I correct in thinking all of the parts would be interchangeable except the pistons? What's the going rate for something like that?


