


Mertz
-
Posts
399 -
Joined
-
Last visited
Content Type
Links Directory
Profiles
Articles
Forums
Downloads
Store
Gallery
Blogs
Events
Everything posted by Mertz
-
I just got my turn signal switch and the diagram shows only one wire to each brake light. I have two wires on the brake light, do I just wire them together? I also got a 12v flasher with the switch will that work with my 6v system? I’m using my parking lights for the front turn signals which are disconnected from the wiring harness. I’ll run new wires from the switch to the bulb wire. BTW The terminal on the light switch the runs the parking lights has broken off so it is already disconnected.
-
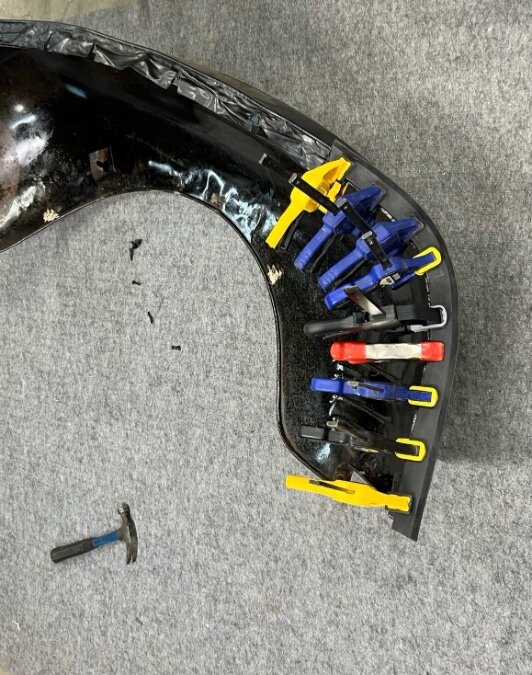
I got the new welting today and it is more like I expected. The fabric behind the piping is glue together as one piece. Here is how I attached the body molding. As a wood worker you can never have enough clamps.
-
I ended up using 3M weather stripping adhesive. The stuff sticks very well. I tried using my rivet gun on the body molding but it is too thick. I could have used rivets on the welting but the stuff I got from Andy was extremely flexible so I could not get things tight with the rivets. I used the adhesive on the edge off the bead only then cut slots for the bolts. I have some more welting coming from another source and hopefully it will be better and easier to apply.
-
Mopar mall has 6ft of lace and 20 nails $24.66
-
The twisted nail held the hood fabric. The rest are pins. I don’t think I can get them in the same holes either. I might glue them on and take an awl from behind, poke a hole and insert pins
-
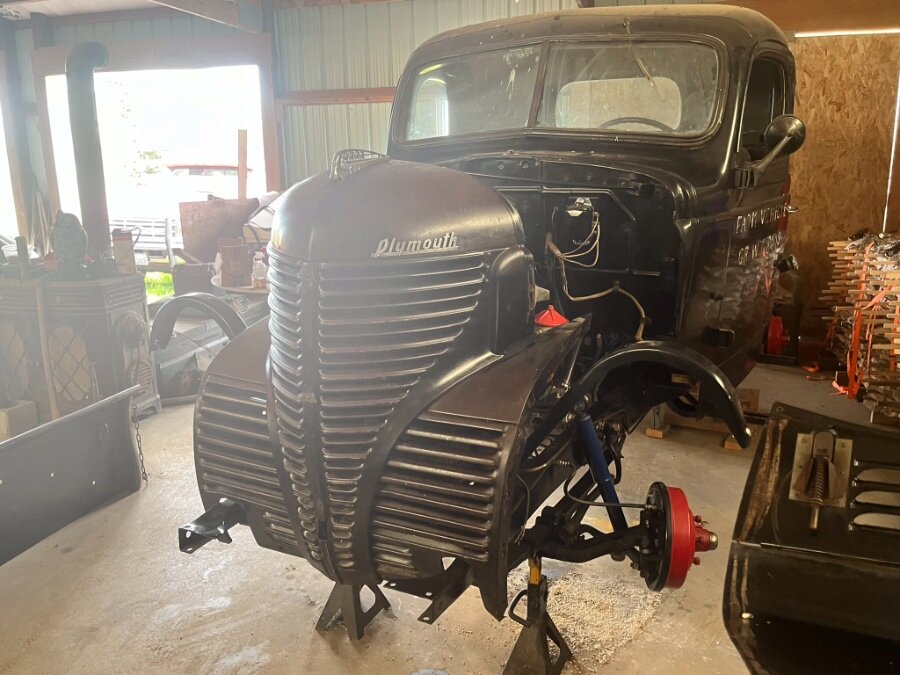
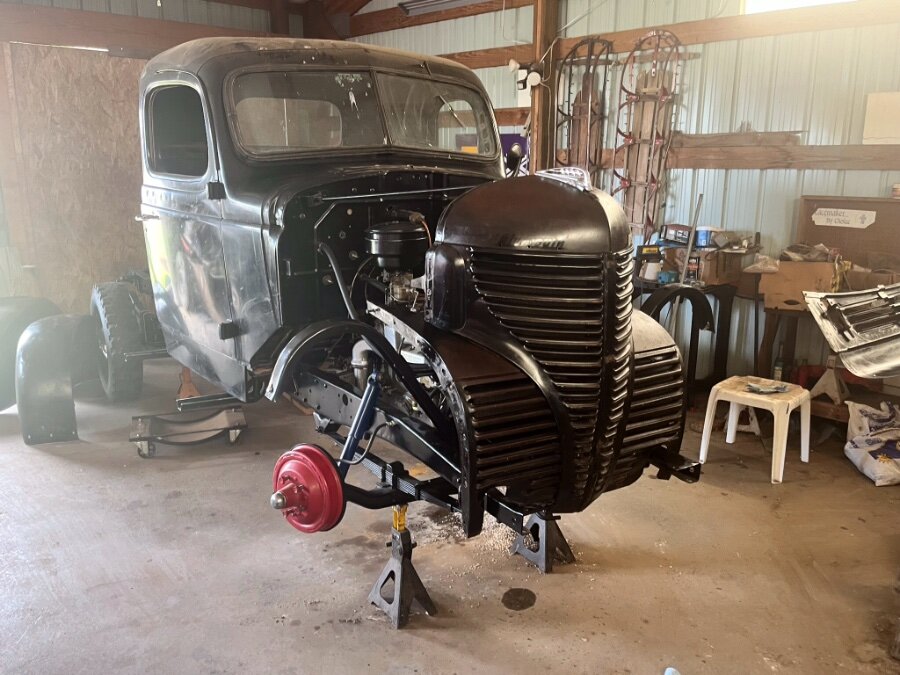
I’m getting ready to put the fenders on the front of my 1940 pickup. The old welting, hood lace and body moldings were held in place with pins. Is that the way it is still done or are we using weather stripping adhesive.
-
I’ve been working with the seller of the sending unit. The id on the box has a part number 317135 75-10 Ohms early ford and mopar. Is that the right resistance for my 40 truck?
-
I thought about cutting one in but the tank is pretty close to the floor and don’t want to hit the tank. If it’s the wrong sending unit I will have to drop the tank and then I might cut the hole or just add a good ground wire.
-
The truck has the sending unit under the cab and impossible to reach. I checked and the tank seems grounded. I checked at the mounting bolt on the frame and the access cover on the tank. I got continuity at both locations. Still might need a better ground. The grounds are as follows: number 0 wire from the battery to the engine and number 0 wire from the engine to the frame. If you ever owned a Jaguar you would know the importance of grounding. Then they’re all the bolts holding on the sending unit to the tank. I will improve the tank ground by adding another wire.
-
I bought the sending unit and the tank together and it was advertised for my truck. I understand there are different sending units and wasn’t sure which was correct. I assumed since it was for my truck it would be correct. It would be very difficult to change out the unit without dropping the tank. I will try improving the ground to the tank and hope the screws holding the unit in make a good ground. I thought that the ohm reading from the sending unit varied with the fuel in the tank. My ohm meter is a cheap one and reads 1.6 when probes are touched together. Other than being over 30 the rest of conditions listed appear to match.
-
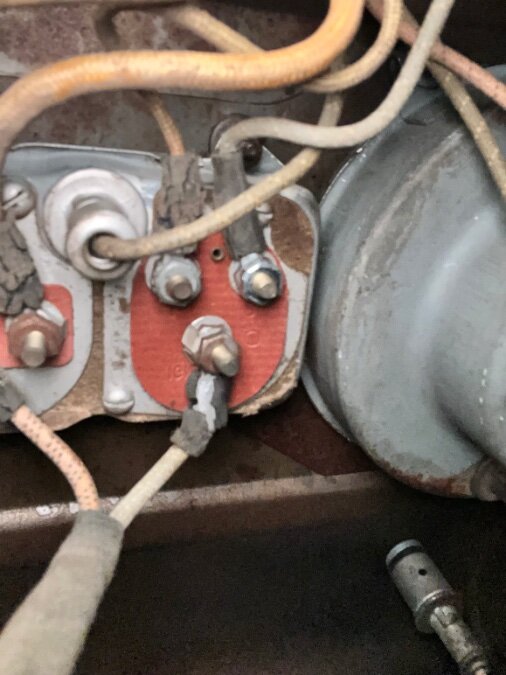
I did some checking with the ohm meter. (Wire 1 is on the right side of the gauge and 2 on the left) Fuel Gauge wire between 1&2 46.6 ohms Sending unit wire between 1&2 61.6 ohms Sending unit to ground both wires open Gauge wire 1 to ground 846 ohms key on Gauge wire 2 to ground 832 ohms key on Wire 1 from gauge 0.9 ohms to terminal 1 48.6 to terminal 2 Wire 2 from gauge 0.9 ohms to terminal 2 48.7 to terminal 1 Changing sending unit wires to gauge had no effect Grounding wire 2 moved the needle to full.
-
The sending unit and tank are new and I tested the sending unit by seeing if it shows resistance with about 4 gallons in the tank. The gauge is original to the truck and the wiring looks good. On the new sending unit the terminals were labeled gauge and ground. I switched wires back and forth and never got a full reading. I believe I have a good ground from the frame to the tank but since the sending unit is isolated from the tank it should not ground it. I don’t believe the wires are grounded because I get continuity.
-
All the gauges in my truck are working very well except the fuel gauge. I have a new tank and sending unit installed per instructions. I checked and I have 6v to the gauge. I checked for continuity of each of the wires from the tank to the gauge. One terminal showed continuity from the wire to one terminal only. The other wire showed continuity to both terminals. The gauge does not move with 4 gallons in the tank. It seems to me that the wire showing continuity to both terminals means a short in the gauge. Would that be a correct assumption? I have never heard of a thermal fuel gauge before but that should be no surprise I’m only 71.
-
I have the truck starting up and running well with a very few cranks. A minor timing reset made the difference. I decided to try using the 2 firewall coils I have. The one I bought from eBay worked. That was the one I thought was the better coil. So I installed the original coil and it seems to work just as well. The Studebaker coil is back on the Studebaker.
-
I installed new points and condenser and tried to start the engine after checking for spark at #1 TDC. I got spark but the engine wouldn’t start. When I got backfire I knew I was 180 out so I rotated the dizzy and it fired right up. It didn’t run long because it only had the gas I poured into the carb. After a few starts I noticed oil leaking out of the filter canister. I had not tightened it waiting for a filter but thought it would not fill because of the intermittent nature of the system. It was full. I guess the oil pump is working. First start in probably 40 years. It sounded good with no muffler and 4’ of straight pipe.
-
I changed out the points from the first distributor that looked like new and now I don’t get spark. I ordered some new ones from NAPA. I think that in the long run Pertronix is the way to go.
-
I installed the 49 studebaker coil. I set the engine to TDC and rotated the dizzy with a grounded plug on the number one wire and got no spark. After taking a closer look I found that the distributor that came with the engine did not open the points when rotated to fire number one. I tried multiple adjustments and could not get the plug to fire. I installed the distributor off the original engine that I had cleaned but had not replaced the points or condenser. When I did it was one wire off, firing number 4 instead of one. I rotated the wires and got number one to fire at TDC. I squirted in some starter fluid and it fired off for a few seconds. Time for new points and condenser. BTW there wasn’t enough gas in the tank to fill the fuel pump or the carb. FIRST FIRING IN PROBABLY 40 YEARS
-
I just checked the studebaker coil in the car with no battery. I got 1.6ohms between + and - on the lowest setting and 14.6 at each side + and- to the high tension wire with the meter set at 20k. I know this coil is good because it has run my studebaker for years. I think I’m going to install my replacement coil because it seems to have the best readings and see what happens. Maybe a dumb question but since these are positive ground do I need to buy a + ground coil or are the windings the same for primary and secondary and interchangeable?
-
My thought was that air compresses more easily than oil.
-
Awhile back I took out the oil pump and packed it with vasoline. It’s has been hot here lately and was concerned that it may have melted and fallen out of the pump. Today I took out the plugs and disconnected the oil pressure gauge line and cranked it over. After awhile I got oil coming out of the line. Great news. I did it a second time and got oil coming out almost immediately. I reinstalled the oil pressure gauge line and I got a very slight reading when cranking. I think I’m good. The big question is that the rest of the line to the gauge is probably filled with air making the reading lower than it actually is. Is there a way to fill the line or will it fill itself over time? Need to get the coil situation sorted then I’ll try to start it.
-
I started over and followed the directions carefully. The original coil, tested in the truck, got an occasional weak spark but a good jolt to my hand trying to ground it. I tested my replacement coil and got an occasional good spark also a good jolt to the hand. I will hook up the replacement coil on the truck and do another test. I checked the ohms again on the replacement. Almost 0 between + and - but off the chart between both + and - and high tension terminal. I think I’m going to borrow the coil from my studebaker and see if I can get spark and the timing set up.
-
That should read + terminal of the battery not -. To be clear the multimeter was set at 200k for these readings. So maybe this means 36k not 36 and 3.2k not 3.2. I’m so confused. I think I’ll start over from the beginning.
-
That should read + terminal of the battery not -
-
I read the 2020 articles about testing the coil and understand what was said. It however conflicts with other coil testing procedures I’ve read. From this forum it says there should be no resistance, 0 ohms readings, on a good coil from the positive to negative terminals and from either terminal to the high tension distributor wire. Also the high tension wire should have no resistance. Others testing procedures say the higher resistance the better the coil. I have 2 old firewall coils, one came with the truck and one used one off eBay. I assume the original coil used to run the truck many years ago. The readings for the eBay coil are: +to high tension 36, +to- O, -to high 36. The original coil was + to high 3.2. Coil is in the car so I couldn’t test the negative side. High tension wire and + wire to the distributor both read 0 ohms. I tried using the suggestions in the 2020 article but could not get a consistent hot spark on the plug. I installed a plug on the high tension wire from the coil and grounded it on the - terminal of the battery. I put a jumper on the positive battery terminal and touched it to the + terminal on the coil. Got very little spark. Is there a wrong way to wire the switch? I believe I put it back on the way it came off. If it is just a switch it shouldn’t matter should it?
-
The cover is centered. Found the problem. The pulley was welded to the hub but came loose during my initial attempts at installation. When I got the pulley off I noticed 2 marks on the cover. I thought they were from the bolts I used to remove the pulley but they are from the bolts I used to attach the pulley after the welds failed. They were just enough too long to make them bind the crank. Everything is good now.
