-
Posts
91 -
Joined
-
Last visited
-
Days Won
4
Content Type
Links Directory
Profiles
Articles
Forums
Downloads
Store
Gallery
Blogs
Events
Everything posted by f_armer
-

512 cid C series on Dakota chassis- build thread
f_armer replied to Radarsonwheels's topic in Mopar Flathead Truck Forum
Haha, i shouldn't admit it, but when i ran my plug wires, i put them on clockwise. I knew better, i had just primed the oil pump with my priming shaft (counterclockwise), but i guess i wasn't thinking, she fired right away, but only on 1 and 3 probably, it took me a minute before i realized what I'd done. Switched them and she fired right up. ? -

1951 Fargo 400cid on Dakota chassis
f_armer replied to f_armer's topic in Mopar Flathead Truck Forum
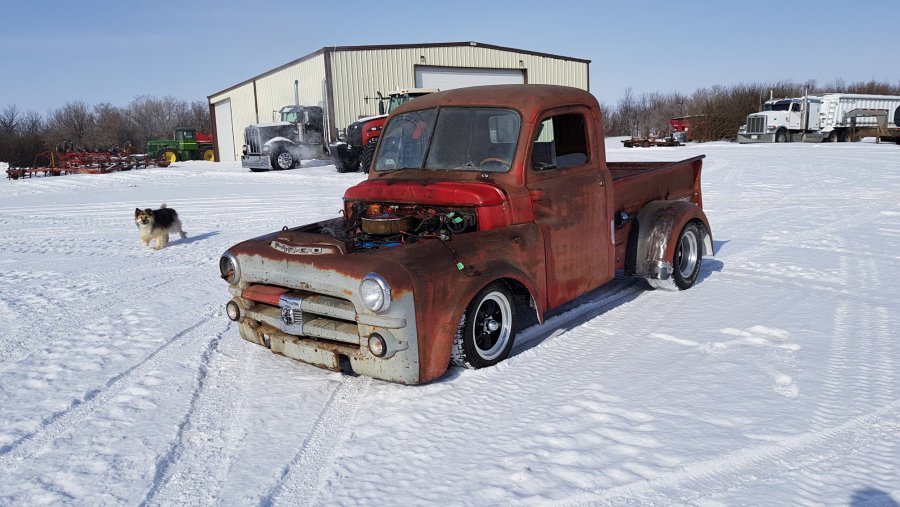
It is low but that pic makes it look like it's on the ground, there's about 4" clearance actually. But still, I gotta put a little larger tire on the front, it's too low. -

1951 Fargo 400cid on Dakota chassis
f_armer replied to f_armer's topic in Mopar Flathead Truck Forum
-

512 cid C series on Dakota chassis- build thread
f_armer replied to Radarsonwheels's topic in Mopar Flathead Truck Forum
Looking really good! Its kinda funny that we are at similar stages, im just waiting on some odds and ends for parts, but mine runs, and I'll be taking it for a short test drive in the next day or so. Sounds like you'll be tearing up the streets in no time. You did a pile of work on that thing in short order, congrats on a good job, and being on the home stretch. -

1951 Fargo 400cid on Dakota chassis
f_armer replied to f_armer's topic in Mopar Flathead Truck Forum
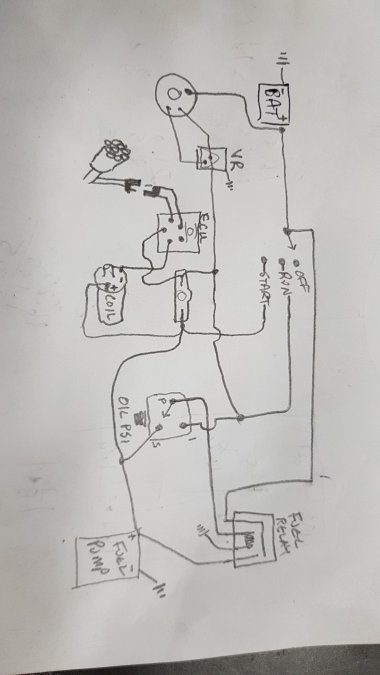
Im not sure if it had a rollover switch, i dont think so unless it was in the computer, there was no other switch/sensor in the harness. I havent tried to run the pump through the resistor, i guess that was sort of my question, would it hurt the pump? Im adding the oil pressure switch for safety reasons, maybe thats what the dakota originally had? Im not sure. I find factory harnesses kind of amusing, there is not much ryme or reason for wire colors, they change colors willy nilly throughout, for no apparent reason. -

1951 Fargo 400cid on Dakota chassis
f_armer replied to f_armer's topic in Mopar Flathead Truck Forum
So I'm using dakota wiring harness. I have 2 scenarios for fuel pump. The dakota had + coil wire inline with fuel pump. I'm not sure I need that. Would 2nd diagram not work just as well? In the first diagram after truck starts the fuel pump would be fed through ballast resistor? I've added the ecu, the dakota was fuel injected and computerized. I've had it running but sort of hot wired stuff to start, I've got to sort things out and make a clean install. -

512 cid C series on Dakota chassis- build thread
f_armer replied to Radarsonwheels's topic in Mopar Flathead Truck Forum
That turned out really cool looking! You dont need to look under the hood to see that it doesnt have the original engine! Good job. -
Was -40.2 C here this morning, (Sask. Canada) my daughter went to Arlington, Tx. this week for a PBR event, and said it was -6 C there this morning, she was a bit dissappointed, she was hoping to see something a bit warmer on her trip!
-

1951 Fargo 400cid on Dakota chassis
f_armer replied to f_armer's topic in Mopar Flathead Truck Forum
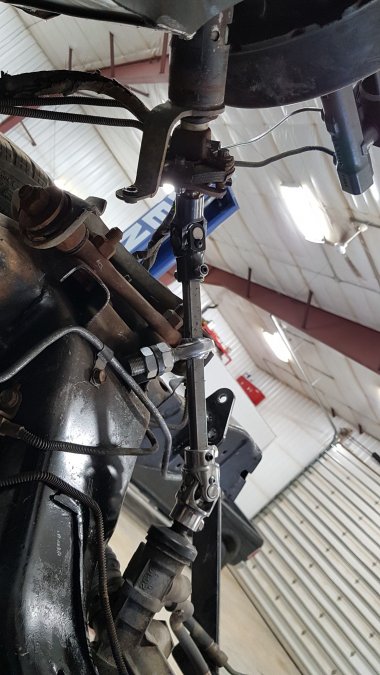
The rag joint is running straight, i was thinking of getting rid of it, but figured it might be good to leave it? I was thinking it would take some road noise out of the steering wheel, but i don't know, i havent driven it yet! I'll maybe revisit the steering after a road test. I dont see in any way at the moment that it would be unsafe. -

1951 Fargo 400cid on Dakota chassis
f_armer replied to f_armer's topic in Mopar Flathead Truck Forum
It'll be interesting to see how it performs. It has 3.55 gears, so it should be about right. I'll put a better intake and carb on later if I find a deal on something better. These engines respond to more air and fuel if you can get it through them. You'll maybe find this dyno test interesting, I sure did https://www.forabodiesonly.com/mopar/threads/dyno-testing-a-stock-1972-440.249866/ -

1951 Fargo 400cid on Dakota chassis
f_armer replied to f_armer's topic in Mopar Flathead Truck Forum
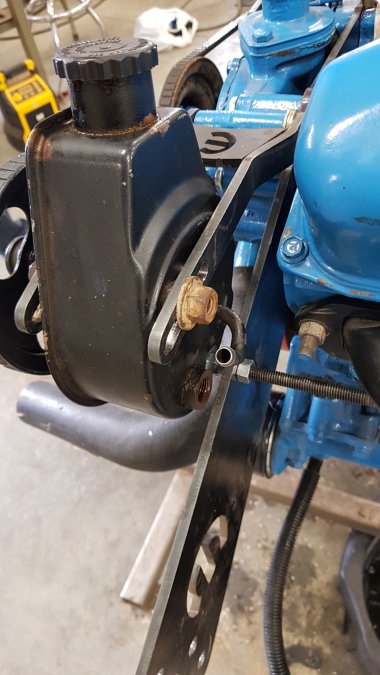
There's a rag joint on the end of the column so I need the heim joint to stabilize the shaft. My dakota wiring is in good shape there's just too much of it haha! I'm using the stock pump(in the tank) Stock fuel filter also, I just added the fuel regulator that will give me 6.5 lbs for a carb (it's adjustable but preset at 6.5) it has a return back to tank (I used the factory return line). I had a 1968 440 hp spec cam on the shelf that I used. It was one I swapped for a bigger one in my 440 in my 1971 satellite. I'm thinking it will be an improvement but yes it's still a low comp engine. What's your thoughts? The alternator bracket turned out good, but it was after I was done I realized I used a ford style alternator! Oh well a bit sacreligious. I had to mount ps pump high because of those dang elephant ears, they blocked the fitting on the back of the pump. And if I went lower, the oil filter and rad hose were in the way of the belt. -
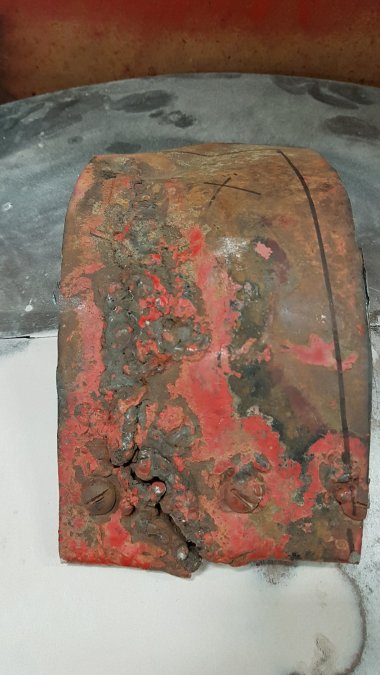
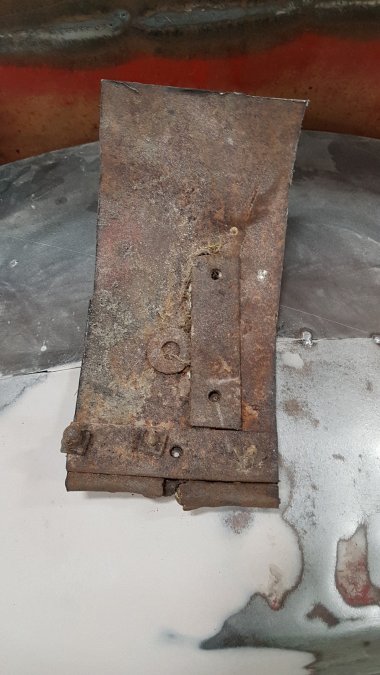
This is how someone repaired one of the rear fenders on my truck. This is after I cut the piece out obviously. Functionally it worked, but cosmetically, not so good!
-

1951 Fargo 400cid on Dakota chassis
f_armer replied to f_armer's topic in Mopar Flathead Truck Forum
-

1951 Fargo 400cid on Dakota chassis
f_armer replied to f_armer's topic in Mopar Flathead Truck Forum
Just an update. I pulled engine back out to go over it. I put a little bigger cam in it, new timing set, all new gaskets. Built new alternator and ps pump brackets. Steering works. Plumbed in the fuel regulator. Now I'm sorting out the dakota wiring harness, getting rid of everything not needed. I think it'd been easier starting from scratch on the wiring. -

1951 Fargo 400cid on Dakota chassis
f_armer replied to f_armer's topic in Mopar Flathead Truck Forum
Most of the stuff I've done is lots of measurements then draw in cad. The fuel fill I just cut the hole so the "bulge" fit inside the hole, then I didn't have to worry about the profile. The inside was hidden by the angle piece inside the box, which I profiled with the angle grinder. I don't worry too much about gaps, that's what mig wire is for. (Within reason) -

1951 Fargo 400cid on Dakota chassis
f_armer replied to f_armer's topic in Mopar Flathead Truck Forum
Haha, I must be losing my mind. I have an old chopper i built from a honda cb750. Did it years ago, but you got me thinking, it has Harley fat bob tanks on it, with a left hand and right hand caps on the tanks, well to my surprise the threads are the same!! Good advice on making patterns also Thanks! -

1951 Fargo 400cid on Dakota chassis
f_armer replied to f_armer's topic in Mopar Flathead Truck Forum
I'd like to find a screw in chrome dome fuel cap that would work, I've looked around but can't seem to find one. Does anyone know of any? This is the closest I could find, but not sure if it's same thread. Wow that's a long link I pasted!! https://m.ebay.com/itm/1978-1979-Chevrolet-Caprice-nova-Chevette-gas-cap-NOS-6410845/142669779286?ul_ref=http://rover.ebay.com/rover/1/711-53200-19255-0/1?icep_ff3=2&pub=5574735181&toolid=10001&campid=5336086427&icep_item=142669779286&ipn=psmain&icep_vectorid=229466&kwid=902099&mtid=824&kw=lg&srcrot=711-53200-19255-0&rvr_id=1827310808265&rvr_ts=6bfd1bd61680ab1d08500da1fffa6dfe&_mwBanner=1&_rdt=1&ul_noapp=true&pageci=97836c47-9619-4fac-b33e-2e6dbf817906&epid=12013805394 -

1951 Fargo 400cid on Dakota chassis
f_armer replied to f_armer's topic in Mopar Flathead Truck Forum
So I finally tackled my fuel filler. I was hoping to plumb it into original fuel fill in the corner of cab, but was impossible due to cross members in the box being in the way. This is what I ended up doing, I'm not totally happy with the look, but it's functional. -

1951 Fargo 400cid on Dakota chassis
f_armer replied to f_armer's topic in Mopar Flathead Truck Forum
I, with the help of a friend, did a very scientific calculation of jumping up and down in the bed, there was no rubbing, i think it'll be fine. Unless i do a dukes of hazzard jump, but i have no plans for that! -
I have a complete seat, it needs recovering, that you can have for free. But I'm in sask canada
-

1951 Fargo 400cid on Dakota chassis
f_armer replied to f_armer's topic in Mopar Flathead Truck Forum
Just experimenting with different looks. I'm leaning towards 5" exhaust. With a nice turnout and in flat black -

1951 Fargo 400cid on Dakota chassis
f_armer replied to f_armer's topic in Mopar Flathead Truck Forum
I haven't done much on the truck. Got my wheels, And the dd to 3/4 round u joint for my steering. I haven't made a mount for the heim joint yet. No pics of that yet, but have some of the wheels. Sits low with the 185 60r15 tires on the front. I'll prob go with a little bigger tire maybe a 205 60r15? -

512 cid C series on Dakota chassis- build thread
f_armer replied to Radarsonwheels's topic in Mopar Flathead Truck Forum
I think that looks great! I like the bead rolling. -

512 cid C series on Dakota chassis- build thread
f_armer replied to Radarsonwheels's topic in Mopar Flathead Truck Forum
I see now, you have no room with those bags. I was looking at some of your older pics and could see that bolt and wondered why you wouldnt use it, but ya youve got alot going on back there! -

1951 Fargo 400cid on Dakota chassis
f_armer replied to f_armer's topic in Mopar Flathead Truck Forum
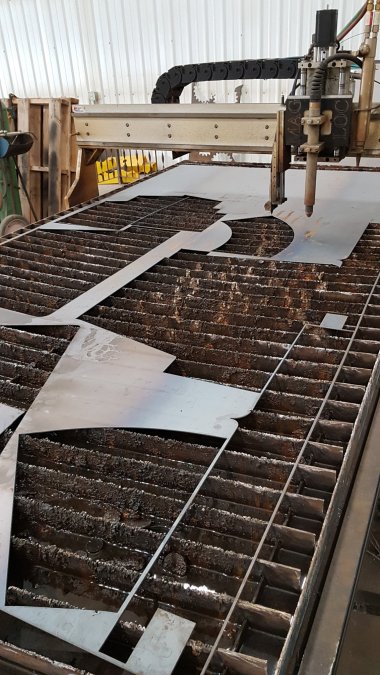
The tools I used The roller I made from 3 chunks of 2 7/8 drillstem with a 1" shaft down the center Works well. Plasma table with my floor pieces cut out.


