-
Posts
201 -
Joined
-
Last visited
-
Days Won
1
rustyzman last won the day on October 20
rustyzman had the most liked content!
Reputation
20 ExcellentProfile Information
-
My Project Cars
54 stake bed
Converted
-
Location
Chicagoland, Where Rust is King - 54 Dodge C1D Stake bed
-
Interests
Fabrication and Restoration of all things mechanical and electronic
Contact Methods
-
Occupation
World Class ASE Master Auto/Truck Technician, Machinist
Recent Profile Visitors
The recent visitors block is disabled and is not being shown to other users.
-
Confirm your pressure with an external gauge. If it is indeed zero at that point, shut it down and run no further. Putting anything behind the spring of the relief valve would just increase the total pressure required to unseat the valve just like you said. Normally, you increase this by using the optional higher compression spring, but a "shim" will have sort of a similar effect. If the bolt was long enough, it could stop the valve from unseating at all, jamming it in place. Overall sounds like someone was trying to find a cheap way to fix a bigger problem. Sudden catastrophic loss of oil pressure can come from a number of sources. One common issue is a spun bearing. That will cause lots of bigger issues if it continues. A clogged inlet screen or a broken crossover pipe similarly will cause the same thing to happen. A totally failed pump is possible, but usually I see those lock up and break the drive gear. That kills the engine because the distributor stops rotating too. Happened to me on a new pump. Drop the pan and take a look. You can pull bearing caps too and see what the bearings and journals all look like too. Mine was very damaged on two of the mains. Good oil pressure dead cold, dropping to almost zero warm at idle. Also found out that I had a clogged chain oiler and that the timing chain had absolutely never seen a drop of oil in the 15 years I had owned it and drove it. That was a surprise. Checked it out and found the cam was retarded 9° because of all that chain wear. It explained a LOT of odd issues I was trying to work out. No audible indication at all. Now with my rebuild complete and all issues corrected I am 40psi at idle hot and about 50psi cruising, and that is with the chain oiler open again.
-
Dodge-Chrysler Starters 1940's-1953 and Internal Parts
rustyzman replied to Tomarsha's topic in Mopar Flathead Truck Forum
Agree with ggdad1951. Vintage Power Wagons lists starters for the trucks. I have found a number of the power wagon military parts match up to the 1 ton civilian trucks. Quite a few items do for my '54 C1D. Worth a phone call, they are nice to work with. If you decide to rebuild your own, Rockauto has the brushes for mine and bushings as well. Likely for yours as well. The bendix is the tricky one. I have not yet located a good reliable interchange resource to determine the correct part number to look for in the sea of old stock ebay ones. I have the OEM part number from the parts manual, but every one of the aftermarket rebuilders used their own part numbering system and most of those companies are long out of business. -
In all honesty... a case of the nerves - 49 Plymouth Engine reassembly
rustyzman replied to nbn's topic in P15-D24 Forum
I had one of those new pumps that locked up after about 15 minutes. Very odd failure and no indication that it was going to happen beforehand. Properly primed, spun freely etc. Knocked two teeth off the drive gear and nicked the cam gear a little. Not the best day... The one I got for the full rebuild this time is fine, no issues. That being said... I always check all clearances myself during reassembly regardless of who did the machine work. I check all bearings, gap every ring in it's appropriate cylinder, check valve contact, adjust valves, etc. Be sure your engine stand is secure and preferably has 4 legs. These are heavy buggers especially once the bellhousing is on and stability is key. Make sure the pistons are facing the correct direction and the rods are in the correct spots. Oil hole faces the cam. Make sure all the rod caps are matched to their attendant rods. Put rubber hoses over the rod bolts as you put them in the block so you don't nick the crank and damage it. I dip the full piston assembly into a coffee can of oil before I put it in the block. Clock the piston rings 180° apart when you put the pistons in. I also do a rotation check after each piston is installed individually to see if there are any binding issues. Prime the oil system before startup, I use a syringe plumbed into the gallery until I see oil at the bearings. Good assembly lube on bearings, seals and valvetrain sliding components. I also plumb in a mechanical test oil pressure gauge. Reassurance that everything is good with a good gauge you can trust. Don't forget the oil relief plunger and spring! If it's a new cam, I put Rev Lube on the cam lobes and tappets along with actual break in oil (for flat tappet cams). New flat tappet cam for me also means prep all ignition, fuel and cooling system for immediate fire up and 30 minute break in run on first startup at 2500 rpm. That oil is changed after the 30min break in and a new filter is installed too. fill the cooling system as far as I can before I put in the thermostat and housing. Helps prevent air pockets and overheat on that break in startup. Make sure you put all the oil gallery plugs back in and sealed. Make sure you coin all your freeze plugs in place. I also seat them in 599 grey silicone myself, but do as you see fit. Be sure the coolant petcocks (both) are closed. Make sure you put the timing chain oil tube back in! Don't forget the oil slinger before you bolt on the timing cover. Center the timing cover seal to the crank. Make a tool or use the crank pulley. Make sure you attach the oil pump transfer pipe back in the correct way or the crank will hit it! Disassemble and clean the oil pickup screen thoroughly if that was not done. I always paint the timing pointer and timing marks on the crank pulley with my favorite bright colors before assembly. Makes tune up work much better later on. Don't reuse any hardware that looks suspect. If it feels funny when you tighten it and torque it, stop and find out what is wrong. Paint everything you want painted now. Replace the water distribution tube and reinstall it with the opening slots facing the valves. Remember to install all the seals. Use your favorite version of thread sealant on all headbolts, manifold bolts and timing cover bolts that pass into water jackets. They will leak if you don't. I personally seal all gaskets. I have never trusted paper alone once something has been apart. Your choice on this, but my rebuilds are leak free. Use whatever sealer you prefer. I like 599 grey. Torque the head in sequence and in steps. Remember head studs have a lower torque than the bolts if you have any studs. Torque them all again hot at the end of your first warm up, they will be loose. Spray copper sealant on the head gasket, one side or both according to your feelings on the matter. That covers most things I can think of. I can reassemble and run in a normal day once all the machine work is done, but each person and each engine is different. I would prefer to spend more time and be absolutely sure it is correct if in doubt. It's just careful work, not crazy complex stuff, but missing a nut or bolt in the wrong spot can end the engine. Just go slow and double check your work. Work without distractions and don't entertain anyone while your doing it. You have the wherewithal to be cautious and ask these questions, and that alone makes me feel like you will do a good thorough job on it. Most of all, have fun! -
With my C1D, it turned out to have the optional 11" clutch. The standard truck 10" clutch bolt pattern was in fact different than the optional 11" clutch and would not have fit. Just FYI. If you take an old timey caliper and spread it across the flywheel OD through the inspection cover and measure that caliper off-car, you can then measure the distance from the edge of the flywheel to the clutch disc edge, multiply by two and subtract from the flywheel OD. You'll have the disc diameter then. You could also feed a rope around the pressure plate at the bolts, mark it and measure it off car and divide by Pi. Tape it, rotate the engine until it comes back around. Another quick measurement from the pressure plate edge to the clutch disc edge, times two, subtracted from the diameter you got from the rope would get you the disc diameter again. Not super easy, but still easier than pulling the trans. Also, if they are compatible, Vintage Power Wagons has 10" clutch kits. I also had to machine a spacer for the backside of the throwout bearing sleeve on my truck too. Mine was definitely wrong for the application and was too short. Clutch release lever was bottoming out on the frame and barely releasing. Works great now.
-
Are those cheap, new, aluminum radiators any good?
rustyzman replied to 1949plymouthdeluxe's topic in P15-D24 Forum
I used many of the GM pellets in the shops. Supposedly were intended to lubricate the water pump seal. The one I personally have used exclusively for the last 15+ years is K-Seal. Same stuff that Subaru issued to help with MLS head gasket issues. We always called it Mechanic in a Bottle. It works. https://www.kseal.com/products/k-seal It works well and does not clog up radiators and heater cores. I use it at coolant changes on the '54 Truck and the '73 RV, just as a preventative measure. -
I still recommend the spray on both sides, even with a newer style gasket. My personal preference and experience suggests that with a less than factory perfect surface on either side, this can help with sealing. A tap of the correct class of fit, used properly, will not remove additional material. Chasers are OK as well, but a correct tap is a perfectly fine tool for the job. I am aware that the plug is not above the piston. Perhaps my wording was less than ideal on what I am trying to get across. The issue I am suggesting to avoid is removing so much material from the head, that area of transition area between the plug, which is above the valves, and the top of the piston is not narrowed too much to get a clean, quick burn transition. Again, your opinion on how much is too much to take off may vary, but if that physical transition area between the plug and the piston is narrowed too much, it limits how quickly the ignited air/fuel mixture will propagate into the area above the actual piston. It is one of the reasons that Fire-Slot style high compression heads existed in small racing flathead applications, to attempt to correct a severe narrowing of that area in high compression heads by providing a direct ignition propagation path to the piston. We of course want more compression to improve the overall power of the engine, but there is a physical limit of how much can be removed from the head or block before adverse effects show up. That is what I was trying to say.
-
Spray coat your new head gasket with Permatex Copper Spray, on both sides before you install it. https://www.autozone.com/sealants-glues-adhesives-and-tape/sealant/p/permatex-copper-high-temperature-spray-a-gasket-sealant-9-oz/520940_0_0?cmpid=LIA:US:EN:AD:NL:1000000:PER:19332030449&&CATARGETID=120054150001286384&CADevice=c&gad_source=1&gclid=EAIaIQobChMI4bHmoaauiAMVzEX_AR33oQxPEAQYASABEgJk9vD_BwE&gclsrc=aw.ds I seal the head bolt threads with thread sealer. My personal preference is this one: https://shop.advanceautoparts.com/p/permatex-high-temperature-thread-sealant-1.69-oz.-59235/16160026-p?product_channel=local&store=7134&adtype=pla_with_promotion&product_channel=local&store_code=7134&&&&&gad_source=1&gclid=EAIaIQobChMIpou-tqauiAMVv0H_AR03PwgYEAQYCSABEgKCIfD_BwE&gclsrc=aw.ds Gently clean out all the head bolt threads on the block, as well as any of the mounting bolt threads on the head with a tap. Torque the bolts properly, in steps and in sequence. Retorque them again when the engine is hot. If you have any head studs vs head bolts, realize that they are not the same torque. Perfect time to shave the head a little too. I took .030" off mine. Lots of opinions on how far to go to raise compression vs. retaining some squish area between the plug and piston. Anything will help a little, our engines are very low compression generally. Paint the head if you like, perfect time. Use proper body mechanics lifting it on and off. It is heavier than it looks, but it is totally manageable. Remember to have fun!
-
12bolt tom/ Langdon exhaust manifold heat plate kit install.
rustyzman replied to BayArea48Deluxe's topic in P15-D24 Forum
I have the dual cast iron headers on my truck with a Thickstun intake, but I chose to forgo the heat plate. I don't use it in very cold weather and have not had an issue thus far. So, I can't help with the install other than to say it should be a bolt on plate with coolant hoses running to it from perhaps the heater bypass connection on the head to the water pump bypass connection on the top of the pump. -
GIve the folks at VIntage Power Wagons a call. Last time I talked to him about a year ago he said he had tons of engines, like 100's if I recall. He can arrange shipping too.
-
If you end up digging into the internals of the transmission, after you have exhausted all external adjustments of course, there is another item that you need to look for. A manual transmission jumping out of a gear can be quite likely too much gear end-play. The synchro itself can be worn and cause a rough engagement of a gear for sure. But a worn synchro ring itself should not cause a transmission to jump out of gear. Once the gear is engaged, the synchro ring is no longer really doing anything to hold a gear's engagement. It is just a friction clutch to help align all the engagement teeth of the various components so they slide together smoothly. A common older manual trans problem is that the thrust face of the gear wears down against the next component on the shaft and starts to create excessive endplay. This is prevalent in bevel gear transmissions, because the driving action of the gears naturally forces the gear up against whatever is next to it and those faces rub together if they are not rotating at the same RPM. Once you have enough endplay, the engagement teeth of the gear that are engaged with the sliding ring shift ring on the shift fork start to engage less and less. Eventually, they start to slip out and you pop out of gear. The gear face may even look like it has a nice machined counterbore on one side, but in fact, it is just worn that way. There are of course other sources of this problem too. The shift forks can also be worn and prevent you from getting full engagement of these same parts, as well as the engagement teeth on the gears or even the sliding shift ring. Once it is apart, some measurement with feeler gages and visual inspection should reveal your source/sources. A lot of cars were run with little maintenance or low on fluids for a long time in their lives. A lot of wear can happen that way. All of this again is suspect only after you have eliminated all issues with the linkages from top to bottom. And Redline MTL is wonderful stuff. It has revived many weak transmissions.
-
High Quality H4 Headlights for 12v Cars (Cheap!!)
rustyzman replied to Sam Buchanan's topic in P15-D24 Forum
I just bought 4 sets from my local Toyota dealer. $29.67 each set, no additional shipping, arrived next day for pickup. I had him search and he says there are 1700 sets left in the warehouse. He was actually quite confused by all this. He was sure that I bought four of the same side headlight. I explained it was a kit and we opened one up so he could see what they were, but the round headlights really threw him for a loop. He really was unsure what these could possibly fit. They fit my dodge RV perfectly. The '54 stake bed is next. I am only using the bulbs, the harnesses and relays will be saved for the future. Nice bag of zip ties too. -
Thank you!
-
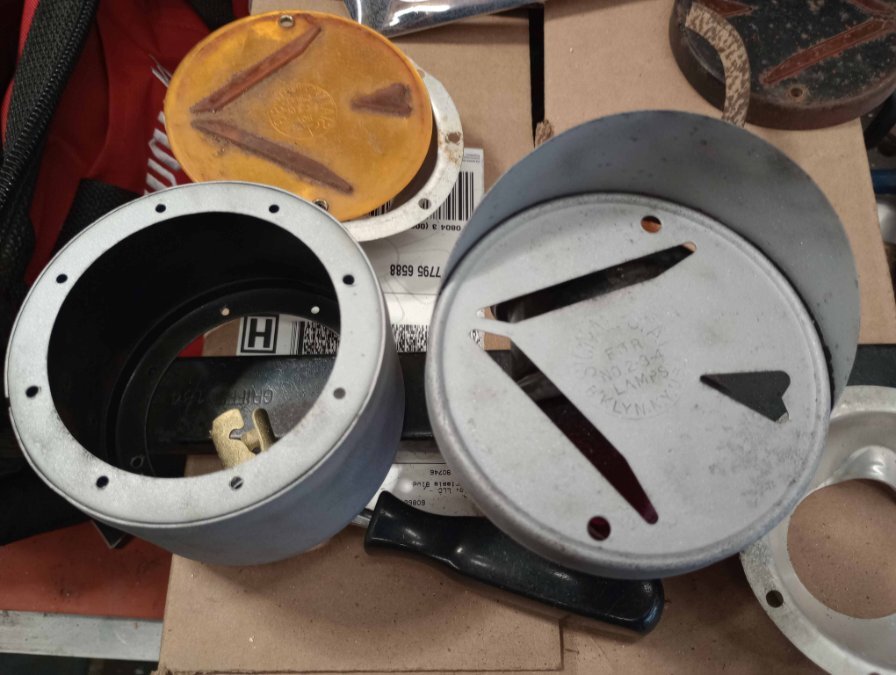
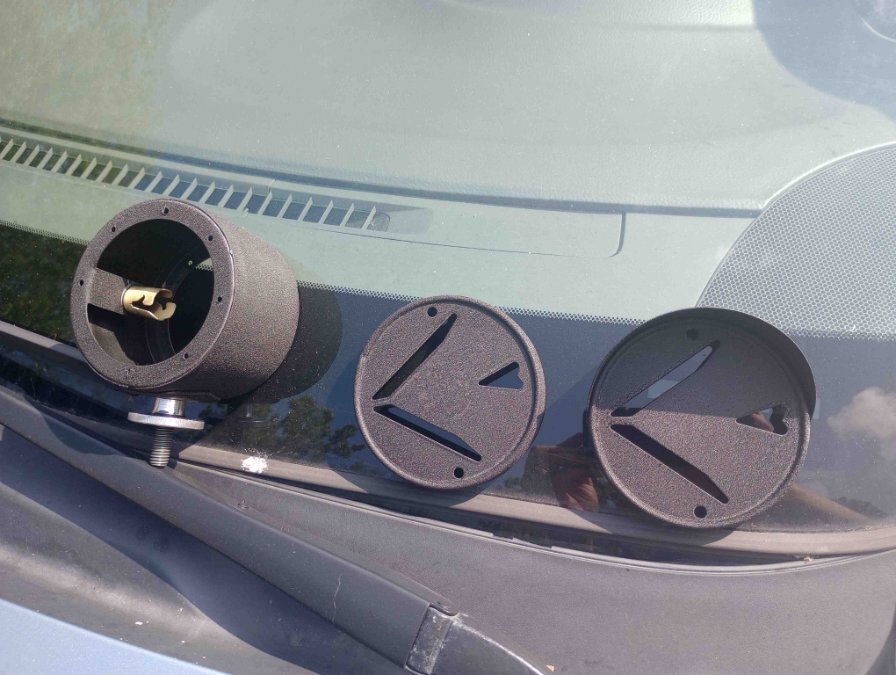
Outstanding work. Old plastic failure is such an issue, this is very inspiring to see and know that with careful diligence small quantity reproduction is possible. A masterpiece.
-
Not going to be of great help, but I did a Thickstun intake on my '54 last year while I rebult the engine and trans. Fair warning, My carb setup is very unconventional, but I went with a custom cable system that I made and did not use the shaft bosses on the intake. All the components are custom, and it works very smoothly. The cable is a generic motorcycle cable (read bicycle brake cable), but all other parts I machined and fabricated. I made the the remainder of the upper intake and all the flanges, brackets, etc. too. The carb is a Mikuni 44phh that I modified heavily to work and breathe properly with the 230. It's working at about 85% of really-good right now, but needs more finesse time to really get it tuned right. I still have to make the high idle cable lever system for the carb. This carb does not have a conventional choke/choke plates, so the enrichment and higher idle are achieved through a fuel enrichment/bypass valve. The high idle system will only be if I need RPM for something, like a future PTO, or just to make it work like it should. Sorry that last picture is sideways... The Thickstun manifold is very nicely made. I did also make some custom exhaust to intake flange stepped washers to get a good seal because of some thickness differences. It has dual Fenton style cast iron headers and a handmade stainless exhaust too. The NiCopp tubing is just a routing carrier for the cable sheathing. Both ends of the cable sheathes terminate in drilled and counterbored ball bearings so they can pivot smoothly as the throttle bellcranks go from one end or rotation, over center and to the other end of rotation without bending the cable itself against the end of the sheath. Maybe helps a bit? This was the most practical setup I found. It is the second iteration of it as well. The first was on the manifold side and looked really great, but it had more bends and was binding the cable a bit, so it got scrapped.
-
My 46 one of those round tuit projects
rustyzman replied to Young Ed's topic in Mopar Flathead Truck Forum
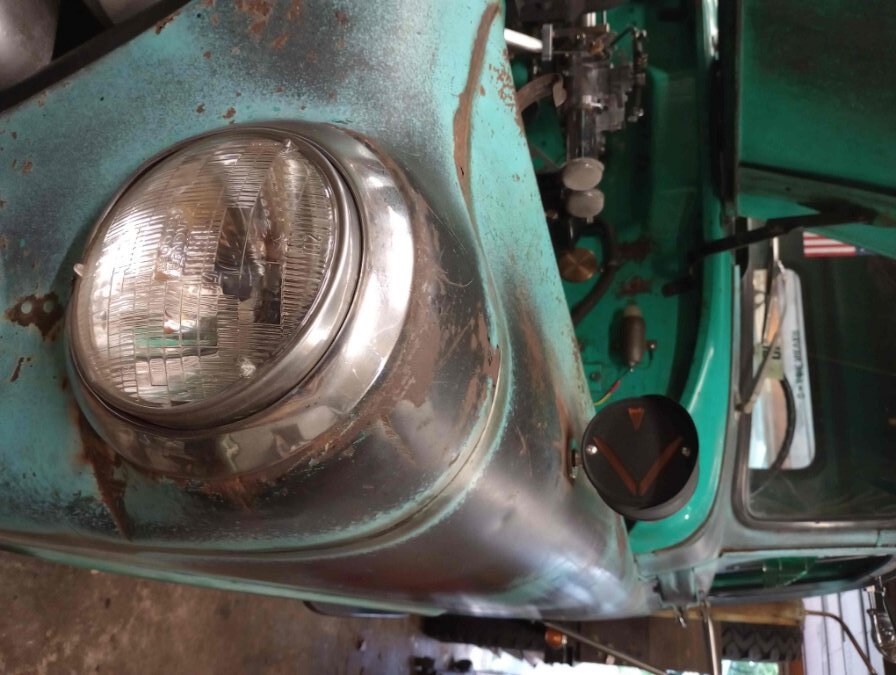
Just an opinion, but I would leave the cowl lights as just regular lights. Given that you have done the nice work on the arrow lights, any additional turn lights in the front would only take away from the arrow effect of those. I think particularly at evening or night, the effect of the new arrows will be quite visually appealing alone.