
Kool48
-
Posts
98 -
Joined
-
Last visited
Everything posted by Kool48
-
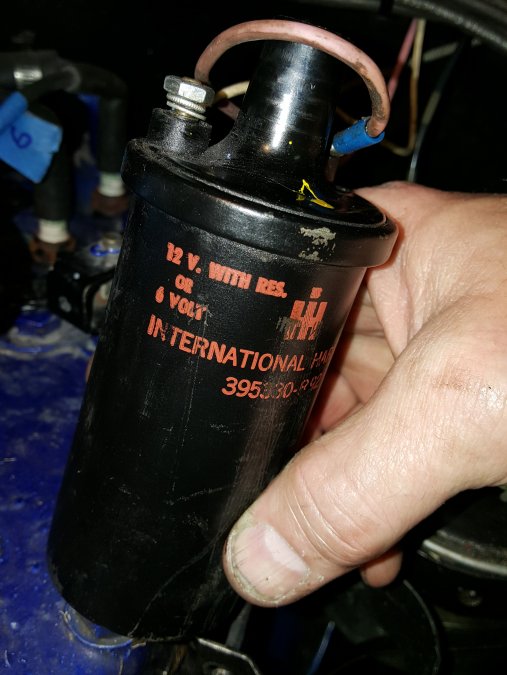
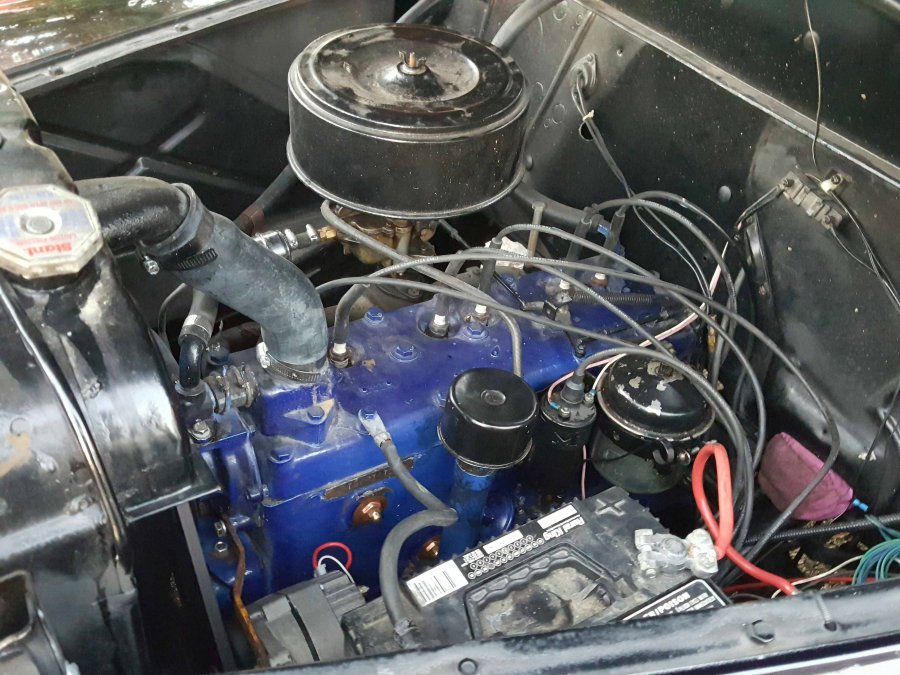
Ok. Just got home a bit ago. Had to replace points and condenser do to my fault. I shorted the condenser out removing distributor yesterday. Anyways that's fixed. Set point gap @ .020. It's all look good and are set @ .025. I had to loan the bracket on bottom of distributor to be able to get the pointer and TDC Mark on balancer in line with one another. So now my travel is approximately 6 degrees before or after TDC. I'm @ TDC. I also had my vacum guage on the vacum port of carb. I can only get about 9"s of vacum at idle. On my old meter. I'm running about 5600rpm and 31 degrees dwell. Car starts right up fast. Not sure if it's advanced to much or because of 12 Volts hitting the 6 volt starte . Which is starting to make noise. I'm gonna have to replace it soon. As far as vacum wipers. Yes I have them. But there not hooked up. I have a line fed out of the rear of intake manifold. But it's plugged off. I noticed this fuel line someone ran before me. I just noticed it now. It's about pinched shut and running right on radiator hose and heater hose. So I know that's not good. Could be starving for gas and also vapor locking. So I'm gonna get new line and reroute it asap. I did drive the car. Leaving in 1st pretty good hit 2nd goes very well. Get up to 3rd gear around 40 MPH and engine starts surging until you get out of the accelerator. That was all with choke opened all the way. I never tried to choke it to correct it. But there a certain area when accelerating you hear this sucking sound from carb. It's in a range of its own. I'm wondering if throttle Rod may be my problem with the leak ? If so can it be repaired ? When listening to engine here in drive. You don't hear any signs of leakage. Except that sound coming right outta the carb itself. You can cup your hand over it and it helps a bit. I've shot either around everything I can think of and no changes. Here's a couple pics. Ya I know the fitting in carb isn't correct. But that's what they had in it. I'll get the correct vacuum fitting first it. But it doesn't leak right now I know for sure. Oh and here's my coil. It has resistor in it
-
I cleaned the carb very thoroughly, using small wire to get it to the small areas. The car ran fairly good before, but had some hard starts and I just wanted a fresh carb. Firing order is good , plugs are tan color around electrode. If I run the idle mixture screw all the way in it does make the engine want to die. I find it smooths out better about 1 1/4 turn out from seat position. I did learn last night. Vacum advance dighram is shot. I tried pulling a vacum on port and you hear the air seeping at he dighram end and the arm does not move in as should when vacuum is applie . I've read to not worry about the vacum advance. Just plug it off at carb ? Not sure if that's correct or not. Searched last night for new vacuum advance parts. No luck. So I'm going to try and find points and condenser today in town and get it fired up again. Points and condenser were new. But as I pulled the distributor last nite. The wire coming out of distributor from points hit my positive post on battery and distributor was still contacting ground. So believe I Fried my condenser. And points. Prior to all this. Car started and ran descent. Not great buy descent. Carb work is where things went really south. One other issue now is. The car was converted to 12 Volts before I got it. It still has original 6 volt starter, which is now making bad noises from being hit with 12 Volts over time. Do they have a 12 volt starter that'll fit on this 48 ? Thanks for everything. Chris
-
I'm going to make a cover plate , thanks.
-
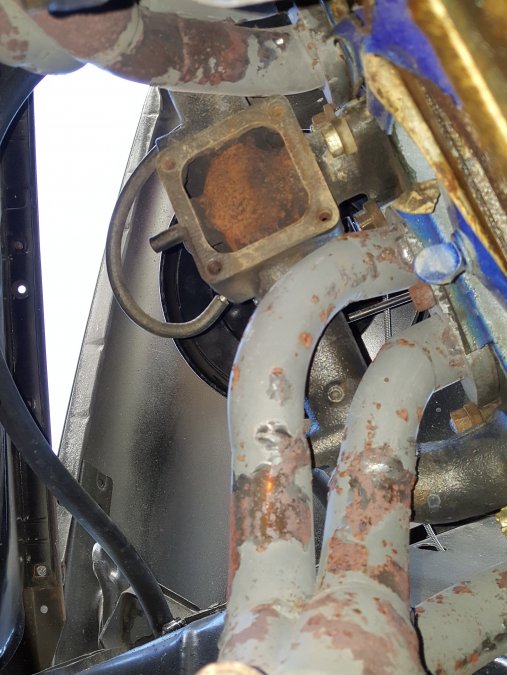
I've recently rebuilt my Carter bb carberurator on my 48 Plymouth. It has to have a vacuume leak somewhere. I've taken top off. Double checked float setting 5/64 per instructions. Accelerator pump 3/8 travel. All good. Everything is cleaned blown out and free moving. Car runs like crap. Have to choke the heck out of it. Well I was under car today and noticed this. This is a pic of the bottom side of my intake. Should there be a plate and gasket there?
-
I've finally found my issue with blowing the fuse for the turn signals . My problem ended up being in the turn signal switch ( column mount ) from Speedwaymotors. The light bulb power wire and broken off inside the housing . So when when you would go to put a left or right turn signal on it would short out causing fuse to blow. I have repaired that as well as rewired the previous owners wiring job they did using a 22 circuit block from Speedway Motors. I also added 2 mini led indicator lights in the dash for the turn signals. The green ones in the turn signal switch, you really can't see . Which it's very easy to forget to cancel signal after a turn. But now I have theses. 2 LEDs mounted right under the cluster bezel , you won't forget there on anymore lol. Just about done with the wiring .....
-
I'm replacing both hoses on my 1948 Special Deluxe. All original heat and duct hoses. I'm pretty sure my hoses one long for drivers side defrost and one short for passenger side defrost . There 1 3/4 ID If I remember correctly . You can get the hose in 6 ft lengths from your local Car Quest dealer or Orielys. They may have to order it but usually have it within a day or 2. Prices vary a bit approx $4 a foot. Hope this helps
-
I wanted to add that even when I got my NOS gauge I tested it straight to 6 volt battery pos side of battery to stud ( ign sw) and touched stud 1 to ground of battery and then stud 2. I got no movement at all. Cleaned the contact point and the entire gauge using Deoxit 5 and and dollar bill soaked in Deoxit 5 for the points area. Blew off with low air pressure. Walla gauge worked perfectly.
-
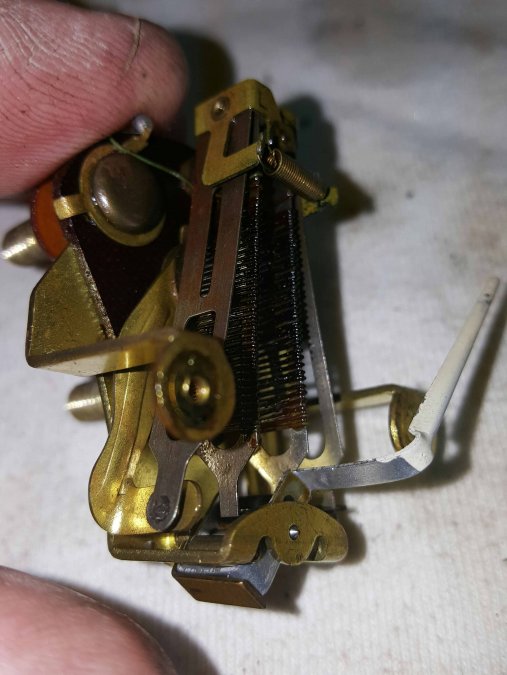
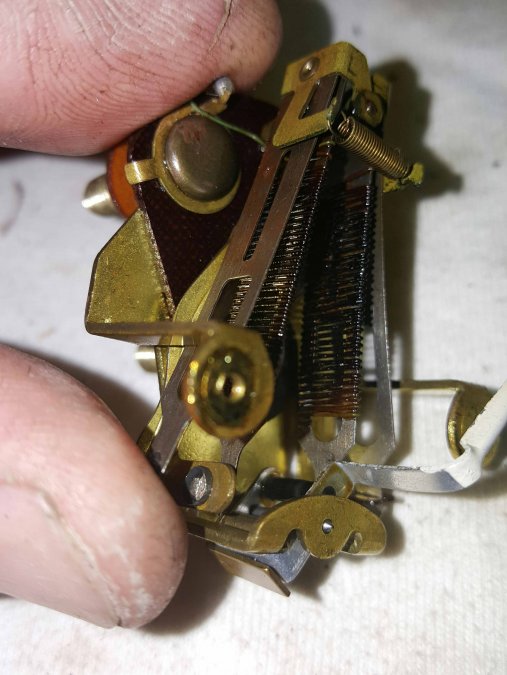
As far as calibration of the fuel gauge it's fairly simply. Just need to be careful and have patients. But in short the 2 brass arms that come down to bottom of gauge are adjustable left to right independently. They're both attached at top of gauge via a rivet. But there independent. You have to have the gauge energized. And using your sending unit float to determine full half full and empty to match gauge needle position. Once you figure out where you are and where you want the gauge to be then you adjust theses brass bars left or right by means of using a non conductive tool such as plastic or wood. I used the ink pen cap I had laying on bench. You'll have to be patient and just adjust ever so slightly and watch what happens to what you do. Here's a pic of the gauge. I put my ink pen cap between the needle base and the brass arm itself for leverage to move outward ether left or right arms You have to be very very careful. Do not push on the Folic ( regulator) side. That's the right side looking from gauge front. It will break off very easily. Trust me , I did it by accident not paying attention on my only good gauge I had prior to buying the NOS gauge. We'll I hope this helps someone. These pics are with the face removed. You can see the gap between needle base and brass arms. This is where you make you adjustments. I adjusted mine with face installed. These pics are just to show arms better.

-
No I only tested the gauges with a 12 volt battery, having a Runtz rudecer inline to gauge. So at the gauge itself I'm getting right around 7 Volts from the Runtz reducer. But before I actually figured the proper way to test it used a 6 volt lantern battery. Very cheap. You can do whatever ya want when it comes to 12 or reducing your voltage. But the way I understand it. There's a reason why they make and use theses reducers. I won't do straight 12 Volts. And if it works for you then that's great. But I'll stick to what works for me and what the professionals recommended. I looked up my sending unit. Here is a pic of the name on it. I got ahold of Mike himself , this man knows his stuff. Very helpful and a great guy. I would highly recommend if your having gauge issues to contact him. You'll be happy you did. I am very much.
-
Well I finally got me a good working gauge. Ended up buying a NOS off eBay really cheap. It's the same as 46 thru 48. Except back ground which I'll change with one of my others. I've learned quite a bit through this process. Thanks for all the advice and help. My conclusion, nos gauge. Runtz reducer 12 to 6 Volts and my original sending unit. Which was the key part in my conclusion of me getting this all resolved. I even learned how to adjust the gauge to match the sending unit if needed. Thanks again for everyone's help.
-
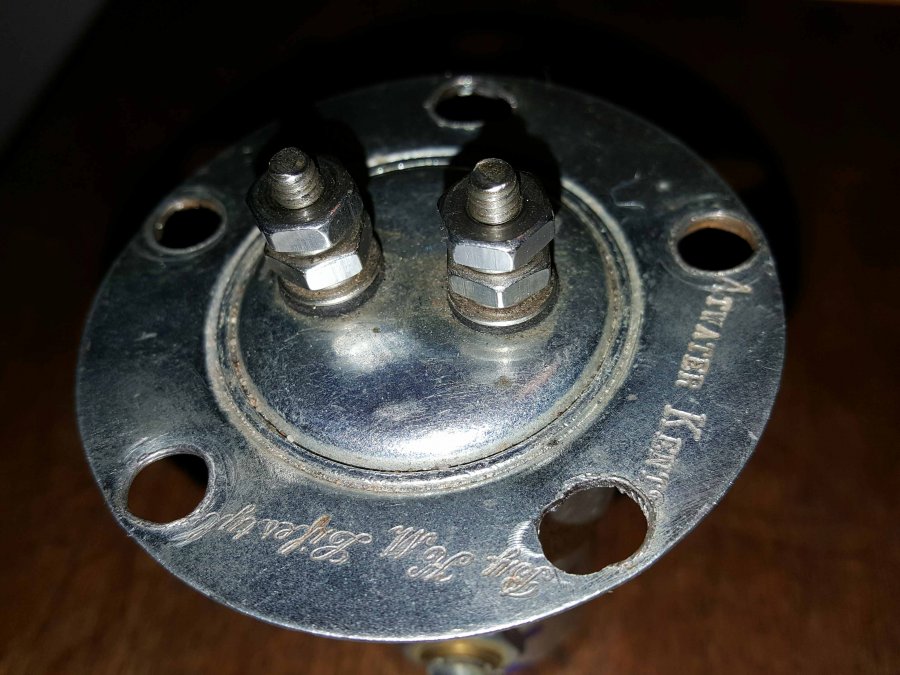
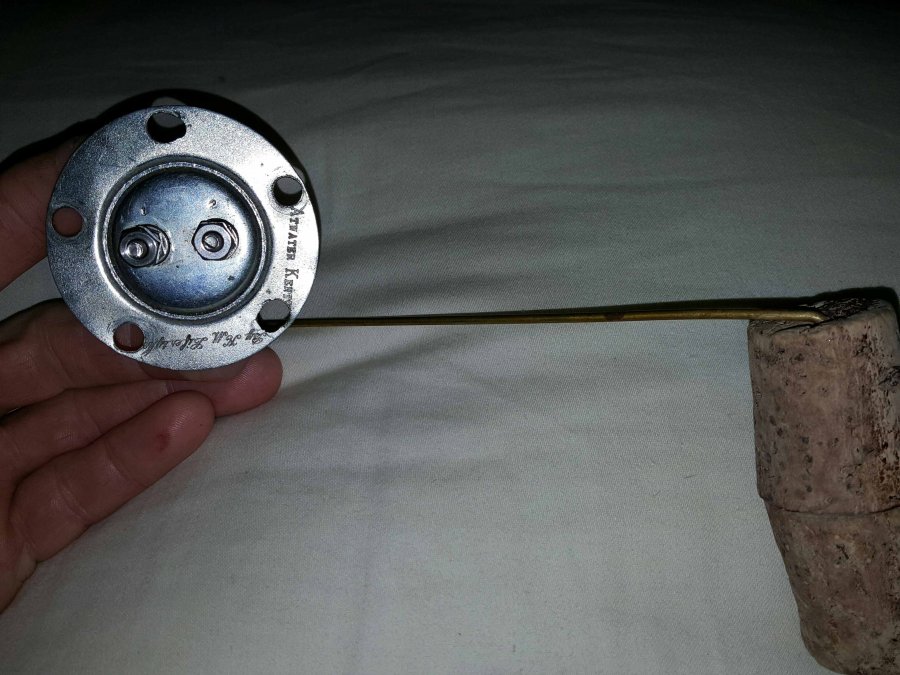
Thanks Moak , I did as you asked. Red wire from Fluke to both 1 & 2 post of sending unit. Ground to body of sending unit. I get .4 ohms either all the way up or all the way to bottom about 6.7 ohms in middle of sweep of float arm. So yes it's consistent. Smooth also. As far as taking this particular sending unit apart to clean I'm not sure. Looks to me to be sealed . The arm has a jam nut holding pivot point to body. But I don't think you can pull the inner parts out this small hole. So I haven't even tried it. And if I did what would you reseal it with. It's just odd that with sending unit connected to gauge I can't no lower than a 1/4 of a tank. But gauge sweeps fine both ways using just a 6 volt battery. I suspect that the sending unit being at fault here. But doesn't make sense. The sending unit and gauge both have 1&2 post and gauge has 3rd post for power input. So yes it's a 2 wire system. I marked sending unit housing with blue sharpie at full , half and empty marks. Tank is 8 "s deep gauge has more Swing than 8 "s though. This sending unit was used on 38 to 48 plymouth. It's a Atwater Kents sender.


-
Well , I'm still scratching my head a bit. I haven't dug out my old electronics stuff yet. It's buried in garage Attic lol. So where I'm at now , is as I mentioned before a few post back. Testing with 6 volt battery. My thing is now , I have 1 outta the 3 gauges that may be good . I know 1 is total loss. The other smokes. So the 3 rd gauge , seems ok it sweeps all the way to the left (empty) and all the way to the right ( full ) when gauge has nothing connected at all. Now if I connect to only the 6 volt battery and ground either stud 1 or 2 out on the battery it will sweep both ways depending on which stud I'm on. So then I test it with sending unit. 6 volt battery connected to the sw ing stud of gauge. Battery ground to sending unit housing and jumper wires from 1&2 of gauge to sending unit. Lift float up to where it looks like it even with the sending unit flange or at full position , needle sweeps past full. Let float down slowly and gauge starts coming down. It's not super smooth ,it kinda hesitates and then moves a bit more towards empty. I kinda think that's still ok. My thing is even with the float completely down , the gauge will not read less than about a 1/4 of a tank and just stays there. Disconnect everything then it'll go on down to empty . So is the problem with the gauge ? Or the sending unit ?
-
Keep us updated on the transplant. Sounds like it will be really cool . Good luck
-
Well got my plugs done yesterday and all back together. Not to bad of a job to do. Highly suggest the Dorman copper expandable plugs.


-
I used the lower left copper,. Dorman 568-010 plugs. Works great.
-
Those Dorman freeze plugs I'm using , I planned on using permatex non hardening gasket sealer. Pretty good stuff. Any one have experience with those Dorman expandable plugs and what they used as a sealer?
-
Agreed. There is a counter bore for the plug to seat against. You could easily bust that cast iron shoulder. Then hmmmmm mmmmmm. Good point Plymouth Adams
-
Gotcha. Thanks
-
Ya I was scooping what looked and felt like almost dry mud out from behind mine. I get her cleaned the best I can. Few flushes , hopefully it'll help. Can't hurt.
-
Thanks I'll give it a try , I have a bunch of resistors around here someplace . Been a long time since I worked on electrics . I have to dig my old stuff out. I'll play with the DMM also.
-
Thanks to all the replies on this matter. I don't have a problem getting them out. I simply drill a small hole run a screw into it and pull out with a wonder bar. Works very easily , my question was did they ever not machine the top 3 for any odd reason. It's dark and cold now. But tomorrow I'll give another look. I'd like to believe they are plugs in there. I can't see a reason why they wouldn't have machined all 5 on the side. But anyways. I just didn't wanna drill into the iron block , if they hadn't been machined and plugs there . I let ya know what I find tomorrow. Thanks again. As far as flushing. It needs it bad. I was told it had a fresh rebuild when I got about 3/4 months ago. Lol no way has it been. Behind plugs , it's full of black crud. It's pretty bad. Car ran good no overheating issues . But I know it needs a good flushing. It actually need to be hot tanked. Flushing isn't going to remove this stuff. It's caked in there. I cleaned the best I could and as far as I could which isn't far. But for now , I'll get the new plugs in it , probably cycle the antifreeze trough a few times. It's got a new radiator so I don't wanna plug it up. I learned on my 49 years ago. Put a woman's pantie hose in the neck of the top radiator and check it often. It'll catch most of anything that breaks lose in there. Thanks for the replies
-
So If I'm understanding you correctly , I can use a good 30 ohm 1/2 watt resistor between power source and gauge and that's it ? As far as the Fluke goes , I have a couple. Never really checked amperage with either. But I'd like to learn as much as I can . I used to do vintage home audio restorations for myself not as a business. But I'm a member of a ver good audio site. Learned a lot from those guys regarding audio. But I'm by far a tech or a professional when it comes to electronics and how it all works. My own projects come out pretty good of course I had a lot of online help. Just like hear. When it comes to 60s 70s muscle car stuff I fairly good at those. I do thank and appreciate everyone here for there' help and inputs.
-
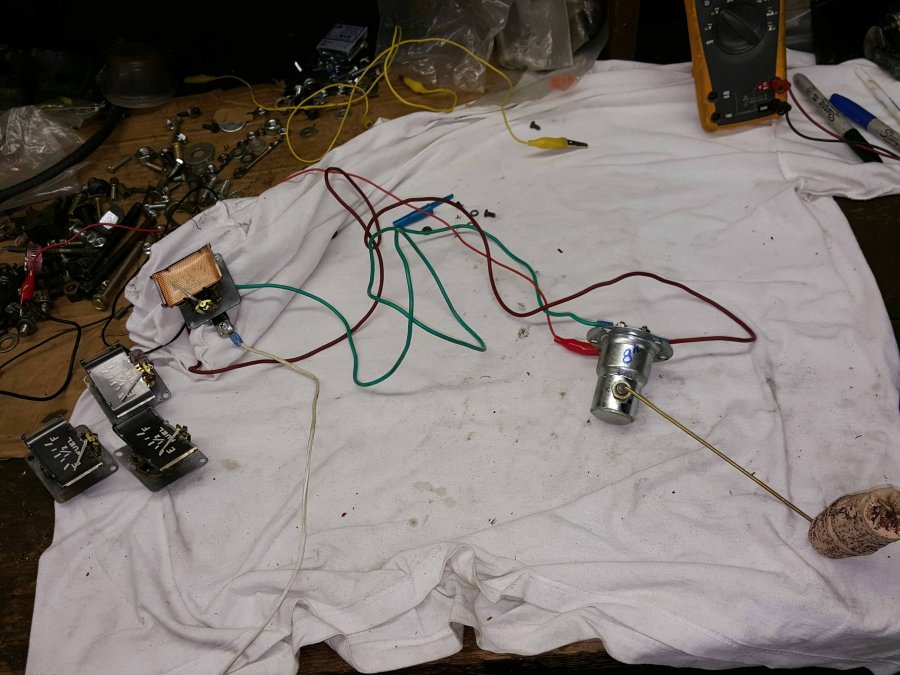
Here's my latest updates on gauge testing. I went a bought a cheap 6volt lantern battery. Came home , I tested this way. Ground from battery to the sending unit body only. Positive of battery to the SW ING stud go gas gauge then jumper wires to 1&2 of gauge to 1&2 of sending unit Finally I have movement. It seems to be working ok , it only goes back to a 1/4 of a tank mark on gauge. But goes past the full mark. Is there a way to calibrate the gauge or tweak the heating bars so it reads closer than it is now. I still don't get what I was doing wrong before. But my Runtz reducer is trashed now. So I need to buy a new reducer before it goes into car. Outta 3 gauges. 1 is just junk. 1 works but starts smoking as soon as power is applied but does sweep. The 3rd is the one I'm working with now that needs calibrated. If it can't be then I'm back to square 1 again lol.
-
I'm in the process of changing my freeze plugs on my 1948 Plymouth Special Deluxe. I believe this is the 217 engine ? My question is. I got the 2 bottom plugs out no biggie. But I started to drill a hole in the top plug to left , it just didn't seem right so I didn't drill through. Look like iron chips not steel. Was there any of theses blocks where the castings had the bosses for plugs but the only used the bottom 2 on th drivers side ? I don't wanna drill a hole in the block itself. So I'm gonna install my new Dorman copper freeze plugs in the bottom 2. I don't wanna start reassembling until I get some answers regarding the top 3. It's very hard to tell that there is a plug. It looks really smooth like one casting (block). .... Thanks


-
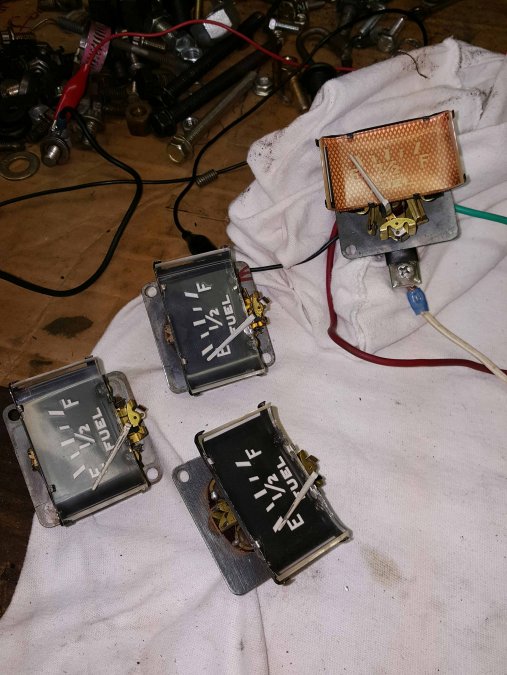
Ok here's the latest. Just left Farm and fleet. Bought a 6 volt lantern battery. I'm down to 2 gas gauges now. I've cleaned both with Deoxit 5. 1st gauge test (only gauge to 6 volt battery. Needle does sweep to full when connected directly to batterys + side and gauge stud #2. And sweeps back to empty on gauge stud # 1. So I'm assuming this gas gauge is functioning properly. Now the 2nd fuel gauge, testing the exact same way. It will sweep but instantly start smoking at the top of the Bi- metal blades ( heated ). So I'm assuming it's at a faulty stage about to go ? No sending unit connected at this time. Any inputs , does #1 gauge sound good as far as this test ?