
ebruns1
-
Posts
214 -
Joined
-
Last visited
Content Type
Links Directory
Profiles
Articles
Forums
Downloads
Store
Gallery
Blogs
Events
Everything posted by ebruns1
-
Thanks Guys! Since I'm pulling the dash it had to come out anyway. Frank, great idea with the light bulb I will do that! I thought I would leave the "guts" out because I will be installing or making a 12v wiper conversion and from what I've read here on the forum I may need the room back there. Since it's not working anyway why not just leave the faceplate and buttons on there for show and open up plenty of space for another radio and the new wiper motor?
-
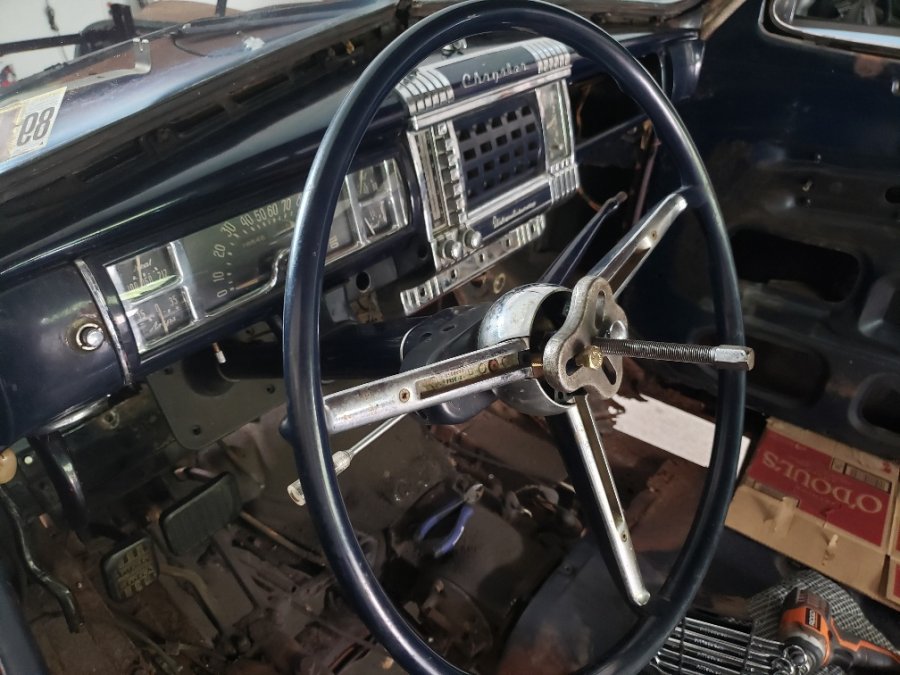
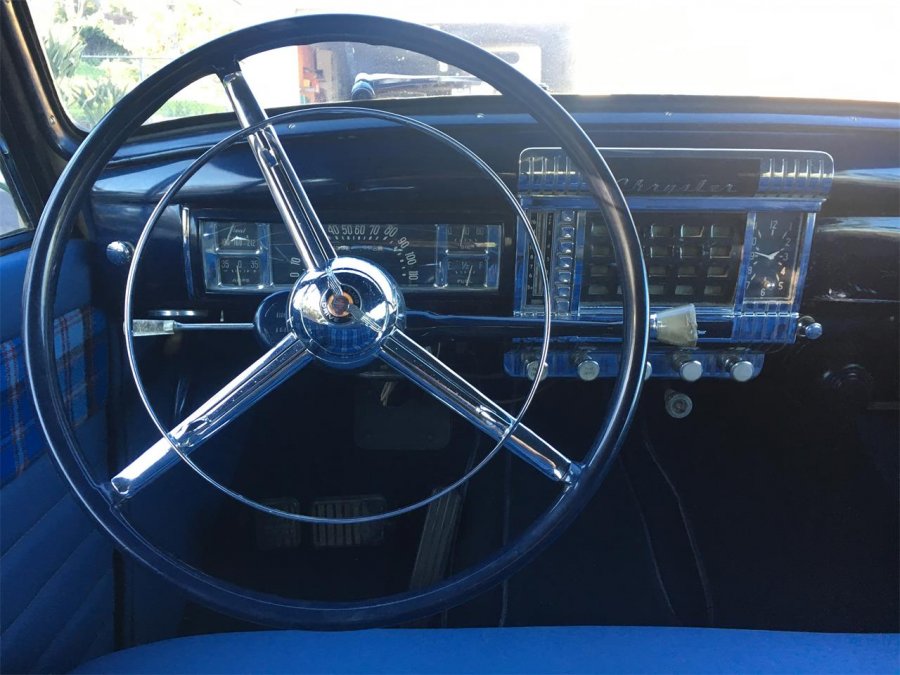
Fellas, Moving on to next step now that the steering wheel is off and attacking the dashboard! I will not be using the original radio but plan on installing some type of hidden Bluetooth device to link to my phone or an iPod-style device. I don't want to use a radio delete plate as I much prefer the look of the dash with the original radio and clock. My radio faceplate is in excellent condition. Also, I want to clean up the underside of the dash and make some room in case I want to install A/C and for better access to future wiring etc. I just pulled the radio and have it on my bench. I unscrewed the side panel and the head unit screws. The head panel is now loose and seems to be held in place with some wiring that is soldered together. I want to separate the head unit so I can re-install it with all the buttons and the dial but not have the back "guts" attached. I'm sure many of you have done this before. So here's the question: 1. Will clipping the wires allow me to separate the head control unit from the back? 2. Did you make a custom bracket once you got them apart to re-install it? Any photos? I will have the dash out for re-painting so it will be easy to get to the back of the dash. Thanks!


-
Sam, that's a genius idea bud! I went right out and tried it. I tightened down the puller and then there was a loud "pop" and the wheel came right off with no effort! One thing to note for the next guy trying this. Do not leave the castle nut on the threads...or at least unscrew it way more than I did (I kept it flush with the top of the tube). If you don't back it out a bit more then that there is hardly any wiggle room for the puller to pop it off. Also note, there is an indexing slot in the threads so you don't have to worry about losing your wheel alignment if it is already set up properly. It will only go on and off in the exact same position as you had it. That's bad news if you thought you could center your steering wheel by removing and installing it at 10 or 15 degrees one way or the other to correct any misalignment of the wheels.
-
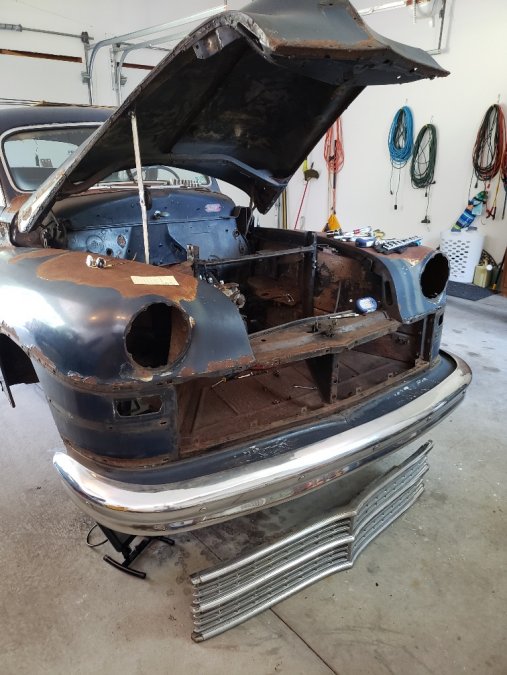
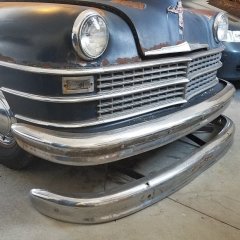
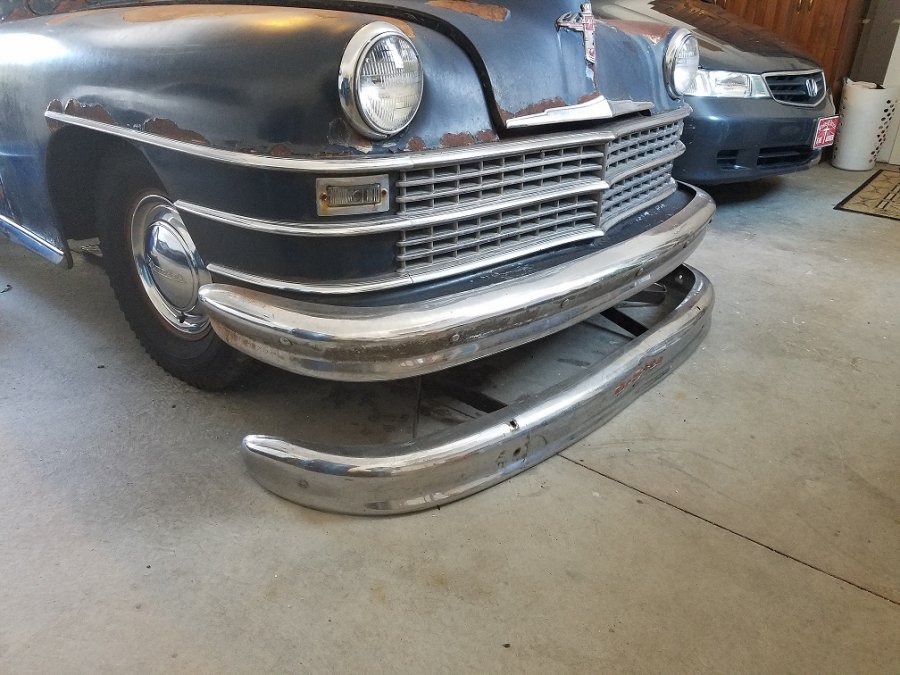
Success! The center grill and all the "whisker" trim was held in place not by bolts, but by threaded studs with nuts and washers. Almost all of them came out easily with 3 or 4 exceptions. Of course, the worst was the inside grill fastener right up against the right side inner sheet metal pan. I had to work on it with the Dremel and a cut off wheel for 15 minutes and grind it all away. What a pain! Couldn't get a Sawzall to stay on the rusted blob and couldn't fit my big grinder in there either. Man, that thing is heavy! Next up are the bumpers. Got them sprayed with WD and soaking. Got a big 2' breaker bar so shouldn't be any trouble...did I just jinx myself???
-
So I borrowed a wheel puller from my mechanic buddy...was missing everything except the center rod and main body. I had two 1/4" coarse thread bolts to attach to the wheel hub. I left the castle nut on the steering shaft so I don't mess up the threads. The center was open so I needed something for the center plunger to push against...nothing in the workshop was either small enough to fit or had a hole in the middle (washers). Hmmm, I have some quarters in my pocket and they are the perfect size to cover the hole. Well, I just screwed myself out of 2 bits! I guess quarters aren't as strong as I thought! Haha Any recommendations on what I can use to cap that opening that will stand up to the pressure?
-
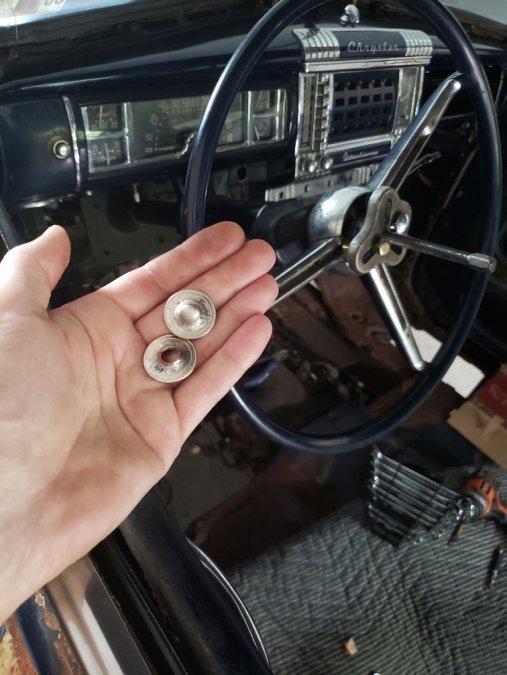
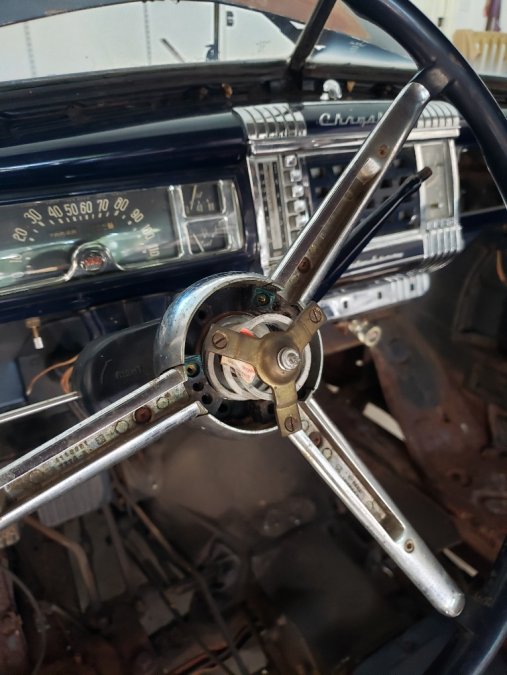
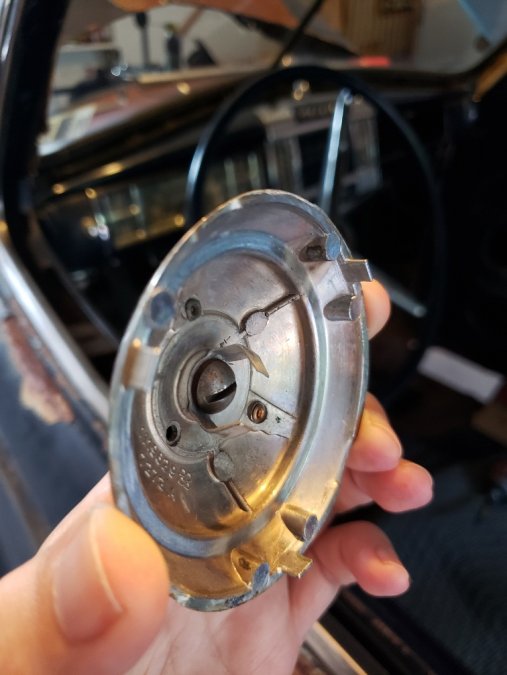
OK, got the steering wheel center part off. Here's a good photo for the next guy. It just pry's off easily with a plastic trim tool. Photo shows the spring clip that holds it on. Look at my other photo for some yankee ingenuity...matchbook covers as insulation for the horn contacts! Haha. Two fell out and under the car but one was still there when I took this photo. The horn must have been going off and this was the quick way to fix it! I borrowed a wheel puller from my mechanic friend. He only had the basic tool so I have to buy some bolts that match the wheel threads. Anyone know off-had what they are? Looks like a fine thread bolt in any case. I'll try and see if I can get the wheel off. MarcDeSoto, yes I'm going to try to get the body off...cant see how to do that without at least pulling the wheel and possibly the column. What would you suggest? It seems that without the column in the way I would not have to lift it up that much. With the column it would have to go almost double the height. Am I missing something? As long as I can clear the rear frame kick-up then I don't need to go any higher without the column correct?

-
OK Fellas, Again, searching this site for 20 minutes and can't find a reference...how do I get the center button off the steering wheel to access the retaining nut? I don't want to break anything and I didn't want to start prying on it. I don't see any outside fasteners so I would think it either screws off, or pops off. Any hints? Once I get this part removed I'm sure I can figure out the rest. The posts I did find mentioned screws on the rear of the wheel holding on the horn ring (but that was not specific for Chrysler). Thanks again for any insight! PS - this photo is not my car...I wish it was!
-
Don, At an assembly plant with unlimited height to lift the body on a gantry conveyor assembly line I guess they might have used one of the methods you mention. Of course, in my garage and with an engine hoist it is going to be difficult enough to lift it high enough over the engine never mind an installed steering column! It seems my best option is to disconnect the pittman arm (easy) disassemble the shift linkage (moderate) and then unbolt the steering box from the frame (PIA)! I guess now I need to start searching how to remove the Chrysler steering wheel and hope I can borrow a puller from one of my buddies... Jim T
-
Thanks fellas, looks like a lot of work! Would it be easier if I left the shaft and outer jacket in one piece and unbolted the entire steering box from below? My objective is only to remove the sheet metal from the frame and I assumed I would have to pull the steering column out. Is there any other way or am I not thinking correctly? (Hmmmm, maybe I should rephrase that...I know I'm not in my right mind trying to tackle this project haha!) Jim
-
Tried searching but came up empty. If I losen up the bolt at the bottom of the column where it goes into the steering box, would it allow me to pull the column off and up through the firewall? Of course I know I would have to unbolt the shift linkage as well but I'm open to tips on that too! Apologies if there is a thread out there, none of my key words worked like "remove column" or "remove steering" Mostly stuff about steering wheel removal. Thanks!


-
Steering wheel and ring removal for 51 Coronet
ebruns1 replied to Dan Heston's topic in P15-D24 Forum
Would this work for my 1948 Chrysler? It's got that big chrome semi-circle in the center of the wheel. Thanks! -
Strange coincidence? Sill trim dents on both sides
ebruns1 replied to ebruns1's topic in P15-D24 Forum
So, after work I went out and attacked the sill trims. Had to grind off one of the bolts but I got them both off eventually! While I was in there I took a photo of the inside of the wheel well and there was a little bracket towards the back but nothing near the edge of the fender to pull it in. Please post a photo of what you finally decide to go with so I can possibly learn from your experience when I go to make mine up. I like your idea of an adjustable brace so you can pull in the fender as needed.

-
Strange coincidence? Sill trim dents on both sides
ebruns1 replied to ebruns1's topic in P15-D24 Forum
Thank you Don problem solved! That is the perfect explanation. When I get home from work tonight I am going to set up a similar jig to see what it does. Once it comes back from paint I will fab up some kind of permanent strap like you are doing. I guess the original straps rotted away and/or were never replaced. I imagine they collected all the spray and road salt from the NJ/PA winters and took a real beating. I'll have to go check my sheet metal handbook and see what the originals looked like but it seems like an easy solution. Thanks again! -
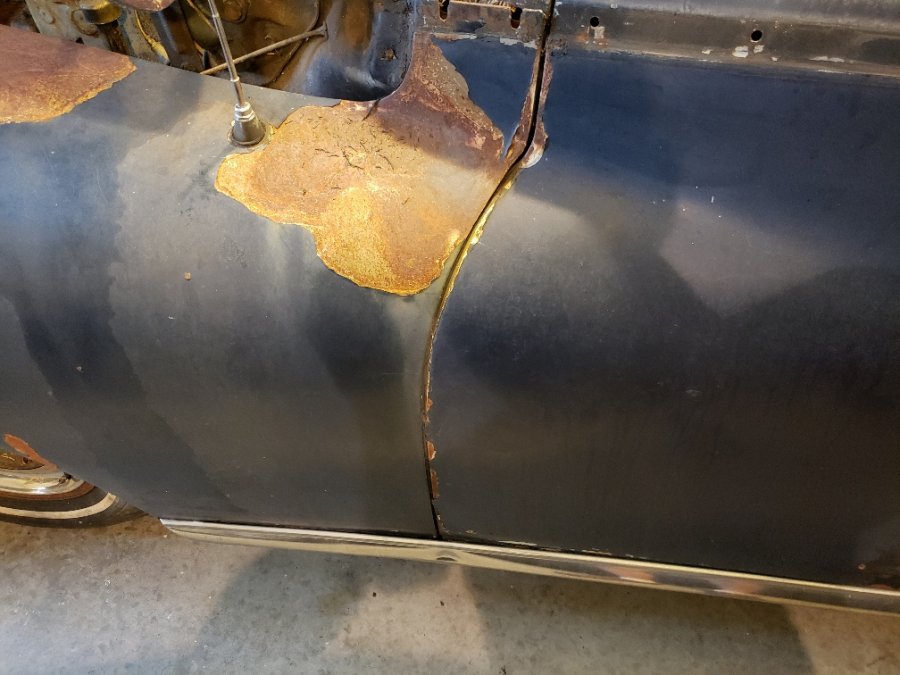
Very strange coincidence...or is it? There is a nice crease on both sides of my sill trim plates in exactly the same place. They are both located right at the leading edge of the door hinge and cowl seam. Do you think this is caused by the door and cowl flexing when the door is opened to full stop? One other thing I noticed, if you look straight down from above it looks like the sill has a long bow in it and is not a straight line. Both my sills have a 1/2" gap or more in the center and does not sit tight to the rocker panel. I assume they should be tight to the rockers without any gap but it sure looks like they are going to have a nice big "bow" in them once they are reinstalled. Is this correct? I don't want to pay to have the dents hammered out only to have them reappear again. Thanks for any insight fellas! PS - My cheap $12 Harbor Freight Dremel tool came in handy to cut the bolt off my mud guard! I was surprised it actually worked. It was not very powerful however more importantly it was very small and because it was such a tight fit it was perfect for the job! A full size Dremel probably would not have cleared the tight quarters I needed to get the tool into. As I mentioned in a previous post the nut was just a blob of rusted metal and no chance of removing it without cutting.


-
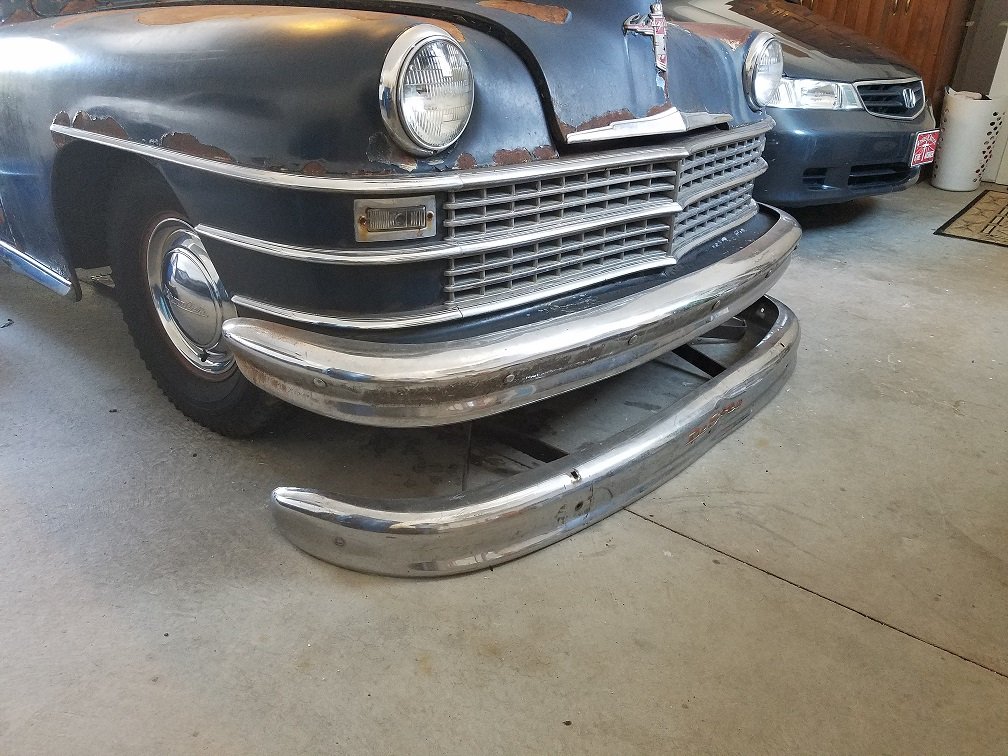
PS - That's a Desoto rear bumper in the photo for comparison. Front Chrysler and rear Desoto are the exact shape and size. The Desoto has some extra square holes above the side bolts and is missing some holes along the center mounts that the Chrysler has. Awhile back there was some discussion on the various size bumpers between the different marques and I can assure you the inner profile of them all are the same. I know because I also had a Plymouth bumper that I sold to NickPic for his car awhile ago and I laid it out and the inside dimension line was identical. I forget why someone was asking, maybe to swap bumpers or something. Here is a rear photo of Chrysler, Plymouth and Dodge rears. I should have thrown the Desoto in too but it was in the basement at the time. They all have the same inner profiles (inside curve). The Plym is the thinnest in height and the rest are about the same. Chrysler and Desoto have same "double-roll" to them. I was comparing because my Dodge bumpers are trash and I may use the Desoto bumpers on it eventually if I ever get back to that project...

-
Fellas, Got most of the stainless trim off! I will have to grind off the last nut and stud on my driver's rear fender mud guard. There was nothing left but a blob of rusty metal and not much of the nut left. It just rounded over when I tried to unbolt it with a socket. Working my way to the front of the car and turning attention back to the front grill. Next up is removing the chrome "catfish whiskers" on each side of the center grid. A few of you guys recommended a torch to heat up the rusty nuts to break the bond between them and the studs. I would like to try it on the whiskers but I am hesitant due to possible heat discoloration of the chrome. Am I safe to use heat on the back side of this chrome? Only asking since the chrome is in decent "driver" condition and the jury is still out on whether they are going out to be re-chromed or am going to live with them as is. I hate to think what the entire front grill and whiskers would cost to be re-plated. My paint guy says he knows a fairly priced chrome shop...but we shall see once I get them off and get a quote.
-
Thank you Dodgeb4ya and mrwrstory! That is what I was after, a "how-to" on what works. Much simpler than what I was envisioning with a turnbuckle! Excellent!
-
So old springs don't lose their tension after 70 yrs? If so, that's great I won't replace them. I thought it might help putting new ones on that's why I asked... Also, the springs from MOPAR PRO that say for "1946 Chrysler Windsor" are the wrong springs??? His ad is wrong?
-
I'd still like an answer to my original question...how do I remove the old hood springs? Why you ask? Well I'm thinking about replacing them anyway... Right now you really have to push up and lift the hood until the arm snaps into the lock position. Wouldn't new springs make lifting that big heavy hood much easier? Has anyone here installed new springs? Did it make any difference or do you still need to heave it up? When I pop my hood release and push the safety catch I have to pull out very strongly and lift it in order to get the hood open. If new springs are not going to make much difference than I'll leave them as is and save the money...they are $75 on Epay! So who's done this and did it help? Thanks fellas!
-
Awesome tip, thanks everyone! I did not even consider those bolts on the bottom lip of the hood as a possibility! That's why I thought my only option was to remove the springs so I could unbolt the scissor hinge plate that's bolted to the sides of the cowl... Unfortunately, I may still have to remove it that way. After reading you tip I went out to the garage and sprayed those bolts up with WD and tried to remove them. One bolt came out, two more broke loose the captive nuts and were just spinning. There is no way to get a wrench down in that tight space and I'm not sure there would be anything to even put them over since the captive hardware is blocking them. Short of drilling them out I guess I'm back to trying to figure a way to remove the springs again so I can take the whole hinge assembly off. On the other hand, wouldn't that save me the trouble of trying to line up the hood mounting holes you guys were saying was a real pain to re-align? This is turning out to be a nightmare...
-
Hold on a sec...I said it's a '47 Chrysler in the post. As far as I know they did not make trucks (?). It is a Chrysler Windsor to be exact. I also thought someone would know that from the photo. Sorry if I was not clear... So I really need someone that knows for sure how to get the hood off...do I need to remove the springs or not? Thanks again!
-
Wait...you mean I can take the hood off without removing the springs? I thought I had to remove the 4 bolts that hold the arm mechanism to the cowl and the springs are attached to that. So you are saying I can leave the springs on and there are bolts that will let the hood come apart? It appeared that the pins were riveted to the hood. OK I did not see where that was possible but let me check again...thanks! That would solve my problem as I'm only trying to pull the hood off...
-
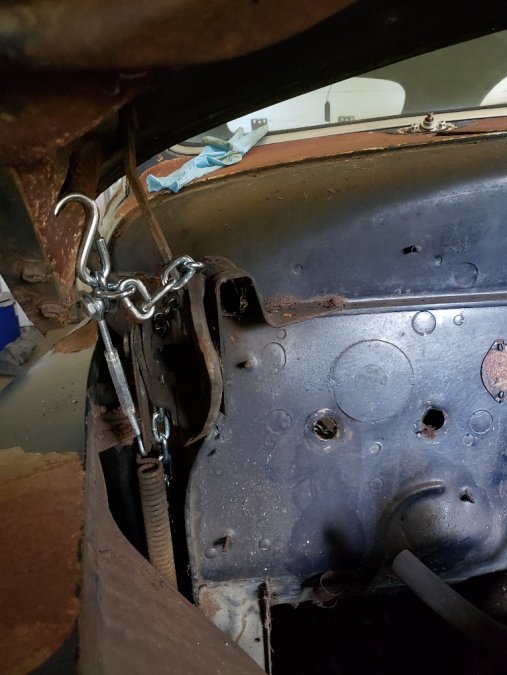
Help! I'm trying to remove my hood to get ready for paint and body work. I've never had to do this before but I remember reading stuffing your spring with nickels would make it easy to remove. So I got my pocket full of nickels and happily went out to my 47 Chrysler. Popped the hood and started jamming it with the 5-cent pieces! Boy this is gonna be easy. OK, ready to go and let my hood down slowly to watch my glorious triumph over that massive spring...NOT! The spring stretches when you close it! Nooooooooo...I just wasted my roll of nickels and now I can't get them out either haha! Boy what a dummy I am! So, on to my next brilliant idea. After studying the hinge and spring for more than I;d like to admit I came up with my next plan. See photo for my turnbuckle idea. I thought I could attach the top of the turnbuckle to the hood bracing and just lift the top of the spring off the arm. Unfortunately, as I tightened the turnbuckle the arm also moved closer together and the spring did not pop aff as I had imagined. Foiled again!!! So now I"m stumped...I tried the search tool but I have found it very fickle and does not always produce the answers you are looking for...so now I need your help. How do I get these dang springs off??? Arghhhhhh
-
Another issue just discovered...I had to drill out the mounting screws on the parking light bezels (what else is new?). You could not tell from the outside but once I got the trim removed I found one of my glass lenses was broken! I could probably re-use it if I glued back all the broken pieces of glass...after I dig them out of the trash bin. Anyone have a spare they would be willing to part with? There were no hits on Ebay for them at the present time. Do they ever come up or does anyone know if any of the suppliers have them?

-
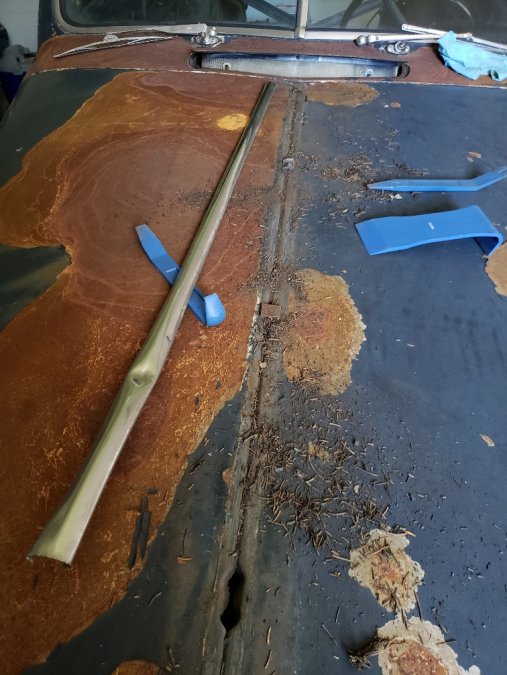
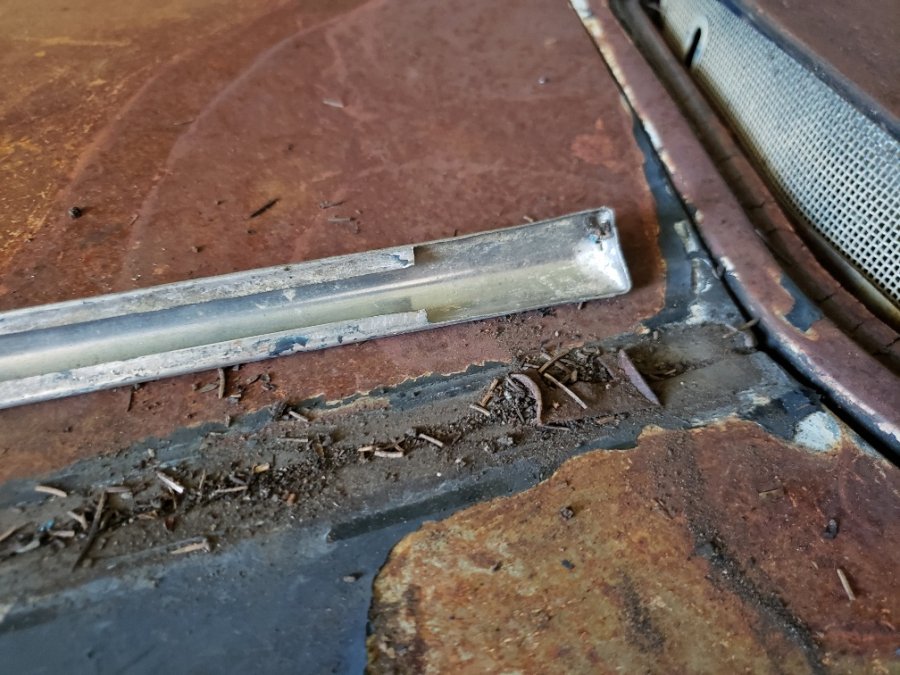
Hood center strip is off! Dodgeb4ya, thanks for the tip. Unfortunately all the tangs on the underside were snapped off and the clips were fused to the metal and would not budge. The only way i got it off was to slip plastic trim tools under the long strip, loosen it up by working it back and forth, clean out some of the crap stuck inside and then pull the strip forwards so that the "opening" in the trailing edge of the strip got to each clip. Then I stuck a pry tool under that end to raise it over the clip and pulled it forward a little more until the next clip and repeated the process. As you can see there was a ton of pine needles and dirt under this trim too! Unbelievable... I would rather use a better style clip to re-attach this piece when I am ready. Anyone use something more forgiving and removable for the future? I'm open to suggestions. PS - that nice bend/ crease in the trim was there when I bought it. It actually gave me something to grab on to while I pulled it forward. I"m guessing the PO either messed it up when it was repainted and he gave up when it would not come off easily... I will have to send it out with the one other door belt trim with a dent to be fixed and polished.