jclars
-
Posts
98 -
Joined
-
Last visited
-
Days Won
3
Content Type
Links Directory
Profiles
Articles
Forums
Downloads
Store
Gallery
Blogs
Events
Everything posted by jclars
-
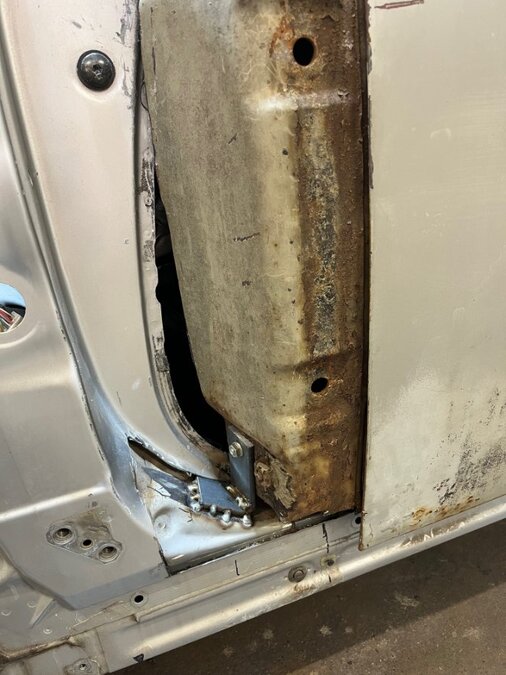
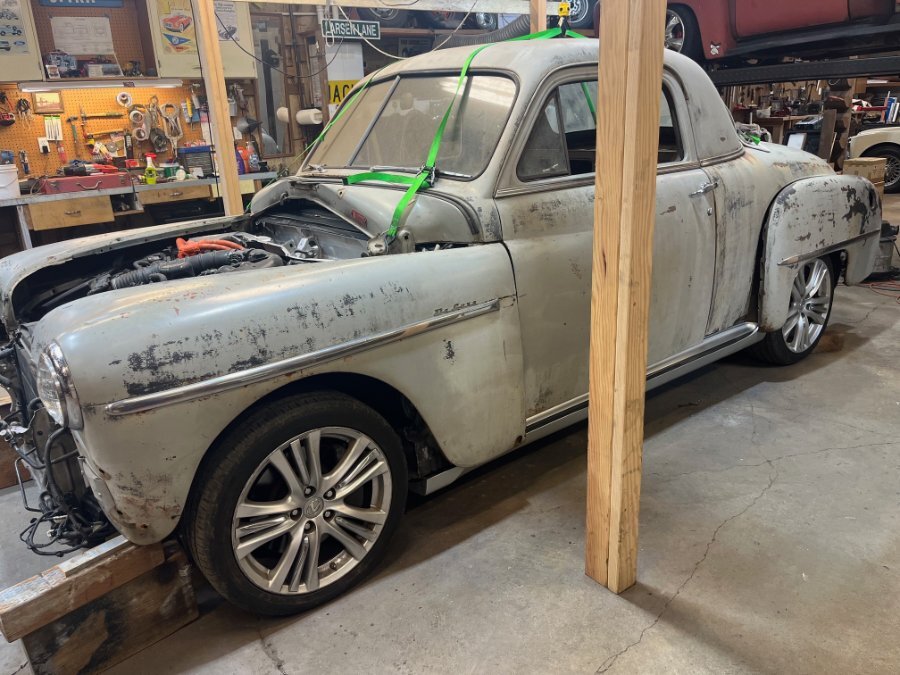
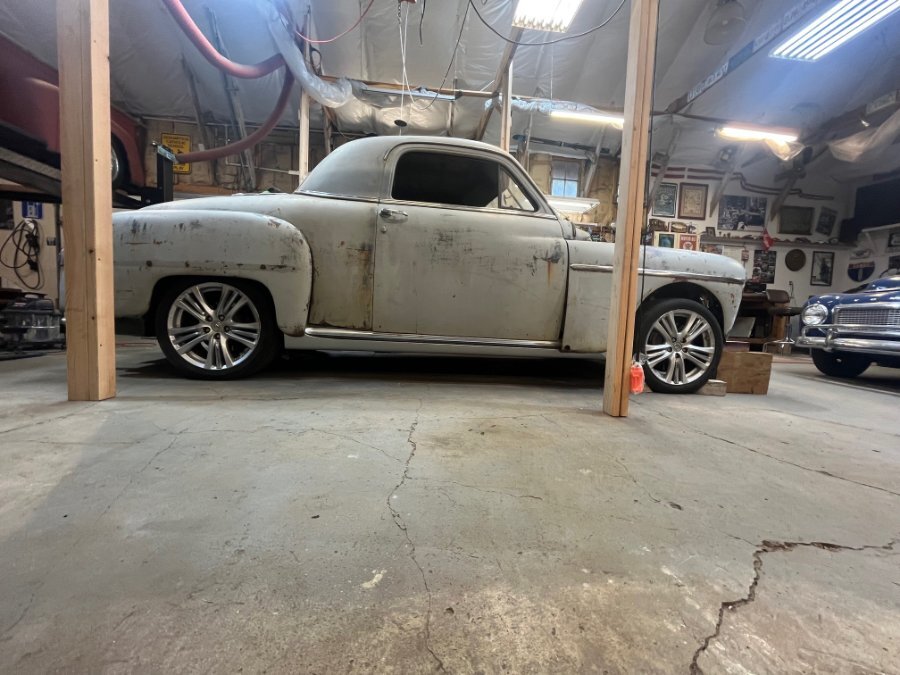
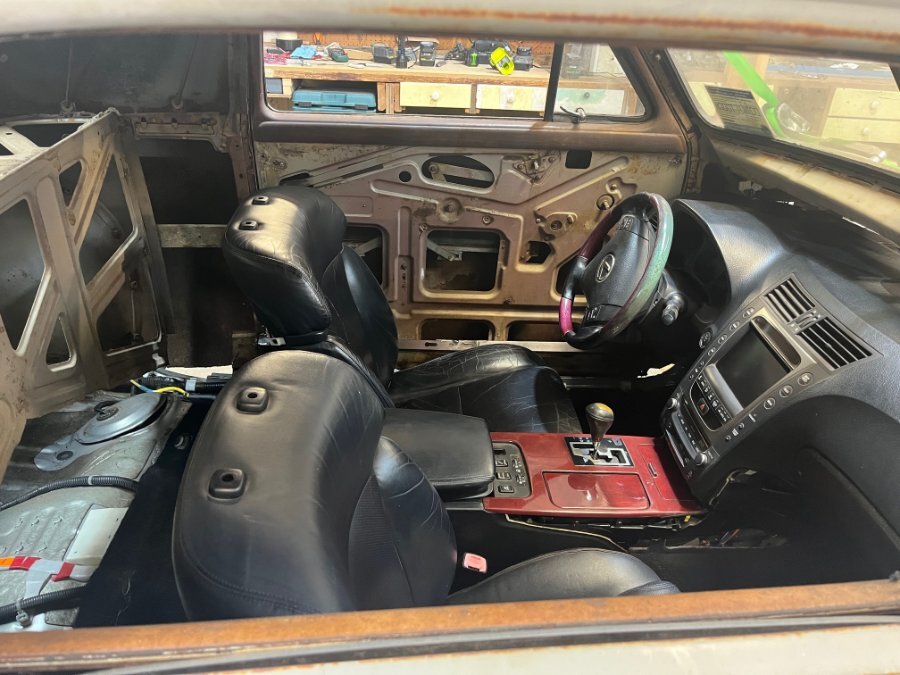
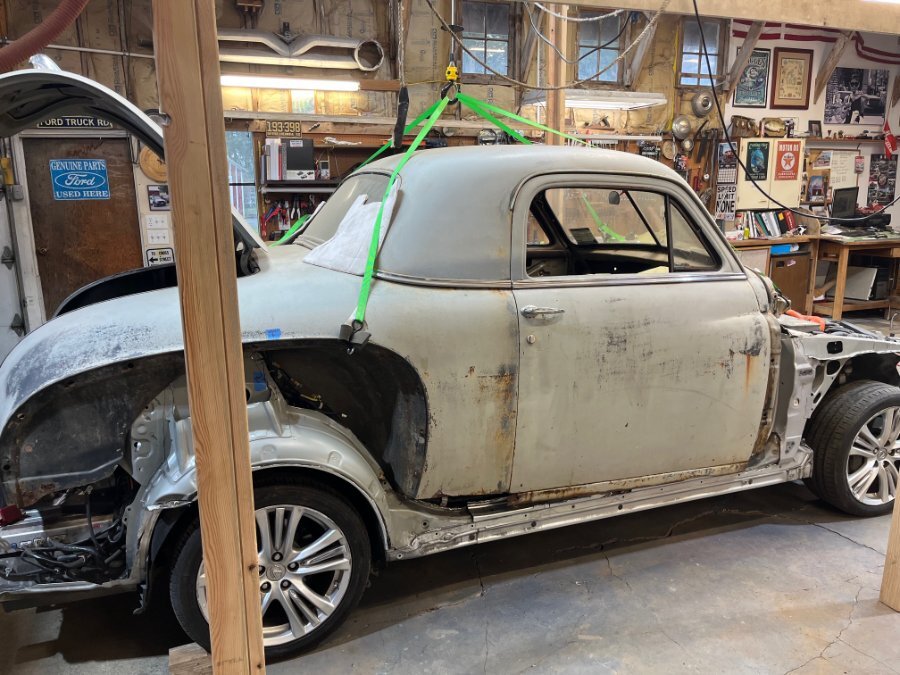
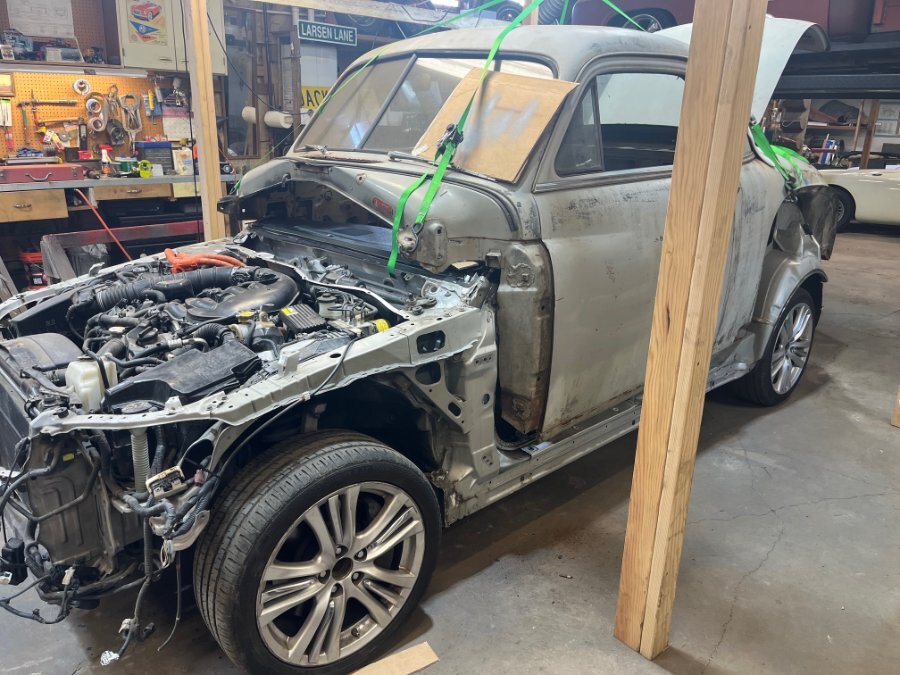
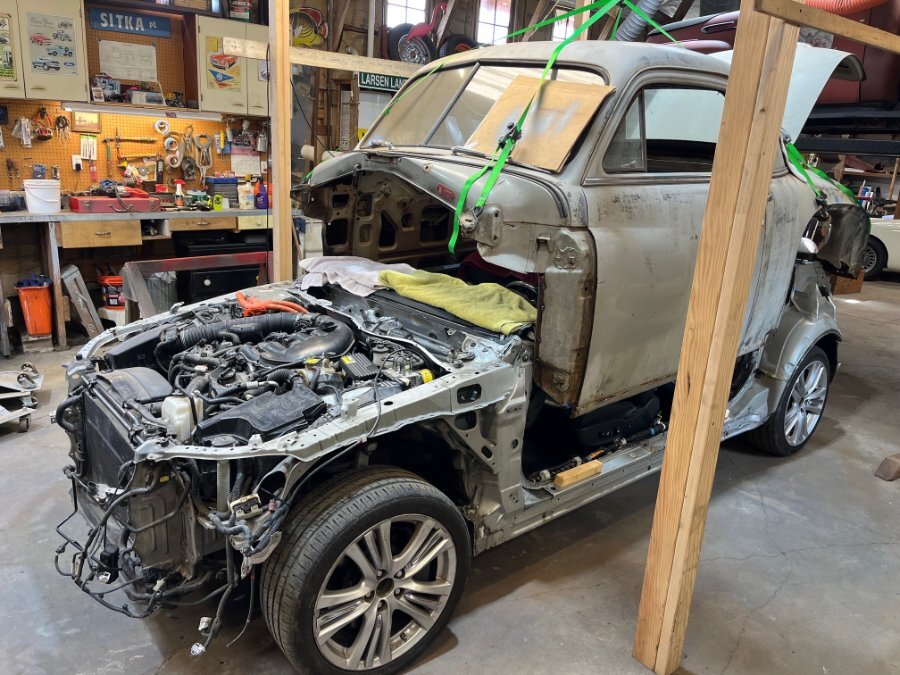
The welds on the front anchor are ugly, I admit, but I wanted to be able to grind them off if it did not line up properly. The good news is that it all lines up. Even better than ever! Once everything was anchored down, the doors are close to adjustment, needing to push forward a bit for clearance and gap. Also when the front fenders got bolted to the A-Pillar, it moved them forward slightly so that I may not have to move the radiator like I had been thinking all along. They still need to pinch together at the front another 1" on each side from what the pic shows. With those critical fit-ups confirmed, I finally removed the lift straps! But they'll be back later, when I determine how to trim/paint the interior. It's looking very possible that the Lexus rear seat will actually fit if I completely remove the trunk bulkhead. That would be cool to have a 5 passenger Business Coupe! You can barely squeeze by the front seats when they are full forward, so may have to reengineer the seat back hinge. The fun stuff! But I am getting ahead of myself!

-
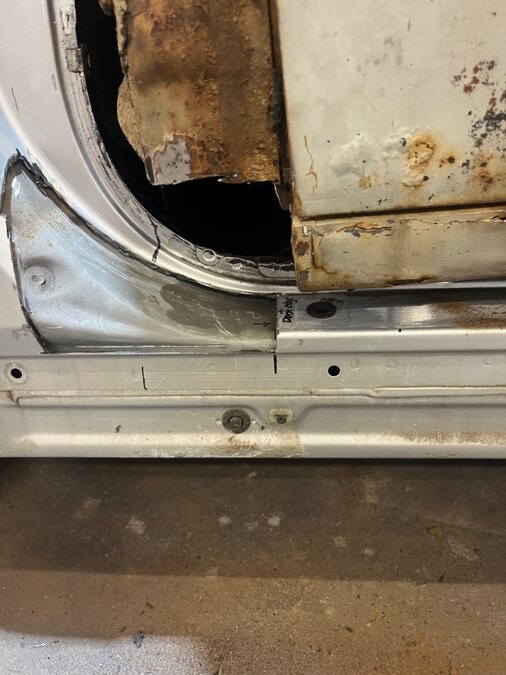
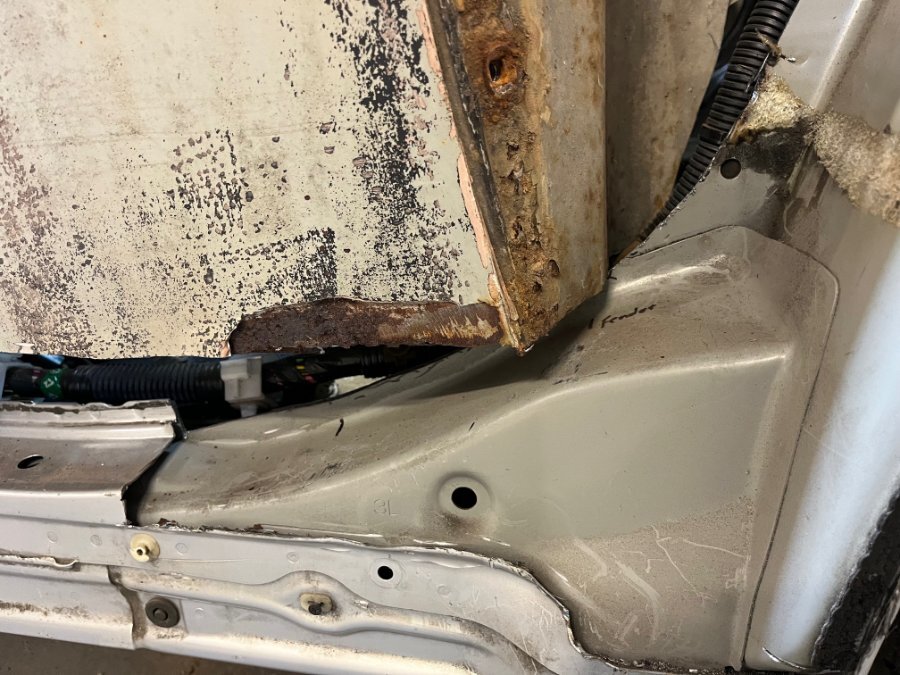
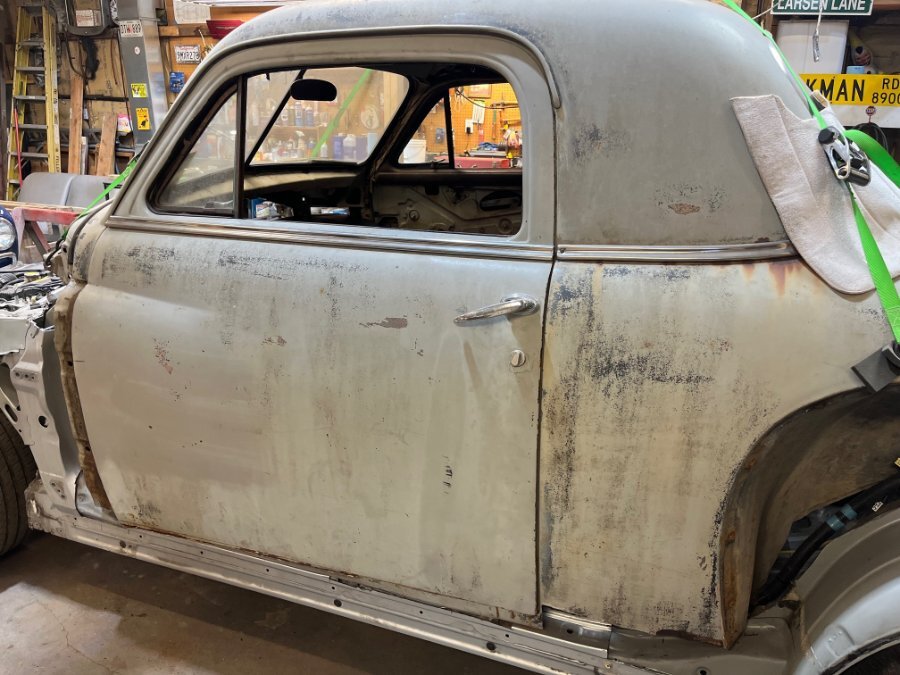
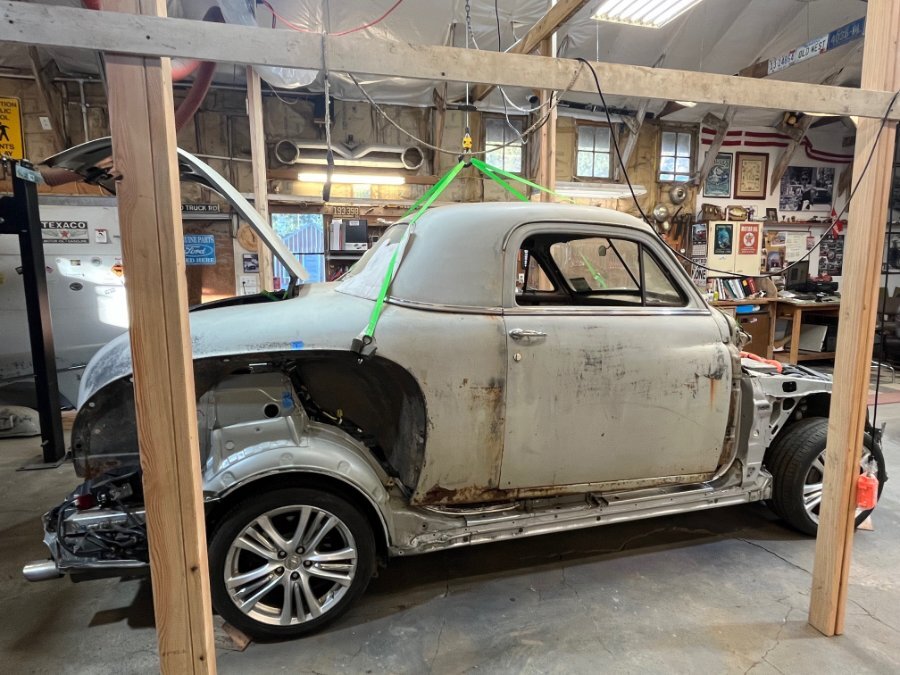
In quick secession, I got the body into position on the new sill covers to anchor it down. No return now! It was tough to patch in to the B-Pillar, as so much had rusted away, but I managed to get it fixed in position. The C-Pillar, where the trunk bulkhead attached, was recreated at the inside of the rear wheel well. I am going to revisit all of these support points, as they were difficult to reach just now, especially the B-Pillar. But I am happy to say that the doors align better than when the body left it's original frame! No wonder, as half the support points were rusted away to nonexistence. Next up is the fender fitting.

-
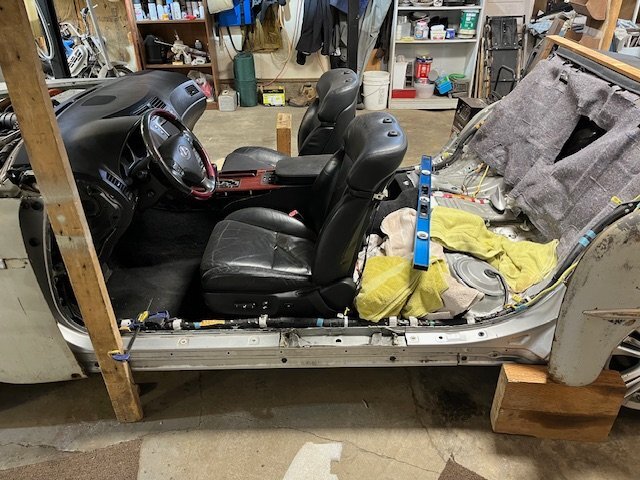
I went into my former employer (mechanical contracting company I was part of) and had them build some top sill covers. It was funny, as I used to drag stuff into the shop and slip it into the schedule for the fabricator to mend, duplicate or make new. When I came in to pick up the new pieces, the fabricator, who was an apprentice when I was there, said "When I saw it was for you, I said, these are sills for a car project!" My legend lives on! If you zoom in, you can see the 5" seat leg extensions I made to make it look like an adult is driving rather than a little kid!

-
I have recently deleted a couple rear "racing wheels" from my car. Don't know the actual spec, but can find out if interested. They were wide enough to require the body to be lifted high enough to get them removed. Tariff Free! Just 1 mile across the Aldergrove border crossing. John

-
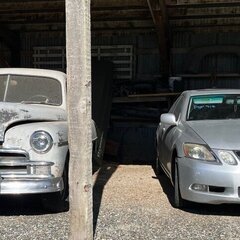
Even though my shop gets quite dusty as well, I discarded car covers a long time ago, as I like to see my "shop art". I am blessed to have enough room to park my herd indoors where I can catch sight of them from my happy hour perch! But then, it also reminds me of items that need attention too!
-
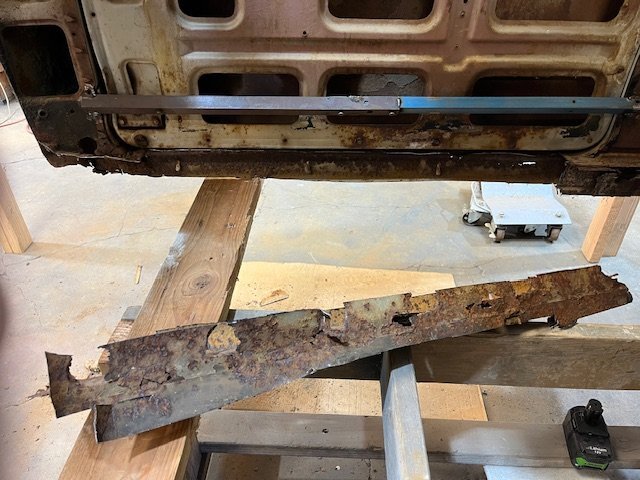
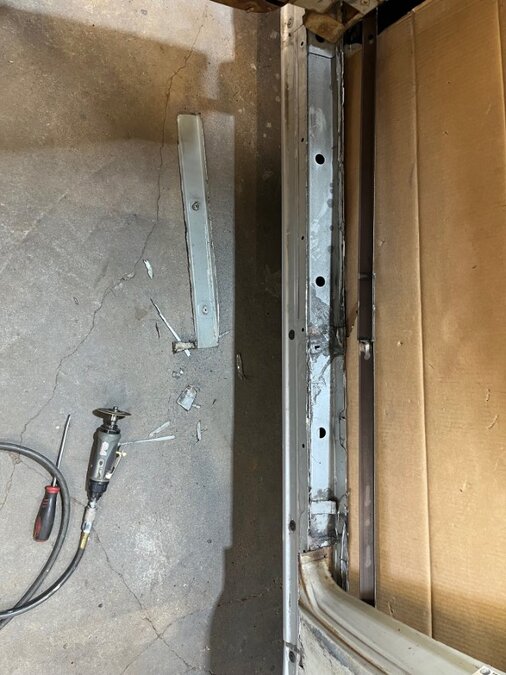
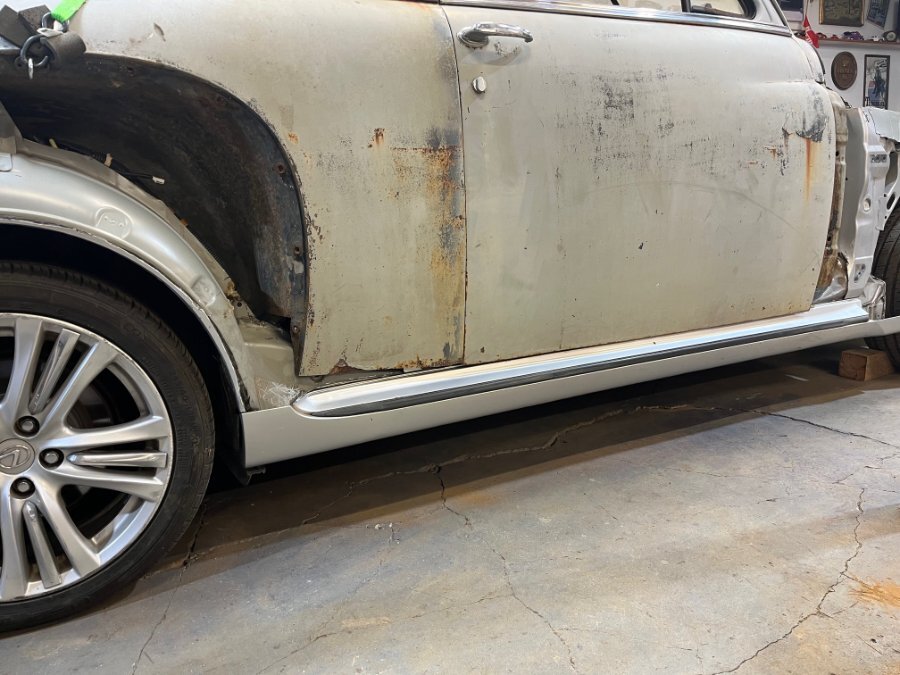
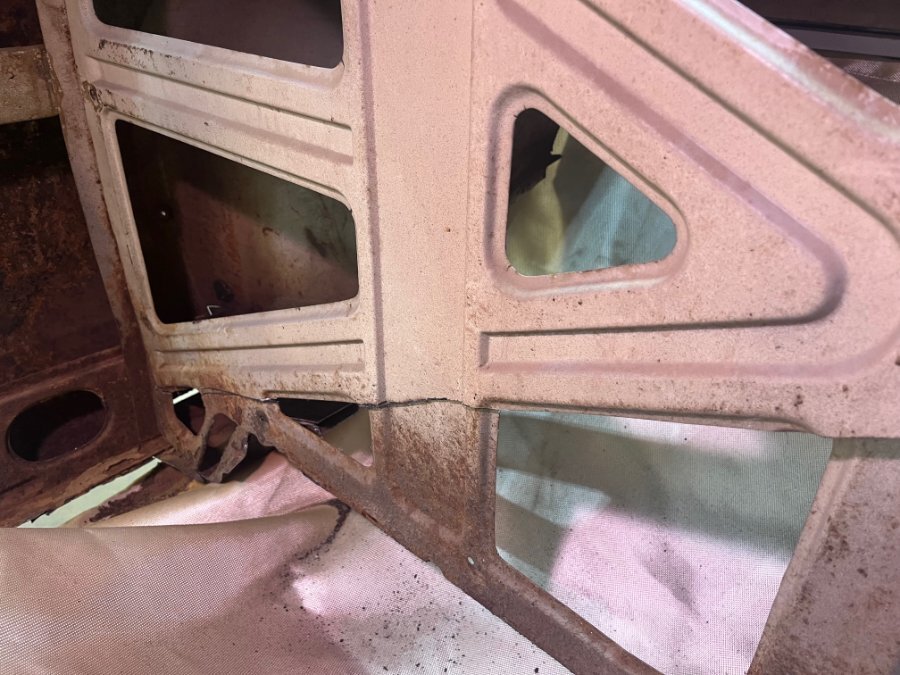
Shown is the rest of the Lexus sill I cut away, which might allow another 1/2" lowering. However, I will replace it with a new sill piece attached to the Plymouth pillars while aligning and anchoring the to the Lx frame. I anticipate using through bolts which would allow future lift off from the frame. As I cleaned up my metal scraps, I realized I already had plastic rocker covers. You can see the foil backing the PO used to plaster a thick layer of bondo over the rotted areas, in lieu of patching properly with patch panels. For smaller holes, he simply pushed bondo through until it oozed out the back side.
-
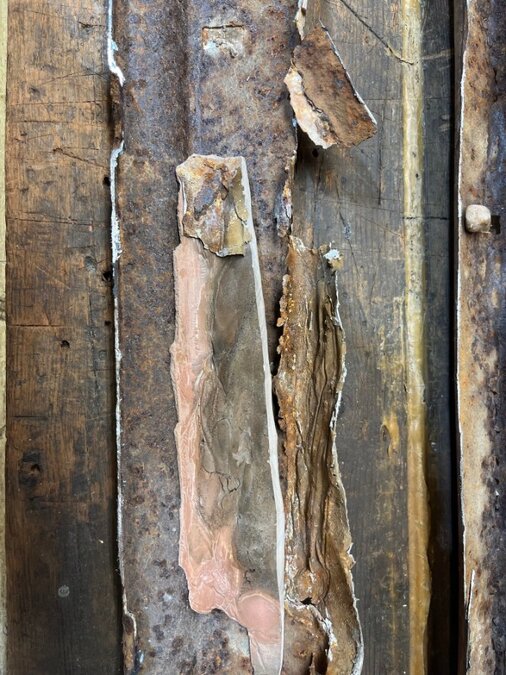
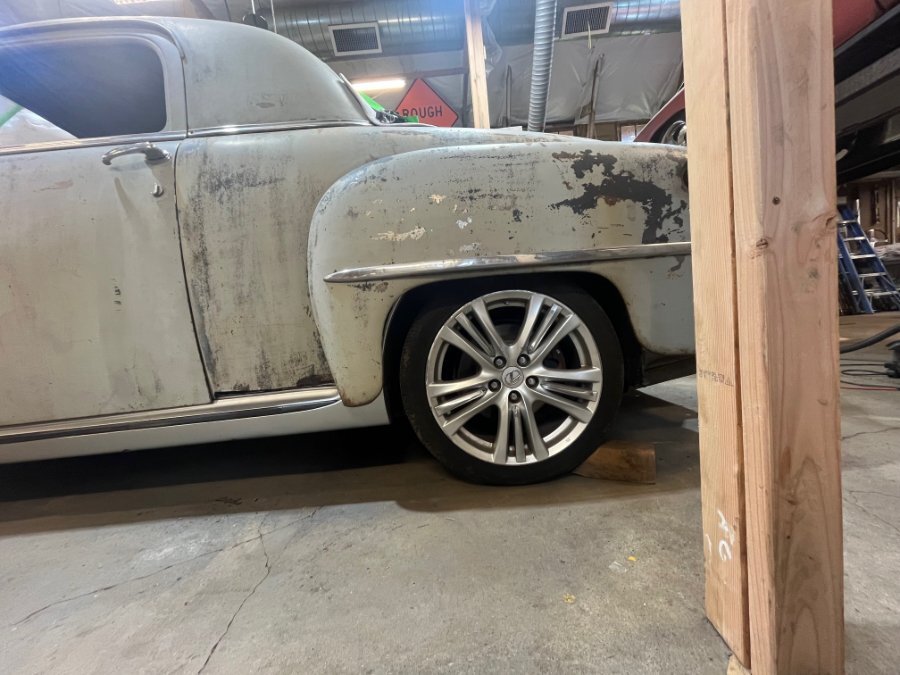
The youngster, who really knew his Japanese cars, felt I could chop more of the Lexus outer sill away and rebuild with new sheet metal welded deeper into the actual frame core below the outer sill. I was going to rebuild the Plymouth sill on top of it anyway, so why not get another 1/2"? Ugh. More cutting. The attached pic shows the outer skin of the Lexus sill and the Plymouth outer rocker since removed. Some of that rocker was solid bondo! Oddly, they had spanned rust out areas with tin foil and filled it up! There is more space at the wheels than the pix reveal. The circumference of the Lexus tires is actually quite a bit less than the old Plymouth treads. Plus, the PO had fitted extra wide racing wheels in the rear that could not even be removed without jacking the body up to expose the top of the fender opening. None the less, I will see how she rolls before too much more lowering. The stance, especially the second pic, is deceptive because I could not get very far away within the shop. So it appears like it has more rake than it actually does. That 1/2 degree translates to about 1/2" over the length of the car. An old hot rod rule of thumb was somewhere around 1 degree. Yes, I have a fishing trip planned for Northern Idaho, but I will have to earn it by completing my yard work before I go! Thanks for your comments guys!
-
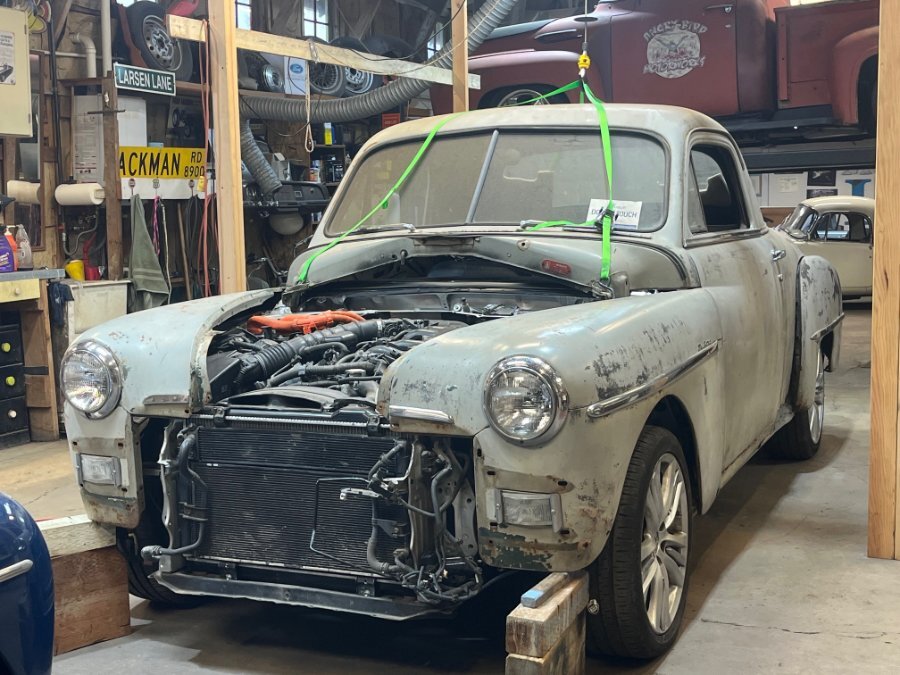
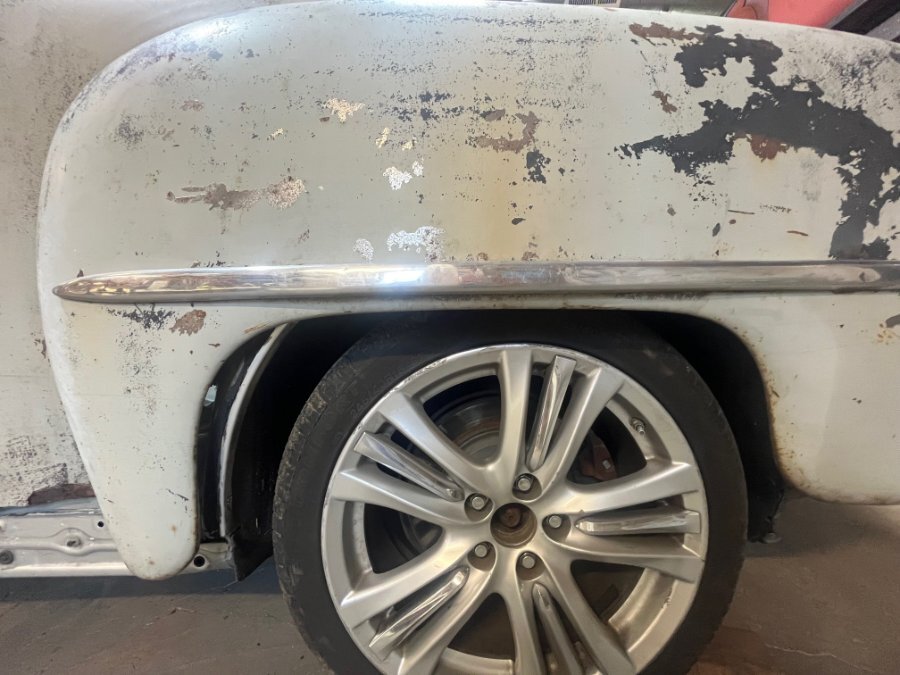
I am now certain it will work! But some friends visited today, including one young guy who had not seen the project previously and had fresh eyes to see what we could not. He's convinced I can get the body closer (lower), and I will endeavor to do just that! I had gotten it close enough to be acceptable, even though it looked like I needed to raise my seat height about 3". I notched the rear Lexus frame to lower the Plymouth rear mount in the trunk, as well as to allow it to slide backwards by 1" which centered the rear wheel (and therefore the front). That worked out well as shown in the latest pics. I also would like to make the Lexus plastic outer rocker cover work. It helps to visually lower the car by about 1.5", and the chrome trim provides continuity between the fender trim. The only issue is I will have to succumb to altering the original lower fenders - something I was trying to avoid doing to the original body. Is it worth it? The rake I ended up with was less than 1 degree, but the rear wheels were sitting nicely. Also the front fenders mounted high enough to access fuse panels and air filter in the engine bay. So the remaining front lowering will have to be by a spring lowering kit to get another 2". All in all, I am happy with the result and progress, but will now get into aligning doors and other details that won't be quite as impressive, but every bit as necessary. Not to mention spring outdoor duties! And a little blue MGB that I need to get ready for sale. Oh, and fishing! Expect some gaps in my postings!
-
Plastic outer rocker anyone?
-
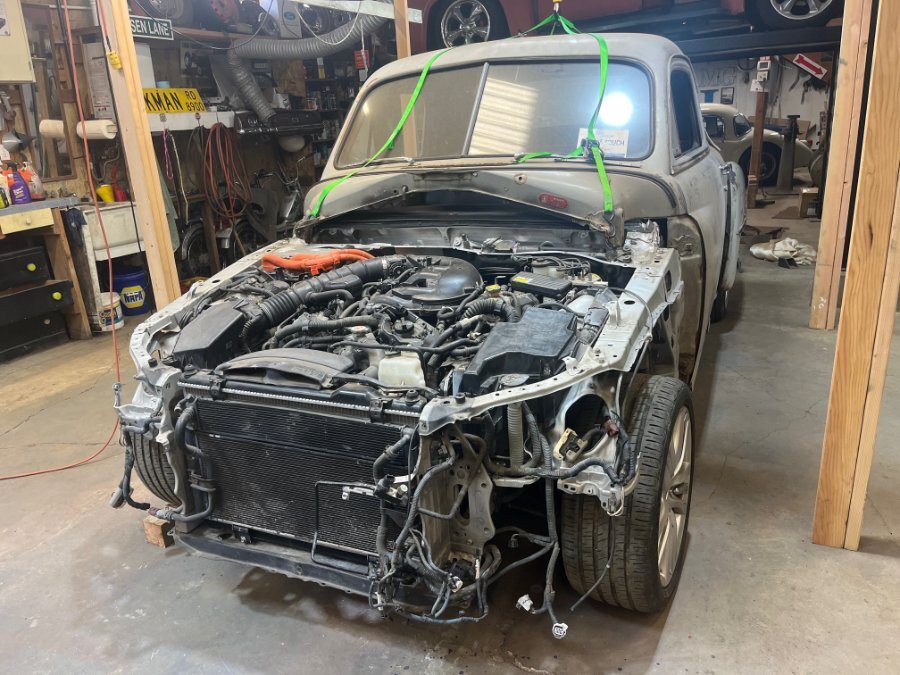
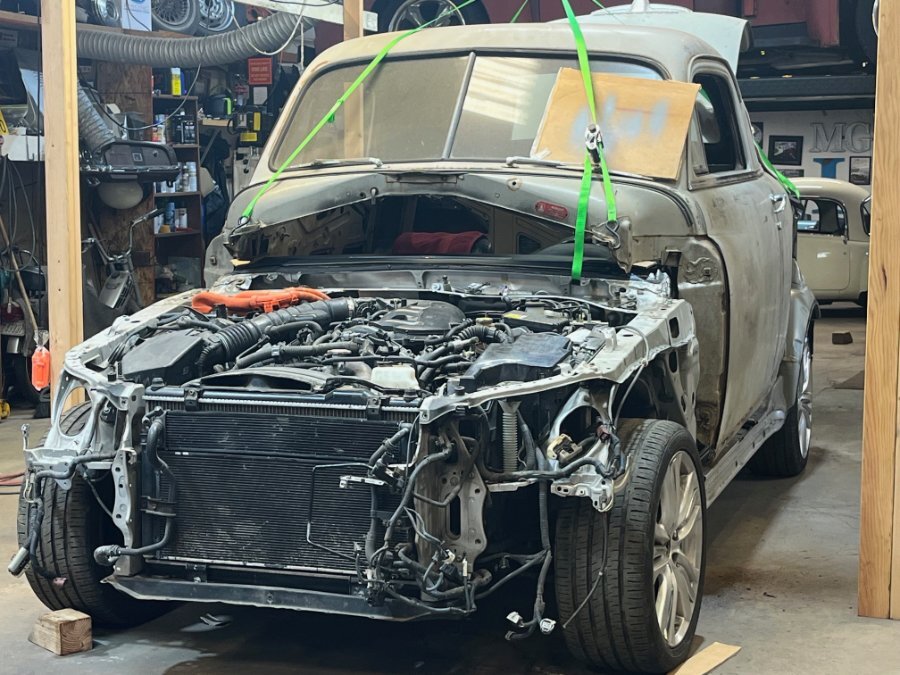
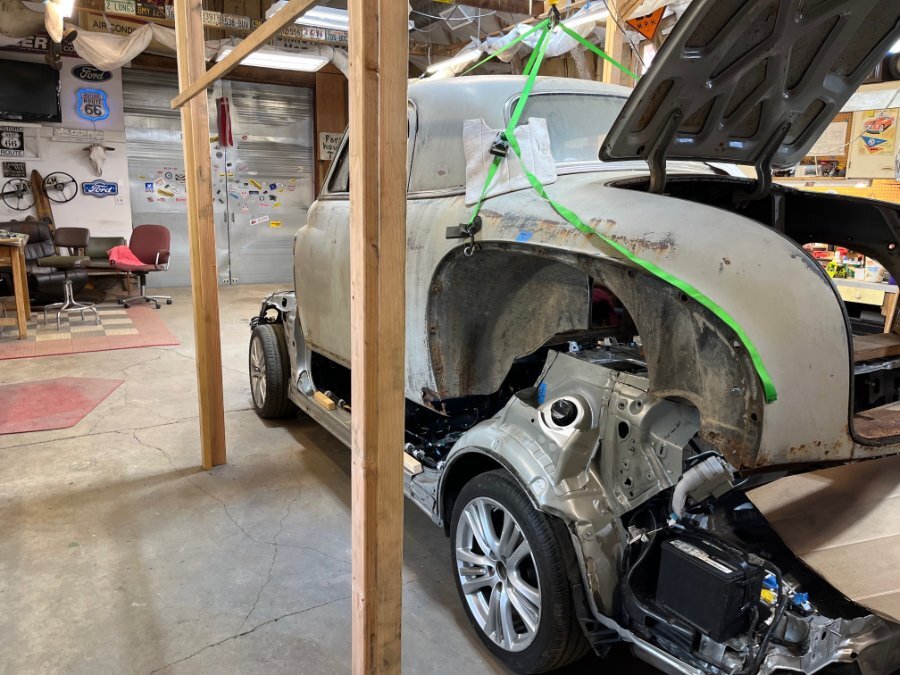
After temporary mounting of the front fenders, let's make it 2" more drop in the front, and I will leave the rear as-is for now. Further lowering may have to come from a Lexus specific lowering kit. The ride as it sits right now looks fairly level for a stock stance. But I still have the issue of the elevated front windshield. Another 2" drop in front will give it a rake and close the seat elevating that is needed. Also liked how the front track is falling within the fender edge! John

-
Thanks Veemoney, I was hoping that the body would bring it down more, at least in the back, but it pretty much settled to where I had mocked it up at the rear fender, and didn't close the gap like I had hoped. But then I moved the bumpers today and remembered how heavy they were! The dimensions I mentioned are the minimums I desire and it will be okay if it drops a bit further. I'm a low rider kinda guy. Plus, I need to get the front windshield in line with my vision. Even with that, I will probably have to raise the seats 2" to make it work!
-
We have a successful landing! Trim #4 got me close enough to know it is going to work, but still needs to go rearward by 1 inch as seen by the rear wheel well centering. Also I would like to lower it another 1/2 inch in the rear and 1 inch in the front (for starters). All are doable with further trims.

-
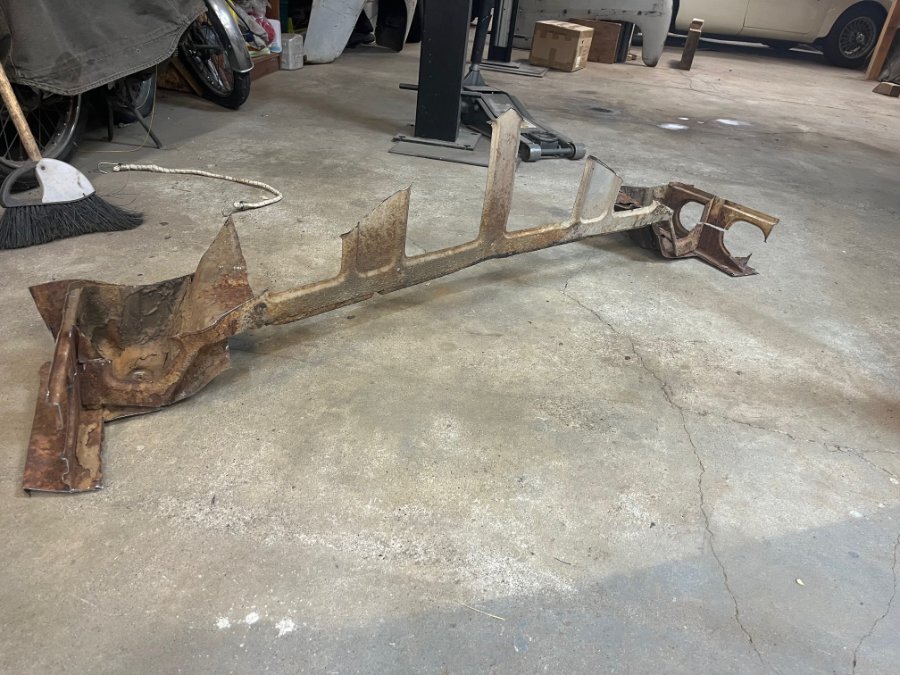
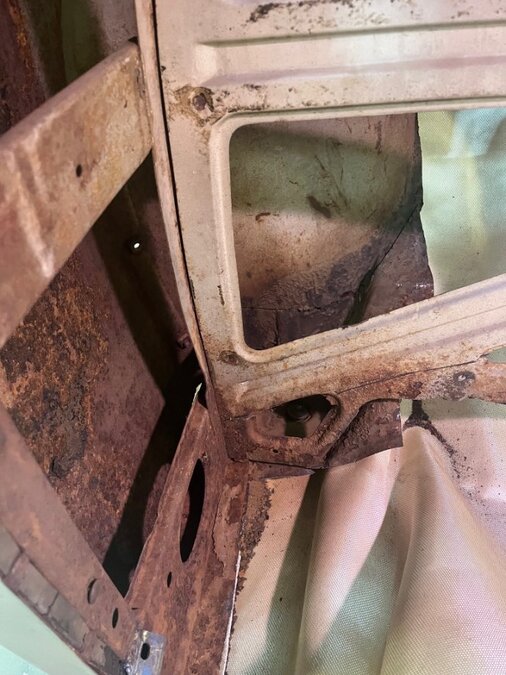
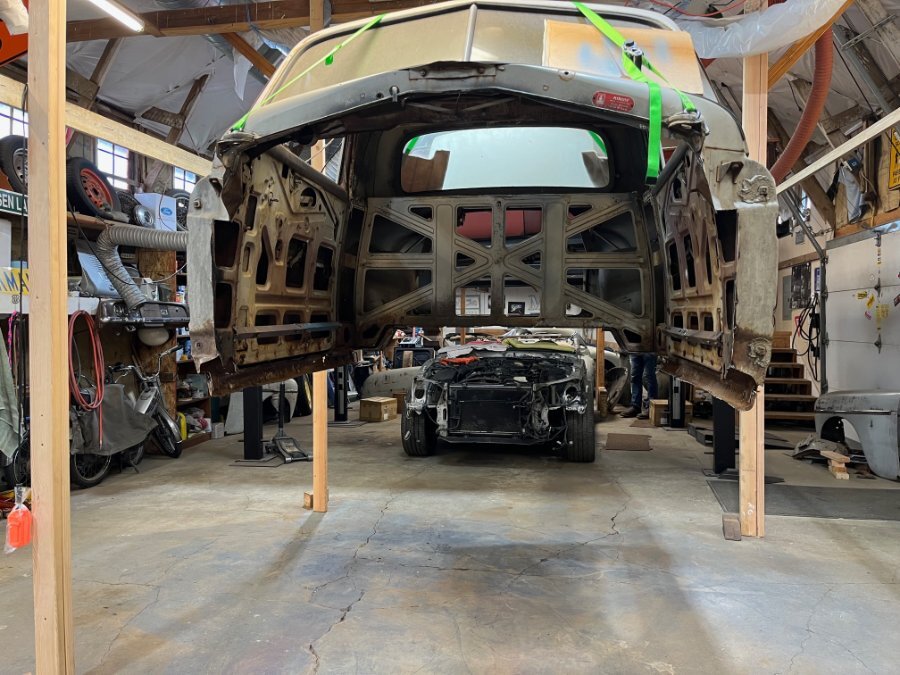
So I ended my shop day yesterday convinced that I would notch the Lexus rear frame where it curved up to meet the wheel well. I had to gain 4.5 inches in the back (2.5" in front) and thought that would be the single biggest obstacle. Then I revisited it this afternoon and realized it would not get me all the way there. I would still have to trim the Plymouth rear mount. And notch the trunk bulkhead and fender wells regardless. So I devised a cutting route, lifted the body high enough to do the work from the inside and dove in. The first pic shows clearly what I removed. It lived up to the cutting nightmare I had anticipated from the start but thankfully never materialized. Until today. 3 hours of constant grinding, saw-zalling, prying and swearing. Sure glad this wasn't at the front end of the project!! This one exercise should now enable setting the Plymouth sill (or remnants thereof) down on the Lexus frame rail. I will rebuild the sill to the contour of the Lexus frame without having to notch it. I was reluctant to mess with the structural integrity of the Lexus frame rail, having bragged it up as a very beefy part of the car! (While leaving the rusty hulk of support you see in the pic?? I must have lost my marbles. Oh yeah, that happened much earlier... Next up - opening up the Lexus wiper drain well to allow the Plymouth hinges down. Hoping to gain that 2.5" in front!
-
Hey Booger - half the Plymouth rear wheel wells are gone, but there were some gaps in the Lexus frame that had a plastic liner. I kept the liner, but wanted to close as many of those gaps as possible and maybe bridge the remaining with the plastic wheel well liner. The notch in the lower left just happened in the last 3 hours as I changed course on the rear support interference. More later when I sort my pix.
-
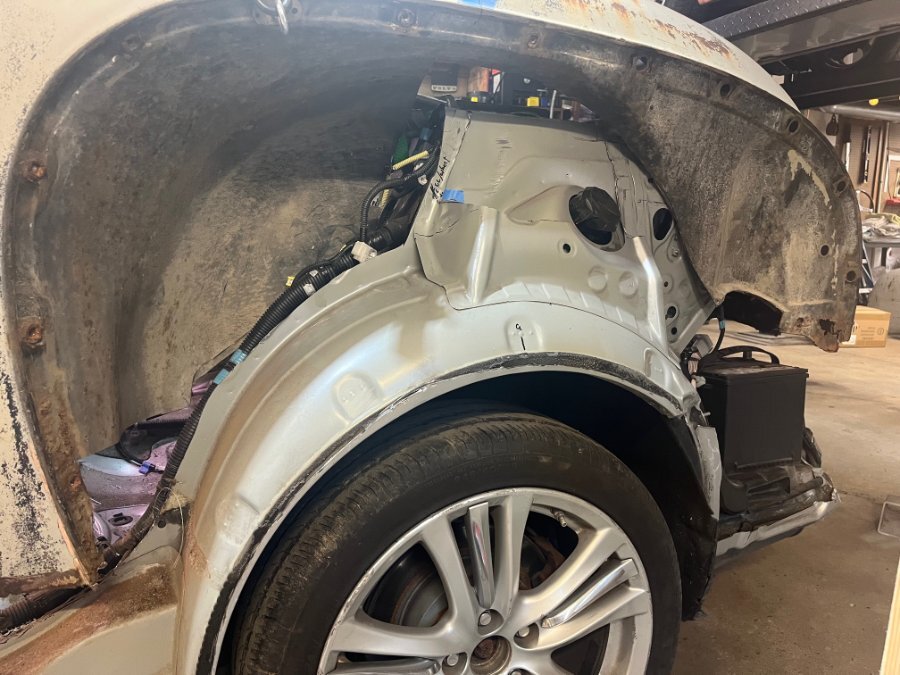
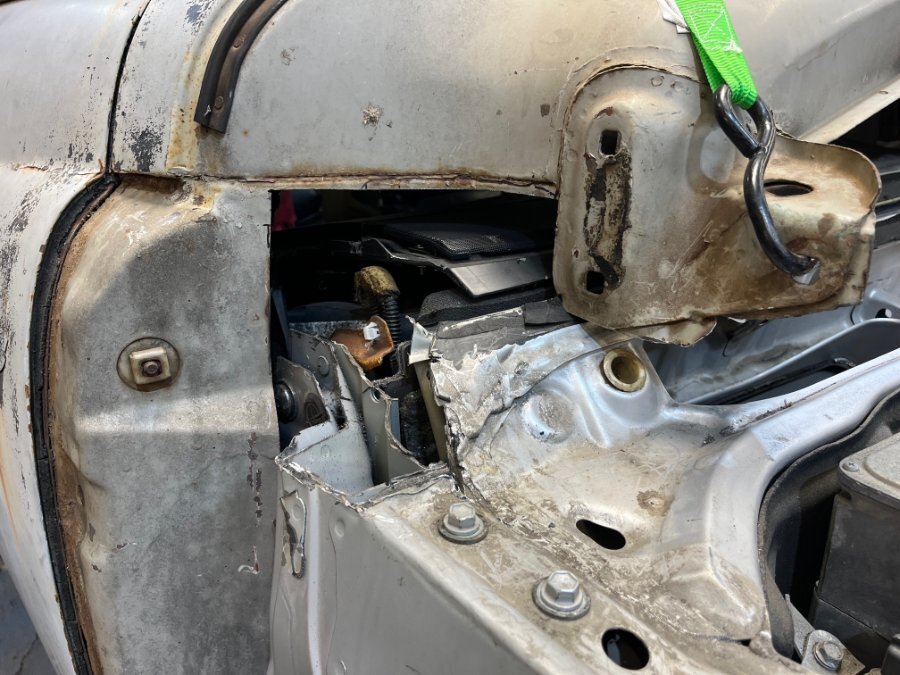
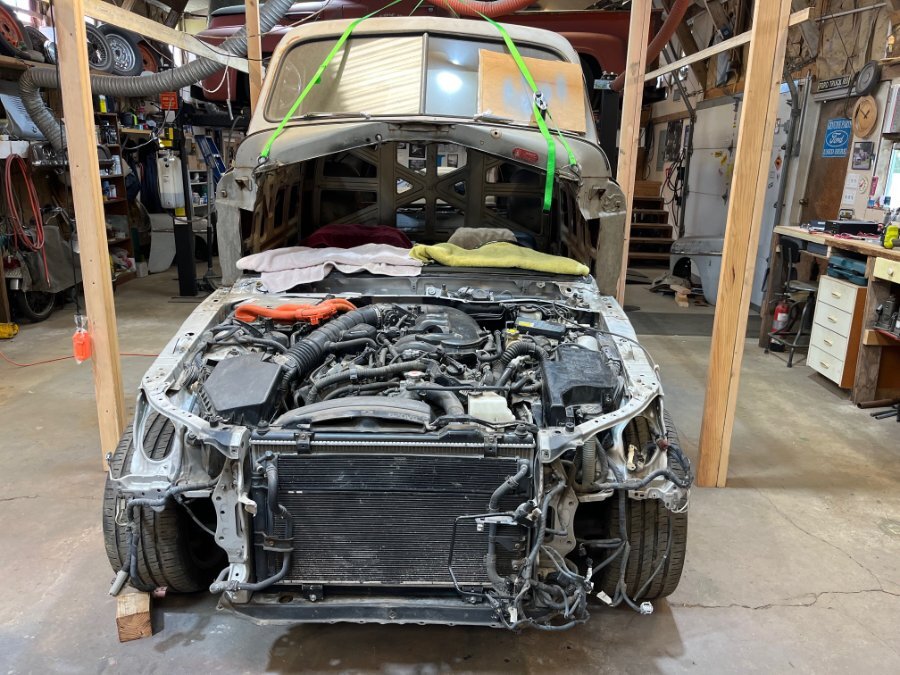
It is starting to look like I will be able to keep the hood hinges. The trailing edge can be dropped into the wiper drain well hopefully. This may push me forward of my planned rear wheel centerline placement. I will have to weight the advantages/disadvantages of that. Mostly as to how it looks at the rear fender. As seen on the pic, I had to cut away the rear bracket for the front fender. I have locations marked for it to be moved to the Lexus upper frame. The next major rear obstacle is the support point at each end of the trunk bulkhead (C-pillar?). I am planning to flatten the Lexus rail with some side pie cuts to lay it down at the rear fender. Not sure of the structure inside, maybe none, so I will have to add some gussets to make up for the cut out area. If that is not enough, I will have to remove the rear Plymouth body support. The only original body support that was fully intact (not rusted away).
-
Another day, another 3 inches. I can finally say with some certainty, that the body is going to slip over the Lexus pretty well in stock form on the outside. But another 4" to go. The challenge will come with the rear end and front fenders. Lexus trimming will be on the docket.
.jpg.d6f94d2758532ac7b3c82cfa658dc8a0.jpg)
-
I am trying to place most of the difference in wheelbase at the rear. It appeared to have more room for correction there after viewing the stock wheel placement within the fender. My benchmark for precutting was based on the centerline of the rear wheel.
-
Welding - I had hoped to create a mostly cushioned bolt down installation like the original. I may be dreaming I know. It is clear that I will need to rebuild the entire sill area, but may still opt to use the Lexus rail as the base. I may have to get creative with the outer rocker to maintain a stock look. Today I will chop around the hood hinge supports, hoping to keep them intact. May have to add reinforcing to beef them up, but another cool (to me) alternative is to go with a tilt up front end. Have any of you seen an old Plymouth with this feature?
-
A day later...almost close enough to weld! This is actually trim #3 and the places I predicted as interference points are finally coming true.
-
It was time! I didn't want to bore you all with the preliminary cutting to the body and frame, as I tried to transfer lines of the Plymouth to the Lexus frame and vice versa. This was the first drop, which didn't get as close as I'd hoped, but did not take too much off at the start. Cutting with the right tools has been much easier than I expected, even on the old Plymouth steel. So no regrets about taking it easy on the cut away pieces.
-
Balancer, crank pully and front motormount
jclars replied to OUTFXD's topic in Wanted Classified Ads
The Portland swap meet is coming up. I have gone to it the last 3 out of 4 years, renting a VRBO in Vancouver with a bunch of guys. But not this year. Otherwise, I could deliver it, although you would probably get the whole engine as I really don't want to do the disassembly! I will keep you in mind before I part it out, although when the time comes, I will want to have it all gone, not just pieces. Good luck on your search and hopefully, your wayward mechanic will return to finish what he started! John -
Balancer, crank pully and front motormount
jclars replied to OUTFXD's topic in Wanted Classified Ads
Too bad you are not closer. All those parts are unfortunately on the derelict engine. I would give them to you if you were to come up here and remove them yourself. As it is, they are currently buried under parts removed from both the Plymouth and the Lexus. More than shown in pic as more is being added every week! Planning any northern expeditions soon? John
-
Balancer, crank pully and front motormount
jclars replied to OUTFXD's topic in Wanted Classified Ads
Hi There - what part of Washington are you in? I am located in Lynden, close to the Canadian border. If you are familiar with my electro-mod conversion on this site, you will know I have pretty much pulled my entire chassis and running gear to replace with, shall we say, more modern technology. While I am not ready to rid myself of the chassis, as parts of it may still be needed on my project, I am willing to part out the mechanical stuff. It is a 1950 P19. John -
Your pic brought a smile to my face! Good job on your shop - congrats! Thanks for sharing your shop build too - it provided me info to put new LED UFO lights in my shop! Look how bright your shop is!
-
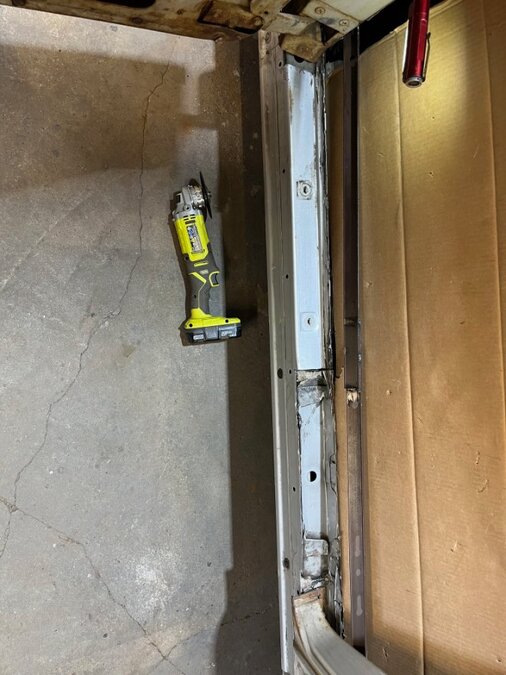
Well I was still on "light duty" so held off on the sills until the last day of my sentence. It wasn't really "heavy duty" as most of the rocker and sill area was like swiss cheese. But it was extremely dirty. Had to change clothes between doors. With some measuring, I determined that it would be best to sit the A and B pillars on the Lexus frame and add the outer panel afterward. Picture shows the nice foundation this will provide. I think I can do a little more pre-trim before hovering over the Lexus, but it becomes more difficult to visualize the closer I try to get, without going too far.