alan32433
-
Posts
218 -
Joined
-
Last visited
Everything posted by alan32433
-
Randy, I used PC-7. After that I epoxy primed, then high build primer, then PPG Acrylic Urathane. The high build primer stage was lengthy. I had to sand the wheel quite agressively to remove the outer portions of the original plastic that had failed. You have to get it down to decent plastic, then build it back up with high build (many coats) or PC-7 depending on how far you have to sand the old plastic. If your wheel is like mine, there are grooves at the bottom end of the center section of the wheel. The horn spider ring fits in these grooves. When you are repairing the cracks, make sure you leave the grooves in place. Practice fit your spider while you are making the repairs.
-
Steering Wheel restored and installed. Before and after pictures. Horn works too!


-
The two terminal dash pot will work as long as you ground the second terminal. I believe I have an extra two terminal dash pot if you can't find a single terminal one.
-
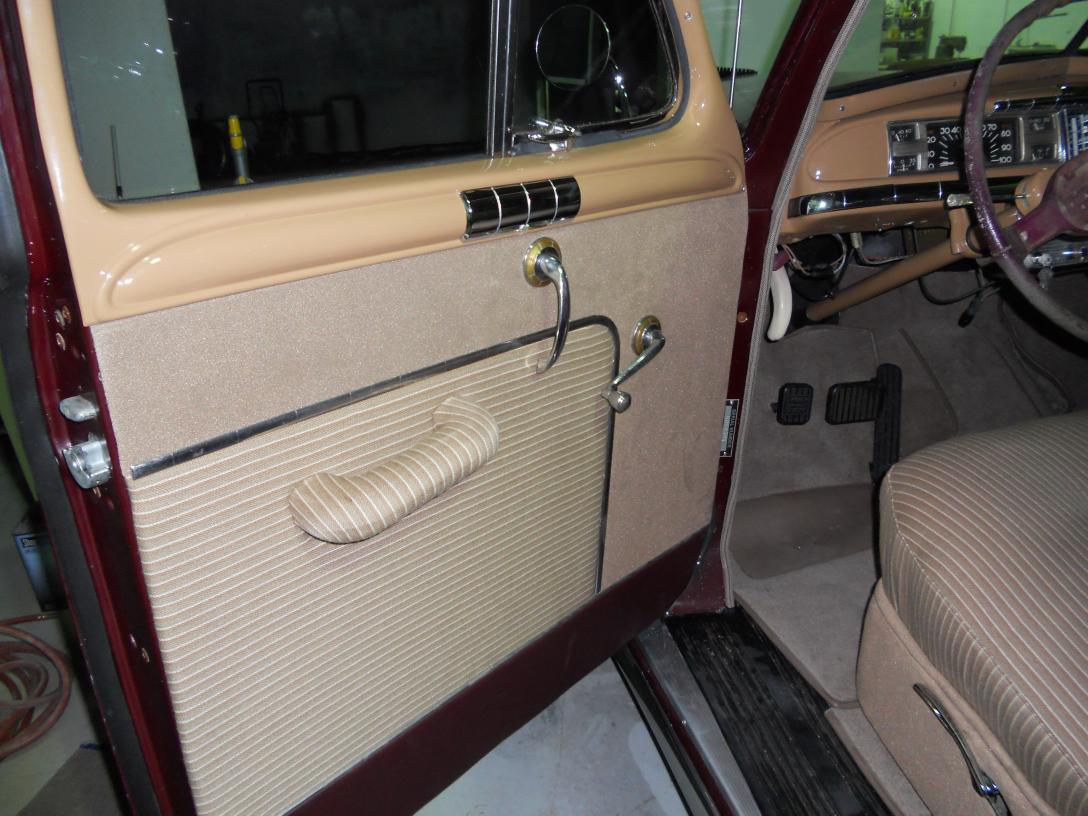
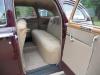
I had the upholstery done locally, but they only did the 4 seat cushions and the front seat frame for $975 (I supplied the fabric). I did the rest of the interior myself, head liner installation, door panels, kick panels etc. After all the sewing I did on the other parts, I regret not doing all the upholstery myself. I bought the striped fabric from Lebarron Bonney at a price of $82 a yard (broadcloth), it took around 8 yards. The carpet set came from SMS Fabrics. The carpet was excellent quality but the front set doesn't fit quite as well as I would like, but its acceptable. The headliner was pre-made from SMS and it fit perfect. It was a lot of work however to install it and get all the wrinkles out. I ordered extra headliner material to use on the front seat frame and the various other interior pieces like door panel sections and the center column between the doors. I used vinyl (like original) on the bottom of the door panels, kick panels, and the trunk decorative panel. I bought the vinyl locally.
-
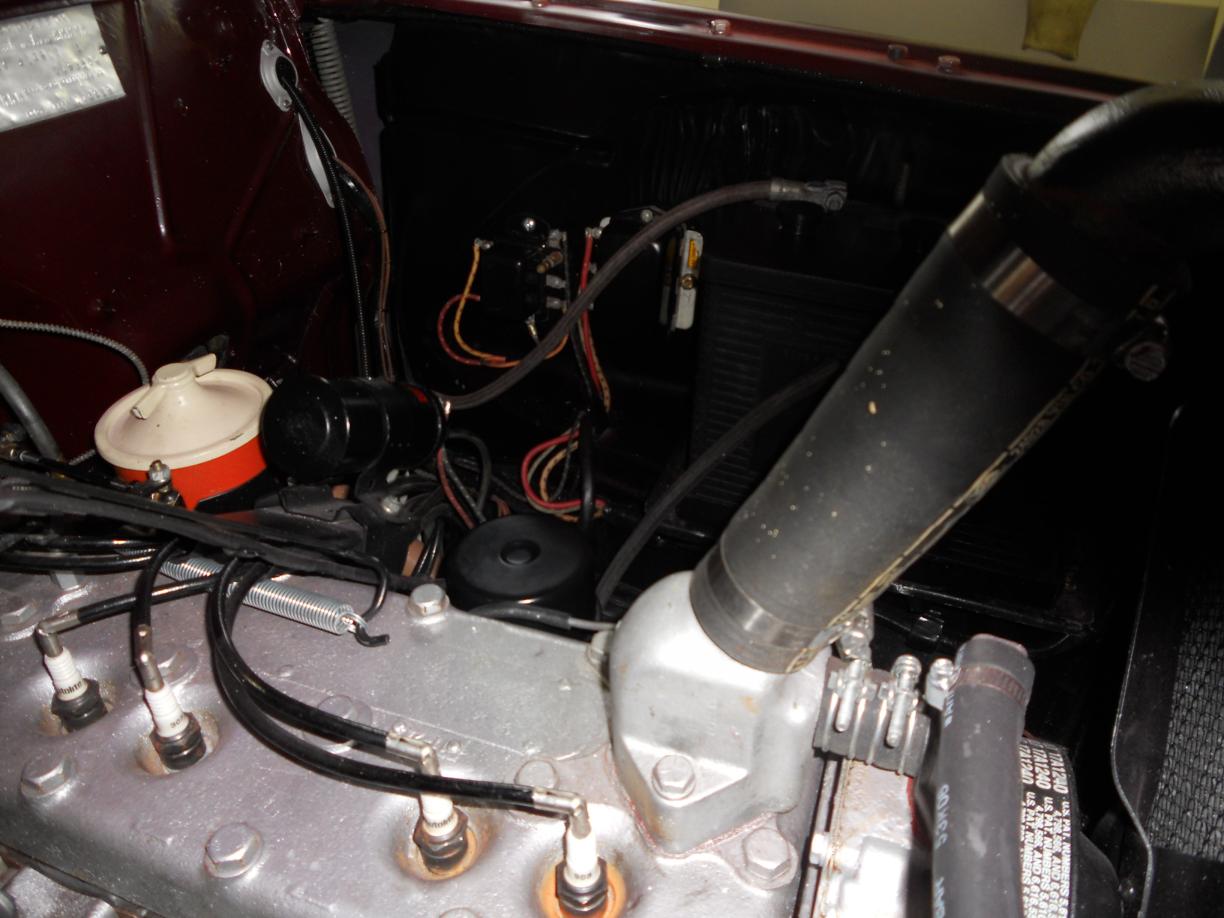
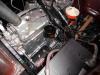
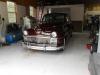
Here's a couple of engine compartment pictures. as you can see, I tried to keep everything original. There's another interior picture too. The steering wheel you see isnt the one that will be installed. I restored the original but its not quite finished.


-
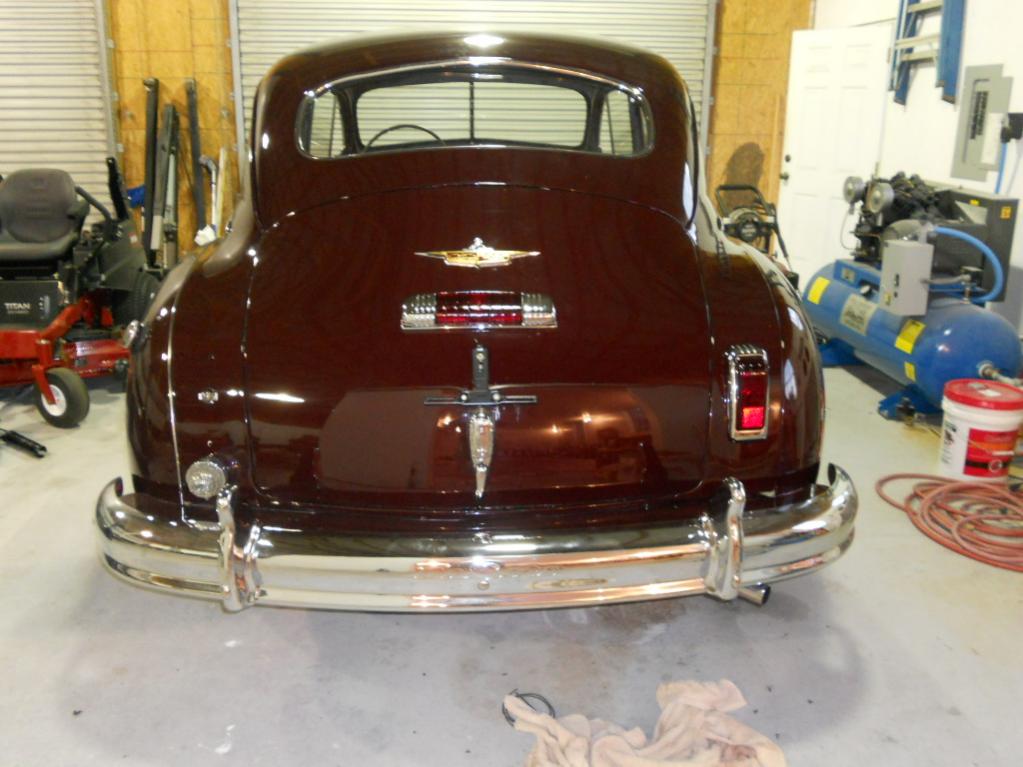
Randy, that's actually my 48 Desoto parts car peeking through the window. It had serious rust, way too much for a restoration. So it sacrificed the last of its life to let another live. Several wanted more pictures. I'll take some today and post later. Again, thanks everyone for the kind words!
-
Thanks for the kind words everyone! My wife and I have had a blast restoring this car. We drove it again this evening, put about 40 miles on it and everything worked perfect. Now, after finishing the last few things on the DeSoto, I'm moving on to my 55 F-100. My uncle bought it new in August 1955 at the age of 27. Unfortunately he's moved on to better things but I'm sure he'll be pleased when I get it restored. Like always, I'll restore it original.
-
About 3 years and $20K and my 48 DeSoto is almost done. The only thing left to do is finish the steering wheel and install the windshield divider trim. I drove the car for the first time today, two or three trips around the big city of DeFuniak Springs FL. It drove like a dream. No squeaks, no abnormal sounds and no oil leaks. I had a blast aligning the front end last weekend. I wasn't sure how my toe-in rig would work but to my surprise, the car drove straight as an arrow and didn't drift to either side. Steering wheel was perfectly aligned also. I built a string set-up using metal conduit for the toe-in adjustment, and bought a "Joe's Racing" bubble level to set the camber. Some of you may remember the car was sagging slightly on the drivers side. I ended up removing the left lower control arm and spring, and installing a 1/4 inch spacer. That took care of that problem.

-
I found ones for my car (48 DeSoto) from Len Dawson, Deception Pass Mopar. You can find his site by searching on the phrase. They were NOS for $8 each.
-
Hey guys, See if anyone has advice. My DeSoto VIN 5959XXX is a 49 1st series that I know was built in early 49. Of course, its a 48 body style because Mopar wasn't tooled up for the body style change. Here's my problem. I found an almost perfect original Florida License Plate dated 49 that I tried to register today. It would have been fine except that the title shows the car to be a 48. My contention is that if you bought this 49 first series car new in February of 1949 (and the car was BUILT in 49), I believe the original title would have indicated 1949, and may have even indicated "1st series" to distinguish the body style. I have to convince the Florida Dept of Transportation that I am right. Does anyone know how I can prove the manufacture date for my serial number???? Alan
-
Someone asked about the cost for chroming the grill. I had it priced separately from all the other stuff and it was a whopping $1300. But, the old one really looked bad and I just couldn't see doing the restoration without it.
-
Thanks guys, wish I had that photo when I was rebuilding the tranny. You know, the original shop manual doesn't have a picture like that and doesn't mention the fact that the lower plug has to be the one with the raised piece. It does say something to the effect that you should assemble in the reverse order of disassembly. So, goofed, but it was fun the whole time! Alan
-
My car is a 48 DeSoto, it would be nice to know if the lean is intentional. Makes sense. Thanks - Alan
-
Greg, It was a long time ago that I did the front suspension and I can't remember If I put the springs back in the same spot. I would hope I did that, but can't be sure. The droop seems to be worse in the rear, but the front is also off a little. Thanks for the help!
-
You can find an exact replacement for your terminal at ynz yesterdays parts. I replaced mine also, and the one from ynz's is an exact replacement, no holes to drill. It cost $15
-
My DeSoto is almost ready to drive to the shop for a front end alignment. Before I take it, I checked the ride height and found the left side of the car is riding about 3/4 inch lower than the left. I really cant figure out why but it must be the front coil springs. The rear leaf springs, shackles and bushings are new. The front coils seemed to be the same height when I had the front end apart, so I'm confused. None the less, I need to level it somehow. Anyone have any good ideas? One option is air shocks in the rear. Another option is a spacer between the rear leaf and axle on the left side. Any ideas good or bad?
-
Some of you may remember I'm restoring a 48 DeSoto Custom. During the restoration I completely rebuilt my M5 using nearly all NOS internal parts and a NOS fluid drive unit. Well the car is almost completely finished, I installed most of the interior this past weekend. The only thing I hadn't been able to "check out" was the transmission since it wasn't drivable, till this past Saturday that is. On my maiden voyage, the M5 would not upshift! I was really bummed out. But, after about an hour of troubleshooting, I figured out what the problem was. During the troubleshooting stage, I determined that all my wiring was good (brand new fabrication) and everything was connected correctly. I verified all the electrical parts, relay, solenoid, governor and interuptor, everything good. During part of the troubleshooting and by looking into the interuptor hole and running the car in gear on jacks, I determined the piston was not operating. That basically narrowed things down to a pressure problem. Long story short, I removed all the valves, pilot and main included. The main valve was the problem because I had assembled it incorrectly. The main valve can be removed from the top or the bottom of the tranny by removing either of two large plugs. One plug has a nipple that is about 1 inch long, the other plug is concaved. Either of the plugs will fit the top or bottom hole in the tranny. When I assembled it, I incorrectly thought the plug with the nipple was a spring guide, and I put the plug with the nipple in the top of the tranny where the spring rides on top of the valve. That was my mistake. Come to find out, the plug with the nipple goes in the bottom of the tranny and limits the valves downward movement. Since I mistakenly placed the plug without the nipple in the bottom hole, the main valve was riding about 1 inch too low in the bore. I simply switched the two plugs, placing the one with the nipple in the bottom hole, and magic, the piston moved forward at about 14 MPH. I put everything back together and hit the road again. The transmission shifted perfectly, you could barely hear it shift. Needless to say I was really happy! Moral to the story, if you ever take an M5 apart, make sure you put the correct plug in the bottom hole of the main valve.
-
If yours is like my 48 Desoto, I took mine apart and cleaned and greased it, then soldered new cloth covered wires onto the assembly (that go down the column). The actual mechanism is riveted to the mount. I drilled out the rivets, and then replaced them with small bolts and nuts.
-
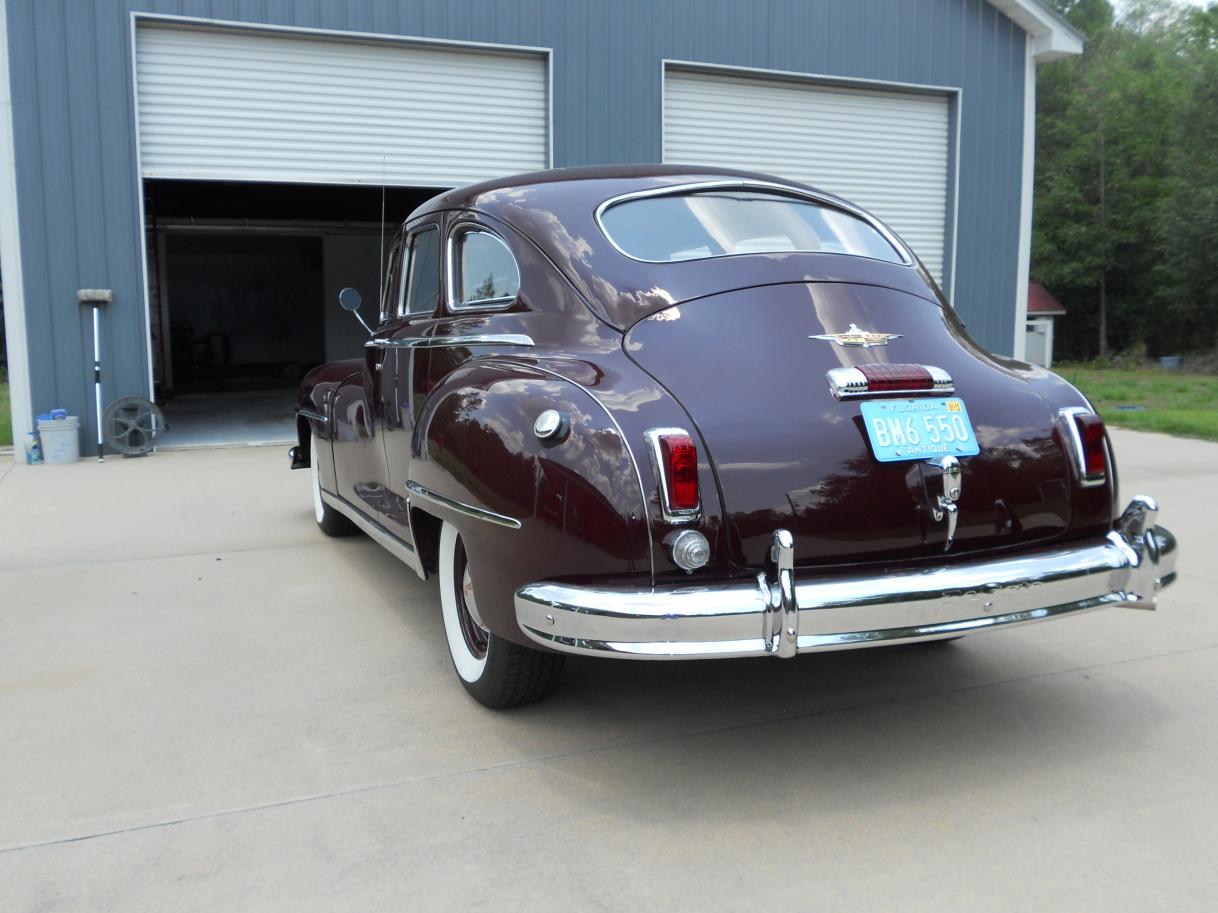
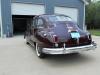
I forgot to mention the chrome shop I used for all my pot metal and smaller pieces and that was "Pot Metal Restorations" in Tallahassee Florida. He did the grill and quite a number of other pieces, all pot metal. He uses some sort of a special procedure for filling pits with a conductive filler, and then uses a really heavy coat of copper on top of that. I know show quality plating always includes a copper plate before the nickel, what I am talking about is a really HEAVY coat of copper. The finish result is flawless and very stable because of the heavy copper. The down side is for pieces that have to fit together, you sometimes get so much build up that the parts don't fit too well. I had to do some light grinding and sanding (areas that don't show) to get some of my pieces to fit together correctly. I included a picture of the front of my car showing the freshly chromed grill and bumpers.
-
After a lot of research, I had my 48 DeSoto bumpers plated in Atlanta by Southern Bumper. They did a superior job, completely flawless. There were a few dings and small dents in them and they fixed those. The bumpers were $360 each, bumper guards $80 each.
-
Jim, I think you are right, the ones I have seem to be correct for your car. I'm going to mount one on my car although they won't be in the original configuration. But I think it will look great. After I get it mounted, I'll probably list the others on eBay.
-
I bought my tires from Coker also, I bought radial BF Goodrich Silvertowns. They have a 2 3/4 inch white walls. Pretty hefty price though, seems like they were around $230 each.
-
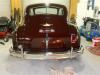
A couple of months ago I installed the springs on my 48 DeSoto. After I figured out a way to do it, it was literally simple. I posted my method back then but I'll repeat. With the hood off. Mount the rear bolt on the hinge loosely. Lower the front of the hinge (into the cowl) as far as you can. You will be able to connect the spring at this point. With the hinge in the up position as if the hood were raised (from the drivers side hinge), extend your left fore arm under the raised portion of the hinge and place your hand on the cowl around where the web seal is (for leverage). Then all you need to do is push up with your elbow until the front bolt hole is aligned, and put the bolt in place. I did it by myself, but if you have a helper to install the bolt, it would be easier. When you do the passenger side, you'll be using your right arm as leverage. I included a few pictures of my car with all the recent progress.
-
Jim, could you possibly take a few close up pictures of your mirrors so I can check? I have 5 of the driver side mirrors NOS in perfect shape. Even though they aren't correct for my car, I placed one about an inch or so above the trim on the drivers door and it looks fantastic! I'm thinking about mounting one there. If I do that, I'll sell the others but knowing what they fit will certainly help. And by the way, your car looks great!
-
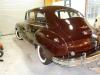
here's the profile.