alan32433
-
Posts
218 -
Joined
-
Last visited
-
Randy, I used PC-7. After that I epoxy primed, then high build primer, then PPG Acrylic Urathane. The high build primer stage was lengthy. I had to sand the wheel quite agressively to remove the outer portions of the original plastic that had failed. You have to get it down to decent plastic, then build it back up with high build (many coats) or PC-7 depending on how far you have to sand the old plastic. If your wheel is like mine, there are grooves at the bottom end of the center section of the wheel. The horn spider ring fits in these grooves. When you are repairing the cracks, make sure you leave the grooves in place. Practice fit your spider while you are making the repairs.
-
Steering Wheel restored and installed. Before and after pictures. Horn works too!


-
The two terminal dash pot will work as long as you ground the second terminal. I believe I have an extra two terminal dash pot if you can't find a single terminal one.
-
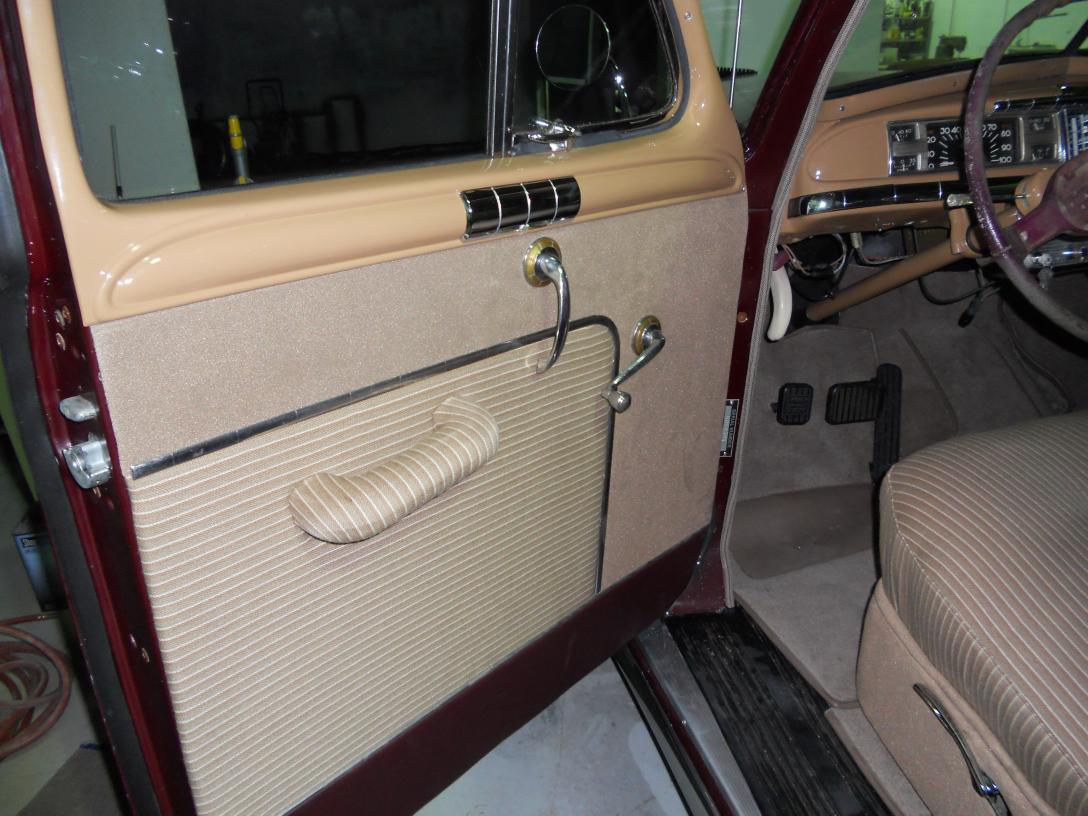
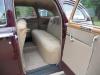
I had the upholstery done locally, but they only did the 4 seat cushions and the front seat frame for $975 (I supplied the fabric). I did the rest of the interior myself, head liner installation, door panels, kick panels etc. After all the sewing I did on the other parts, I regret not doing all the upholstery myself. I bought the striped fabric from Lebarron Bonney at a price of $82 a yard (broadcloth), it took around 8 yards. The carpet set came from SMS Fabrics. The carpet was excellent quality but the front set doesn't fit quite as well as I would like, but its acceptable. The headliner was pre-made from SMS and it fit perfect. It was a lot of work however to install it and get all the wrinkles out. I ordered extra headliner material to use on the front seat frame and the various other interior pieces like door panel sections and the center column between the doors. I used vinyl (like original) on the bottom of the door panels, kick panels, and the trunk decorative panel. I bought the vinyl locally.
-
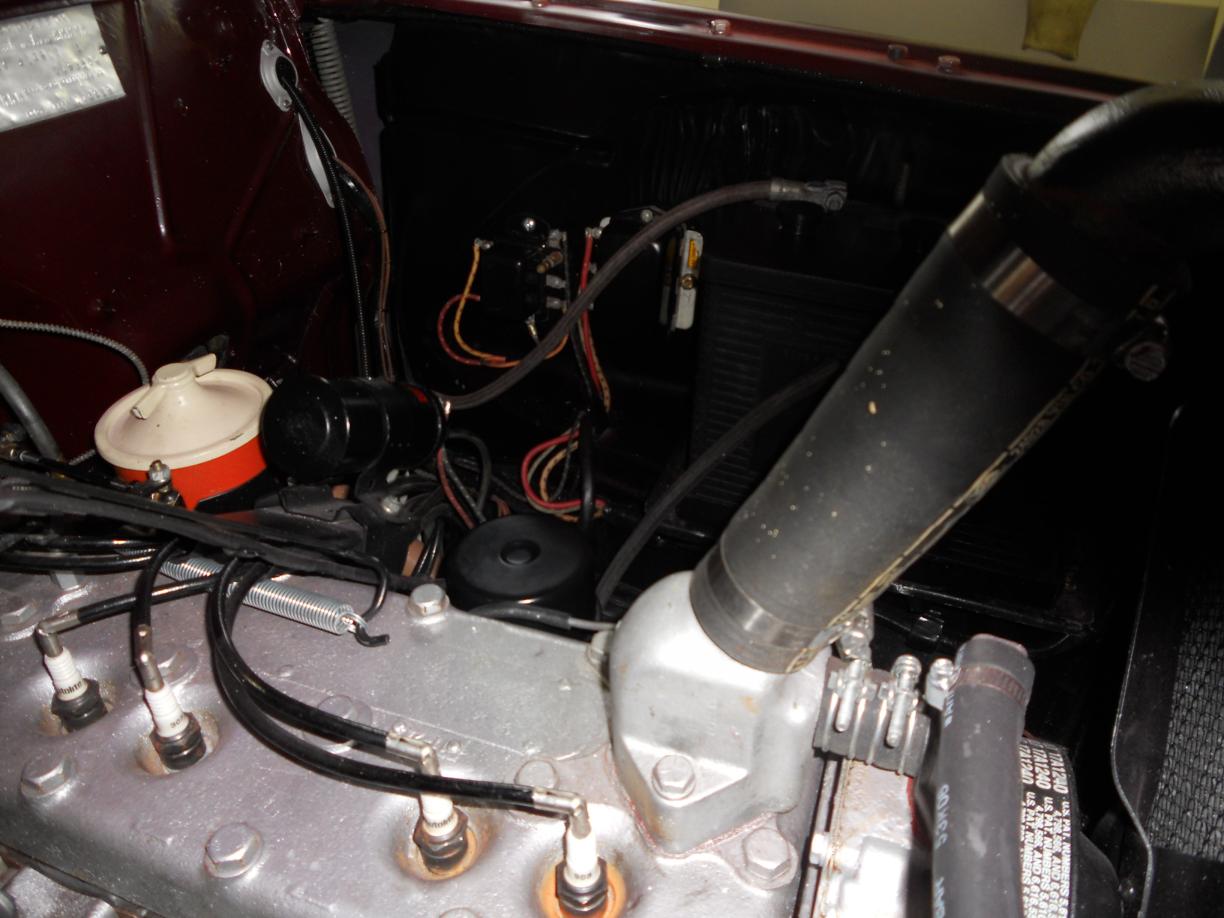
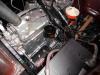
Here's a couple of engine compartment pictures. as you can see, I tried to keep everything original. There's another interior picture too. The steering wheel you see isnt the one that will be installed. I restored the original but its not quite finished.


-
Randy, that's actually my 48 Desoto parts car peeking through the window. It had serious rust, way too much for a restoration. So it sacrificed the last of its life to let another live. Several wanted more pictures. I'll take some today and post later. Again, thanks everyone for the kind words!
-
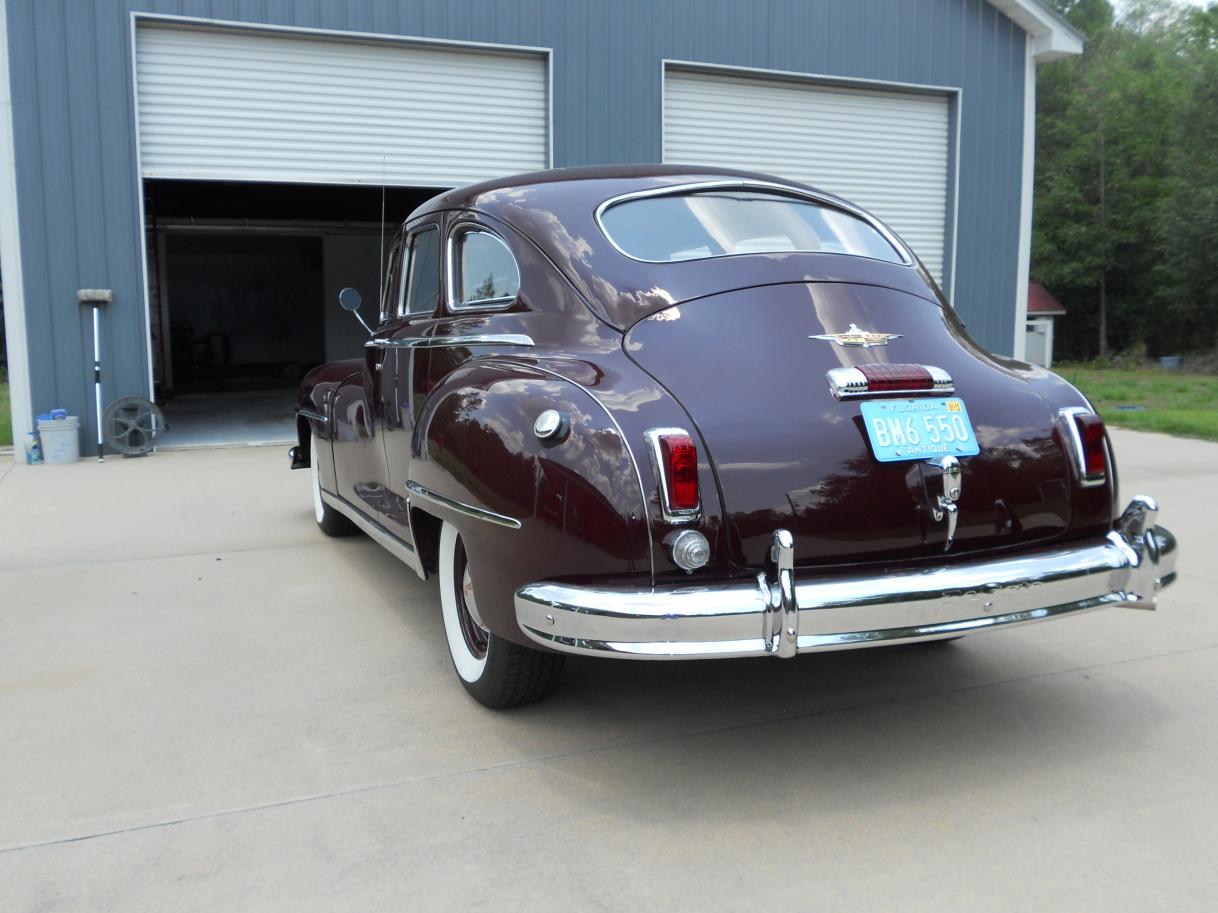
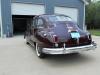
Thanks for the kind words everyone! My wife and I have had a blast restoring this car. We drove it again this evening, put about 40 miles on it and everything worked perfect. Now, after finishing the last few things on the DeSoto, I'm moving on to my 55 F-100. My uncle bought it new in August 1955 at the age of 27. Unfortunately he's moved on to better things but I'm sure he'll be pleased when I get it restored. Like always, I'll restore it original.
-
About 3 years and $20K and my 48 DeSoto is almost done. The only thing left to do is finish the steering wheel and install the windshield divider trim. I drove the car for the first time today, two or three trips around the big city of DeFuniak Springs FL. It drove like a dream. No squeaks, no abnormal sounds and no oil leaks. I had a blast aligning the front end last weekend. I wasn't sure how my toe-in rig would work but to my surprise, the car drove straight as an arrow and didn't drift to either side. Steering wheel was perfectly aligned also. I built a string set-up using metal conduit for the toe-in adjustment, and bought a "Joe's Racing" bubble level to set the camber. Some of you may remember the car was sagging slightly on the drivers side. I ended up removing the left lower control arm and spring, and installing a 1/4 inch spacer. That took care of that problem.

-
I found ones for my car (48 DeSoto) from Len Dawson, Deception Pass Mopar. You can find his site by searching on the phrase. They were NOS for $8 each.
-
Hey guys, See if anyone has advice. My DeSoto VIN 5959XXX is a 49 1st series that I know was built in early 49. Of course, its a 48 body style because Mopar wasn't tooled up for the body style change. Here's my problem. I found an almost perfect original Florida License Plate dated 49 that I tried to register today. It would have been fine except that the title shows the car to be a 48. My contention is that if you bought this 49 first series car new in February of 1949 (and the car was BUILT in 49), I believe the original title would have indicated 1949, and may have even indicated "1st series" to distinguish the body style. I have to convince the Florida Dept of Transportation that I am right. Does anyone know how I can prove the manufacture date for my serial number???? Alan
-
Someone asked about the cost for chroming the grill. I had it priced separately from all the other stuff and it was a whopping $1300. But, the old one really looked bad and I just couldn't see doing the restoration without it.
-
Thanks guys, wish I had that photo when I was rebuilding the tranny. You know, the original shop manual doesn't have a picture like that and doesn't mention the fact that the lower plug has to be the one with the raised piece. It does say something to the effect that you should assemble in the reverse order of disassembly. So, goofed, but it was fun the whole time! Alan
-
My car is a 48 DeSoto, it would be nice to know if the lean is intentional. Makes sense. Thanks - Alan
-
Greg, It was a long time ago that I did the front suspension and I can't remember If I put the springs back in the same spot. I would hope I did that, but can't be sure. The droop seems to be worse in the rear, but the front is also off a little. Thanks for the help!
-
You can find an exact replacement for your terminal at ynz yesterdays parts. I replaced mine also, and the one from ynz's is an exact replacement, no holes to drill. It cost $15