
Scott Knecht
-
Posts
88 -
Joined
-
Last visited
-
Days Won
2
Everything posted by Scott Knecht
-
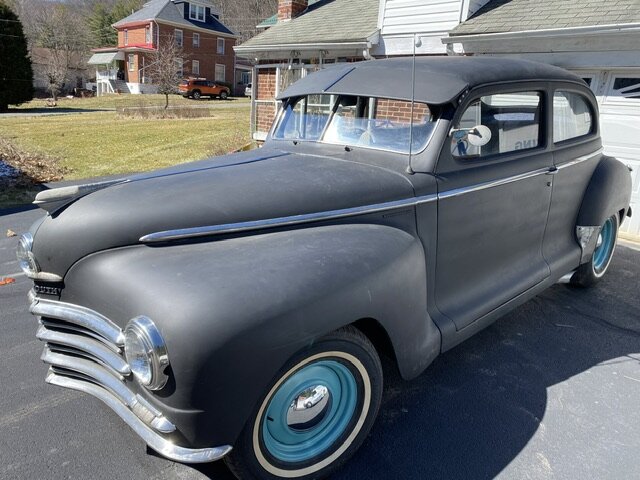
My ‘48 Plymouth Special Deluxe rat rod project
Scott Knecht replied to Scott Knecht's topic in P15-D24 Forum
Wow Vin that’s awesome! I really dig all the little touches. Especially the rolled fender lips. It sounds fantastic! I’m sure mine will eventually morph into more than just the rust rod it is now. I need continued inspiration from all the fine folks on here! -
My ‘48 Plymouth Special Deluxe rat rod project
Scott Knecht replied to Scott Knecht's topic in P15-D24 Forum
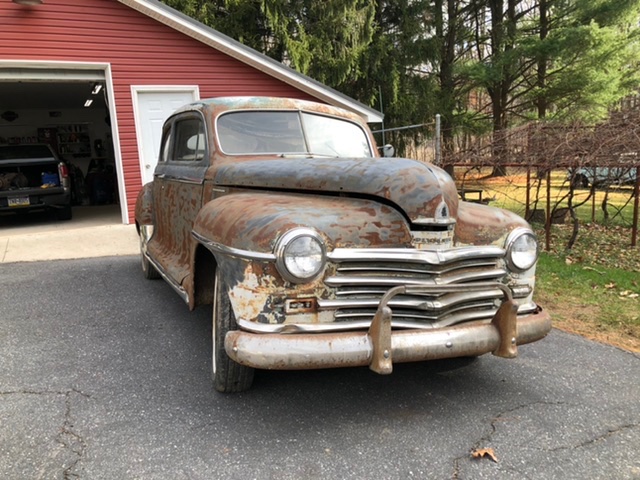
You know I actually was wondering that myself. I really wanted a club or business coupe when I was looking but I picked up this sedan for a song and dance. I don’t know actual production numbers but I surmised the sedan was somewhat rare just from what I see out there. Yeah I’m changing my mind a bit about keeping it a rat rod. I may do some quality body repair in the future. Thanks for the input guys! -
My ‘48 Plymouth Special Deluxe rat rod project
Scott Knecht replied to Scott Knecht's topic in P15-D24 Forum
I agree Knuckleharley, it is just my labor to restore the car so yeah it may happen at some point. For now though I want all the mechanical things to work and be reliable. Yes Yukon I made the shorter arms from bar stock. They are pretty much mandatory if you want to keep the turning radius tight with the Cavalier rack as it doesn’t move nearly as far as the stock steering box. The rack is mounted with a kit I got from Fat Man Fabrications. I basically just did a little trial and error measuring to come up with 1-3/8” shorter. I used two right side cavalier inner tie rods to keep things even. The outside ends are 05 Explorer connected to the inners with sleeves included in the kit. I bought a 7 degree tapered reamer from eBay. It worked great for $60 and it lived to see more action in the future. I got the cheap kit from Scarebird Classics for the brakes. It includes the backing plates, and hardware. I did use the stock hubs but I had to turn down the outside diameter slightly and remove a little lip from the hub center to rotors to sit flat. The rotors are Ford Probe pieces. The calipers are from an Eldorado. The Scarebird kit gives you a parts list to get in addition. Also I drilled out the wheel bolt threads and installed standard wheel studs. There’s some pics and video on here somewhere when I was working on the steering. -
My ‘48 Plymouth Special Deluxe rat rod project
Scott Knecht replied to Scott Knecht's topic in P15-D24 Forum
Thanks everyone. I’ve restored several muscle cars in my life but that was just bolting back together what came a part. This is really my first big adventure with so many modifications. I just take my time and there’s still some trial and error. As for dressing it up Andy, she’s really rough. It will eventually probably have a single coat of hot rod black and some pin striping at some point but it’s really too far gone in many areas to be worth a full on restoration. The bank account won’t handle it, or the wife for that matter. Hahaha -
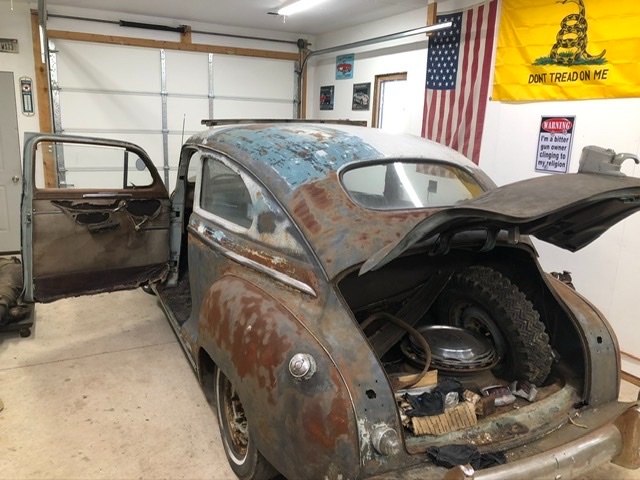
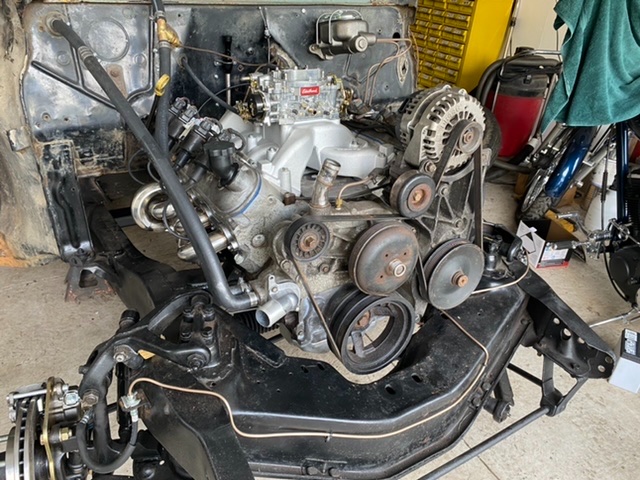
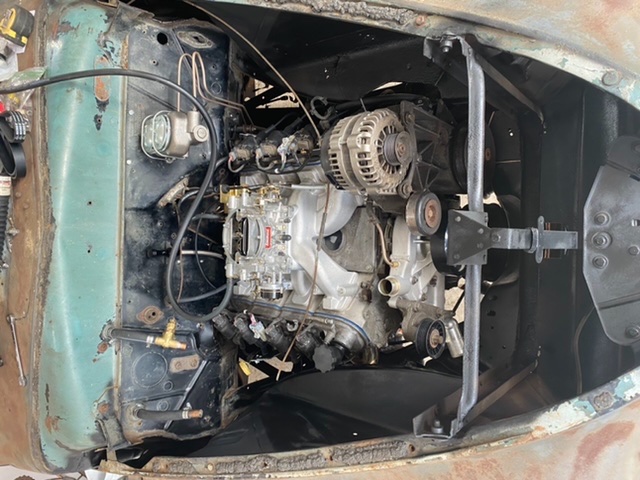
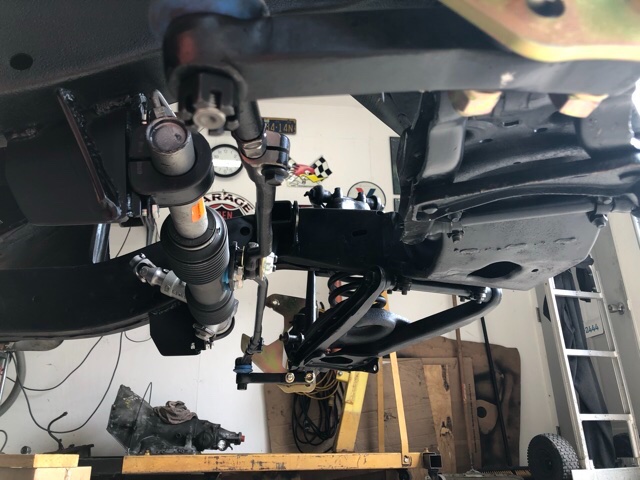
I found this site about a year ago looking for rack and pinion advice and have enjoyed reading the many topics ever since. Here’s a few pics of where I’m at. I was hell bent on going with a 6.0 LS just because I had it in the shop. A hemi would’ve been neat but that would’ve broke the budget. Had the motor fired already for a test run. So far so good. Got the rack and pinion working just right. Went with a conventional master cylinder setup. Fabbed up a bracket and brake pedal from scratch. I also converted the “3 on the tree” to work the turbo 350 trans and that was surprisingly easier than I expected. Inside still looks stock. The swapped disc setup up front seems like it will work okay. Just started the rear end project. Installing a Dana 44 from a Grand Cherokee. 3.73’s and posi. It too has disc brakes. Impala driveshaft will be fitted after the rear. Long way to go yet including the Painless wire kit and other small things. But it’s getting there. Learned many things along the way from some of the folks on here. It’s been a fun project so far. If anyone has any questions please feel free to ask. I don’t everything but I’ve learned a lot.


-
Good to know
-
That makes sense
-
Hmmm. Not sure how that would work on a car. The idea from what I understand is to have the center attachment points for the inner tie rods so they mimic the original steering and follow the arc of the lower A-arm to eliminate bump steer. I’m not sure though how the truck suspension is designed.
-
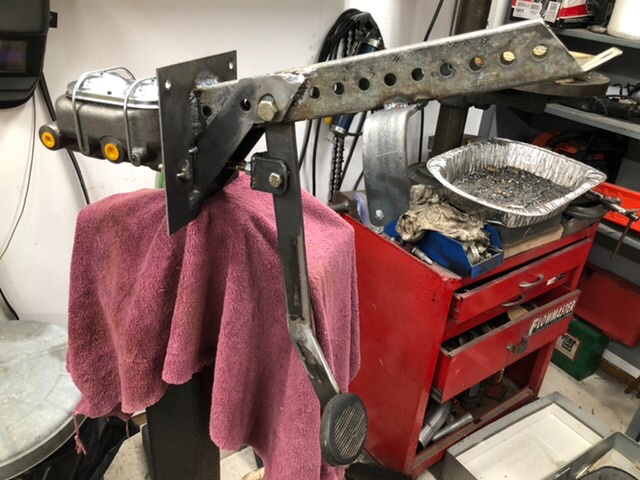
Okay my friends. Here’s a quick update of the ‘48. So I made a quick brake master cylinder bracket out of a piece of stop sign post and some 3/8” steel for the pedal with a 5.3 to 1 pedal ratio for decent manual brake force. I also fabbed up a pad mount which locates the factory pedal pad securely. I turned it sideways because I think it looks better by itself without the clutch pedal. I used 1/8” plate for the firewall reinforcement. I’m moving the master cylinder to the firewall since there’s not enough room under the floor with exhaust and what not. Welded to the stop sign post I made a steering column mount out of 1/4” steel flat stock to bolt the lower steering column clamp which squeezes the bearing in place. It holds the column super tight! Made my own brake pedal clevis from 1/4” flat stock and a grade 8 bolt cut to the proper length. You could totally mount the column though without a brake upgrade by simply making a bracket to tie the firewall and dash together and a bracket to the column. So I’m curious should I start a new thread or keep this one going since my steering is done?? Let me know.

-
Thanks Bob. Pretty much using as much of the factory shifter rod as possible. I’ll make some kind of support near the firewall since the column no longer exists in that space. Also fab up a lock position for park somehow. Then I’ll probably use small heim joints and some rods to figure out a linkage. Might need to build a bell crank set up or something to get the direction I need. As you say, news at 11! Hahaha
-
Thanks Sniper. I keep having to remind myself this is a rat rod project. Lol. As I’ve said I’ve restored many vehicles where you’re just bolting the factory parts back together. This is my first try at this much adapting parts from other cars. It’s fun though.
-
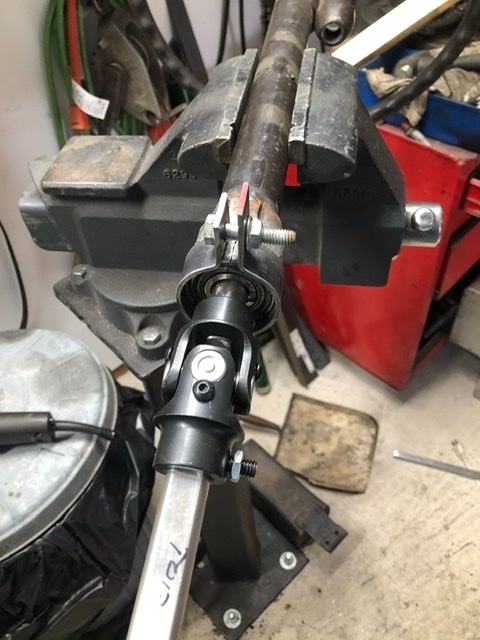
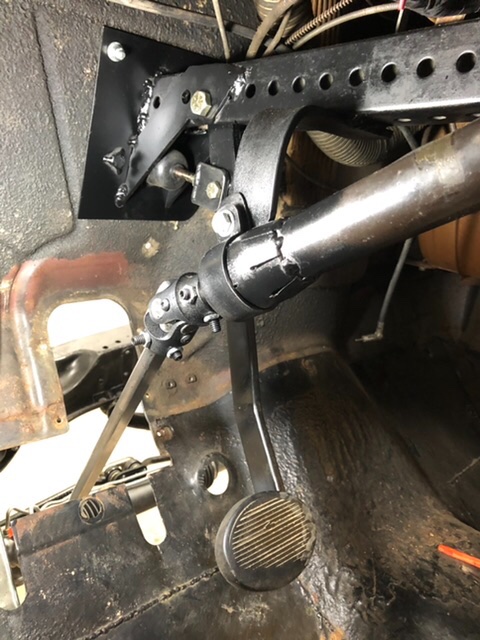
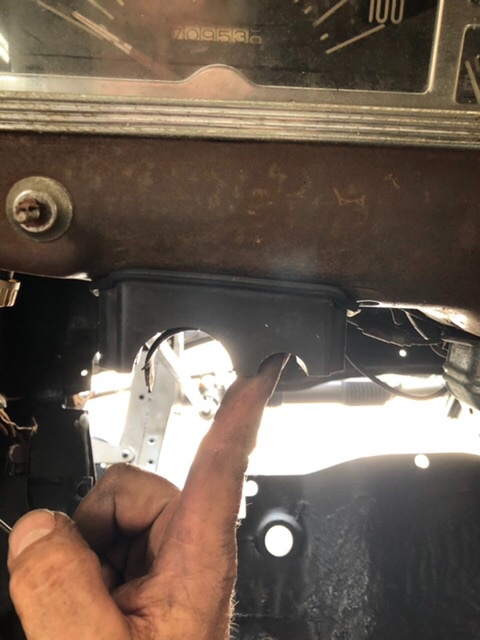
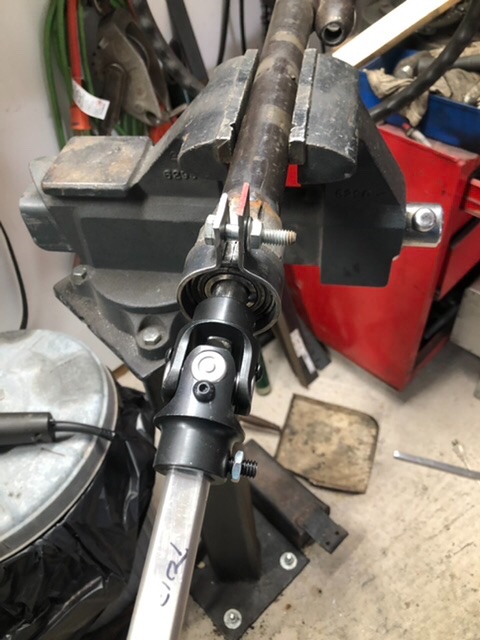
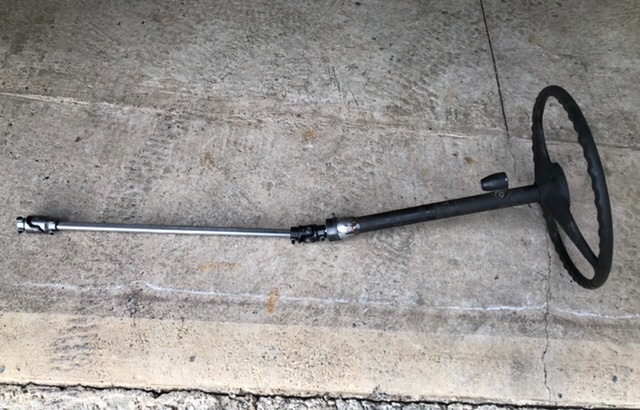
We’re steering! Sorry the pictures uploaded all out of order! Spent a couple days cobbling up the steering shaft. So starting with the stock column, and after some careful decision making and figuring out the placement of the wheel, I ultimately cut 27” off the bottom of the tube and a lesser amount of the stock shaft. I came up with the 27”by also moving the column tube in towards the dash 3”. This resulted in a much more comfortable position of the steering wheel compared to the hanging in space and in your face feel of the factory location. I also moved the column mount on the dash to the left about 1” and angled slightly to the left. There was one extra hole in the dash already from the factory and I just drilled another on the other side). I welded a piece of the 3/4” double D shaft to the end of the stock shaft to mount my upper steering u-joint. (I could’ve used a round weld on joint but I wanted to be able to remove or change easily if needed). Scrounging through the tool box I found an old 3/4” ID John Deere mower bearing that fit the shaft. I made up a quick adapter from a piece of 2” exhaust tubing slotted to tighten down on the bearing and to reduce diameter to weld the other end to the steering column tube. Then I made up a band clamp from a piece of 1/8” flat stock to squeeze the bearing fast. After assembling it all it seems to work fine. I will weld the band clamp to a brace at some point to hold the lower end of the column in place and make it rigid. (I’m mounting my brake system to the fire wall because of clearance issues with the stock under floor system. I’ll probably weld that clamp to whatever I come up with for the brake support) 64246818880__46C9F99A-843B-4900-8D47-5B763C5D9F3D.MOV


-
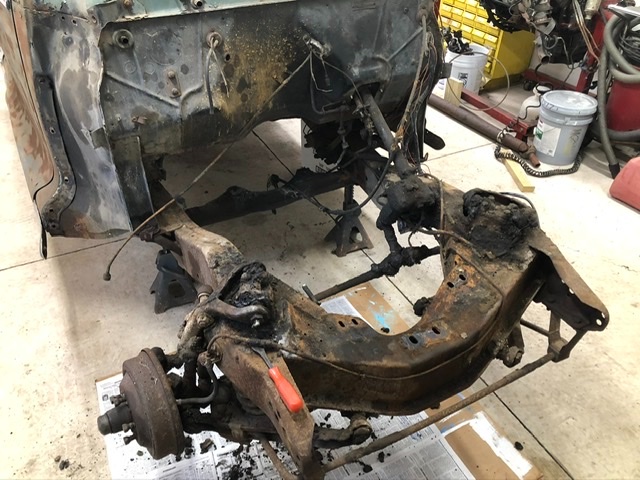
Don’t feel bad Bob. I did pretty much the same thing never doing this before. I basically started from scratch with a bare front end not knowing better. But as I’ve learned so far it’s not impossible to overcome mistakes. With a little research into suspension geometry and a little trial and error, it should be fine. My design may be one of a kind due to the engine I’m using, oil pan, headers, etc, but so far it seems as it should work well. I’m onto the steering column mods now so I should have a working system soon. Key for me was taking my time and test thoroughly before final welds.
-
Hi Andy. No the clamps aren’t billet. They’re forged right into the Cavalier tie rod.
-
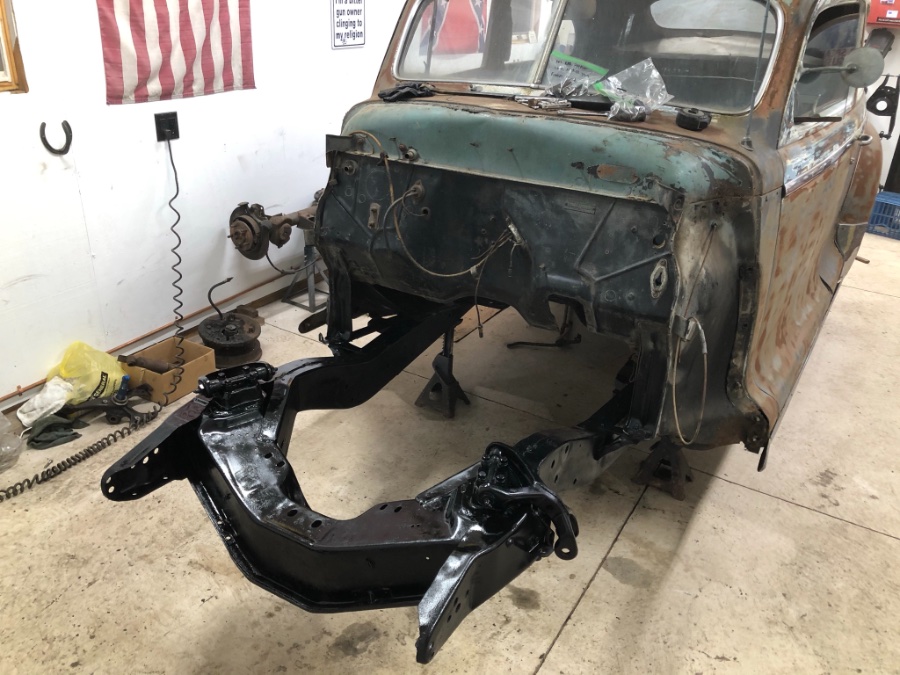
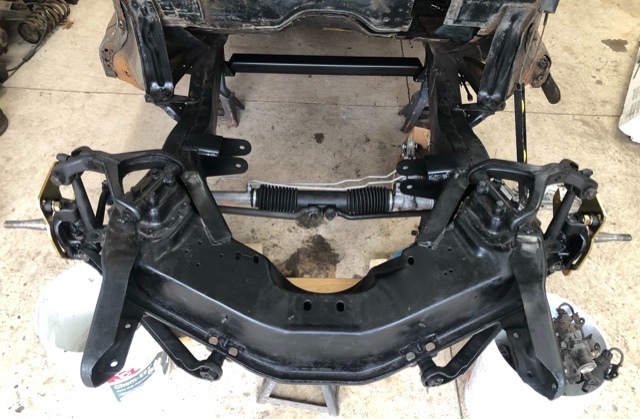
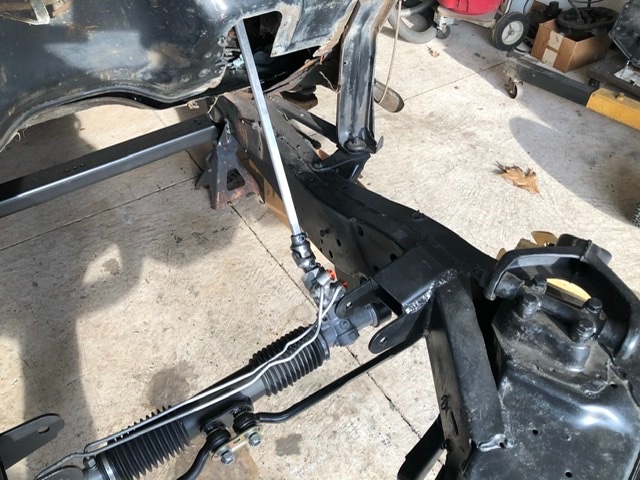
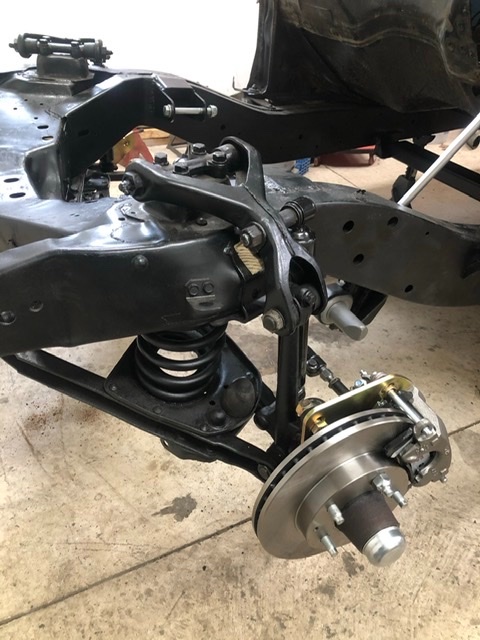
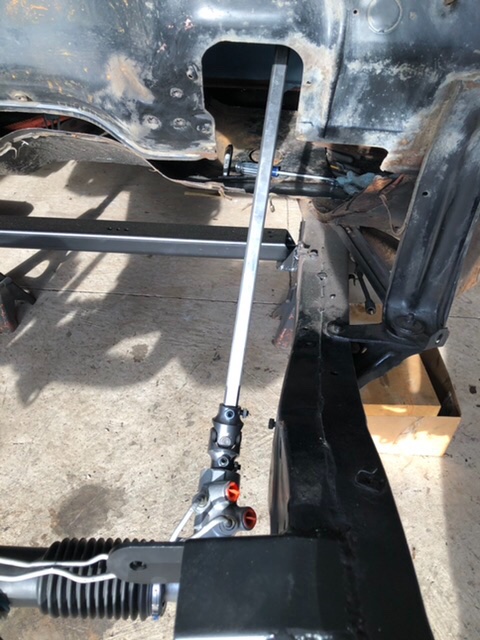
I reinstalled my springs and then pulled the motor for some upgrades this past Saturday. So I snapped a few pics with the motor out. You can see how the tie rods follow the angles of the lower control arms. The next project is getting the steering shaft connected to the column via some double “d” shaft and another u-joint. Gonna try to keep the original shaft and steering wheel up top along with the “3 on the tree” shifter to work the turbo 350. So that’s going to be a whole other project.

-
Thanks Bob. You know I’m intrigued by the factory design but it does seem a stiffer shock is needed for the limited travel it sees. I might just keep these to see how bad they really are and if I decide to go with a traditional set up I’ll probably just make my own. But we’ll see.
-
Cool thanks
-
I also had to cut about 3/8” off each mounting bolt attaching the new fabbed up bracket so they wouldn’t bottom inside the rack.


-
I tried briefly. I’m about useless with this tech stuff. Lol Sniper offered to post it so I emailed it to him.
-
I sent it to you friend
-
Thanks Andy. No the tie rods have about an inch clearance on full compression and that’s with out the rubber bumpers in the control arms. Once they’re in place it should be safe. The factory steering arms actually incline upwards a few degrees from the attaching bolts in the spindles. The new arms are straight in line with the bolts which brings the tie rod down a bit, further putting it in parallel with the control arm. Almost brought a tear to my eye when I saw no bump steer. Lol
-
I tried to post my short video of my NO BUMP STEER but it’s apparently too large even after down sizing it. ?
-
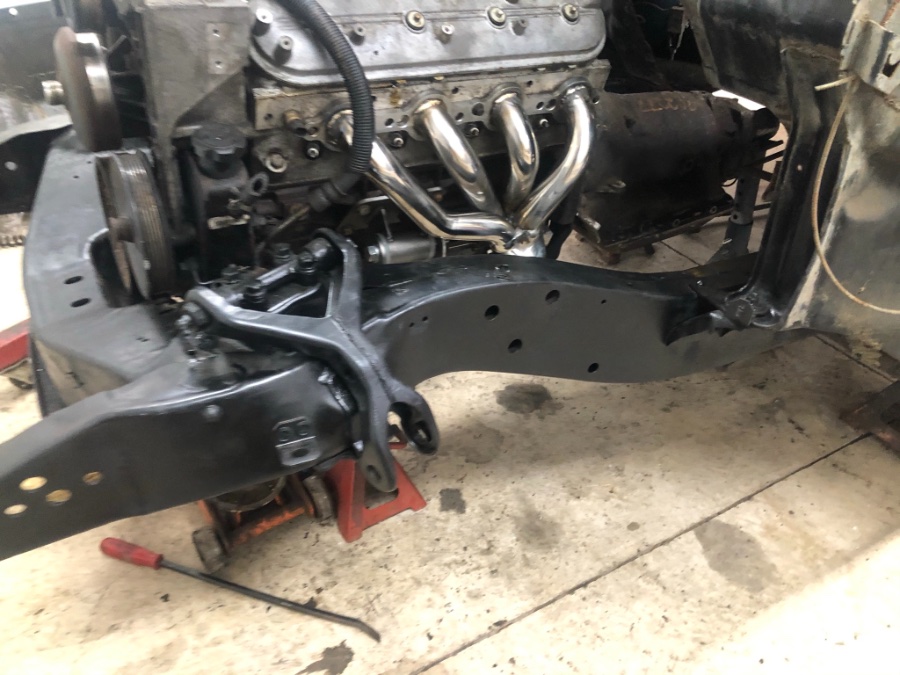
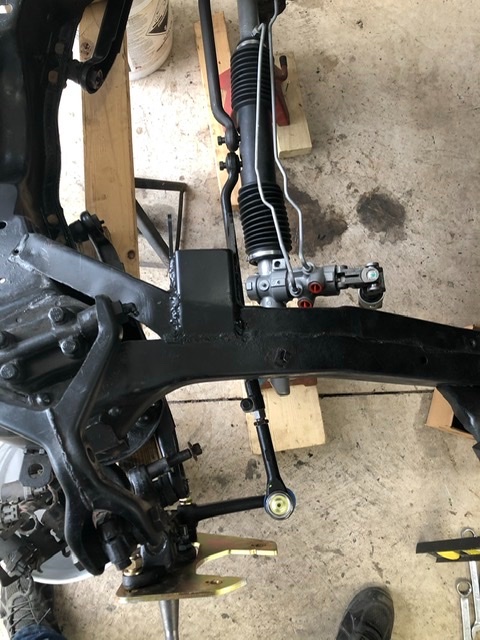
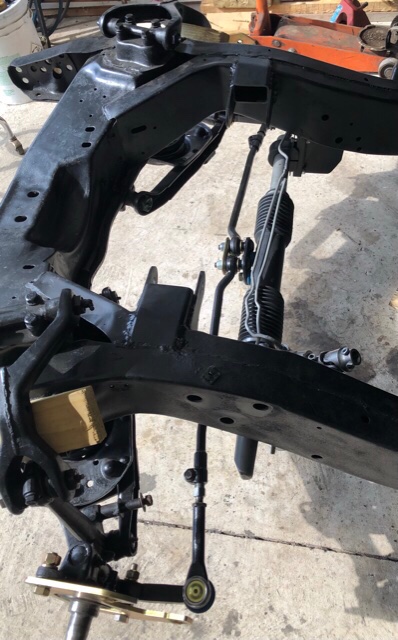
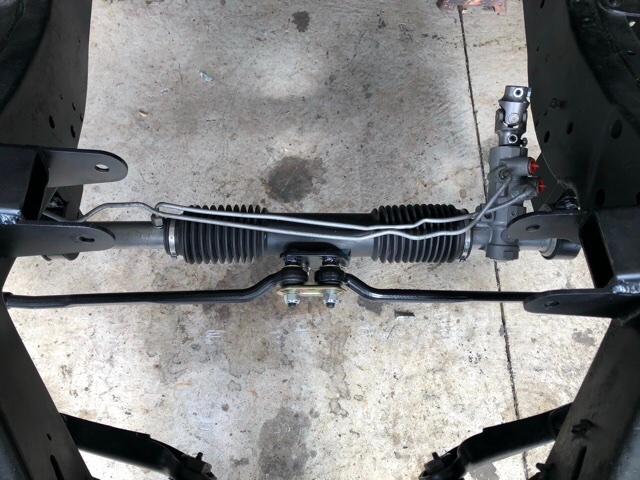
I also got to fab up the inner tie rod mount today I was eluding to. It raised the tie rods right in line with the lower control arm pivots ultimately giving me ZERO bump steer! Keep in mind I had to move the rack slightly to the driver’s side for header clearance and also keep it and the hydraulic lines (slightly repositioned from stock) south of the LS swap oil pan. This may not be the case on your ride. I stuck the motor as low and far back as possible. I made a crude, but effective enough, wooden buck to hold the spindles straight and take measurements. I ended up moving the inner tie rod pivots up 1-7/8” and to the passenger side 1/2”. This put things right in the middle. I previously purchased an inner tie rod bolt and bushing kit. I cut the spacers from the kit in half and used a half on each side of my 1/4” plate. I used half of the urethane bushing on the rack side to seal up the rubber bellow on the rack. I welded two more 12mm x 1.25 bolts to the plate as well as the other half of the spacers I cut. This along with the spacers on the rack side put the tie rods squarely on the rack and right in line to my shorter fabbed steering arms. So here’s some pics to enjoy.
-
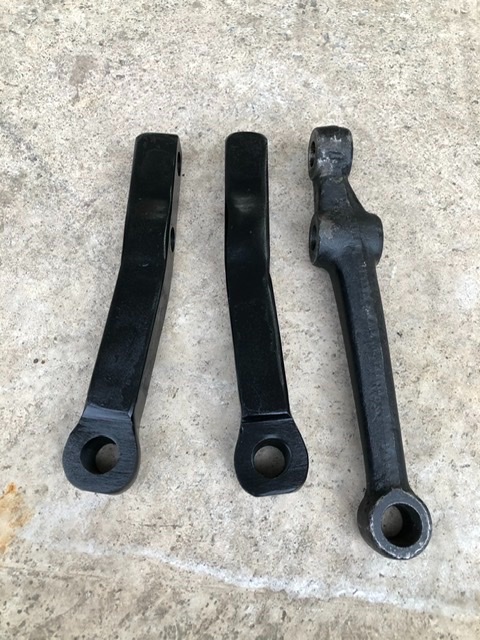
Holy cow guys it’s been awhile but I had a few hours this week to dedicate to the rod. Soooo I finally got the steering arms fabbed up. Being they were 1x1 cold rolled steel I wasn’t afraid of welding on them so long as I left them cool without quenching. Looking back I should have started with 1-1/4” bar stock and just removed what I didn’t need. A 9/16” hole takes a lot of material away. None the less I believe they will work fine. I could not bend them in my 20 ton press without heat so I’m pretty sure they ain’t bending. Also the eBay reamer I purchased for $68 worked like a charm. The tie rod ends fit perfectly.

-
Well not sure I’d go that far Sniper. I just read a lot. Lol Yeah maybe I’m on to something here! I could mass produce these if they work! Ha Here’s a pic of what I’m starting with. I did get the angles bent in them this evening. I’ll post some more when I start drilling.


