


Fargone
-
Posts
165 -
Joined
-
Last visited
Content Type
Links Directory
Profiles
Articles
Forums
Downloads
Store
Gallery
Blogs
Events
Classifieds
Posts posted by Fargone
-
-
On 8/30/2019 at 8:44 AM, 55 Fargo said:
Here is the type that you need for an easier install.

When you raised your shifter did you have to alter your shifter rods or just make simple adjustments? And does it shift well after these changes?
-
20 hours ago, DJ194950 said:
Plymouthy's plan sounds good to me along with some of the others info.
I would add some braces for support to this plate back to one or two of the tailshaft housing to main case bolts. Shorten and tweak (or is that twerk?) the shift rods and maybe change the
angle of the shifter arms at the trans as needed also.
DJ
I am a little concerned about shift rod geometry this will be a one of kind.
-
On 8/30/2019 at 1:47 AM, Plymouthy Adams said:
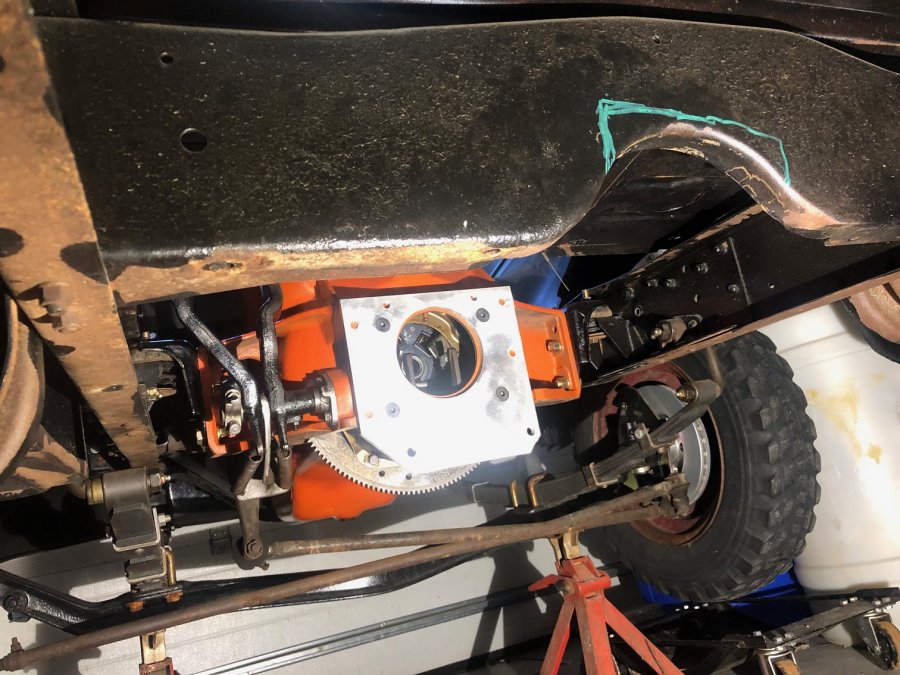
I believe in your case knowing you wish not to buying a new tail shaft housing or locate another unit that you will need to get a piece of plate steel and mount it where the existing shifter mounts at the rear and at the front of this plate you will cut, drill and weld ears to attach to two of the bolts that hold the tail shaft to the gear case. Then you can locate your shifter pad anywhere along this plate that you find comfortable. the forward part will have you dealing with an angle but I don't see any way to prevent that and you need to stay top and center of the bolting forward as you speedometer pinion gear assembly will be a the center and bottom bolts. It would be nice to have two bolts at the forward position but there is a possibility that you could get by with one.
if there was a tail shaft housing with the forward shifter position I'd buy it, but I'm not sure 1 exists for my shorter trans. My current plan was to have a machinist friend of mine craft me a bracket.
-
Does the filter have to be mounted so high? Could it be lowered closer to oil pan level? It just seems to make more sense down lower, but I'd have look into clearance issues on my truck. I'm so doing this mod!
-
I don't want unrelated suggestions just facts related to an A833 transmission swap to a flat head six. I have an A833 but it is the wrong version, in that it does not have the central shifter mount position. I'm left with a few options and none of them are great. The best option is to get the correct transmission, but I'm already heavily invested in this tranny. The second best option and here's where I need advice. Can I fab up a bracket that moves me a few inches ahead? I see several examples of people raising the shifter position in their swaps of the central shifter. So my bracket could do both things move it forward and up. I know I'm going to have to alter the shift rods, but that looks a whole lot easier than the alternatives. Any thoughts?
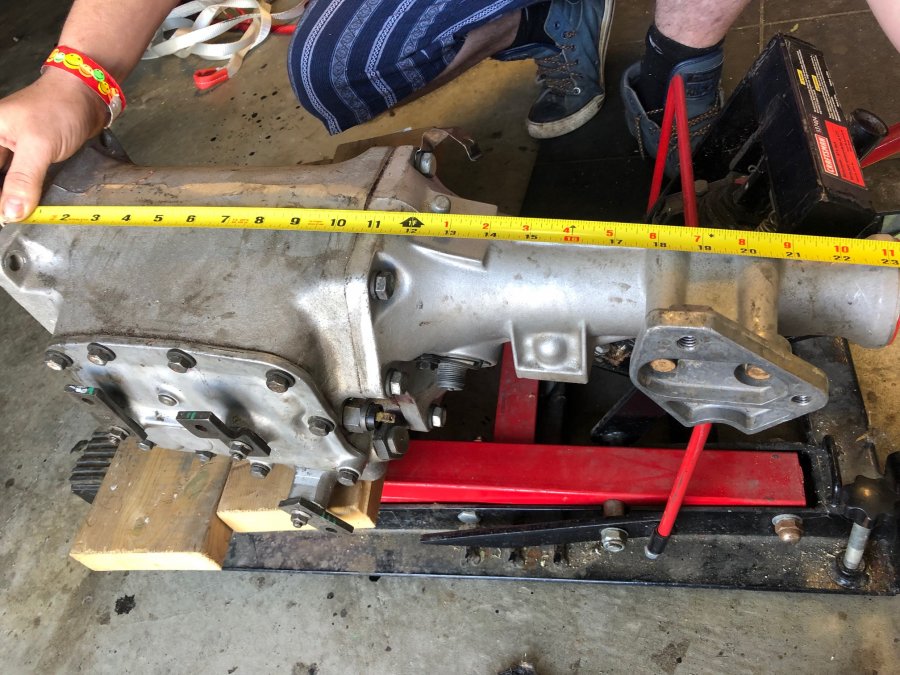
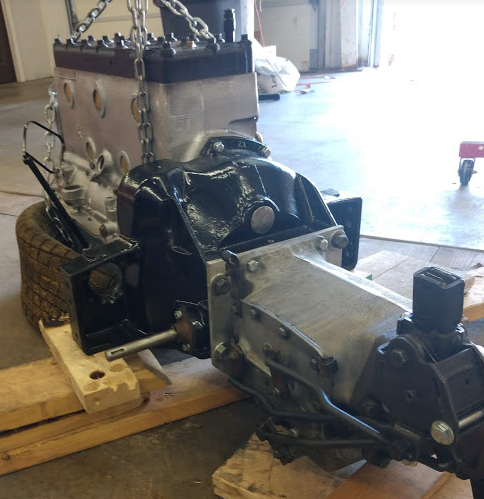
Just for clarity the first image shows my tranny mounted in the truck and cross member out, the string runs where my cross member mounts. The second image shows my tranny out and back on the floor it is the short version 23 3/16" long. The third picture shows some of the tail shaft housing options, clearly mine appears to be the first one.


-
 1
1
-
-
On 8/23/2019 at 5:41 PM, nkeiser said:
My pickup doesn't have the same crossmember that your's does, so I didn't have that issue. There were lots of other "opportunities" along the way though. The transmission mounting bolts are 9/16", so I had to modify the adapter plate and find some place that had 9/16 bolts. I had to order a bronze bushing to account for the input shaft and throw out bearing diameter differences https://www.amazon.com/gp/product/B00IG7PONW/ref=ppx_yo_dt_b_search_asin_title?ie=UTF8&psc=1 I mentioned the linkage issue, but that could have been solved if I would have found OEM linkage instead of after market. All of the information and websites that have parts for Hurst shifters cater to after market and don't deal with OEM which of course are all unique.
I enjoy fabrication, so I had fun tweaking the shifter to fit. It still needs some work as it has a little slop and can be a knuckle buster going to third.
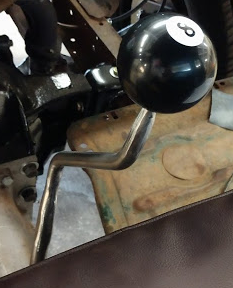

It's funny your shifter looks just like the one I got from 1950 Fargo 1 ton. Mine will look very much like yours I'm sure. It will likely be a little shorter than yours maybe 6" or so. I love the shifter knob!
-
On 8/24/2019 at 6:24 AM, 1949 Wraith said:
Very nice, did you split your manifold or make a header?
Yep George welded up a nice set of split manifolds from my original.
-
7 minutes ago, Plymouthy Adams said:
there are different tail shafts for positioning of the shifter mechanism...just as there are good and not so good factory shifters.....as much as I like the A833 it is not the better transmission for some ventures. I have one here and I do not see using it when the later 5 speeds provide more bang for the buck....do not look to Dodge for just the tranny...bell and tranny is one...Jeep, another source for the later that is split at the bell...I retrofit modern but use the engine and all modern electronics when I do the swap. I buy older bodies without drivetrains...therefore...dropping in a modern creates no heartburn with me.
I can see what you're saying but I'm financially invested in these components now and just have to work with them.....
-
16 hours ago, nkeiser said:
I used the OEM shift lever, but spliced in a section of 1/2" rod to lengthen it. It also required some heating and bending to get it to the right shape. For the floorboard, it required a small hole to be cut at the corner of the existing plate. I guestimated on size and cut it a little too big.


Here's the attached picture pre-installation. Ignore the linkage. I had to get creative to fit aftermarket linkage arms to an OEM shifter and transmission. 1-2 and 3-4 are backwards (1-2 is on the right side of the H).
It looks like this tranny swap is getting more complex the shifter location causes serious problems for the cross member and fuel tank. It looks like my fancy new tank can't go in the factory position and cross member will require a more creative redesign than I anticipated. Adding to the complexity is the floor mods I'm going to need to do the dang shifter needs to come up through the seat base structure. It's almost like I have the wrong tail shaft on this tranny my shifter position is further back than yours.
-
On 8/22/2019 at 5:31 AM, 55 Fargo said:
Have you bolted up the A833 yet?
Does the bearing retainer fit with your truck bell?
Or have you not mocked it up yet?
Yep, I bolted her up yesterday a bit of task though. The Aok adapter plate has very tight tolerances and to get her in the last 1/2" was hard work. For my first test fit I did not have the throw out bearing installed. I know I will have the tranny out a couple more times before final install.
-
5 hours ago, Merle Coggins said:
Since that cross member unbolts and comes out, you could remove it for the modifications. Then you could install the trans without the cross member in place, with some support under as needed, and test fit things as you modify.
I looked at that and it seems like a good idea. I might be able to slide the cross member back 2-3 inches and the whole issue goes away. Of course that means pulling the cab again, but hey it's only 4 bolts and I need the cab off for some other tasks as well. Thanks for your input.
15 hours ago, Young Ed said:If you look up my turkey truck 47 Dodge build thread you can see how I handled the same frame issue. I have a T5 in mine but I also had to enlarge that hump in the frame cross member
Thanks I'll take a look.
-
Thanks for the responses guys, I'm ironing out trans job first then I'll bolt up some jewelry to the engine. A dirty engine is a running engine and I look forward to the maintenance.
-
-
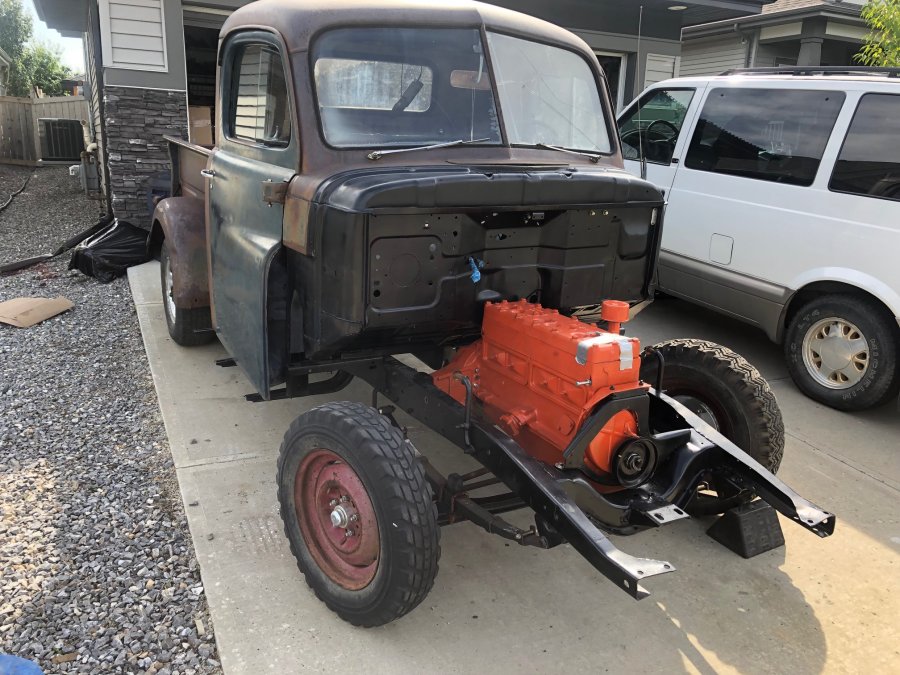
The engine is an over sized 251 that I thought was a 265, but with help from Tim and George at Aok I've got a really strong and cool engine. George supplied cam, triple carb intake, rebuilt the carbs, crafted the throttle linkage and carved up my exhaust manifolds. Keith Black Racing actually had pistons for this thing not forged but nice cast units. All that's left is about 2000 small and medium sized jobs to finish her. The guys at Pro Stock Performance Machining asked if I wanted the factory engine color for my engine or if they could use hemi orange.
-
4
-
-
I've looked through all the images in our library and didn't see any photos of an A833 transmission actually installed in a 1950s Dodge 1/2 ton pickup (mine's a 51 Fargo). I'm hoping someone actually has some pictures of task while it's being done. I'm to the point in my build where I'm doing this install and I've run into a couple of issues and I'd like to see how others dealt with them before I start cutting and grinding. The first problem I've encountered is the cross member just below the seat has to be modified (cut out and boxed a bit). The second problem is the shifter position is quite far back and I assume I'll have to custom make a shifter lever and mod the interior floor and the bench seat a tad... I suspected I'd have to do these changes I'd just like to see how others did it. I do have the excellent Aok adapter plate so I am ready to get this done, just a little cautious (chicken).
-
I've been working on this conversion for my 1951 Fargo 1/2 ton for a few months. I had a fair amount of difficulty finding the transmission in Canada, but I just found 3 of them close to my winter home in Arizona. Tim Kingsbury has been very helpful with this project through his AoK blog and via e-mail. I now have the OD transmission complete with shifter and linkage. I've added the list I used to send wreckers while I was looking for this transmission. I paid $450 for mine and it appears to be in really good shape. I do plan to go through the trans with new bearings and seals before I use it. if anyone is looking for this trans in the south western USA Hidden Valley Auto Parts near Maricopa Az has a couple.
A833 4 speed manual transmission with aluminum housing.
The overdrive configuration with a 23-spline input appeared in these vehicles:
o 1975 to 1979 Valiant, Duster, Dart, Scamp, Swinger, Volare, Aspen
o 1975 to 1987 Dodge light-duty pickups and Dodge and Plymouth Vans
o 1977 to 1979 Diplomat and LeBaron-
1
-
-
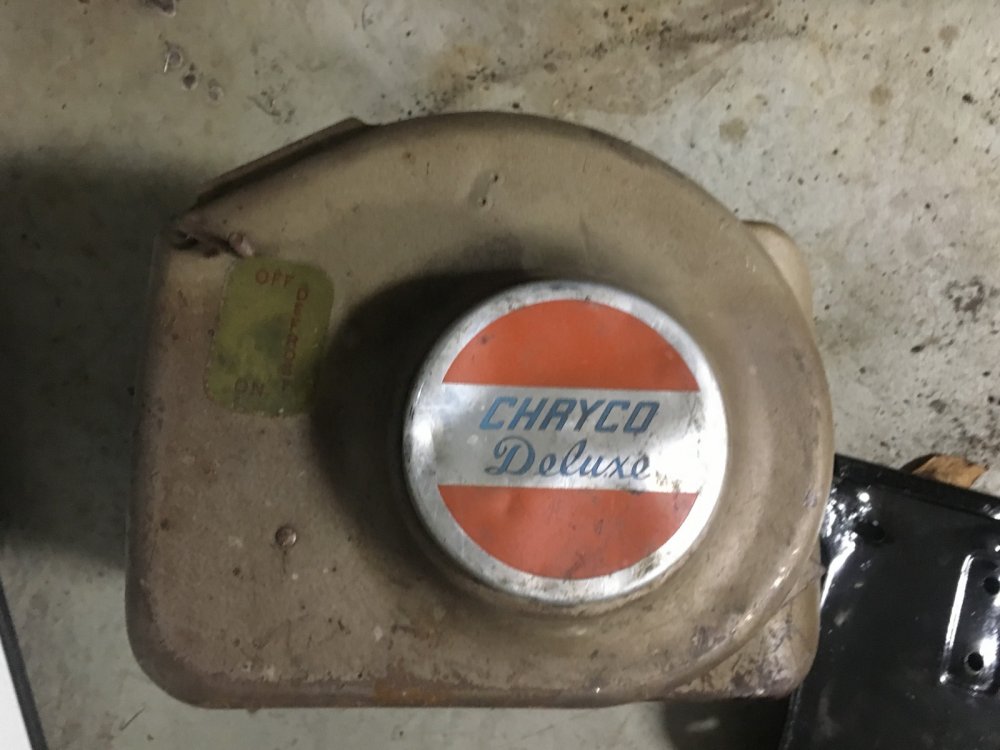
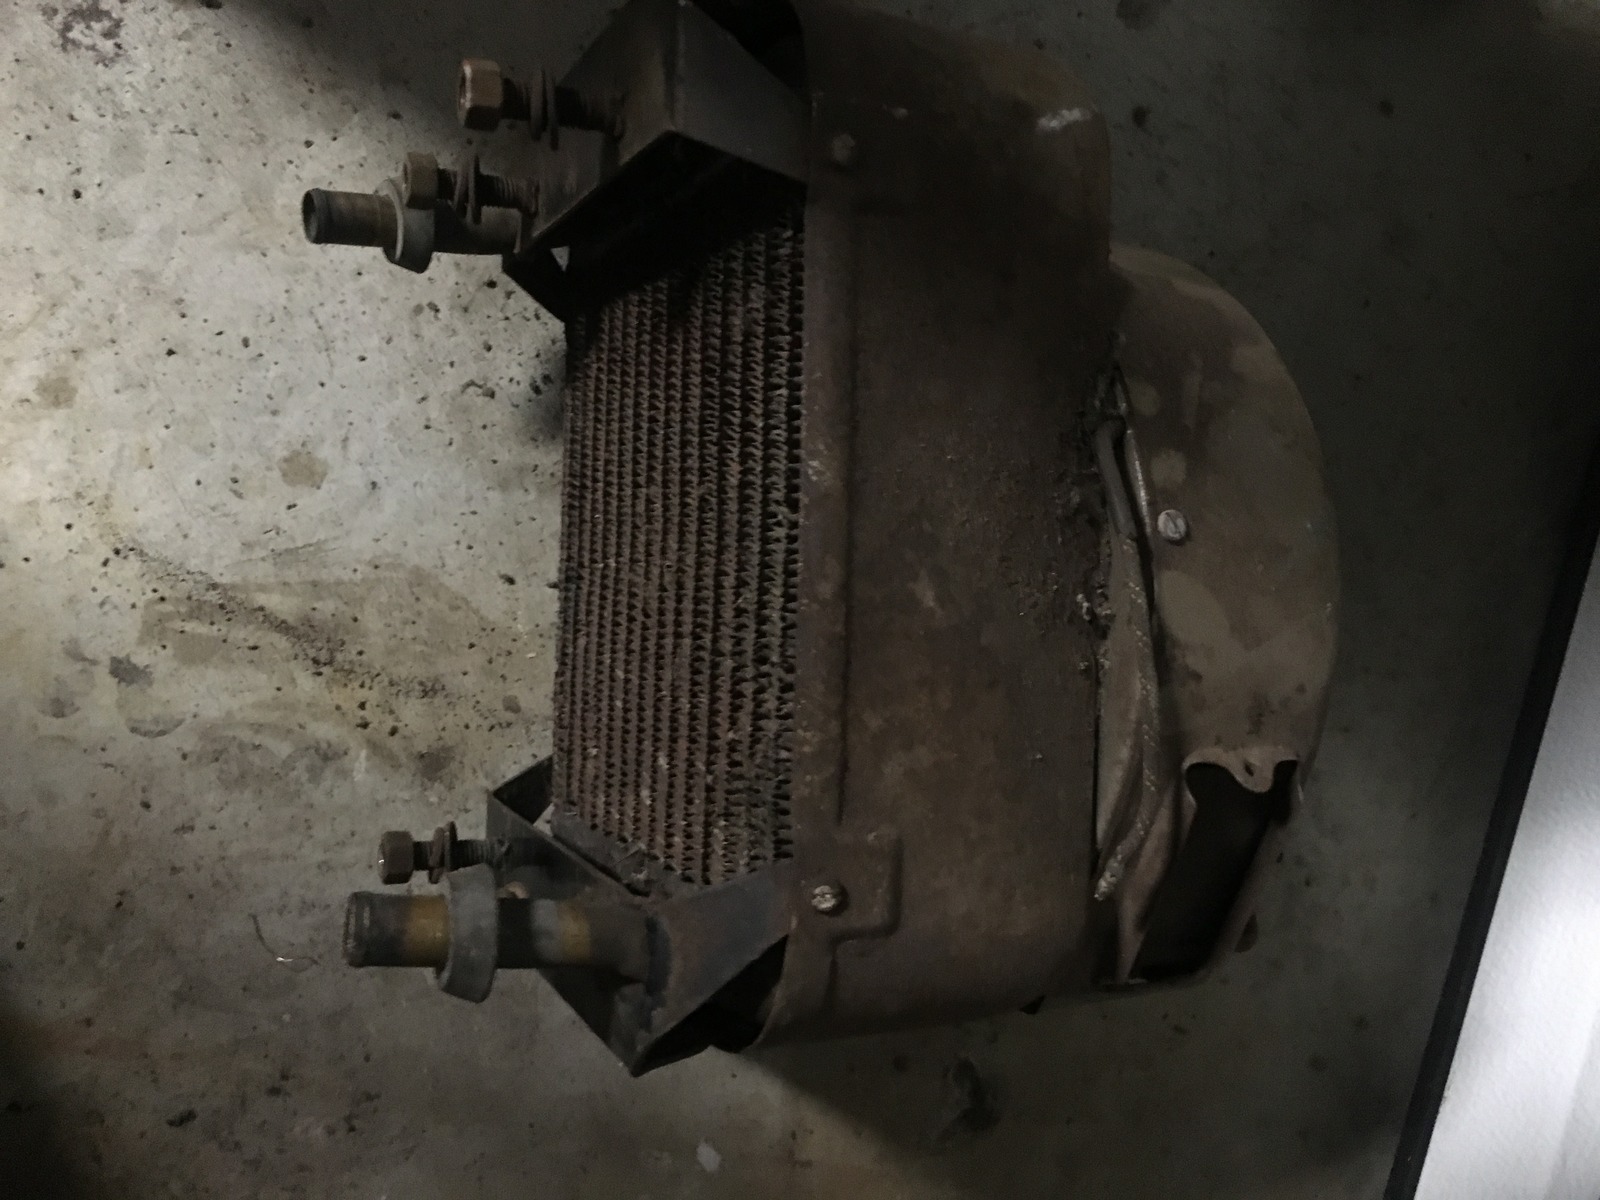
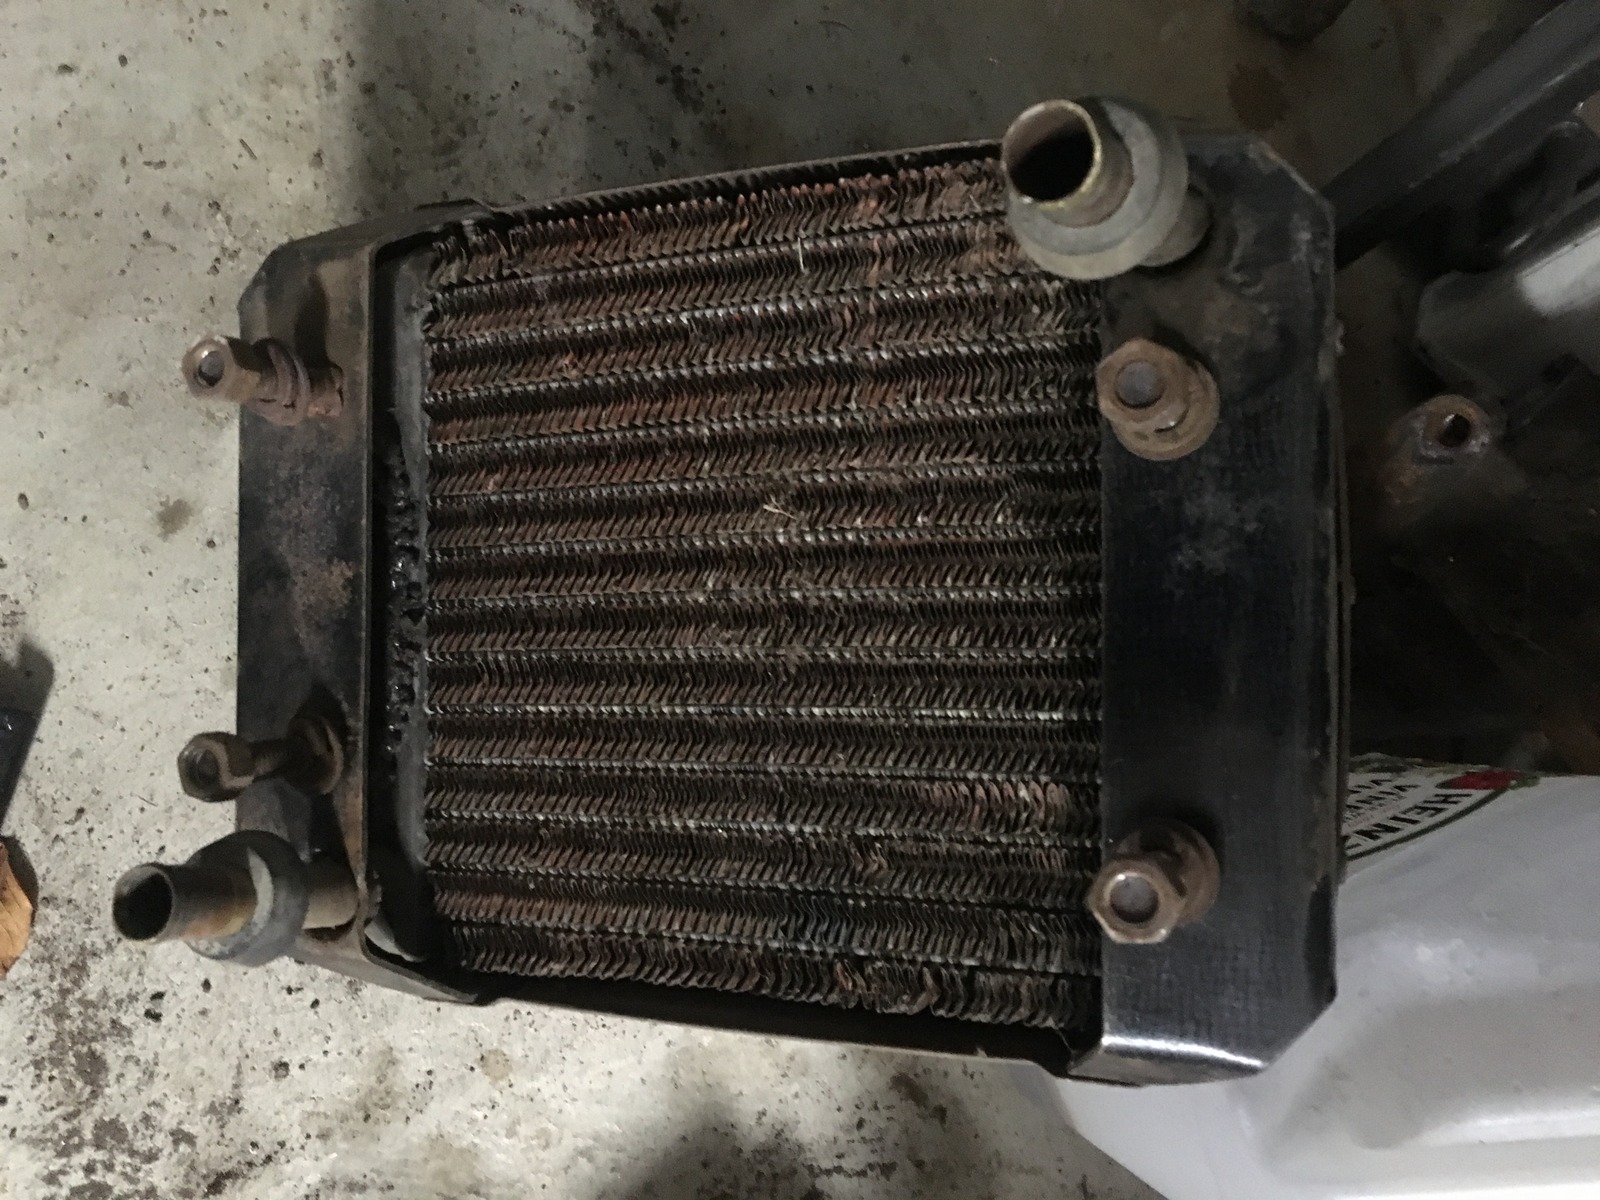
I just pulled the old (I'm guessing original) heater from my 1951 Fargo. Up in Canada I'm guessing the heaters weren't an optional piece of equipment. As you can see from pictures it is a Chryco item. I guess it still could have been dealer install.
-
I checked the old posts and couldn't find any information on pulling the steering column out while leaving the steering box in place. Is this even possible? Or should I just yank the steering box and column as a unit? It seems like they should separate at the column, but maybe the steering box has an internal connection as well? Any guidance would be helpful here, thanks in advance.
Sorry guys just found information on-line in Aussy service manual the whole unit has to come out.
-
I checked the old posts and couldn't find any information on pulling the steering column out while leaving the steering box in place. Is this even possible? Or should I just yank the steering box and column as a unit? It seems like they should separate at the column, but maybe the steering box has an internal connection as well? Any guidance would be helpful here, thanks in advance.
-
About a year ago I posted how I got the really stuck water distribution tube out of my truck's engine.
Posted 19 June 2015 - 07:55 AM
I went through the same shades of hell when I pulled the water distribution tube from my truck's block. After trying pretty much everything you have, I had 1/4 of the tube out and the rest still installed. I was able to hook a stiff wire way to the back of the tube's remains, but could not pull it like the shop manual says. Finally, I took a piece of flat metal roughly 3/4" wide and 1/8" thick, rounded the end off, then sharpened one side of the end down to the other side - basically made it a long wedge. I was able to slide that between the side of the tube on the cylinder side (flat side to the cylinders). I was able to tap that in and basically crush the tube off of the cylinders. I would tap it in a short distance, try pulling, then tap it in some more. Finally, it broke loose and came out.
Very frustrating and I had reached the point that I was either going to fix it or really break it.
Your approach worked for me as well! I got the damn thing out. Thanks
-
2
-
-
I made up a removal tool (after seeing how Paul removed his) and my WDT came in out in pieces. Seems to be about the only way to remove those old steel WDT's.
That thing is beautiful, I teared up when I saw it. I'm so building one right friggin now!
-
You are doing all the right things.
Best to do a forum search on 'water distribution tube' for more information as we have discussed this problem on numerous occasions.
Sorry guys I didn't know the right term for the "thing", the threads were a great source of information. I was about to give up and find another engine, but this is the original engine block from my truck so I'm trying to use it. So far I've had no luck with the slide hammer, but I'm off to bolt house to get so stuff and try again.
-
Collapsing the tube is an interesting idea, I suppose the manifold studs could be removed for punch access to jar the tube lose every few inches along its length... then hook the tube to pull out some, then drive it back in, so as to work the tube back and forth to allow debris to fall away in the water jacket rather than form a wedge that holds the tube in place. I have not seen a tube corroded so much that it would need this extra effort, but working bolts, studs, sheaves and shafts loose with this back and forth method has worked many times, with the aid of lots of MMO and plenty of patience

I'll try the manifold studs approach as well, maybe a thin punch will get the thing loose.
-
If a search has not shown this, after the hooking has failed to persuade it to come out for some, they have gone to thin flat stock down the side between the block, and the tube. Puts some crush on it to break loose. Some have had to get theirs out in pieces.
I wish I had some super strong 36" long shim stock I could hammer in along the sides. Or even really long air chisels to vibrate it loose. I'm off to the tool stores to see what I can find.

Looking for advice about an A833 swap.
in Mopar Flathead Truck Forum
Posted
Believe me I know that the rods will be 3-4" too long