gillettealvin
-
Posts
52 -
Joined
-
Last visited
Everything posted by gillettealvin
-
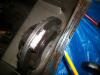
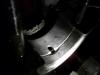
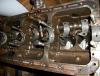
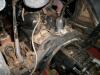
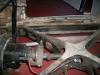
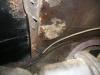
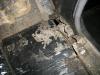
I believe I may have found a major cause for oil leaks on my engine! It is very hard to photograph the parts, and as difficult to describe what I’ve discovered, but here is an attempt. As mentioned in my bearing post, earlier this year, I’d pulled the oil pan to clean it out, and replaced the gaskets/seals with a NAPA gasket set. The set I got was for a ’40’s car, but the parts man told me “they’re all pretty much the same in the book.” I installed the pan and went for a ride. Over the summer I noticed a pretty good sized oil spot under the car on a regular basis, as well as drips coming from the flywheel housing tin bottom cover. All along I’ve suspected a leaky rear main seal. This was/is the main reason I’d decided to tear the engine down this off season. What I’ve found is that the rear main bearing cap has an area that looks almost as if the factory left out a “step” in manufacturing, and although I’m sure this isn’t the case, what exists looks like some bad engineering. (Or, am I missing something?) At the very bottom of the main cap, there is an area that is maybe an inch or so long, and it is cast so as to allow the cork that mates into it to flatten for that little spot, right at the bottom, and right at the edge of the metal lip of the oil pan. While most of the cork forms an edge that acts as a “dam,” this part of the cap actually allows the cork to interrupt the shape of that dam, and looks as if it would be an open invitation to the oil splashing around in the pan to exit same. I’m posting a couple of shots, and as I said, it is difficult to see the thing I’m talking about. The first picture shows the front of the motor with the front main cap, and the ridge on that cap is what digs into the cork when the pan is tightened down, forming a seal. There are no leaks here. The next picture is of the rear main cap and the corresponding cork in the pan. For whatever reason, the camera, (operator, ) only caught one half of the “dam” made in the cork, but the flat spot at the bottom shows up pretty well. This spot would allow a very minimum seal, and I think hot oil under any kind of pressure, or velocity, could easily escape through this little passageway. I’m thinking a fix would be to carefully grind away some of the area of the cap’s casting. The part needing relief is chalked in one of the photos. It seems this would allow the cork to crush higher in this area, subsequently causing the current break in the cork line to be more of a continuous nature. Hope this is a little clearer than mud. Comments? GA
-
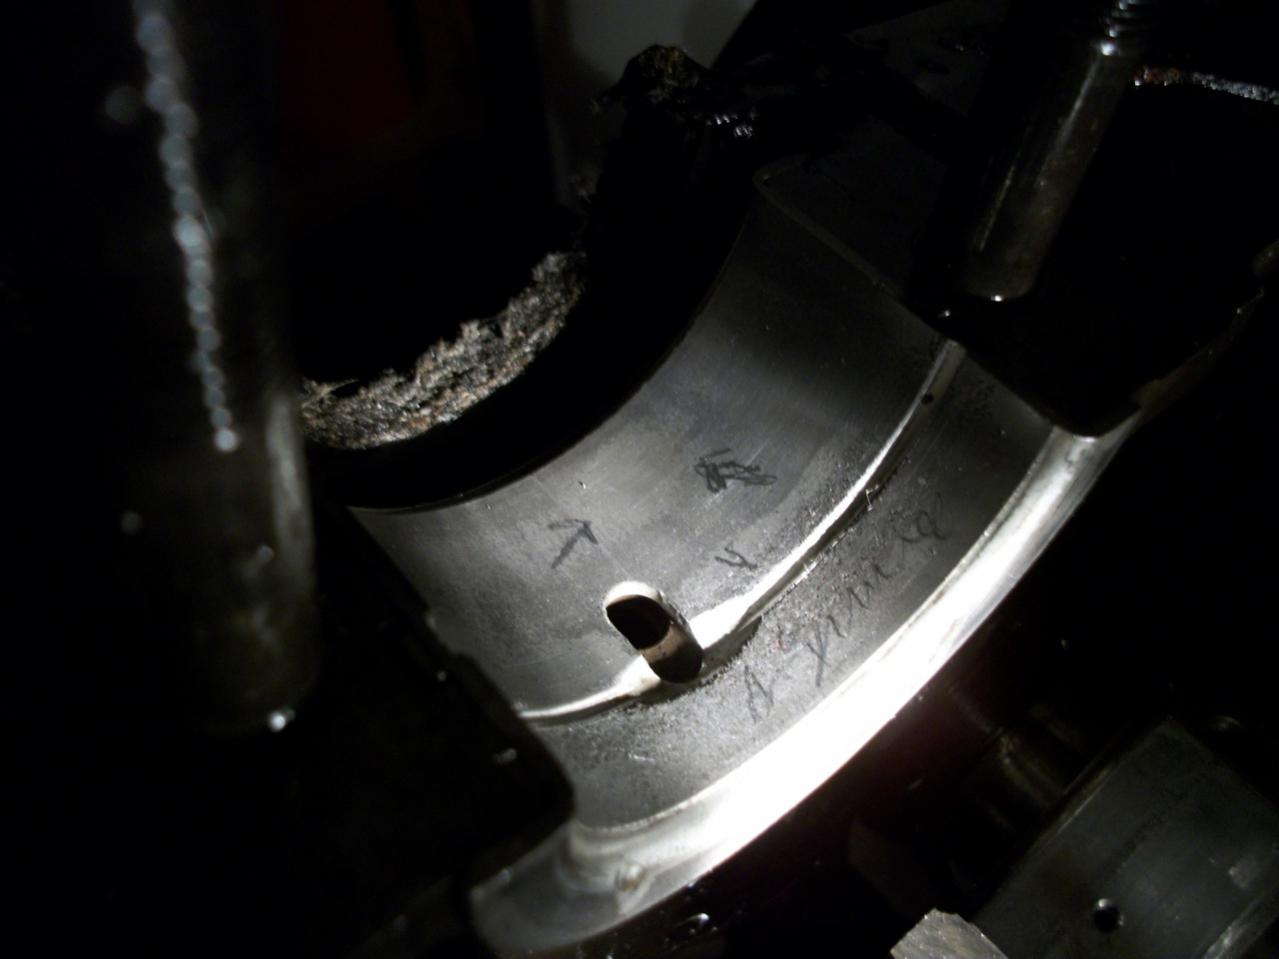
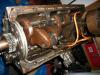
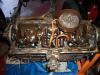
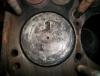
I tore into the ’33 motor today. When I first got the car last March, I’d dropped the pan and cleaned out the sludge on the bottom, caused most likely, from years of sitting. Everything looked immaculately clean, then; and today I was pleased to find most of the inside very tidy. My suspicion is that some PO did a ring/valve/bearing job in the very recent, (mileage,) past. As mentioned, the oil pressure had been on the low side, and following some of the suggestions here and my own instincts, I kept an eye to any problem areas. I think I’ve found the issue: bearings. I’m attaching some pictures of the overall cleanliness of the insides, and some detail shots of some of the other parts, and the bearings. All of the mains have a grayish tint, and the rear, especially, looks rougher than the others. While the crank has minor scratches, (sorry, no pictures,) that will more than likely polish out, the bearings look prematurely “worn.” I tried to show the worst of it in the picture of the rear. Note the blushed spot where the pencil marks (arrows,) are, and also the VERY rough area that I scribbled on in pencil towards the front of the motor. If you run your finger over this area, it is noticeably bumpy to the touch. I’m thinking a new set of bearings, and also feeling lucky I caught it before any further damage was done to the crankshaft. What is the likely cause of this kind of earlyt wear? Improper “start up” oiling? Bad quality bearings? Any input is appreciated. My planned direction at this point is to take the motor to my rebuilder and have him boil the block, check all the other tolerances, clean up the crankshaft, maybe re-hone the cylinders and check the valves. With any luck I’ll get by with a new set of bearings, and new rings? GA

-
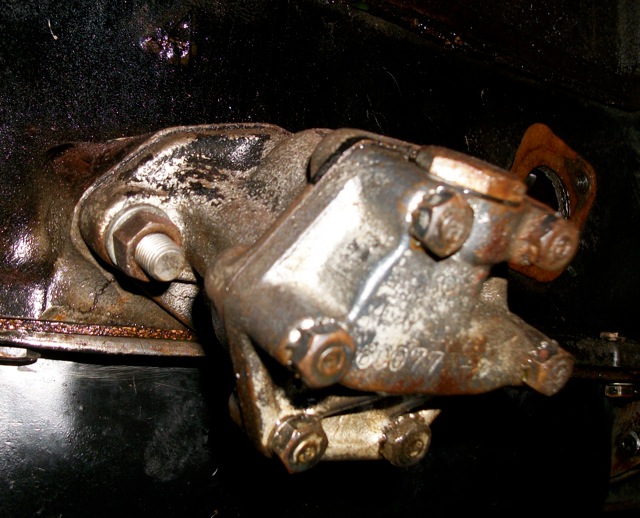
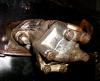
Tod, Thanks for your thoughts. The firewall will definitely get the treatment, as he has to fill holes from the last PO's fifteen different heaters mounted, each with a different hole! What I'm hoping for, and looking for when I get the engine opened up, is a quick main/connecting rod bearing replacement, and maybe rings and a valve job. LOL! I cannot find anyone selling kits for the '33 oil pump, (pics attached.) My experience with Fords, over the years, is they seldom need a "kit," mostly just cleaning and reassembly? I will let you know what is in there when I start pulling stuff apart. Thanks again for your input. GA

-
Knucklehead, Thanks for your input on the rear. The guy that is doing my floors and firewall is going to check with his gumba for a Mopar rear, probably an A body, which is the "right" width/spring pad measurement. This fellow allegedly has Mopar rears stacked like cord wood in his back yard. I am definitely going to ask him about a rear for a six cylinder car when the time comes. Thanks again for your thoughts. GA
-
Thanks for your offer, Tommy. I think the guy right here in town is going to hook me up with a rear. Appreciate your offer, though! GA
-
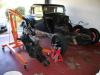
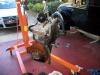
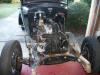
The motor is out, parts spread all around our little two car garage. I’d like your views on a couple of things. This motor runs very well, no smoke, noises, smells, etc. It shows 25 pounds of o/pressure at 40 miles per hour after warm. I did not take a compression check. It leaks to the degree that I leave a cookie sheet under it. My first plan was to leave it alone until next year and fix the floors and the firewall. But, the body work will be much easier to do, and the chassis will definitely benefit from a good wire brushing and steaming, also more simple sans the engine/transmission. So far so good. (Let the games begin!!) My newest idea, (and subsequent quandary,) is to take the engine apart and only fix the rear main seal. Can of worms? Is it possible to take it all down, clean it up some, check for major stuff wrong, install the new seal, and button it all back up-or will I end up doing a complete rebuild? Also, does anyone know if the later style solenoid/push button starter will fit in the same place as the foot activated ’33 on this bell housing? I would like to switch. If you know it to work, anyone got one for sale? Thanks in advance for any comments. GA
-
I really appreciate the ideas and suggestions about the rear end. I had thought of an 8 ¾ Mopar, but that is essentially because the “Southern Influence” is catching hold of this displaced Yankee. You know the builders down here are adamant about “a Ford in a Ford, a Chevy in a Chevy. . . . etc.” I’ve been using the attached chart as a guide, but the suggestion of going with the 7.25 or the 8.25 has merit based on its less desirable status for the high horsepower guys, and subsequent cheaper price. The bolt pattern would need to be watched on the donor rear, it looks like. And yes, Todd, while opting for a few hop up goodies, we won’t be making much more H/P than the factory! The guy that is doing my welding claims a Mopar hot rod buddy of his has 8 ¾ rears “stacked up like cord wood” in his yard. After some of the comments here, I’ll be anxiously awaiting the pending visit to pick out a rear for the car. GA mopar_axle_sizes.pdf
-
I've gotten in the habit of reading the seller's feedback. 92% on 104 transactions ain't that impressive, 'specially when you scroll down and read the buyer's comments on what was sold them and how a complaint was handled. My .02. GA
-
Thanks! For the time being, we're planning to try to get there! GA
-
-
Thanks for your note on the rear end stuff. My information says that all A-Body, (Valiant, Duster, Dart, and Demon,) used a 55.5 inch wide 8.75 rear with spring mounts at 43 inches. My stock rear is 56 inches wide, and the spring mounts are 43 inches, as well, which should come pretty close to a bolt in installation. I think the ratio in the mid 3:00 would be the best, something like a 3:55. This because I’m not going to change the transmission. The ’33 transmission mounting is complicated to say the least, and I’d as soon avoid hacking up the existing cross member just to put in a later transmission. My main goal is a relatively comfortable 55 MPH.
-
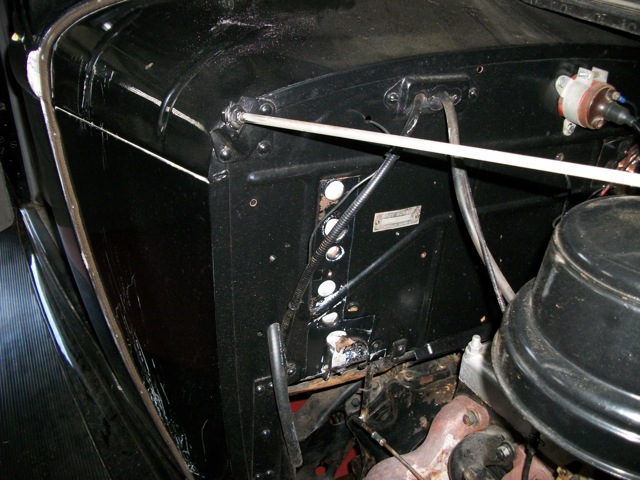
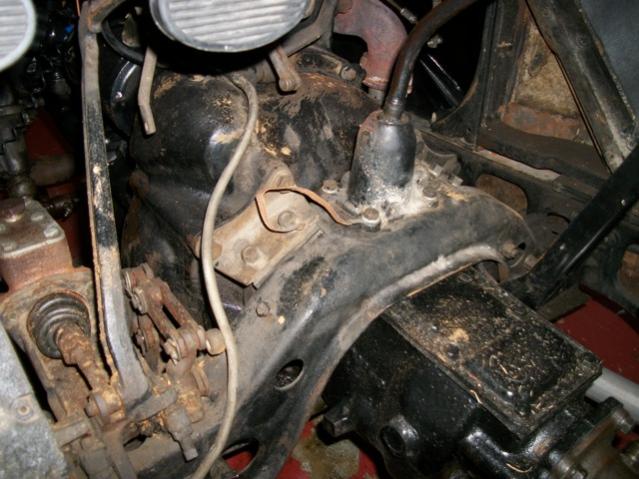
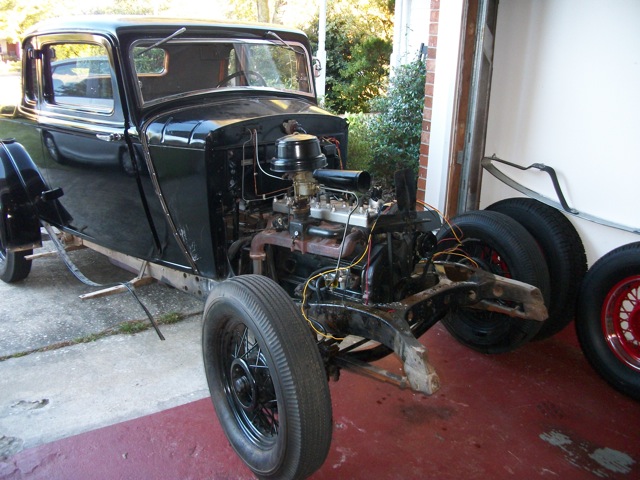
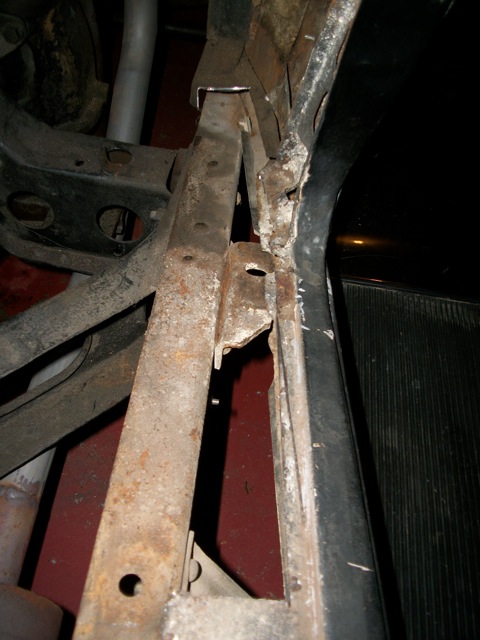
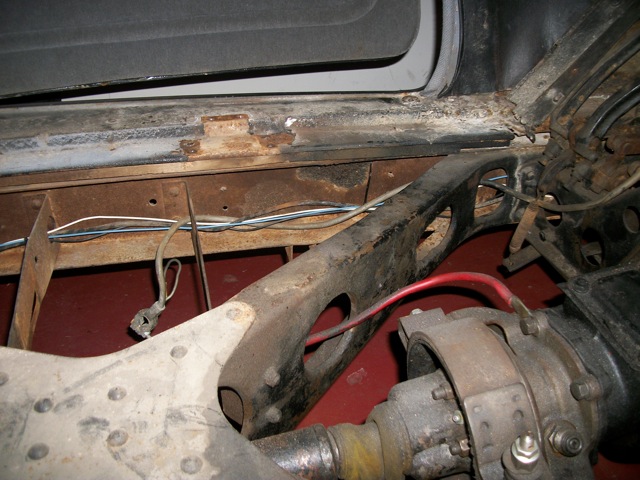
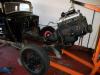
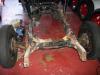
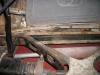
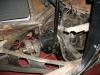
When we got the car last March, my REAL girl really fell for the suicide doors and art deco look. In the spring we took a modern car from NC to CA and back, a lifetime dream of mine. Then, this past summer, my girl suggested that we try a trip in the old Plymouth, (“you’ve always wanted to drive an old car cross country, let’s cross the other way!”) At about that time the POC, (Young Ed??) started planning a “tour” in MN for August ’11. Meanwhile, old US 421 has its humble beginnings right here in Wilmington, NC, and it meanders all the way to the Upper Peninsula. What better way to “cross” (North/South) in an old car than on a lesser traveled route, with the end goal the meet in MN? Thusly, our current dream is to ready the old Plymouth for a “ride of a lifetime.” With God’s help and some diligence I may just show up in MN with my favorite girls! There will be some concessions, the main “upgrade” to a later Mopar rear. When it got down to it, installing an overdrive transmission would involve some major reworking and refitting of the original (’33 only,) transmission mounts/cross members, rendering any hope for a return to “stock” pretty much undoable. (See picture.) Attempting to get to a more highway-able rear ratio, the much lesser of the two evils is to change the factory 4:37 to 1 ratio closer to the middle 3:00 range. For those purists in the audience, we’ll keep the old rear end wrapped in a tarp in the shed in case a subsequent owner flinches at the “modern” rear. At any rate, in addition to the floor/sill repair, our guy is going to help the firewall rehab additionally. One of these pictures shows the holes from previous heater installs. (Must have been several, from the look of the number of holes!) (See pic.) As long as she is down this far and needing a rear main seal, my convoluted logic says pull the motor and get a look inside. Better now than along the side of US 421 next summer. Here are a couple pics of the car with most of the sheet metal now off.


-
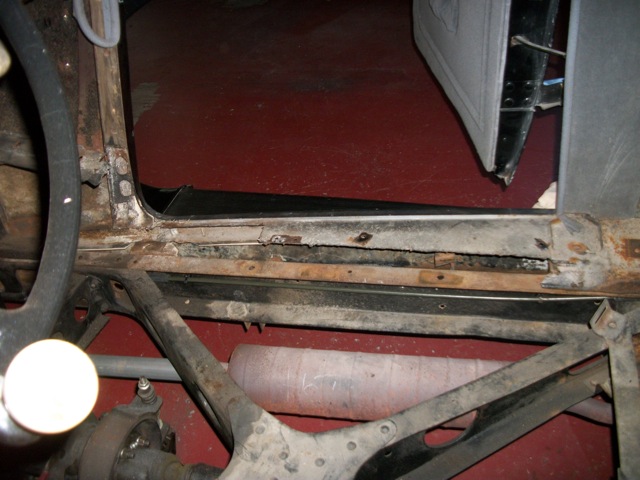
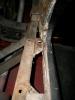
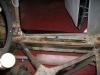
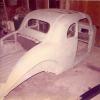
So, three days later, the floors/sills/sub frame areas are cut out of the passenger side, the totally rotten wood sub frame is out, and I’ve located a fabricator to cut and fit the new pieces into place. Of course, with our girl this far “down,” the urge to pull the motor and trans to attack the stinky leaks is coming on strong. (More on that later!) Here are some pictures of our girl more scantily clad than usual and showing her operation progress. The driver’s side sill/floor/sub rail area is very solid, for which I feel very fortunate. The actual rotted area is small for this vintage car.
-
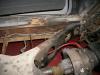
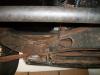
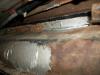
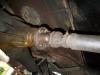
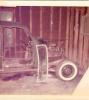
Since I first crawled up under the car I’ve itched to get after it. The body has never been off the car and it sat for over 40 years in a shed in MO. The right side took the brunt, but the underneath is just plain nasty. In one of these pics you can see some of the original factory paint on the x-mambers, but you also catch my drift as to the cobbled “repairs” over the years, the rust, (all surface, thankfully,) grease, cobwebs and dirt dauber nests, to say nothing of the All Metal smeared right over the rust on several areas, and the extensive use of my favorite: dry wall screws. I knew if the floors came out I’d be attacking the thing with deruster, wire brushes, and good old elbow grease. I’ve also contemplated a complete “body off” with all the appropriate sand blasting, painting, detailing, etc. My budget vetoed this idea, plus my desire to keep it simple, (Stupid,) after years and years of over-kill street rod/hot rods that were too nice, (or too expensive,) to drive.

-
aero3113 has motivated me to share some of the stuff I’ve been messing with over the last few weeks. While I’d planned to run our ’33 PC coupe through the warm NC fall here, the “bug” hit, and she got sidelined a couple weeks ago. Since I bought her last March the floor and sill area of the passenger’s foot area have been gnawing at me, you know, the kind of thing that keeps us awake nights thinking about it? Meanwhile, I got some friends that look at the car and say: “You could driver that thing for the REST of your LIFE and it would never rust anymore than it has!” Probably right. We won’t put 1000 miles a year on the car, it never goes out in the rain, and, well you know the story. But still, there is that pesky floor! One picture here shows the only rot visible when the mat/insulation was pulled up. Another shows a couple hours later with the floorboards removed. Let the games begin!
-
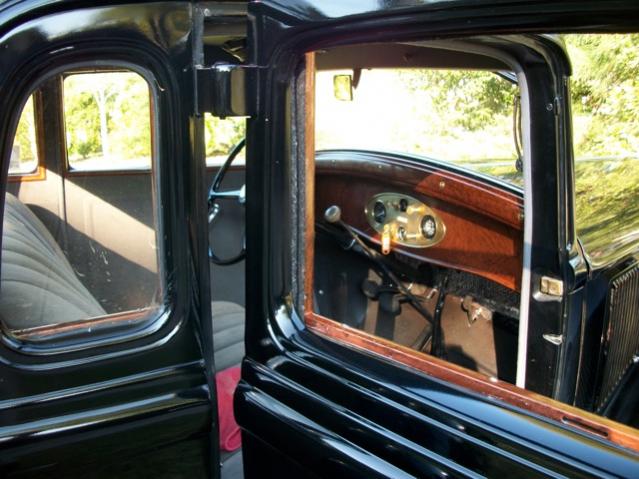
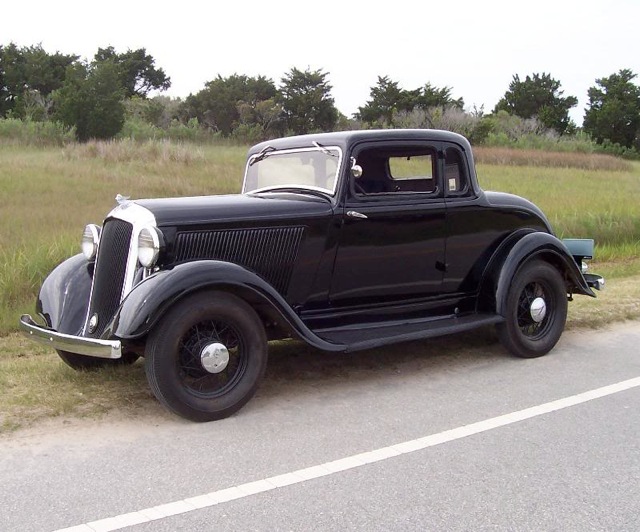
One pic is with bias plies and 17" wires which is the way I got it, others show the (factory optional) red 16" wires and radials, ('cept for the spare which looks odd with the radial on the back, thus, bias ply.) The two inside shots are of my recent attempt at wood graining. GA


-
I like this one 'cause it is pretty easy to use and includes egay, kajiji, and c/l (private sales and dealer sales.) Just plug in what you are looking for, example, "Plymouth, 1940's" will net the whole day's worth of ads. Hope this helps. GA http://www.jaxed.com/cgi-bin/mash.cgi?cat=cp
-
http://www.jalopyjournal.com/forum/showthread.php?t=519908 I'm jus' sayin'. . . .
-
Hey, Jim, My first response is to think, “My engine leaks now, and I’m considering a rebuild?” I’ve been fooling with Model A flathead four bangers for too many years to count. On several forums dedicated to this motor the question of engine oil leaks comes up on a regular basis. The Ford motor is a famous leaker, and many have tried more modern improvements to help reduce the size of the puddle. One such remedy is the reduction of crankcase pressure by the use of a PCV (Positive Crankcase Ventilation,) system. I have experimented with a couple of these on Model A motors with a moderate degree of success. Your post and the garage floor under my ’33 PC have prompted me to begin considering a PCV for my engine. The principle, as I understand it, is that any internal combustion motor builds pressure within the crankcase when operating. The solution in the early days was to provide a passive system incorporating the use of a “road draft” tube and a ventilated oil fill cap. (The model A, and many earlier motors didn’t even have the tube, instead relying totally on the vent at the oil fill.) Most road draft systems work best at highway speeds, when the tube, (supposedly,) creates a vacuum from the slip stream, as the car moves forward. A newly rebuilt motor is likely to produce even more pressure inside, due to the better seal of the new pistons/rings and valving. Picture your motor with oil under pressure trying to escape, especially at idle, or low speeds: if the factory attempt at relieving this pressure is inadequate, all openings, (seals, gaskets,) are subject to this pressure from within. This condition is an open invitation to leaks. The concept of a PCV uses the introduction of a negative pressure to the crankcase in the form of engine vacuum. Some form of baffling at the point of entry/exit of the plumbing is sometimes necessary, depending on the location of the vacuum line port, to prevent suction of engine oil out of the motor. Usually a PCV valve is installed in the line to prevent back flow of air/gasses into the crankcase area when the motor is not running. In the few Model A Ford motors I've converted, I've installed a ⅛” pipe nipple to ⅜” fuel line into the valve cover of the motor, then, run a line to the intake for the vacuum source. (On one of these engines, the leaks almost completely disappeared, and the others showed marked improvements in the size of the puddle underneath and the dampness of the gasket surfaces on the engines.) The Mopar six has two such valve covers, and either may be a good candidate for the installation of the vacuum line. Looking at my motor, the running of a ⅜” line from the rear valve cover, up and around the back of the exhaust manifold to the vacuum port on the the intake would be pretty much a no brainer. I’ve read, and been told, that the choice of the PCV valve should be to look for a valve designed for a motor close in cubic inches to the one to be fitted. My past experience shows a parts counter man with some savvy can be helpful, here. Not to hijack your thread, but I’m thinking maybe the best way to prevent leaks is to possibly relieve the inside engine pressure that may be the main cause of them. I’m too new here to know if this is all “old information,” but a search of the site didn’t net any direct reference to a PCV installation. My 3 cents. . . GA
-
Very nice pictures, all. My first company, (Borden Chemical,) transferred us from my native MA was to Upstate NY in 1969. My sales territory covered from Rochester east to the VT line, the Southern Tier, and north to the Canadian border. I was headquartered in Syracuse where we rented a house near the University for six months, then bought a home in Fayetteville. I spent a little over two years there, and although the winters were pretty bad, I never met more friendly down to earth and caring people. I don’t miss the weather, but I often miss the folks and their simpler way of looking at life. I think our famous “Midwestern” values start in Upstate NY. JMO. Just to stay on topic, (sort of,) here are a couple of pics of my project '36 P-2 Coupe, way back then. . . GA
-
Ms. Plympton, our '33 PC coupe, showing off her new red shoes, 16" '34 Plymouth wires, (egads, what a difference in handling!) Also now strutting the "correct" tail light stands from NC Industries, but cannot yet find '33 tail light buckets, (rare?) No worries, the F%##% look okay for a driver, me thinks. She's ready to finish the summer 'fore some more work this fall and winter, (provided she stays in retirement here in NC. And, yes, Todd, I saved the 17" wires and bias plies.) GA


-
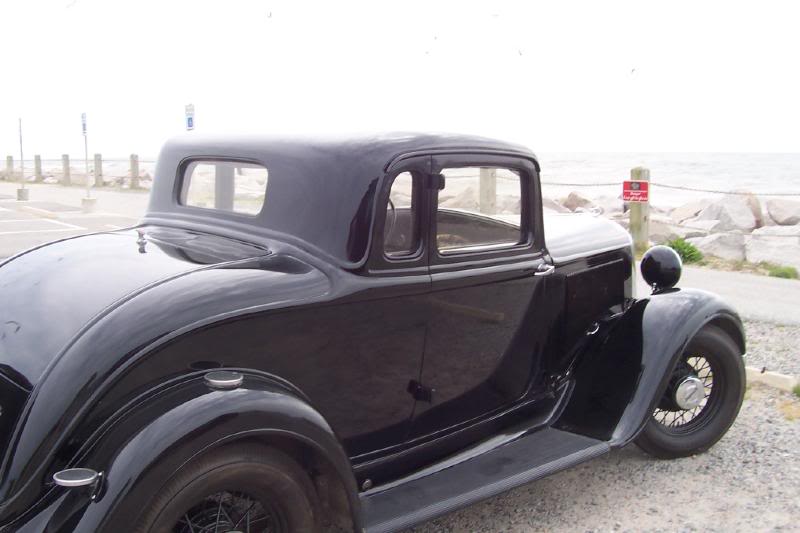
Ms. Plympton goes to the beach-Kure Beach, NC, Fort Fisher, NC, March, '10


-
Hey, Joe, Glad you’ve found a machinist to help you shed some light on your motor. Hopefully you will pardon my possible ineptitude, (stupid question alert!) as the inner workings of these old Mopar flat sixes are “new” to this old dog. I’m wondering if the lead paragraph from the “Technical Tips” page of this board may hold a clue? “The water distribution tube provides a vital function in cooling your engine. It directs cooling water in the upper block and valve area. Generally it is removed for inspection when an engine is overhauled, and replaced as required. However, in my experience, many production rebuilders do not perform this repair because the tube is rusted in place and difficult to remove. Failure to replace a rusted out water distribution tube will certainly lead to hot spots in the block and future problems.” . . . I’m just sayin.’ GA
-
At least I hope it went. Thanks. GA
-
To answer Eneto-55’s question about the chemistry of a de-rusting tank, to my recall, the solution is alkaline, and I think phosphoric acid sounds correct, but I am not a chemist, and do not have a good enough memory to be more specific. Any of the de-rusting companies advertising in HMN or on the internet could answer your question. The one thing I am sure of is the process does not involve muriatic acid. My experience is the water jackets have by far the most accumulation of caked and flaky rust inside. It is very difficult to even see this, other than to peer down inside of a water passage while the head is off. The water jackets are where the moisture from changing temperatures collect and raise havoc with the raw cast iron inside. A running engine with a de-rusting coolant, or anti-freeze can keep ahead of this condition. A stored engine, not so much, especially one of the vintage we are fooling with. There are many small passages that will benefit from a couple week soak in the right solution. As far as your oiling the tops of the pistons with liberal doses of ATF, this was a good move on your part, and probably saved the rings from trying to marry the cylinder walls. But, I think 30 years is an awfully long time to rely on any oil/grease lubricating values holding up to ambient temperatures and moisture. Just for an example, a rebuilder coats the cam lobes and lifters with a lithium style grease specifically formulated for those first few moments of start up/run in. I suspect this grease could get hot over the years of sitting in the summer months, and eventually begin to break down and maybe even dribble away from the lobes and lifters. A dry start on a cam is almost a guarantee lobe wipe out. Result: new cam and lifters needed. I agree with Joe’s answer about the limited time it will take you to disassemble the motor and check things out. I believe the time you invest in this fairly straight forward process could be worth a lot of time and maybe some $$ down the road. It is also a great opportunity to re-check all the machine work performed, and reconfirm all of your specific tolerances. Certainly the ATF flush you are proposing may help with some of the crud that may have accumulated inside your motor, but how about heavy rust, moisture, or worse, what about a big old dirt dobber adobe home, or mouse nest hidden away in there? I once found a dead mouse on top of a piston in an engine that was sitting for a long time, and was very happy that I’d not tried to start the thing without discovering that. At any rate, good luck with your project, which sounds like a great time! Just seeing the old car and some of the stuff you did all those years ago will be a lot of fun. Keep us posted. GA