


Dozerman51
-
Posts
286 -
Joined
-
Last visited
-
Days Won
1
Content Type
Links Directory
Profiles
Articles
Forums
Downloads
Store
Gallery
Blogs
Events
Classifieds
Posts posted by Dozerman51
-
-
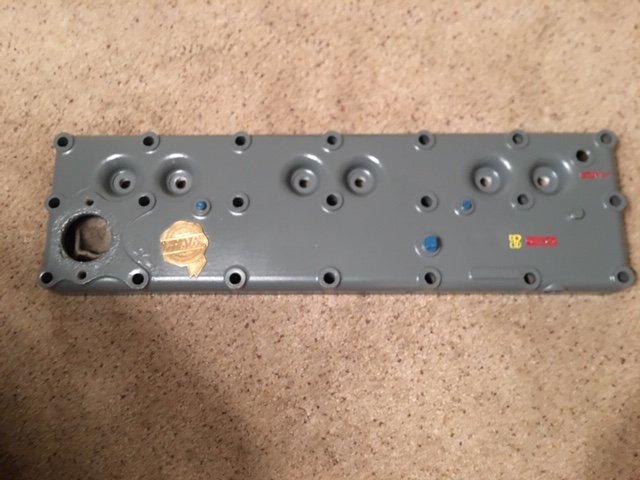
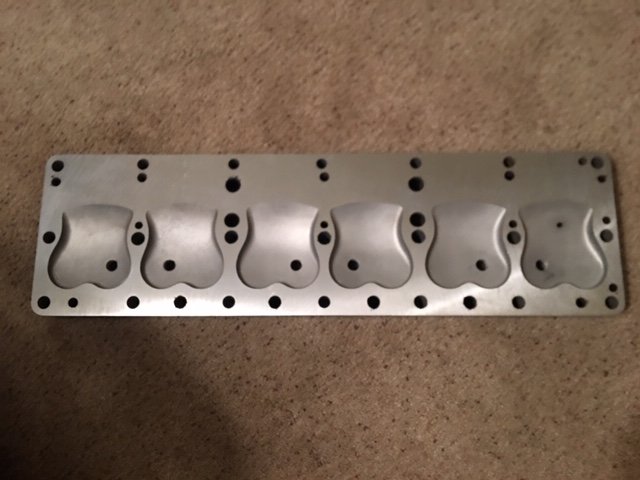 Here two photos of an Aluminum Head I picked up a few years ago. Soon, I hope to install it on the IND-7(236.6) which is installed in my WC 1/2 ton Military 4x4. it will save me weight over the 41' Spifire head I have on it now, and it has been shaved down for some higher compression. I have bought a Chrysler steel head gasket as they say to use steel instead of cooper.
-
 3
3
-
-
Is it a real ball bearing type or a bushing type bearing?
-
Yes, the 3.91 and 4.10 1 ton ratio’s are very hard to find. The VD & WD 1 ton trucks could be ordered with the 3.91 also, but again very rare. The only other option is to find a 54-56 Functional Design 1 Ton or the 57-59 Power Giant 3/4 ton or 1 ton 4x2 trucks with the 4.10 ratio. I have 4.30’s in my 1941WC 1/1 ton Military 4x4 along with the larger 900-16 tires. With the T-118 IND-7(236) in it I can cruise at about 60 with the Tach showing around 2500 RPM’s. Small hills I can keep it in 4th, anything more than that it’s downshifting time. I do have a set of 4.10 third members which I plan on installing in the truck one of these days and return to the original 750-16 tires. It will increase the RPM’s about 200 or so, but the smaller tires and wheels will save weight thus more pick up and less shifting on hills.
-
From what I have read, all Canadian built Mopars use the 25 & 1/4” block where as the US built Mopars used the 23 & 1/4” block for the Dodge and Plymouth’s and the 25 & 1/4” block for the Chrysler and Desoto’s.
-
Did you use Permatex 2 or similar on both sides of the gasket before installation? Another trick is to apply a small bead around the the outer edge of an oil seal before installation. On splined yokes etc I apply Permatex#2 on the splines before Installation as gear oil can work it’s way through the splines and leak through the washer and retaining nut. Half the fun is trying to have a 100% leak free vehicle. LOL.
-
The post-war Power Wagon was available up to 1978. The VC 1/2 ton military 4x4 was built in 1940, the WC 1/2 ton military 4x4 was built in 1941 up to about the middle to end of April 1942 at which time the WC 3/4 ton military 4x4 series were produced for the duration of the war.
-
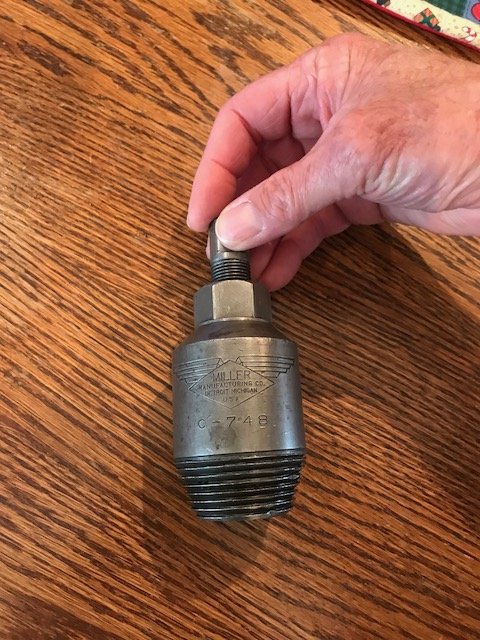
12 hours ago, Dodgeb4ya said:
Like This...
(Large).JPG.1cd6c0ca77dff8773bfc02ec1577025d.JPG)
Yes. That is puller the puller I was talking about. Bought one about 6 years ago used and like I said well worth the money.
-
A Military truck steering wheel puller is probably the best designed one for pulling steering wheels such as this. They are worth every penny. Hard to find, but they are out there on E- bay etc. You won’t ruin your steering wheel using this type puller.
-
Here is a photo of the oil filter line routing for the 1/2 ton WC military trucks. I believe the civilian trucks that had oil filters used the same routing. I routed the oil lines the same way on my WC military. I do have the slightly larger oil filter canister that takes the paper element, not the sock type element. I use a Wix 51100 in my canister.

-
Is the 180 Lbs Ft. Pounds or Inch pounds? I’m in the same boat. I forgot to punch mark the nut and pinion when removing the oil seal in my 8.75” 4 pinion third member in my WC-12. Thanks for any help.
-
I bought one of those tachs and installed it in my WC-12. Hooked it up just like the instruction sheet showed. 6 months later, the tach took a big poop on me. Sent it back for warranty work and on return, it still was not showing the correct RPM’s. Gave up on it. Two years ago, I purchased a vintage Sun D-1 type 3500 rpm tach. Along with the transmitter box, it has run like a top. Yes, the tach this is much larger, but it has the vintage look and most importantly it functions correctly. Hope you don’t have the same problem with yours, that I had on mine. Very nice looking truck by the way.
-
1
-
-
Go to the 39-47 Dodge truck forum at 39-47Dodgetruck@groups.io and they will have all the info you need. You will have to sign up, but it is free. They are very helpful there just as this forum is helpful. Good luck on your project.
Joe Giraud
1941 WC-12(Salad) Military 4x4
-
The DU Route Van third member unit is identical to the PH 8.75” 1 ton third member. They came with 4.89, 4.30 and 3.91 ratios. The EU Route Van third member is the same as the 9&5/8” third member found in the WDX and later model PW’s up to the WM-300. The military M-37 also used this third member. Ratios for the EU Route Van were 4.89 and 5.83. People claim that the EU third member could be ordered with a 4.30 ratio, but I have looked at the parts book and have never seen the 4.30 listed. Perhaps it could have been a special order type deal, but I doubt it. Vintage Power Wagons has had some 4.30 ratio sets made up for the 9&5/8” third member.
-
I believe some of those Worthington models also the 8&3/4” CC full floating third member. Some guy on E-bay bought one last year or so and was going to get it running again. Also believe it had the crash box 4 speed also.
-
As far as carb kits go, I use the Hy-Grade kit from Standard Motor Products - the number of the kit is 101A. Napa also has a kit - 2-5066A.
-
 1
1
-
-
On 1/10/2019 at 10:21 AM, Worden18 said:
I scraped off the gunk and discovered a 4 and 3; 4.30 it is! I never would have known that was there if you wouldn't have posted that. Thank you!
Glad you found it. Sometimes it seems like the factory had kids doing the number stampings - especially on the frame serial number and the third member ratio numbers. I believe the 4.30 ratio was the factory standard with the very rare 3.91 and the 4.89 as options.
-
1
-
-
The T-207 WC-1 truck beds had the early “D” ring closed tie down hooks. The later T-211 and T-215 aeries 1/2 ton pick ups had the open type hook like is shown on the above picture.
-
1
-
-
Niiiiiice. Those Mopar flatheads run practically forever with the proper maintenance.
-
1
-
-
Wonder what 3rd member ratio you have. The ratio can be found on a flat rectangular pad located below the filler plug and reinforcement rib on the right side of the truck. Should be stamped either 3.91, 4.30 or 4.89. Most of the time you really have to wire brush the pad to get the stamped numbers to show. At least you will know what the ratio was out of the factory. Nice looking rig. Get it running and on the road. Good luck.
-
1
-
-
If you are going to have to replace the pinion oil seal, this is the factory tool to use to make your job a whole lot easier. You can also drill two holes on opposite sides of each other on the face of the seal. Make a pulling plate drilling one hole in the center of it and 2 holes that line up with the holes on the oil seal. Screw two long sheet metal screws through the plate and into the 2 holes on the face of the seal. Using a slide hammer with the proper adapter in the center hole of the plate pull it out. I have not tried this method, but it is said to work if you don't have the factory pulling tool. Good luck.
-
I’m sure it is a good freeway cruiser with the mods you have done to it. Nice color and the highlighted Dodge tailgate adds a finishing touch. I believe the Navy calls you guys Puddle Jumpers or something like that(Just kidding now). LOL.
-
I don’t know about “Seating” a bead at 100PSI, but I would think your head stands a good chance of being “Unseated” from the rest of your body at that pressure with a split ring wheel. Ouch!!!!!!!
-
2
-
-
Thank you for your service. My older son is a CPO in the Navy. He’s a Crew Chief and a rated rated Rescue Swimmer on MH-60’s. Transfered this past May to NAS Atsugi with the family. He’s got about 1 more enlistment to go before retirement. That will give him about 23 years. Hope to go visit him in the new year. I like your truck. Is it stock? Does it still have the 217 flathead?
-
Hello CWO.
Do not mean to pry, but does CWO mean your a retired Chief Warrant Officer?
1939-40 Chrysler Aluminum Head
in Mopar Flathead Truck Forum
Posted
Thanks for the compliment Radarsonwheels. Desoto39, what brand and or part numbered spark plug do I need for this head. Thanks for any advice.