-
Posts
943 -
Joined
-
Last visited
-
Days Won
10
Content Type
Links Directory
Profiles
Articles
Forums
Downloads
Store
Gallery
Blogs
Events
Everything posted by Jim Shepard
-
Update: waiting for another carburetor base plate/linkage bracket from George. His initial kit did not include one for the middle carb and what I discovered is that there is too much flex in the linkage without it. So much so that I could not get the carbs adjusted or synchronized. It’s going to be tight as to whether I will get this done by the BBQ. I don’t get back from Indiana until April 1st…
-
I had 18 complete Carter B&B’s to work with. Sounds like a lot but when you’re trying to match three it isn’t really enough. I finally settled on the only three that matched. They are E7T2’s which, as far as I can determine (and according to Tim Kingsbury), came originally on the 1950 through 1956 one and one-half to three ton trucks. This number, as you probably know, is stamped into the “ridge back” of the air horn. This designation apparently is only there to identify the original application - and provides a part number when ordering rebuild kits - it tells nothing about the internals. The other number is cast on the horn itself. In my case it’s 636. The middle section, or float bowl part, is 0-660. Finally, the bottom section or throttle body is 1-638. These parts represent the smallest sizes I could assemble based on what I had three of. The same goes for the jetting, which are the following: the pump jet is 48-75; main jet is 224-13s; step up jet is 149-56s; idle orifice tube is 123-31s. No modifications were done to the carbs.
-
Ok, got the gas pedal linkage dialed in and did a fuel pressure check. Some initial small leaking at two of the float bowl tops and two inlet fittings. That was at 3.5 lbs. of pressure at the regulator. They tightened up nicely and stopped. We’re ready for initial start up on the 5th. More later…
-
Almost there. Just need to tweak the gas pedal linkage a little more. Looking at March 5th for initial start up date. That gives the month of March to deal with last minute problems before the BBQ.
-
I welded a bracket on the log to imitate the boss on the factory manifold. It seems to line up correctly but I’ll know for sure when I get it back on the motor.
-
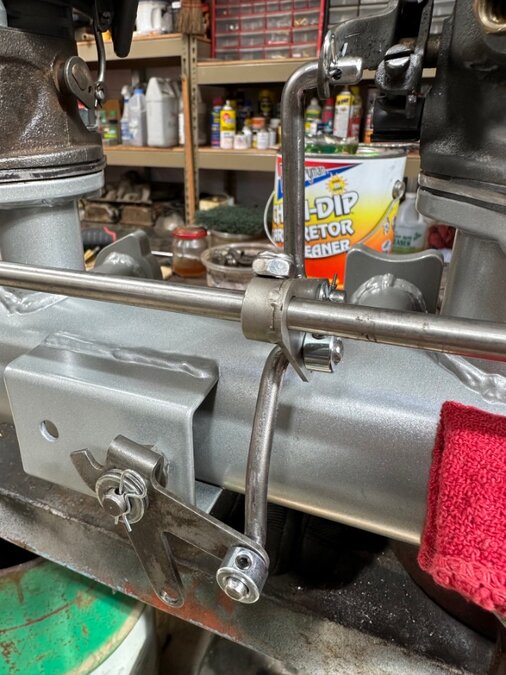
Ok, I think I’ve got the linkage dialed in. Just had the drill one additional hole in the middle arm. Otherwise, the George Asch linkage kit works great. With the cold, wet weather I decided to powder coat the manifold. That ended up delaying me an additional week or so.
-
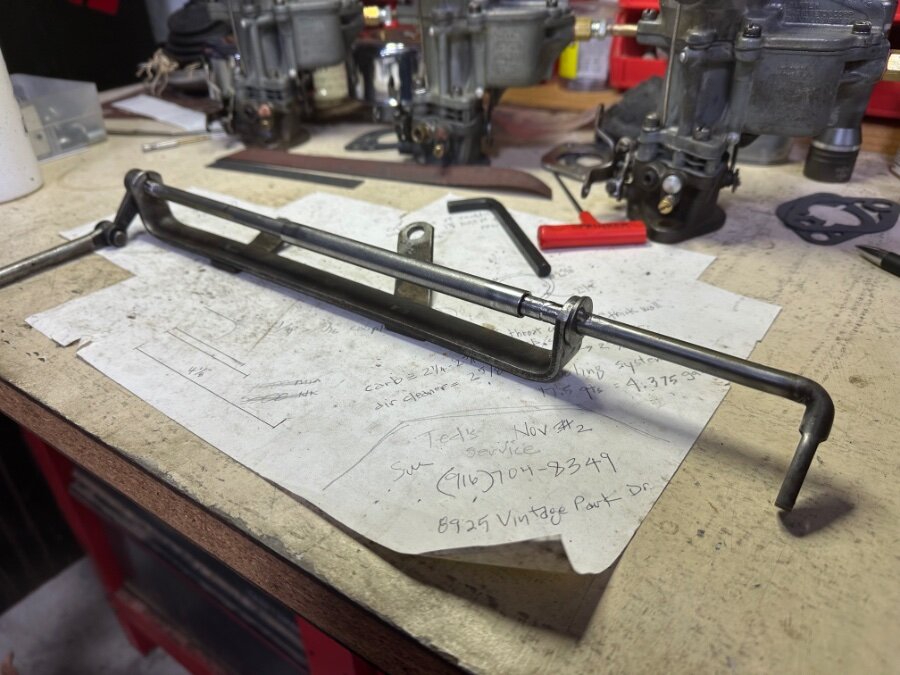
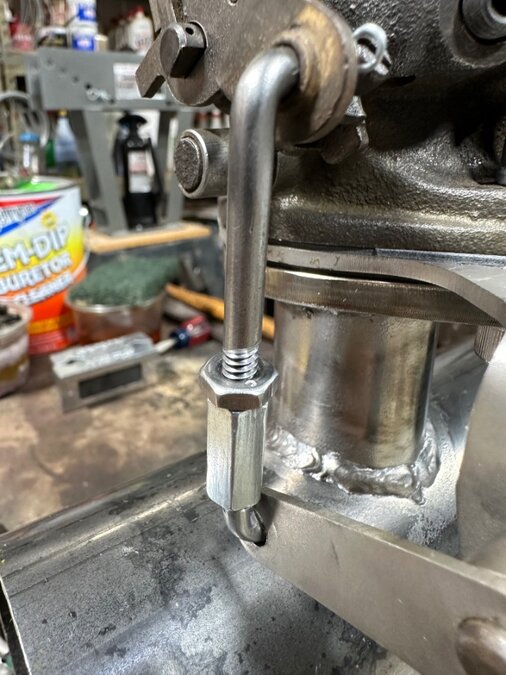
I extended the rod by cutting it and slipping a tube over the ends and welding it.
-
I had to cut and extend the gas pedal rod in order to line up with the new manifold. The push rod (?) that is between the pedal rod and the swivel on the manifold wouldn’t clear the back of the manifold, which is about 3.5” further away from the block than the factory manifold. I’m not sure of the terminology I’m using so I hope you guys can follow. Anyway, maybe a photo will clarify it.
-
It is tight. The truck motors seem to be tucked up into the firewall more so than the cars.
-
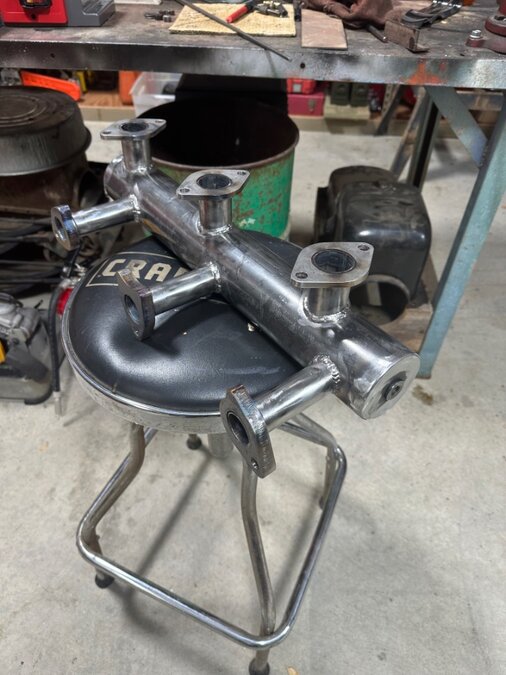
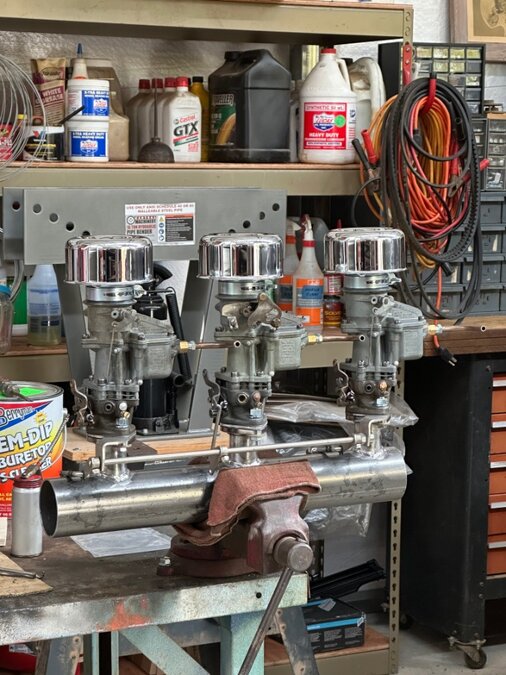
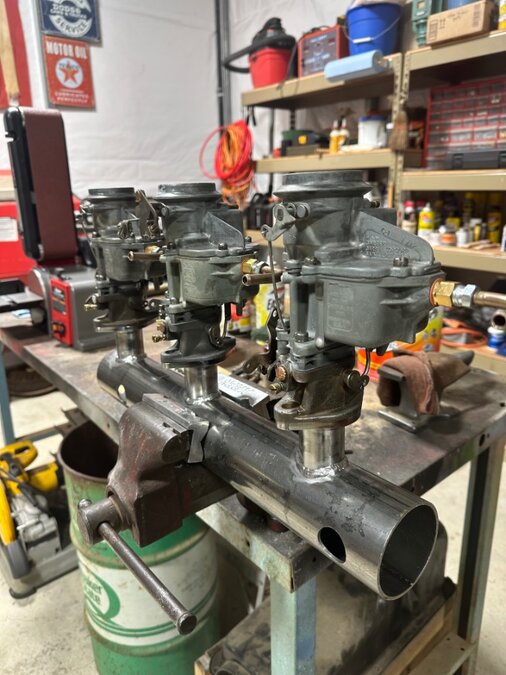
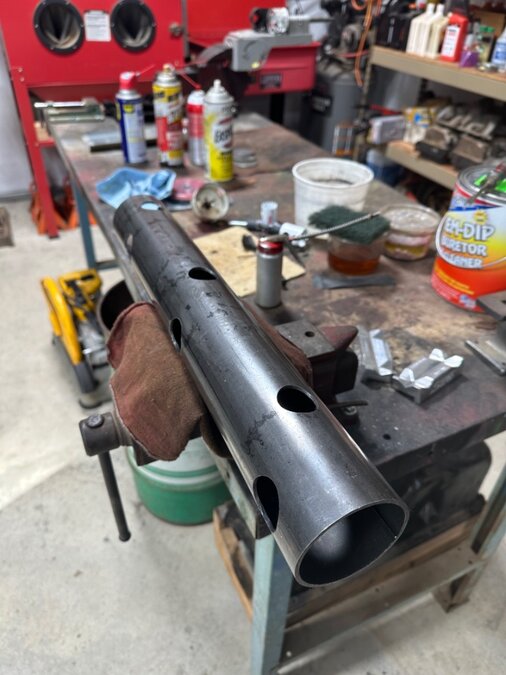
The threaded bung on the end is for vacuum gauge…
-
Here’s a better shot of just the manifold. I’ll weld some bolts to the carb flanges to make it easier to mount the carbs…
-
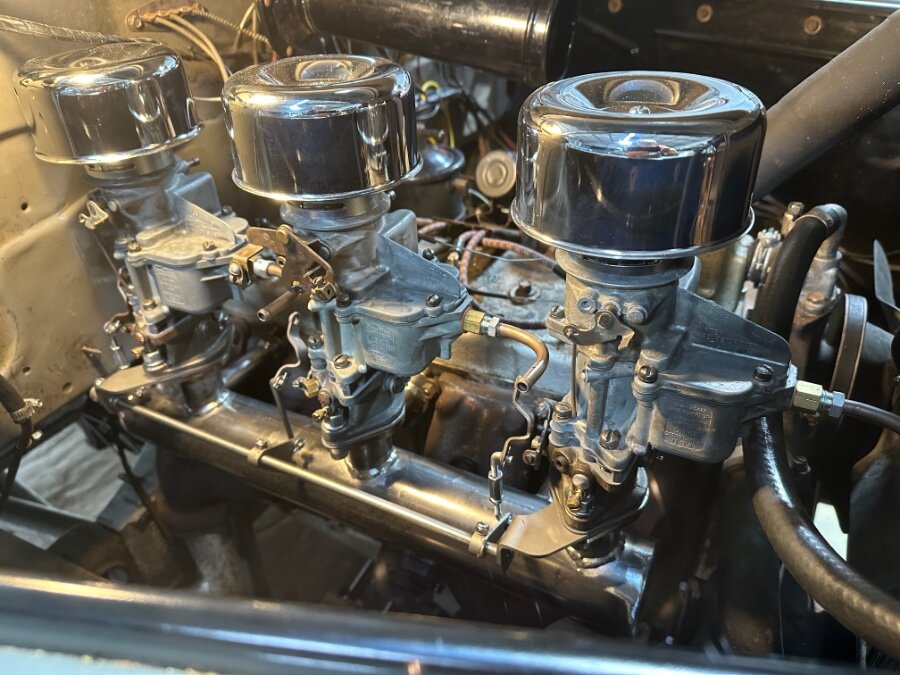
Finally got some more welding done. Enough to allow a test fit on the motor. Everything seems to fit with no clearance issues. I was concerned about the firewall but it clears it.
-
Did Chrysler have an illustration of this setup in any of the parts manuals?
-
That’s it! Thanks…
-
What I’m after is an illustration of the one that comes up from the driver side and crosses over the head. As I remember there is some kind of swivel thing on the head and between the gas pedal and carburetor. I think these were on the MOPAR cars of the late 40’s early 50’s that had the flathead six.
-
They don’t all come up on the driver side and go across the head?
-
Can someone post an illustration of the linkage from the gas pedal to carburetor for a flathead equipped car?
-
Didn’t really like the pushrods that came with the Asche linkage - much too modern looking. So I’m making my own and trying for a more original look/design.
-
I got the stock intake manifold off today. Held up the log and it looks like it’ll match up pretty good. The only clearance issue was the hand brake cable, which I removed. I’ll have to figure out another way to activate the park brake…
-
My understanding is that there are some 3.73 pumpkins from MOPAR cars of the same era. Should be a direct bolt-in. Don’t know which makes/models. One side benefit is that you get to keep the hand brake…
-
Got some more welding done. Also mounted George Asche’s linkage and finally found after market air cleaners that fit. As it turns out, I’ll have to modify the linkage some, but the main parts (rod, levers, flange bases…) should work. Gettin’ close to removing the stock intake and carb. Gotta be done by April 5 so I can show it off at Tim’s BBQ…
-
Well I got some welding done on the manifold. Welded the three carb intake runners to the log. Next is the intake runners between the log and the block. Having the carb runners welded allows me to dial in George’s linkage.
-
I’ll probably just tack weld and then take the plate steel off. I decided to have the machine shop drill my holes. I needed an exact size that I couldn’t find bits for. Won’t be long now before the welding starts.
-
I’ve made my first jig. This will ensure the carb intake flanges and runners are welded to the log in the correct orientation and position.


