Crazyred
-
Posts
65 -
Joined
-
Last visited
Everything posted by Crazyred
-
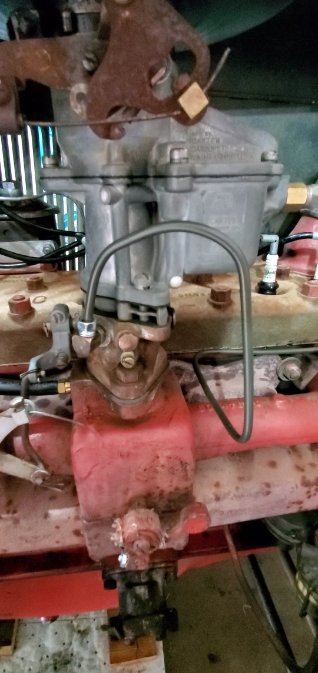
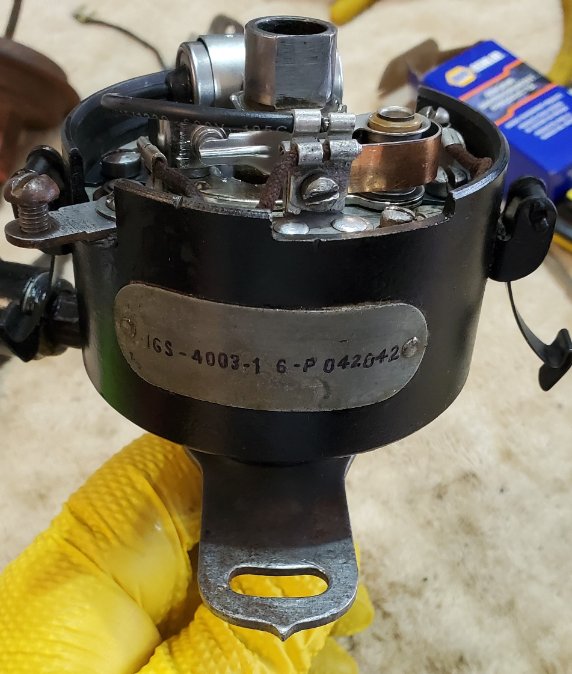
Well finally had some extra time and was able to work on the car again. Received a useful father's day gift and wanted to give it a try but first I completed my first dry compression test for the car and myself. I performed the test twice to make sure that I did it correctly and received the same results for both tests. The results: #1 - 95 #2 - 92 #3 - 100 #4 - 91 #5 - 90 #6 - 93 I would assume that these numbers are acceptable? Also, cleaned and gapped the plugs while they were out. Now to play with my gift, a new vacuum gauge!! As you can see the readings are different with this gauge. I have not changed anything other than gapping plugs and lowering the idle by ear since the last test, so maybe the other gauge caused some fluctuations? The car has a miss in it, so I checked the timing. First, I opened the window on the flywheel once I had it TDC and found no markings. @TodFitch my window is similar to yours but the timings specs are different on the pointer plate, which should be expected since it's a 1934 engine. I moved on to the crank pulley to look for markings. I figured I would remove the alternator (no generator on this car) to make it easier to hunt for markings. After some scrubbing and sanding, I was able to see markings by the existing white dot. So to help my old eyes, I added my own markings at every 5 degrees and a line at TDC and 3 degrees after TDC which is the settings for this engine. After reassembly of everything, I placed the engine on the 3 degree mark, checked the points setting at .020. Started the engine again and the miss is still there. Adjusted the dwell to 36 again and no change. Loosened the distributor and rotated and no major improvements. Rechecked all vacuum connections and no obvious leaks. I went so far as to take the carb off again and check the internals to verify that I reassembled it correctly the last time. Found no issues and after reinstalling the carb, still had the miss. Frustrated by this point, I decided to remove the distributor after setting it to TDC. Once removed, I checked the vacuum advance diaphragm and could not pull a vacuum on it. So there would be one source of a vacuum leak @keithb7and @chrysler1941. Just to mention, I replaced the tubing for the vacuum advance a couple of weeks ago as the other one had some pin holes in it. Also, this engine has a Carter BBR-1 carb with a vacuum port, not original for this year. So, I will try to find a new vacuum advance or have this one rebuilt. I went through the distributor and cleaned, greased, added new condenser and gave it a new coat of paint. While this is out of the car, what's needed in order to set the dwell on the bench? Once I have things back together with a new vacuum advance, I'm hoping this corrects the miss!?! What else should I be looking at?

-
I bought and installed a tanks inc fuel tank for my 1933 plymouth. I have had no issues with it. I did however have the filler tube welded to make a solid steel inlet and not use the rubber hose they sent. This may not be an issue for your car though. I would recommend them for my experience.
-
Todfitch, I always wondered about the original color of the car. I have a request in to Chrysler Historical for the build card but they are out due to covid but hopefully returning this summer. It's so interesting to see what has been done to these cars over the years to keep them running!
-
Wow, I appreciate all the feedback on this!!! ? I was hoping it might be something other than possibly having to tear in to the engine but that may be the end result. After reviewing the above links and info, looks like it points to these areas: possible bad head gasket, valves and/or valves guides, or vacuum leaks. I will start simple and check for vacuum leaks and timing issues first. For the vacuum, I have three sources / areas for possible leaks, the distributor advance is vacuum (autolite distributor igs-4003-1 from later plymouth engine), intake / carb area and intake manifold gaskets at the block. Does this sounds correct? I'll check the flywheel for timing marks again. When I open the cover plate, it has a timing pointer plate as well with the pointer on one end. The plate can be installed in either direction and that would make the pointer at the top or the bottom of the hole. Which end should it be closer to? I will also check the crank pulley closer and clean off some rust to identify any markings. Hopefully I can find markings on one of these areas. If not, I will have a new adventure with a back dial timing light. What should the idle rpm speed be for these engines? After setting the idle adjustment, I will readjust the mixture screw since it has no impact currently. Keith, thanks for the thorough write up. When I cleaned the carb I was able to soak it in a 1 gallon carb solution for over an hour. I had it completely disassembled and soaked all items and blew out all areas and tubes, etc with canned carb spray until it was clear. The carb was dirty and had several areas clogged but now is cleaned. I bought a rebuild kit from Hal Houghton which had all new gaskets as well. I removed the carb after installing to check the alignment of the intake/carb gasket. The gasket aligns with the single hole on the base of the carb so I think it's good in that area. I have not completed a compression check but adding that to my to do list. After the above steps are complete and I have the same vacuum result, I will move on to the valves. I would assume I would need to check the valve clearances and adjust as needed (another first for me). How would I be able to tell if the valve guides are worn out? As always, the advice is greatly appreciated and always impressed with the knowledge from everyone in this forum!!!
-
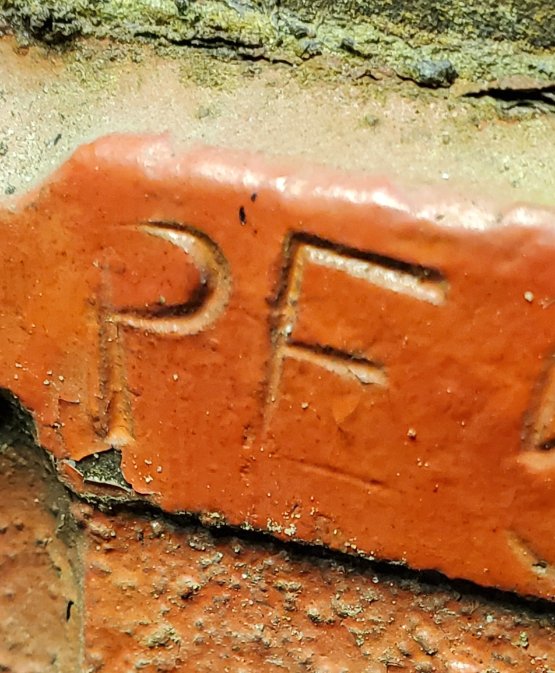
Soooo, I performed my first successful vacuum test, ever. I read and watched videos to research what I should do and have not seen the results that I had. First, let me tell you what I have done to the car so far. It's a 1933 plymouth pd with a 1934 PE or PF engine. The engine serial number clearly looks like it's PF but looking closer, it looks like it could be PE. Either way I believe they should be close to the same engine in specs?!? I have changed the plugs, points, rotor cap, and set the dwell to 36.2 degrees (which is another first). After watching @keithb7 video (thanks keith for the video!!) and seeing that the accelerator pump should give an extra squirt of fuel from idle when accelerating, I rebuilt the carburetor. This resolved the carb stumble from a dead stop to accelerating. Also, found other issues within the carb as well and corrected. I have not been able to check / set the timing and I am sure that is needed. I looked at the flywheel for timing marks but found none. I checked the crank pulley for the same but only found a white dot when it's at tdc for the #1, verified by rotor pointing to #1 plug. If there are no timing marks to be found, what other ways can I verify the timing? This is one reason I performed the vacuum test but as you can see in the video, there may be other issues within the engine. When I performed the test, I had the engine up to temp and the hose connected to the intake manifold below the carb. As you can see in the video, I adjusted the air / fuel mixture screw with no changes to the engine performance. I did while the engine was running, unscrew it all the way out and the engine died (not shown in video). With the erratic readings shown in the video (sorry for the poor camera shots) I am not sure what to do next and what it means. Any and all feedback is appreciated!
-
Thanks frank i didn't think about calling a rod shop. There is one close by I'll check with. If no luck locally, then snipers suggestion looks great! Thanks for sending the link over sniper!
-
I have a 1933 Plymouth PD sedan and need to get the single exterior keyed handle rekeyed. I have taken the handle to two of the oldest locksmiths in my area and they were not able to work on it. So before I kept driving around dropping it off or trying to find somewhere to ship it to, I figured someone may know of a locksmith in the Houston area that can work on these. Does anyone have any recommendations?
-
Well after exhausting the local auto stores and not finding any washers, I decided to try to anneal them before ordering online. This is another first for me while working on this car. Heated, cooled and reinstalled. Fired it up and backed out and noticed a pool of gas were the car was...,? Thirty minutes later and fixed a stripped screw on the fuel pump, time to test the filter. After driving and everything’s up to temp all seems sealed now and no fuel leaks either. Thanks for the advice and I’ll try that again when working with copper washers.
-
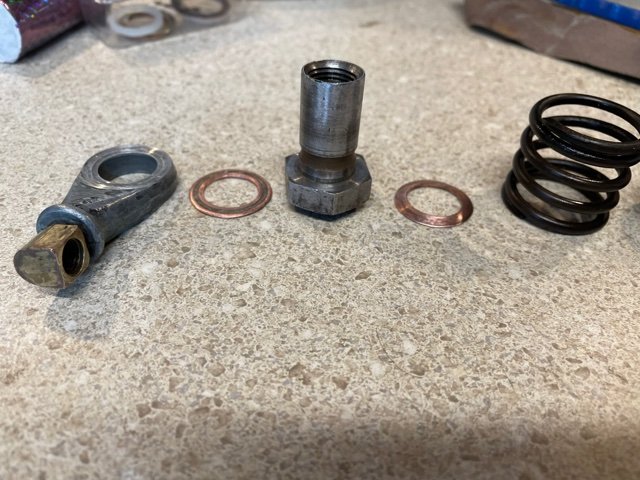
From a recommendation from other site, I went to an aircraft site and found the copper washer/fabric. They call it a copper asbestos gasket, which upon more research it appears to be a type of crush washer with the material inside / wrapped by copper. So could I replace this with a regular copper crush washer without the asbestos type material inside? Still on the hunt for a beveled washer.
-
Andy, that's a nice looking filter beehive. There are a couple more parts places to check but the go to's have not had anything yet. I will try some suggestions above and let you know if it improves. Thanks again for the feedback!
-
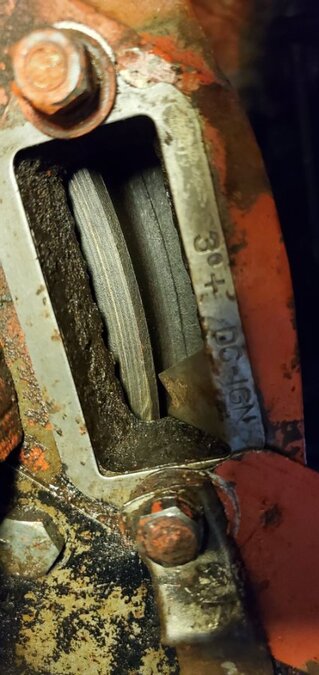
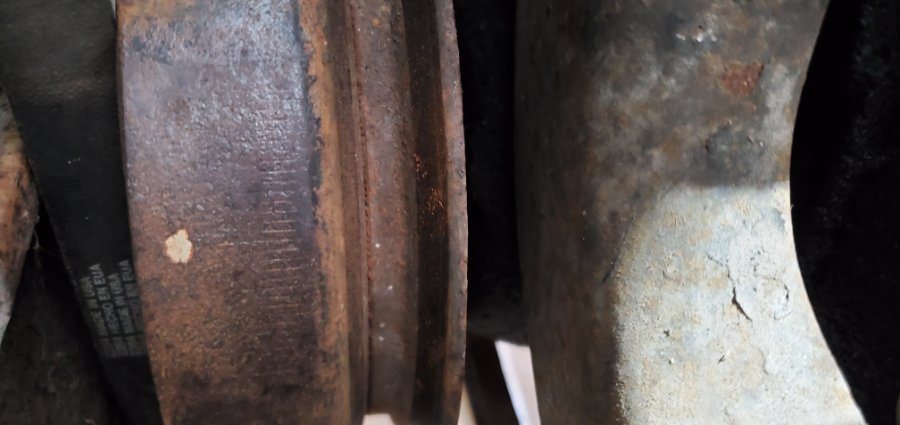
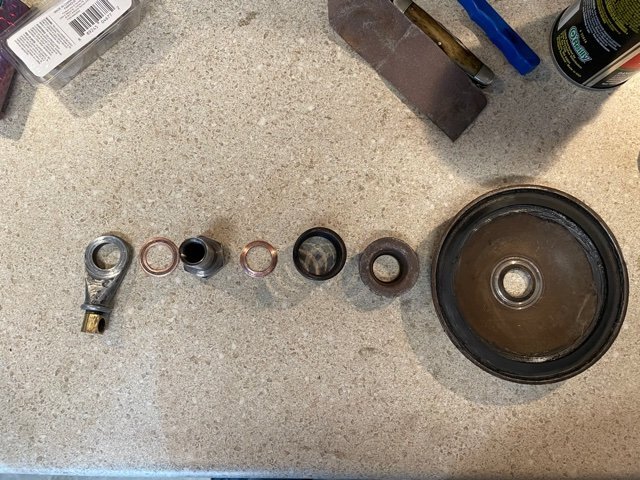
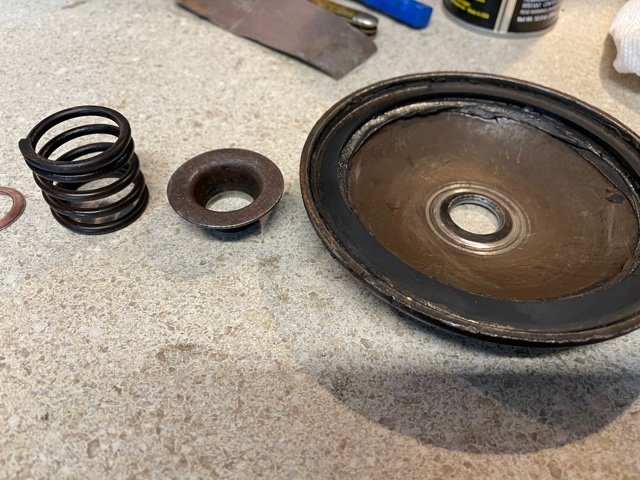
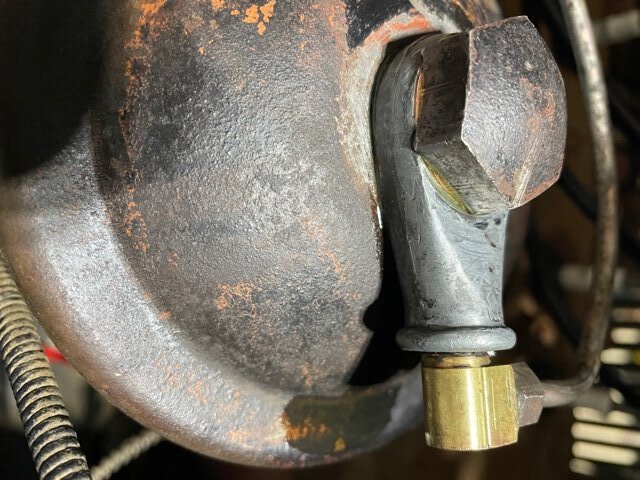
I guess these pictures would help ?


-
I have a 1933 Plymouth PD that has a 1934 PF standard Flathead 6. The oil filter canister has the replaceable filter inside. In cleaning out the oil system, I replaced the filter. This canister has a banjo type bolt on top with two brass or copper washers on each side to seal. Once assembled both of these are leaking. The top washer is flat with paper or fabric embedded and the bottom washer is flat on top and beveled on bottom. See pictures below. Does anyone know what this may have come off of and where I can get replacement washers? I have had no luck in finding any replacements. My plan b is to put a new original type throw away filter on. Any and all help is appreciated!