dangulo
-
Posts
41 -
Joined
-
Last visited
-
Days Won
1
Content Type
Links Directory
Profiles
Articles
Forums
Downloads
Store
Gallery
Blogs
Events
Everything posted by dangulo
-
@Plymouthy Adams thanks for the heads up, I've also seen some use moog p/n 8234 Here are some of the specs I found https://www.fmmotorparts.com/fmstorefront/federalmogul/en/USD/Suspension/Coil-Spring-Sets%2C-Seats%2C-and-Insulators/CS-CoilSpringSet/MOOG-Coil-Spring-Set/p/AMGCC850?categoryCode=CSCoilSpringSet#.W_2DaWhKiUk If I have mis-quoted please correct me 8234: Dimension - ID 3.88 inches Bar Dia 0.62 inches Spring Rate/lbs - 283 Load - lbs - 1668 Installed Height - 10.50 inches Free Height - 16.31 inches CC850: Dimension - ID 4.07 inches Bar Dia 0.75 inches Spring Rate/lbs - 605 Load - lbs - 1825 Installed Height - 8.75 inches Free Height - 11.65 inches The obvious difference is height and spring rate.. .Now I need to do further research on my 1940 Chrysler specs and try to interpret how spring rate and height get me to where I want... Also, sorry if this is an obvious question but what exactly is the spring pockets? Is that the same as insulator? If so mine had both upper and lower insulators along with a spacer only onthe driver side... weird but that's what i found LoL.
-
@40desoto I am going with rustyhope brake kit. Already purchased the parts needed for full conversion (from parts list) other than master cylinder. Since the front end needed a full rebuild my brake conversion has drifted to a full front end rebuild, so in other words, I haven't focused on the master cylinder yet... I know I need to but will do when I get there.. Man I also wanted to go with fatman dropped uprights but since the front end needed a full rebuilt I needed to shift the funds to making safe and fun to drive... My plan is to lower the front just enough where the wheel well meets the whitewall so to get there will be to either cut coils or purchase shorter coils. Ya will definitely be interested on what you end up going with... Will be looking out for that so please post share your insights on a master cylinder.
-
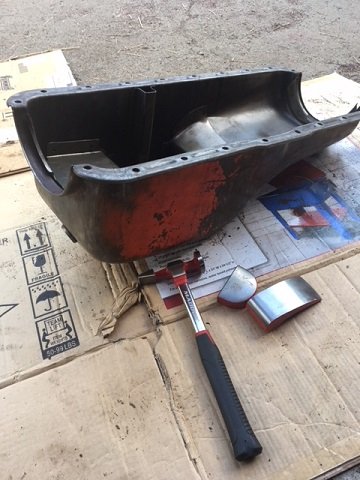
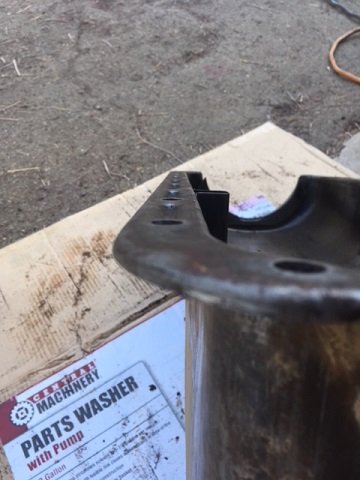
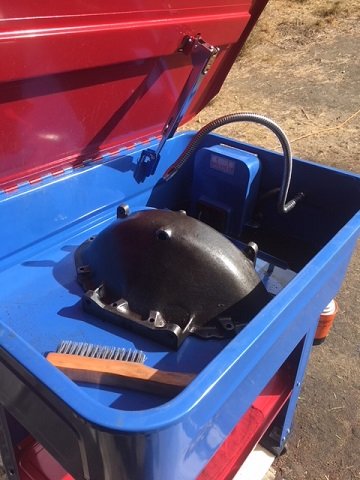
Happy thanksgiving to all, this was a great week here with family and friends. In addition, I was to be able to sneak away and work on the C25.. I was able to finally attach the lower control arms with new bushings/seals on both sides and so now to move on the upper control arms. Luckily I was able to find some american made Moog NOSR parts for the upper shafts w/bushings as well as NOSR eccentric bushing for both sides. Nothing against anything new nowadays but some of my experience with "new" parts made overseas has not been or worked for me the best. On the other hand, still looking for tie rods both inner/outer so any insight with positive feedback where to buy would be helpful... In the meantime while waiting for parts to come in...clutch cover before and after with my HB parts cleaner in action.. Next I plan to move onto the oil pan, which I been trying to remove little dents here and there... not to bad but after using my grinder with a wire wheel its starting to look promising. This is probably a good time to experiment with engine colors which I am leaning for bronze or copper color... well see as how that "pans" out...

-
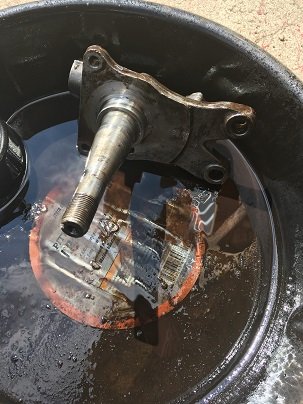
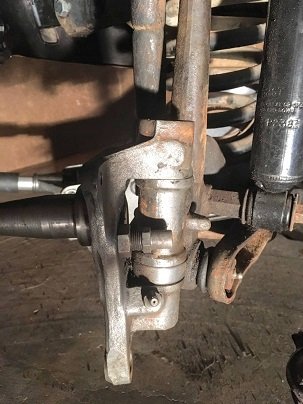
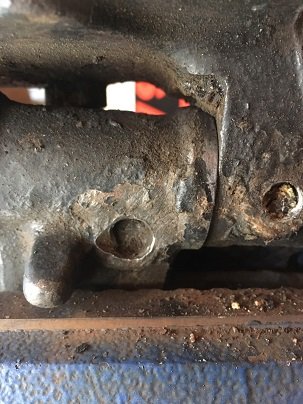
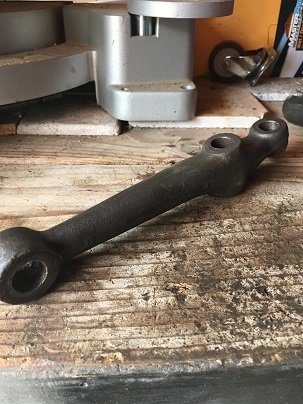
A little bit of progress this weekend, the lower control arm kit came in the mail (yay). Also, I got the king pins back from machine shop which were pressed and done right! They look really good and have no play so pretty excited about how they turned out.. The spindle bottom holes and steering arms have also been drilled/tapped for my Rustyhope disc brake set up. Next paycheck will be to order the upper control arm kit which I was able to find some NOSR american made parts.. But will still need to find some eccentric bushings. Here are some pics of how its looking at the moment.


-
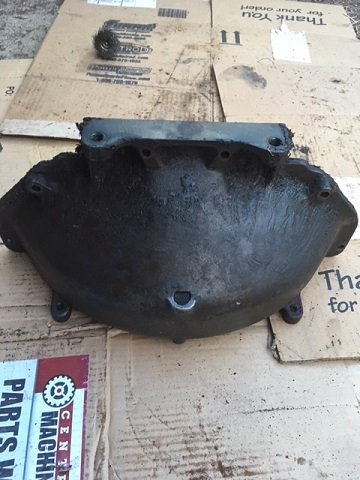
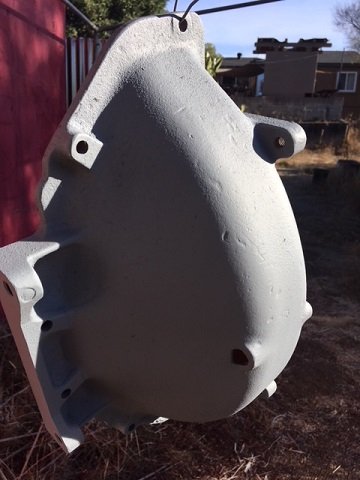
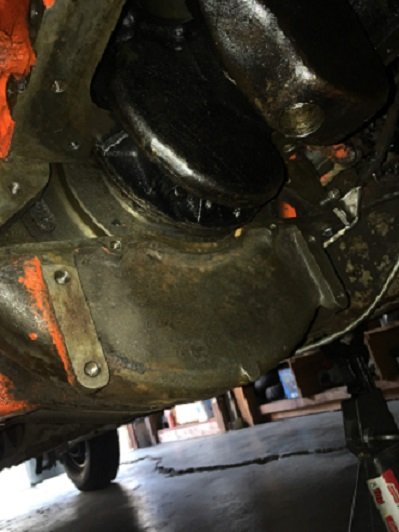
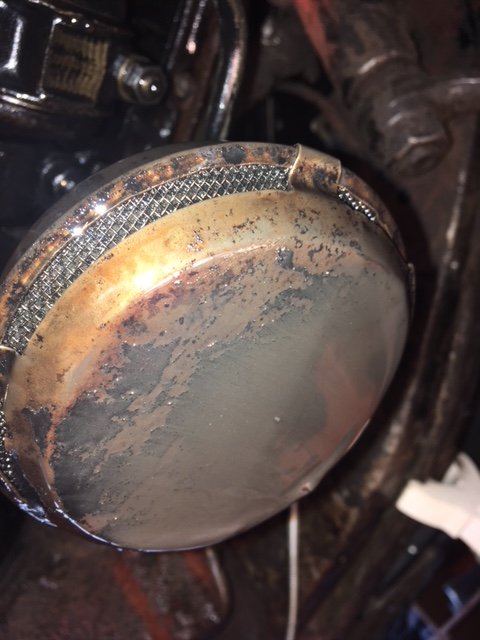
Yes - thank you all for the great feed back. As some of you mentioned, I am considering replacing the lower rear main seal since I already there.. As I am reading topics here on p15-d24 in regards to replacing the rear/front main seal, I should first remove prior to purchasing to match the upper seals (since I wont be pulling engine).. On a separate note, my only confusion is the clutch housing dust cover. Mine is seen better days so I will be replacing. The rubber or what seems to be cloth is riveted and if you fellas or gals know where I can find one would be great to know. I 've searched for hours last night and can't seem to find one. It covers where the oil pan rear meets the clutch housing. I'm not even sure if I identified it correctly as the clutch housing seal.. LOL
-
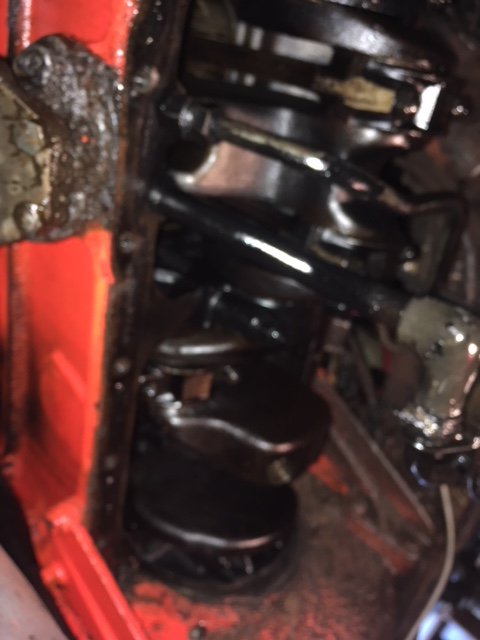
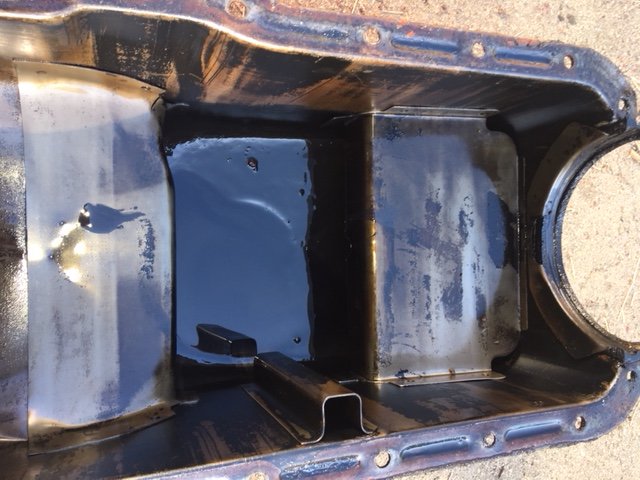
The journey is moving forward... as I am waiting and saving for front end suspension parts, decided to replace the oil pan gasket. Main reason is due to oil leaks all around the oil pan including where it meets the clutch plate. Seems that this would be a good time to replace oil pan gasket since it would be easier to access while the front end is take apart. Overall, there oil seems to be okay... I expected to see sludge but to my surprise no sludge.. yah! What I did find is a grey discoloring on the oil pump filter. Makes me think of water leak coming in but not quite sure... I will probably still replace the oil gasket as a rebuild is way out of the budget for the time being. Any pointers or gotchas I should be aware of? What are things I should look into while I have her belly open..?
-
@Adam H P15 D30 I think you might be right, called fatman to get some info, they suggested I send the one of my uprights to confirm that their mopar drop uprights fit. So might just do that since I will have more time than money at the moment. Also I figured I can work on other front end stuff while I save enough for the upright kit.
-
@Andydodge good to know just in-case and appreciate the heads up
-
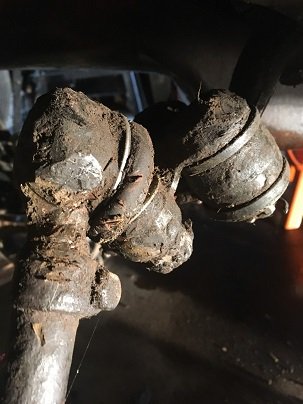
Today the tear down continued as well as some interesting findings.. This car seemed to be buried sometime BETWEEN 1940 and 2018 as I dug up all this large pile of dirt...lol both lower control arms had about the same amount of dirt which was a ridiculous amount LOL... The good news is that no more dirt after I used my scraper to break loose all the dirt following up with the vacuum... The not so good news is for my wallet will be to replace new inner lower control arms with bushings/rubbers.. but will be worth it. I am also considering upgrading the sway bar to a thicker size as I have been reading some cool stuff here on Pp15-d24 forums. That will be next on my list but one step at a time.


-
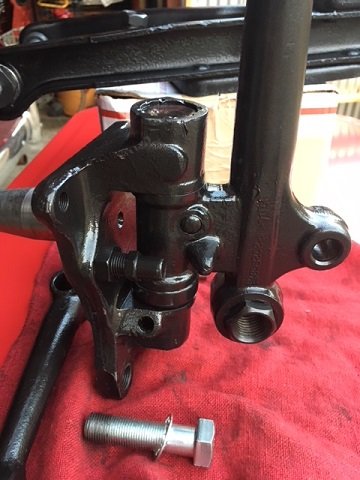
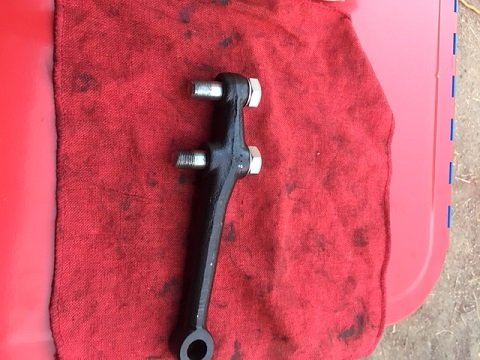
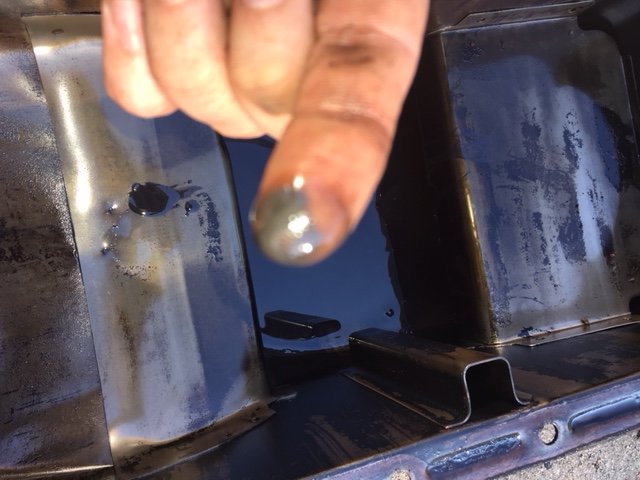
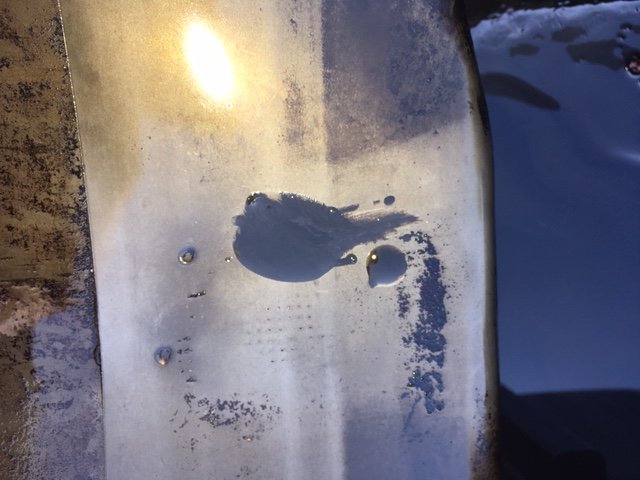
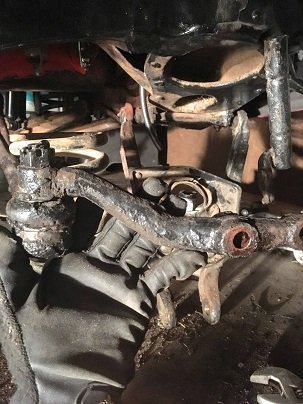
Hello All, Excited to get started on the front disc conversion for several reasons. One reason is that this will be my first conversion that I am actually tackling myself and second for all the reasons to make her safer. I feel that this will not be a weekend job but will actually take me longer than expected. After receiving the kit in the mail, I started the tear down. The next is what I am I found during the tear down.. Inner/Outer tie rods need new ends/bushings Upper and lower outer bushing need replacement Steering arm and basically everything else is gunked with grease and dirt/mud.... King pins And the best surprise is what seems to be a bent knuckle spindle support on the passenger side. I suspected something was fishy when the I disconnected the steering arm and could not turn the spindle without using massive force.. Well this just means that I will have to order some front end suspension to replace and make the conversion take a little longer than expected. On the bright side, once I started putting some elbow grease some parts were looking pretty good. Here are some pics I took while doing the tear down for reference which will help me remember where everything goes.. Lets just say that I am not surprised that I'm not surprised... hmmm sounds like a good country song title...


-
@Andydodge I will see if I can take some of interior tomorrow and upload them. As far as the interior, the only thing that seems to be original is the dash with all working gauges and front bench seat. Oh yes and before I brought the car home, I had a well known woody builder here in San Diego, CA by the name of Paul Dunn do a 12v conversion. Since the wiring was rotting and missing several portions in the circuit it was the best time to do the conversion. Your 41 is beautiful and digging the body lines.. Looks killer!
-
Many thanks for the kind words and yes I agree with everyone's comments and if it works for you all the best. @Adam H P15 D30 and Andydodge everything you you stated about safety and tools to get proper adjustments is how I also felt which let me towards the conversion. Not to take anyone's else view point away from sticking with stock drums but for this old gal were moving forward. Thanks Friends!
-
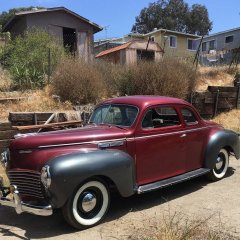
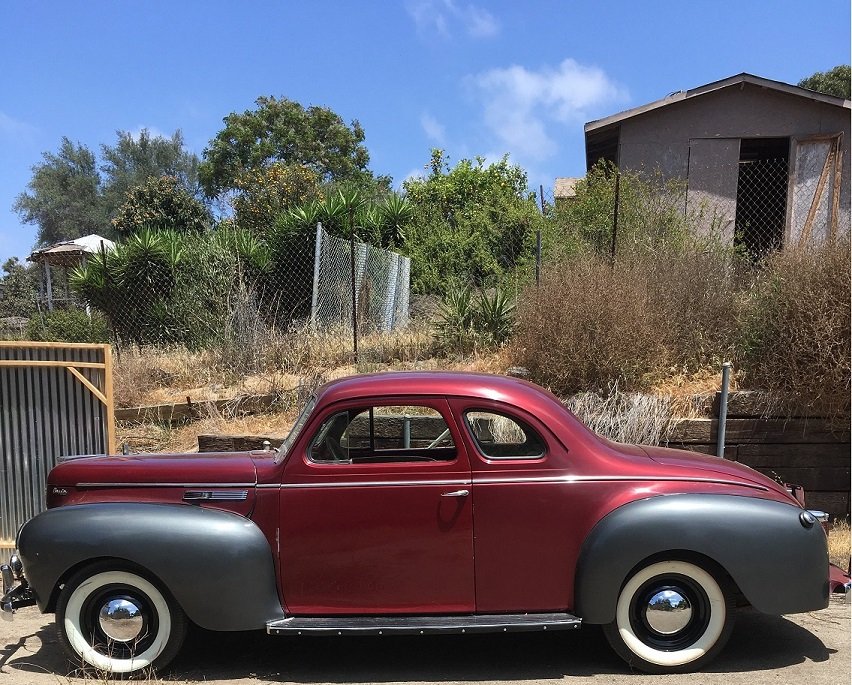
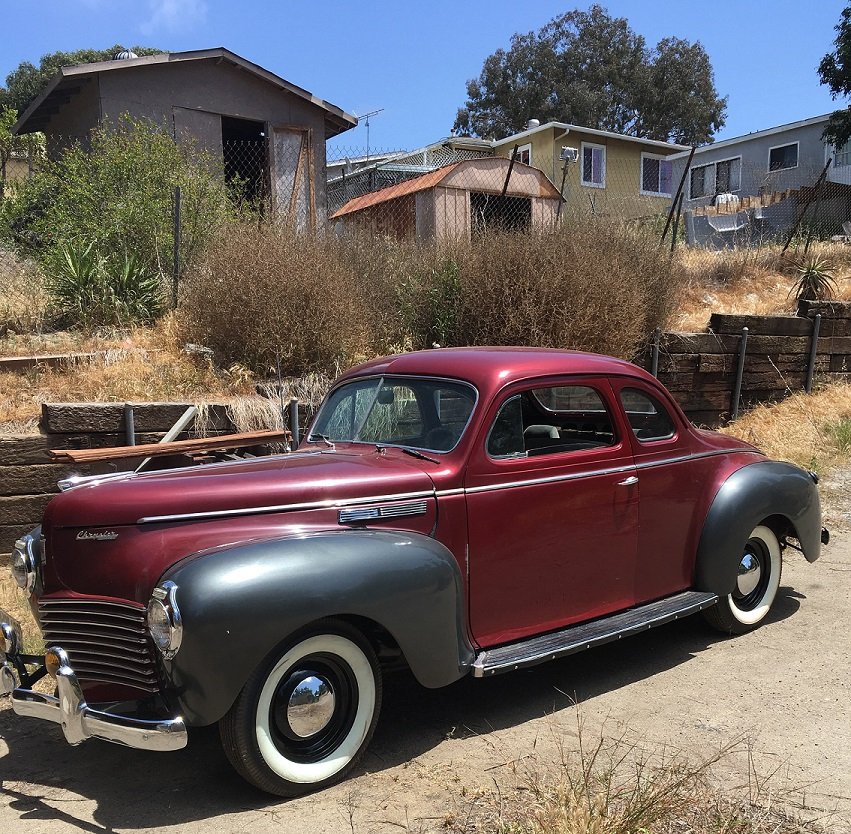
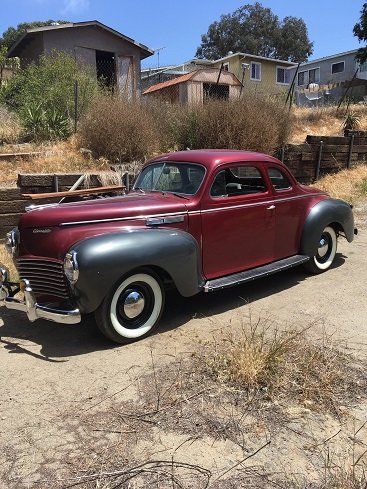
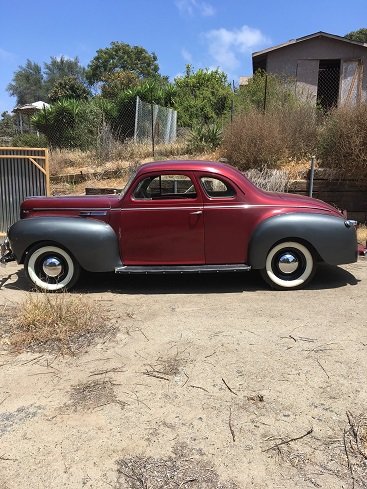
Ya, well here she is my friends... My goals are to make her road worthy and most of all safe. I lean to more of a stock fella so no major upgrades other than some under the hood upgrades. Currently running the Flathead 6. Pretty excited overall and enjoying all the existing topics to gain some useful knowledge here. Also the wife is getting jealous of my new gal but it's okay she's starting to fall for her as well


-
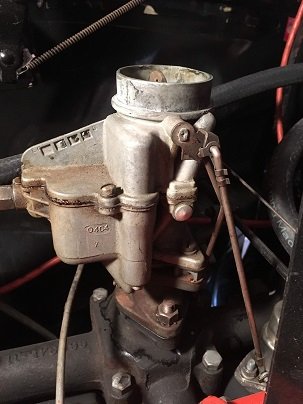
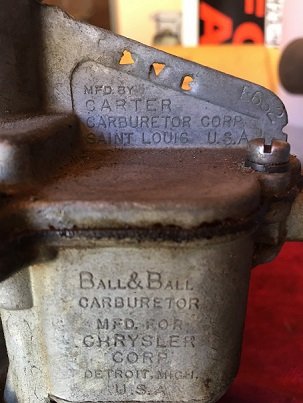
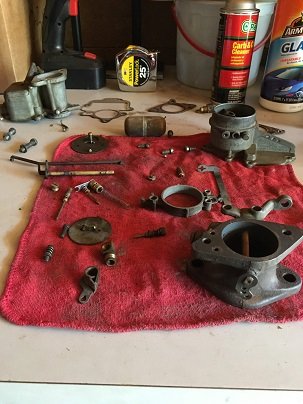
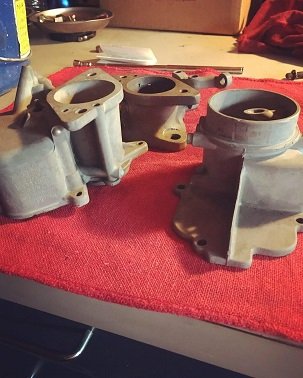
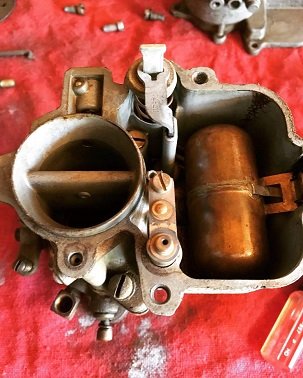
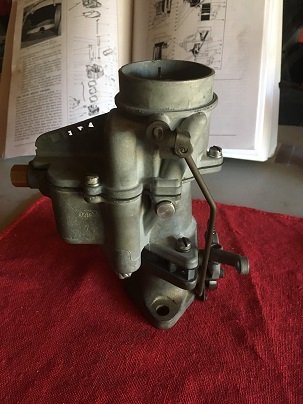
Hello all, this is my first post of hopefully many to come. I recently bought a 1940 Chrysler Windsor Coupe and one of the first projects that I am doing to make her drive better is rebuild the carburetor. As you can see from the pics below, stock carb to my knowledge which is a Carter B&B. Purchased the kit and things went pretty smooth (so far). The next project is to convert to disc brakes as the current drums are not stopping completely.... Honestly it was a little scary so going to convert to disc brakes. I recently purchased a rustyhope kit which came in the mail and pretty excited to get that started.