Search the Community
Showing results for tags 'Rewiring'.
-
56 downloads
1946 Dodge D24 Town Sedan Main Wire Harness Assembly April 14, 2012 Purpose of Document This document details the configuration of the Main Wiring Harness of the subject vehicle which is undergoing restoration by the author. The actual configuration of this Main Harness is not determined in reference documents available to the restorer. Therefore it may be necessary to fabricate a replica harness to replace the original harness as part of this restoration project. -
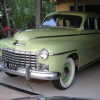
Hi all Thought I'd give the 'final' update on my rewiring project on "Dorothy". Yes, the job is done! After sorting out the starting problem I had, Dorothy is back up and running with new wires throughout. Brake light, tail lights, indicators, headlights, park lights, all instrument lights, gauges.....THEY ALL WORK!!! I know that any purists here might jump in and say that my method isn't period correct etc etc. I know its not up to the standard of something 'off the shelf from, say, 'Rhode Island Wiring', but I'm very pleased with my efforts and the overall result...proud almost! If nothing else, I'll rest sure in the knowledge that the wiring is clean & in good condition, reliable....and safe. I found the job quite satisfying. Time consuming, yes, but not particularly difficult really, just had to make sure to label EVERYTHING before it came off, and took plenty of photos to refer back to. I also had the D24 & P15 wiring diagrams to reference, and noted changes to colours etc as I worked along it. The ONLY residual issue I have now is a problem with the Ammeter not registering any charge from the generator, but I'll defer any questions on this to another post. Here are a few photos of the project, all nicely compiled in one thread. Sorry for the size. Thanks to EVERYONE on the forum who has helped me and given some advice for my various questions, AND for all of the encouragement. Regards Rob. 1. Old wiring removed and laid out on my pool table in the shed with some of the wires done already. In my opinion, taking the whole 'kit & caboodle' out of the car in one go is the BEST way to do a complete wiring job. Much easier on the knee joints and back... 2. Gauge side of dash (RHD remember...) 3. Centre cluster underway... 4. Split loom for the dash 5. Engine bay view 6. Inside trunk with fuel gauge take off 7. 13. Tail & Indicator LHS Continued...
-
Hi, Thought I might update as to my progress. Spent yesterday unscrewing, undoing, untwisting, yanking, pulling, pushing, unravelling, untying and....uninstalling my wiring harness & dash. Now, its out!! I think I was about 5 minutes into this job when I realised that my previous intention of doing this rewire job '1 wire at a time', was simply ridiculous. So, redirection of intent has seen me take out the entire loom and dash in (almost) 1 piece. Only place I've had to cut is for the wires running to the rear (under the headlining). I now have my dashboard and loom laid out on my pool table in the shed (covered, of course), with the wires running to the right positions etc. For anyone considering a total rewire - THIS IS THE WAY TO DO IT!!!!:D:D!!! Only my opinion of course, but at the very least its now an 'informed opinion' So, I'm now setting to and starting the much more relaxed job changing the wires over. I do have some questions hankering at me already, but I'm still researching these through the archives to see what I can find. Might have some in due course though. Rob.