DCJ
Members-
Posts
20 -
Joined
-
Last visited
Reputation
4 NeutralProfile Information
-
Gender
Male
-
My Project Cars
1949 Dodge Meadowbrook
Contact Methods
-
Biography
24
-
Occupation
Business owner, General Contractor
Converted
-
Location
Cincinnati, Ohio
-
Interests
Bluegrass
Recent Profile Visitors
The recent visitors block is disabled and is not being shown to other users.
-
Jim, I have not yet been able to get my block up to machine shop, but I'll try to catch some pictures of this goo if I find some more (there was some in the bottom of the pan when I removed it, I just havent messed with the thing in a few weeks). Give me a few days, it's going into the teens this weekend out here, so I have some other winterizing I need to complete! Thanks! It was pretty apparent as I started pulling down into this that it had been apart previously. I just kept finding random/ non-matching gasket builder, bolts, nuts, washers, etc. I will definitely know more when I get it up to machine shop. I just need to find time at this point. Had a few other bills pop up as priorities, and I needed to engage those first! THanks! I'll take a look into these threads for sure, I've been disconnected the last few weeks (got stuck in a few other projects that I hadn't anticipated). I really appreciate all the support, and I'll try to keep moving forward with this project asap! DJ
-
Sorry I disappeared for a few days fellas! I've been combing my manual the last couple days... My valve spring compression tool was not here on Thursday afternoon... THen it didn't show up on Thursday... and NOW I'm being told it will be here Tuesday. Not too worried though, I have plenty of time. Cars' been here since the middle of the 20th century, I think it can survive a few frustrating days with me (haha). Also discovered that the 'sleeves' I keep referring to, are actually referred to as 'bearing shells' in my shop manual (PG 222 Dodge Shop Manual, Section 8). I suppose that's also a rather 'on-the-nose' term to use for them as well. I guess just 'bearings' should work. I think I'm going to actually print out the specific tolerance guides out of my manual for this, and supply him with those, just in case. I'm located East of Cincinnati, OH. Specifically just outside of a tiny, tiny town called Sardinia. We have one bar, one pizza place, and a single gas station/ grocery deal called The Sardinia Market (or whatever...). If anyone is nearby, that would be pretty sweet beans right there...
-
THat's a good question. I suppose it all really comes down to cost, in a way. I like doing things myself an awful lot. If he's able to paint it and have it all ready to go, and it won't cost me much to do it, then it's very likely I'll have him do that. I won't be able to get the stuff to him today, but am planning on getting everything to him on Monday. I'll ask him to include the other stuff in his quote for me at that time.
-
I do, actually. Haven't spent too much time in it. I picked this car up on trade in April (first 'real' classic), and didn't really even get a chance to mess with it until a couple weekends back. I did order a digital version of the shop manual, and have that available to me (Ordered from Detroit Iron Information Systems), but am just now getting into this project in general, and there is a lot of information in there. Another guy over in a Jalopy forum had posted a video of a guy rebuilding one of these things, and called them bearing 'sleeves' (which, from a purely aesthetic perspective makes sense I guess). Maybe he was using the term to make sure there was no confusion about more standard/ recognizable bearing types in case someone was needing a more literal descriptory adjective to pair it with? Not sure, but I'll be sure to be a bit more diligent with my usage. This is my first full teardown... A LOT of learning progress has had to be made very, very quickly. I ask a lot of questions, some a bit elementary, really to make sure that I understand what I *think I understand, before I start making decisions about it. This stuff can get expensive, very quickly, and I really like my money safe (haha).
-
Awesome, thanks for the info! I'm really trying to get as many parts as I can ready for paint. Machine guy says he can get my block ready for that, but I'm not sure what that means, or if his procedure would be useful for the other components I have that I'd like to have done. This engine does have surface rust, as do covers and such. Just trying to figure the best way to go about doing this. I had a motorcycle frame done years back, prepped for paint, but I just honest to god can not remember what it was that I had done. I remember we had it 'dipped' somewhere, and when it came back, we just painted away at it. Is there a recommendation to get some of these smaller parts (brackets, manifolds, etc.) free of rust and ready for paint that does not include sandblasting them. If I have to have them blasted that's fine, but if the machine shop I go to can just do absolutely everything at once, that would be the bees knees!
-
Yes, I agree, I already talked to the machine shop, and they said they can do that (a lot less mess for me anyway...). I also don't blast with anything that isn't water soluble. Sometimes takes longer, but I've heard of horror stories about guys using glass, or oxide, shavings and chips that get stuck in places they shouldn't be... Or sucked up into things they shouldn't be in either. Definitely going to be worth it to let this guy handle this all at once. He says he can get it all the way prepped for paint for me (at least the block and head). Just as a question... Might be sort of dumb, but when they hot tank/ strip this thing, can they also do other things like some of my brackets and oil pan, valve covers, etc.?
-
Standby... This engine is a 23 1/2" block, exactly!
-
Thanks! If you find one, can you send in a link to that part? I also think you're right. #1, #3, and I beleive #6 had some odd spalling like this in those bearing sleeves... I can't seem to find any dates stamped on anything, and I also do not see any numbers stamped on the top of those pistons either. I do not know if the bore has been messed with. First step is to get these valves and springs out. I'm off to get a spring tool, and then I'll get this guy cleaned up the best I can and ready for transport. Will a machine shop already have the specs for what all these measurements are at stock, so that they can tell me if it's been machined before, or will I need to have those numbers ready for him? Found a shop who can look at it tomorrow and tell me what's going on with it, but I want to tanke sure I'm dilligent with my information when I go as well... Thanks!
-
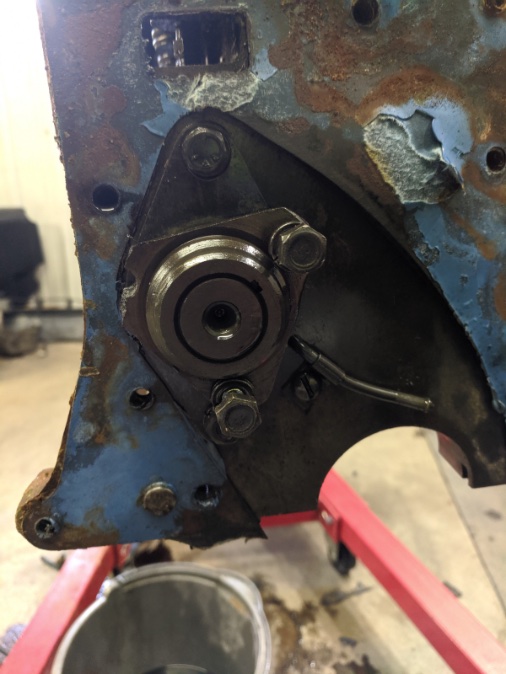
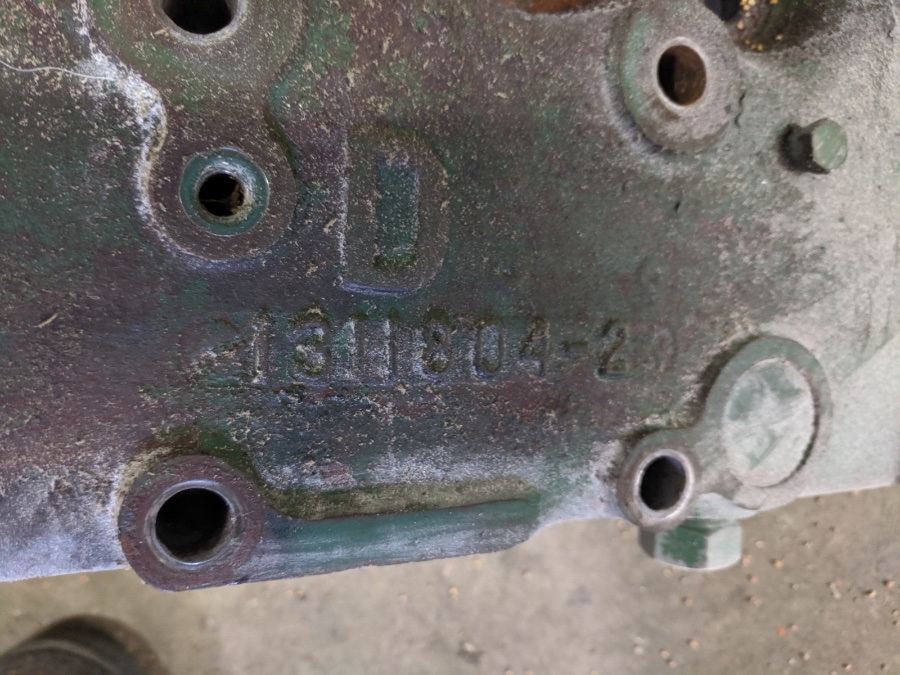
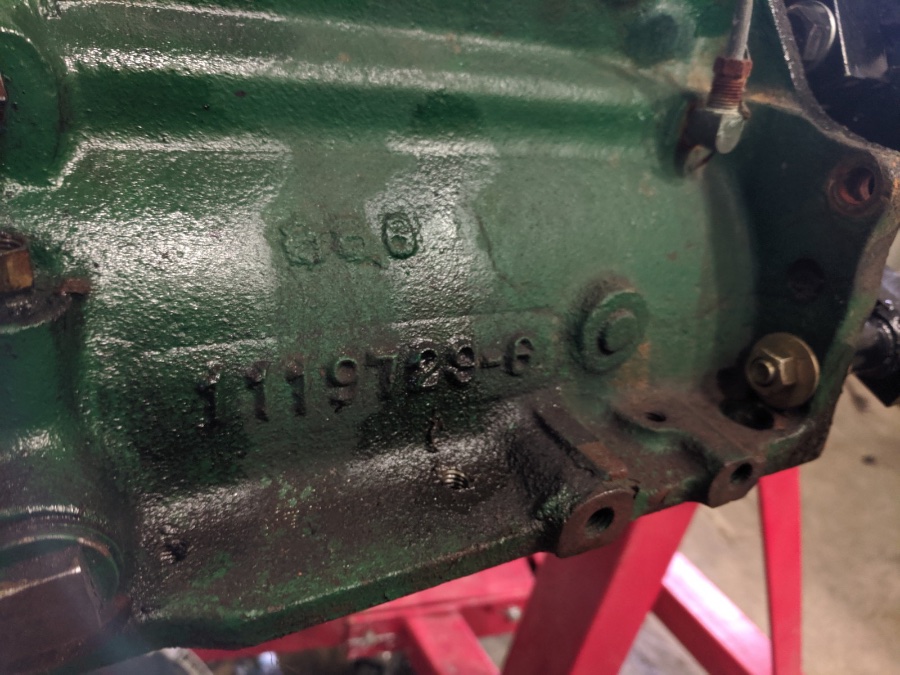
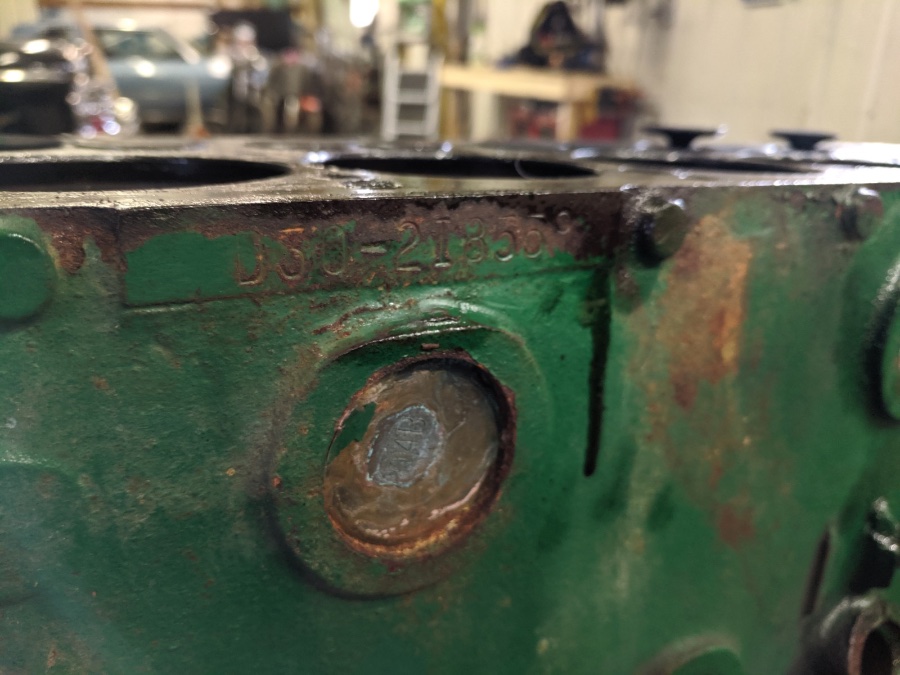
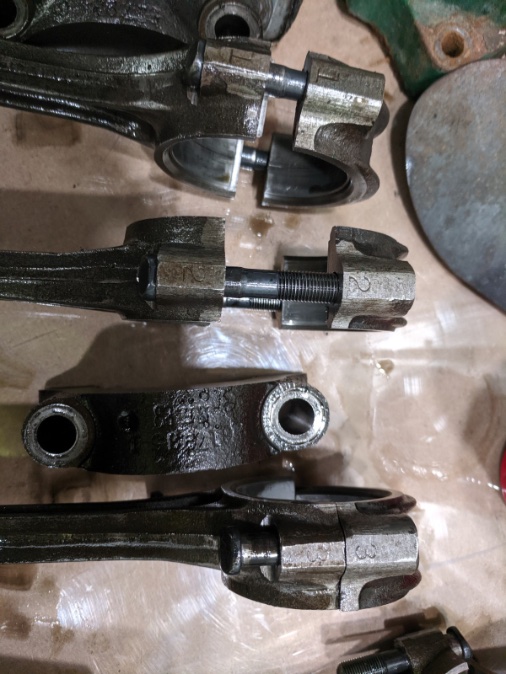
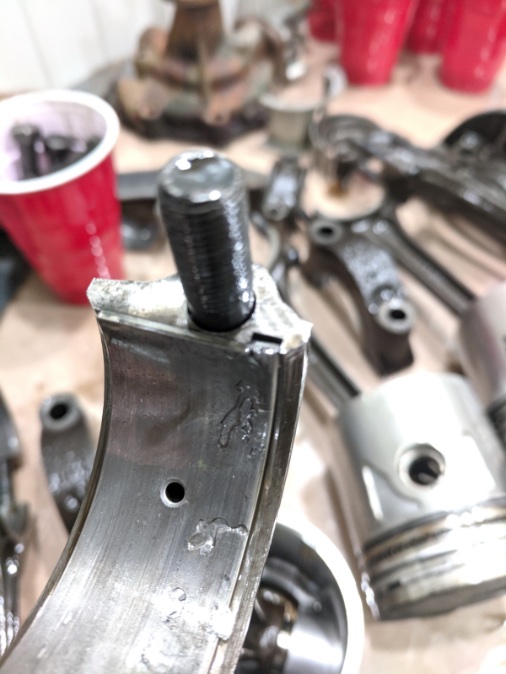
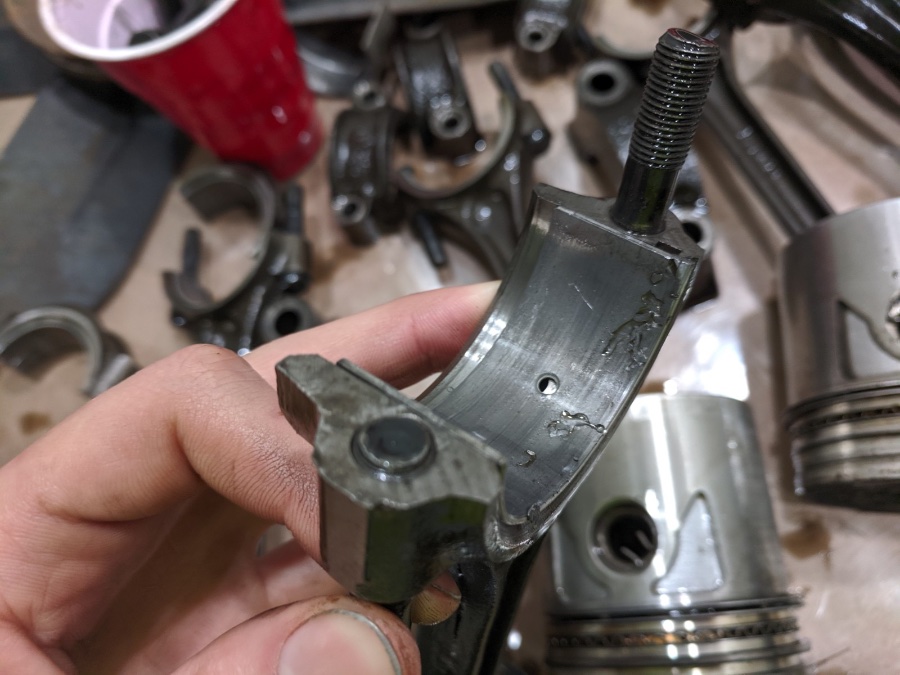
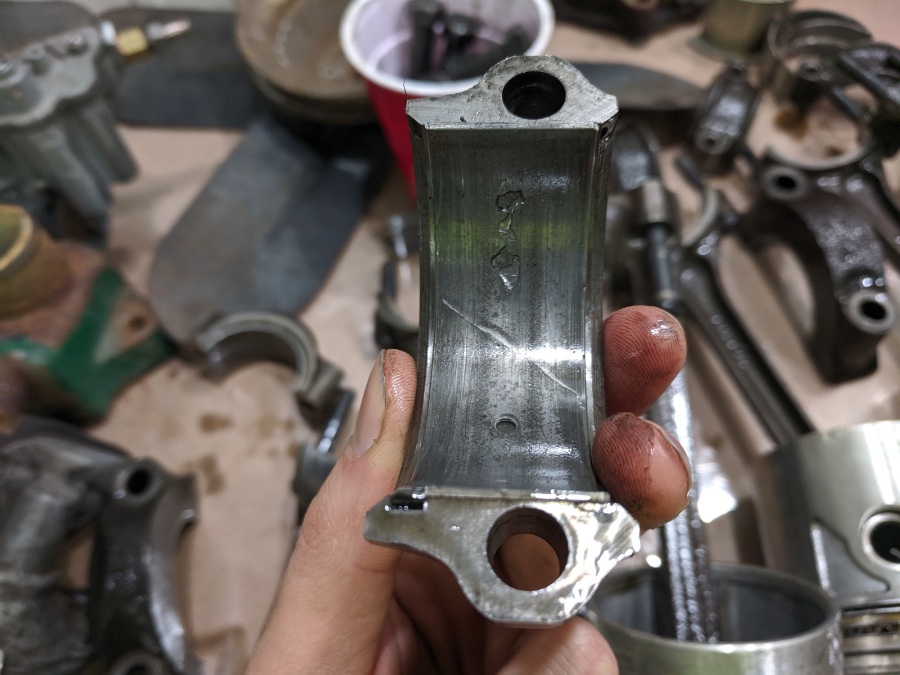
Sorry, I have a few new pics that might help! With my 'metrics' comment, I actually meant the different criteria. items, not literal metric system measurements, sorry about that, I was very, very tired. I hope some of these help. I'm going to call around a little and hunt down a shop today, and get a sense of what I'm looking at. With the broken part, I meant this end bracket/ flange deal at the end of this, see below (under timing chain cover). Also, I've already laid everything out in the order they are place. The rods all have matching numbers with the caps as well, I took pictures of their orientation. I also included a couple pictures of the bearing sleeves for the rod, and caps. There is a small depression/ cut out on each of these that hold them in the groove, they are just sort of hard to hold up and get a good shot of with one hand! I also have some pictures of the various numbers on the block, but I *think the one you're looking for is D30-2I8559 (upper side of block). On the lower side of the block (near firewall), there are the numbers: 119729-6 I am also including a picture of this number on the head, it doesn't match anything else around it, not sure what that means, or if it even matters, I figure I can't hurt anything with more pictures!
-
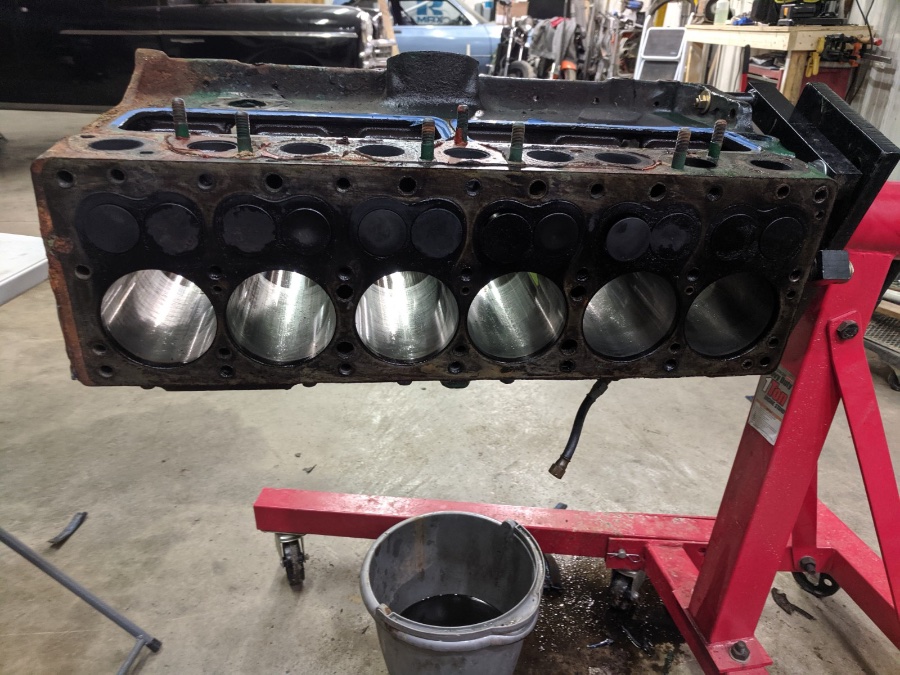
Thank you for the info! I've never pulled an engine completely down before, so this is definitely an ambitious project for me... I would appreciate if you stuck close by this thread, I'll be visiting it frequently as I move forward, and can always use all the help I can get understanding what I'm looking for/ at. I have a machine shop that I used several years ago to mill down the head of an ex's car I was rebuilding after she blew a head gasket, I'm sure they would know more. Do you have any idea how much it might cost for a shop to clean this block up (get it stripped enough for paint maybe/ clean up and verify the surfaces are flat and ready to go?) I just really don't know how to tell what I can/ should try to save and re-use, and what I HAVE to replace. I'm not sure how to determine if a cylinder has been bored in the past, and what that means toward my build today (if it makes the pistons I have useless, etc.). My BIGGEST worry right now, is trying to figure out what made this engine so damn hard to turn. I would absoultey lose my nuggets if I get this thing back together and its that tight again... I feared high compression at first (still a legitimate concern after discovering all this hooey inside)... But after I pulled the head I still needed a breaker bar with a pole on it to turn the motor. It was so hard I almost flipped the whole contraption over, stand and all trying to turn this thing. The cylinder walls are still smoothe, no gouges or scarring I can see. Not sure how hard this thing was supposed to be to start, but good lord heavens on high. I called a mechanic friend of mine who said he didn't think it should be so hard to crack, especially after running dual 1k CCA diesel batteries to it...
-
Sorry, I actually did NOT attach that picture... Those pictures were of the sleeves themselves, not the actual rod surface, there are no bearings underneath those that they ride on. They ride directly against the crankshaft. In that context though... The crankshaft surfaces seem to be super smoothe, I didn't notice any scoring, or marring of any kind on any of the rod to crank meeting places. Just some weird wearing on the rod to crank sleeves (they just seem really cheap, honestly).
-
That's a very good question... Not sure, actually. I can tell you that there was this strange, silver, metallic, 'goop' in there though. Not a ton of the stuff... but definitely enough to make me scratch my head. I thought it looked like a soupy version of Permatex anti-seize...
-
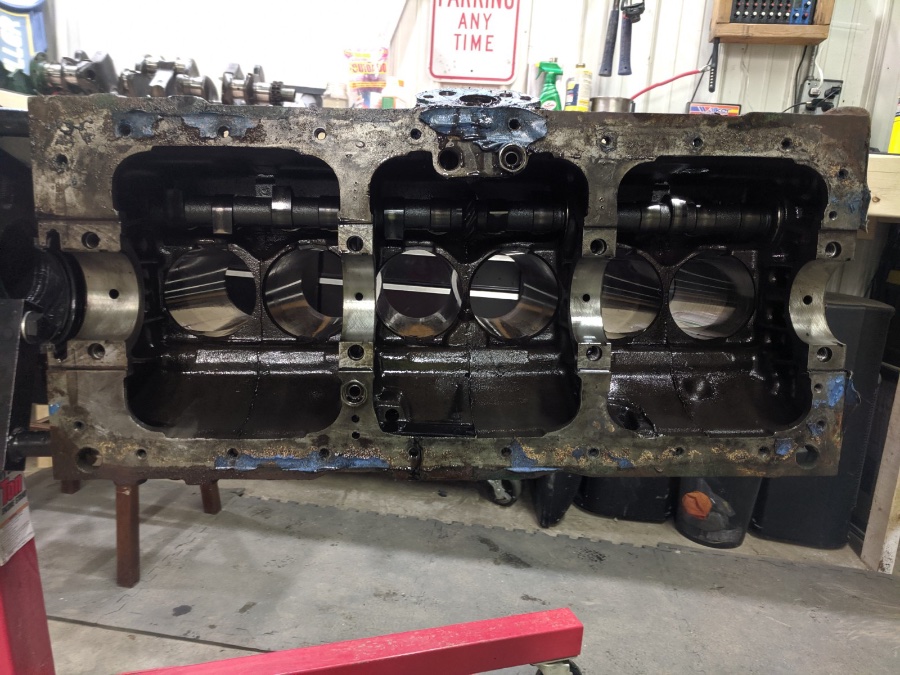
I have not, no, but I'm not entirely sure what it should come out to either. I do NOT have much of a machining background at all. I can take the measurements, but I'm not sure what to measure, or what those metrics need to reflect. I'll be hunting down a gauge tomorrow to add to the collection, but I was hoping to find a gauge for the bore as well, not sure what to go searching for. I also get a very, very strong sense that this motor has been 'rebuilt' before. there are numerous bright-blue gaskets all over the place, definitely modern, and they go all the way down to the deepest parts of this motor. I do not think that the pistons are original, and I don't know if it's been bored in the past, because I really don't know how to tell, or what to look for. THere's mis-matched bolts and whatnot all over the place as well. I'm definitely not impressed so far with the general quality of the build at this point. There's a bracket of some sort on the camshaft where it meets the timing chain sprocket... It looks like someone might have stripped out the original bolt that went into it... Then attempted to tap it and thread a larger bolt in (they accomplished that), but it weakened that end of the bracket so much that it cracked off (see above pictures).
-
I did BOTH, I lifted the rear dif, and I also removed the rear first (the bolts holding it in place were NOT studs like the back of the trans, they were standalone sets of bolts/ nuts and came right out! Thank you so, so much! Definitely saved me a bunch of headache.
-
Hello all, I made a post several days ago about my rough idle issue, I only just got the motor running a couple weekends back, so this is all fresh... I ended up rebuilding the carb (cleaned, all new seals, etc.), but it still ran sort of goofy. Well... I decided to get frisky with it, and just pulled the whole motor (frustration and boredom are a funny couple). A little backstory here... After I sat a new 6V starter, and a brand new battery in it, she would NEVER start under her own power. I mean, would barely turn over here, if it even did that most times. I ended up having to jump it every time (yes... I already know, bad for 6v components) off of my 24V Cummins (with 1000 CCA at that), and even then it was much, much harder than I felt it should have been. I ended up fashioning my own main battery cables out of much heavier 00 wire, and grounded it directly to the starter casing, hoping that it was a simple amperage issue dropping after having to run through the entire block back down to the starter... No dice, didn't help at all. Once it was running, I finally was able to take some readings coming from the generator (I already felt like I was going to need to re-do internals), and it was pushing a steady 7.5-.8 volts at idle, and a steady 6.97 was running back to the battery. I've never broken one of these down before, so I took a few pictures. I'm getting ready to pull the valves, and springs, and cam shaft out of this guy, so those will be gone tomorrow. I noticed on some of the slip-in sleeves at the ends of the rods, there were several places where there were strange 'chunks' missing out of them (also pictured). I figure they must have just been cheap, but I don't know exactly what I'm looking at either. I do NOT think that these pistons are stock. For one thing, they are missing the heat slit/ cut vertically down the side of the pistons ( I thought that was standard back then for these engines). I also noticed on cylinder #1, there was a bit of abnormal charring on one area of the cylinder above the first ring (pictured also). No sure if that means the cylinder itself isn't round, or if it's just normal buildup? I want to paint this engine, and put it back together, but I'm honestly not sure what to start getting into after I pull these valves. I planned on sandblasting it myself and painting (eventually...), but I clearly have other things I need to address. Do I HAVE to put new guides in for these valves, and do I HAVE to completely replace all the valves themselves? If I don't, can I clean them up and return them, or do I HAVE to have them cleaned up/ machined before I can do that? How do I know if the head/ cylinders have been machined before? Is that something that I MUST do, or is that sort of an extreme situation? If it has been, do I need to order new pistons completely? Does anyone think I need to order new pistons and rings? Never done this before, just looking for some guidance... Or a LOT?


