


ktb
-
Posts
73 -
Joined
-
Last visited
-
No doubt. I've got more time than money.
-
That's interesting, #3 & #4 are in fact very near the top. Makes it so you can't get any appreciable amount of magical loosening fluid on top of those pistons. Today I tried to hammer a wooden plunger handle under #3, but it went nowhere. The handle got so stuck in there, I spent the next 5 hours trying to get all the pieces of it back out. It was not a great day. I may go ahead and try brake fluid. What have I got to lose?
-
I would happily remove the engine if I had the means. I'll keep trying.
-
Freeing stuck pistons... Today I removed all the rod caps (again) and the front and rear main bearings (leaving the middle two to support the crank). I tried hammering a wooden dowel on top of each piston and pushing up from the bottom on a couple I could get to. Nothing will budge. So I'm back to soaking the tops of each piston with a diesel/ATF mixture. I tried a prybar on the ring gear long ago, but no crank movement. Is it advisable to try pushing up on the underside of a piston with a wooden dowel using a hydraulic jack? Also, is it okay to continue trying to turn the crank with no rod caps in place?
-
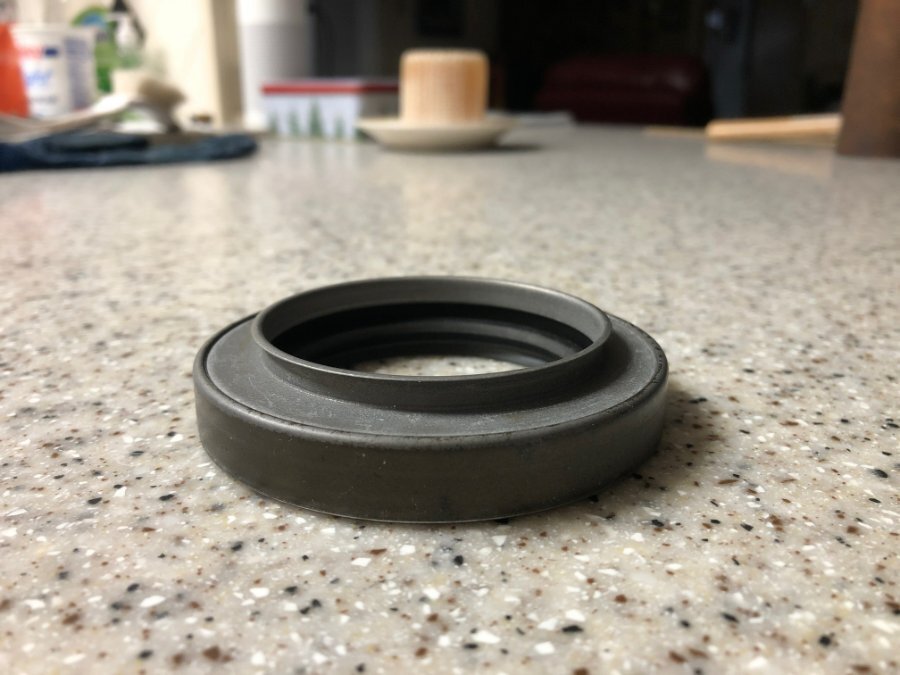
Thanks, does anyone know which side of the new seal faces out? My concern is the sharp protruding metal lip. Normally an oil seal has a flat side and an open side, and is pressed on from the outside toward the inside, with the flat side facing out, and the open side facing the oil or high pressure side. But as we know, on our timing cover, installation requires that the seal is pressed inside-out. In the case of the new seal, the "open" side has a sharp metal lip, but either side is flat enough to drive the seal in from. It will go on either way, but do you want the sharp lip away from the crank sprocket or toward it? I've been asking VPW the same question, but I don't know if theirs is the same sharp-lipped seal. If interference is a concern, the sharp lip should face outside the timing cover. But that leaves the "open" side to the outside, where dust and debris could potentially accumulate. Why they didn't design the new seal like the old one is beyond me. The old one has a flat side that you press on and a shaped side that protrudes perfectly through the timing cover opening; both sides are closed. If the main concern is that the rubber lip is oriented the same way as on the old one, then the new seal should be installed with the sharp metal lip facing inside. And I think that is the way most people on here have done it. But why on earth is there a sharp metal lip at all? Clearly I am overthinking this... P.S. Just received confirmation from VPW that they say the sharp metal lip faces outward... It probably will work either way, but assuming interference is not an issue, based on the rubber seal orientation I think having the sharp metal lip on the inside would be less likely to leak oil. The gasket for the timing cover oil seal that came with the set will not fit around the sharp metal lip, so there's another piece of evidence that the sharp metal lip should face inward.
-
OK, I guess I will try the National 411431 seal and check for interference. Does anyone know if there's a difference between it and the SKF 21820 seal? I am concerned about the raised lip seal based on this post by Dodgeb4ya and wonder if the SKF seal is flat on the inside. Or is the metal lip supposed to go to the outside? (comment by Powerhouse) https://p15-d24.com/topic/17364-timing-chain-cover/#findComment-163655 "A note of caution on the 2 styles of front cover seals. The one seal is flat on the rear side. The other style has a raised curved lip/oil slinger on the back/chain side of cover. The t/c picture shows a later style slinger type oil seal. This one was rubbing against the crank gear because of a slightly caved in timing cover! You can just see the metal shavings in the cover pic. It was making a slight rubbing noise. Took it out of a "Overhauled " engine. The pic of the timing chain is a modern replacement chain ( narrower) than original DPCD chain installed on the old DPCD gears-WRONG! Always replace all 3 pieces as a matched set. Bob Edited July 28, 2015 by Dodgeb4ya" "as per VPW's technicians....that's installed backwards. Metal lip out, rubber seal in. Edited March 29, 2010 by Powerhouse"
-
Thank you for that suggestion - RockAuto's part interchange lists SKF 21820. I can't tell if it's more like the original or the one with the sharp lip. And thank you for clearing up the oil slinger for me - I was not visualizing what it was or how it would get chewed up by the timing chain. Yes, I agree - 3/16" is a lot, but that's what I'm measuring since the National 411431 outer side can't protrude out the front of the timing cover hole and inner side has a sharp lip.
-
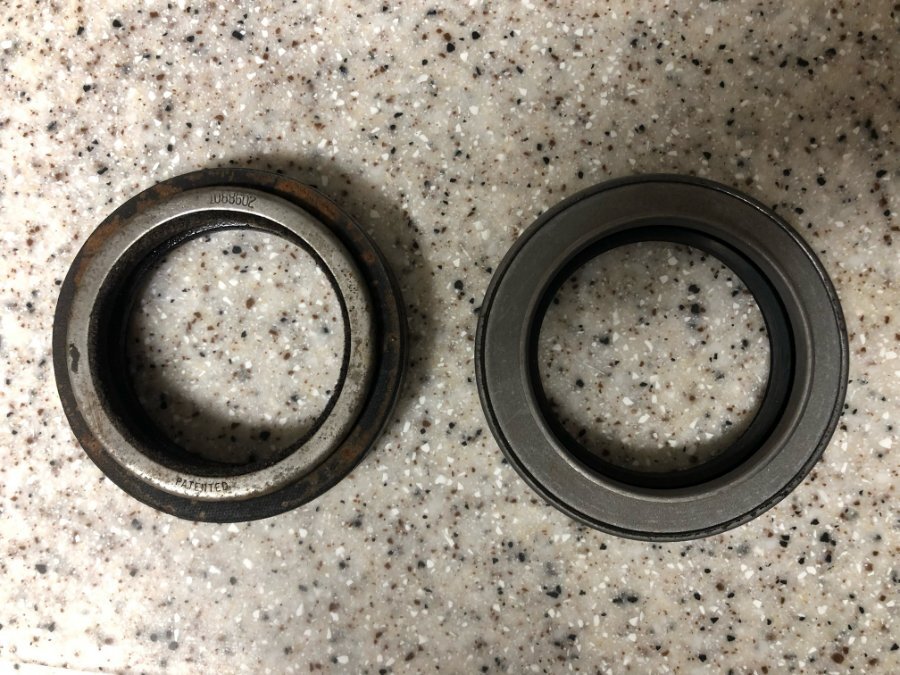
The oil seal I pulled out of my '51 B3B is Chrysler part number 1088602 (left) which correlates to National 6186. The oil seal that came in my Fel-Pro gasket kit is National 411431 (right), which has the oil slinger (?) lip and no recessed area to push through the front of the timing cover. I've read a couple anecdotes here where the slinger rubbed on the timing chain - it looks like the slinger style would sit about 3/16" closer to the chain than the original style. Should it work for me if my timing cover is not dented in, or should I play it safe and track down a National 6186 (leather) seal? My engine has the oil squirt tube and doesn't need a slinger. Thanks!

-
Thank you Los! I measured my slack to be ~3/8”, which is okay, I guess. I will have to consider replacing the chain and sprockets while I’m in here. The cam hub moved freely once I removed the cam sprocket, so I guess it has been the piston rings keeping the crank from budging all this time. Unless there are other suggestions, the next phase in trying to rotate the crank will be trying to free the pistons by removing rod bearing caps and pushing up from the bottom. In the meantime I have a lot of stuff to clean up and reassemble. Thank you all!
-
Timing chain slack question - I found nothing in the B-3 Shop Manual. Old forum topic stated "specs say change at 1/2" slack, measured between the sprockets on the bottom of the chain." (corrected from 3/4") Not sure what this means. Push the chain from the bottom side up toward the gap between the two sprockets and measure that deflection? Thanks!
-
I don't know what checking trueness involves, but the thing was rock solid stuck on there. Also, I have no idea how I'm going to get it back on to center the seal, back off to tighten the cover bolts, and back on again once the speedi sleeve is installed. I've already destroyed O'Reilly's puller loaner tool.
-
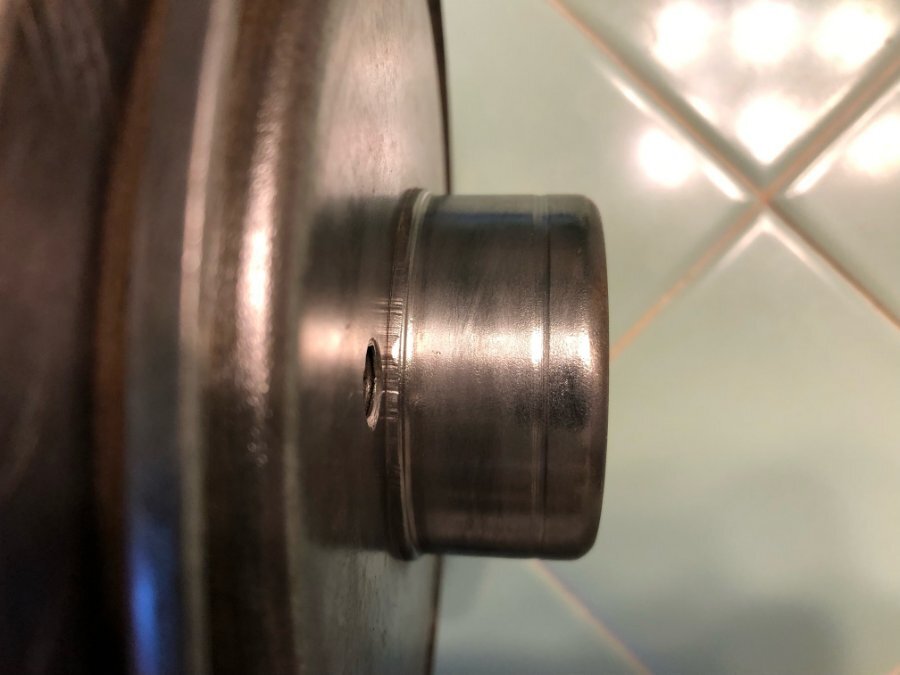
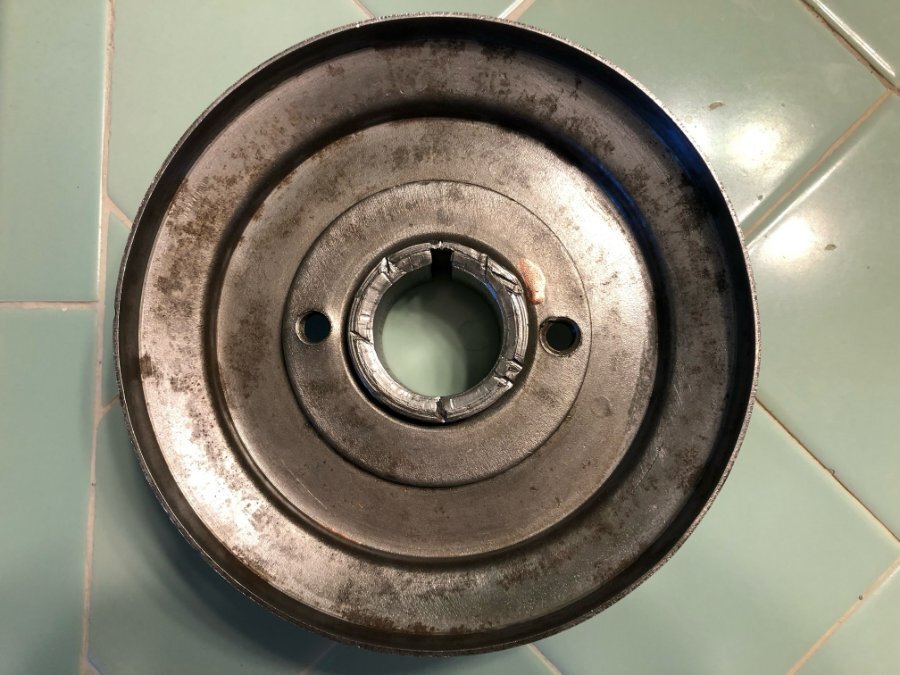
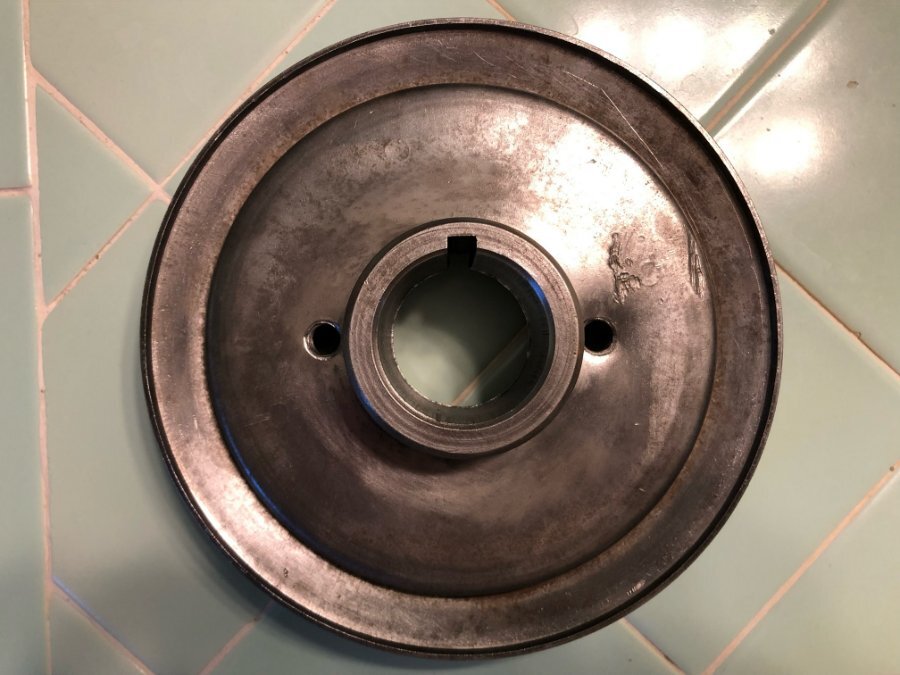
Today I got the crankshaft pulley hub removed. It did not want to come off. After a few broken tools, weeping and gnashing of teeth, it came off. It looks like someone whaled on the inner front of it with a hammer and chisel once upon a time, and the shaft has an obvious groove. Does it look repairable with a speedi-sleeve, or should it be replaced (if they are even available)? Hopefully soon I can get the timing cover off and figure out why this engine won't turn. In the meantime I'm becoming excellent at breaking tools.
-
Last week I removed the main and rod bearing caps and didn't find any unusual wear. I cleaned the surfaces and applied assembly lube and torqued them back on. This week I'd like to remove the timing cover and have a few questions before I begin. To jack up the front of the engine to remove the front engine mount support, should I put the oil pan back on first and lift directly on the pan, or is it safe to leave it off and lift up on one front lower corner of the block? The timing chain/sprockets are pretty much the last things I can think to look at to figure out why the engine won't turn. If I can find an old oil pump to pre-oil the system as Bobacuda suggested, I'd like to do that. Otherwise I'm pretty well stumped. Is it okay to try to rotate the crank with main and/or rod bearing caps off, or is that a bad idea? If I do manage to get the engine turning without pulling it out, is it advisable to replace piston rings with the engine in place, or is that something that should only be done with the engine out? I'm planning to replace the front engine mount, as the rubber is pretty well deteriorated - I've seen two different kinds advertised (photos below). Mine definitely looks like the top one, but it made me curious what the bottom one is for... Thanks!
-
🤣 Regarding the distribution tube, I was as amazed as you are! It's possible the distribution tube was replaced, but I doubt it. The freeze plugs looked factory-dimpled and had the same patina as everything else. This pickup has been in the family since 1951 and engine has never been rebuilt. It spent its first 22 years as a farm truck in western Nebraska, the next 25 years occasionally driving but mostly sitting in a driveway in Utah, and the last 26 years parked under a tarp in California. I would love to get the engine turning but am dragging my feet checking the bearings or pulling the timing cover off to check the crank/cam gears. Underneath the engine is now a swamp of greasy chunks and spent coolant - I know for next time to lay down a sheet of plastic first 😩. The crank has turned a very small amount a couple times but broke a 1/2" extension and a breaker bar in the process. I've tapped down on the pistons with a wooden dowel (OK, a plunger handle) but really don't think the piston rings are stuck. Anyway, this thing will turn one day... Thank you for your patience!
-
Yesterday I finally got the oil filler tube removed and all the block welch/freeze plugs out. FWIW, there was almost zero corrosion and no thinning on any of the freeze plugs, and the water distribution tube looked good and pulled right out - just a little bit of surface rust and some rusty scale inside. Unlike the head, which had mostly crumbly flaky rust-colored scale, the block water jacket had black sticky tar-like chunks up to the top of the lower row of freeze plugs. A lot of it came out with water and a coat hanger, but i'm sure there's some sticking to the walls where I can't reach, especially the lower corners. Would you recommend spraying something like degreaser or brake cleaner through the water holes in the top of the block to try to flush the tar deposits down and out? Or just carry on with water and coat hangers? Also, what kind of a leak could get oily tar deposits in the water jacket? Thanks!
