Search the Community
Showing results for tags 'frame'.
-
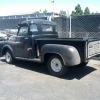
... what's around the corner. Well we were supposed to have the frame spliced by now but we ran into a little delay. My buddie who is doing the heavy lifting at his garage had the 12x20 foot garage door fall off its hinge and land on him. No broken bones but more than one doctor visit, crutches, a physical therapist, some pain medication and two weeks of healing a black and blue mark from his toe to his hip . Now he is limping enough where we will give it a shot next week. In the meantime I did the springs for the rear. Thanks to 48Dodger for being such a great part horder! Hang on to those front springs for me too. Looks like the previous owner torched them all.
-
From the album: Frame Build
Couple of the pictures taken while cleaning up and prepping the frame.© MPrutz 2014
-
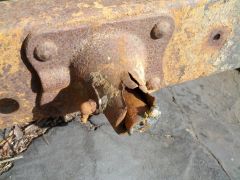
My next project step is the frame now that I have one to start working with. One of the specific items I need to work on is a rear shackle mount replacement. It seems fairly straight forward - but I learn a lot more when I ask a question than when I assume I know the answer. I also could have just asked the guy that I got it from 'cuz I know he knows too, but then a lot more people don't get to learn. I know I have learned plenty form archived posts ... I could find plenty of posts that talked about the shackle hangers - including 48Dodger's videos on removing them, but only one post that talked directly about the rivets and none that talked about mounts. I bet a lot of you have already done this. I bet even more have something to say! Here is the part that I am talking about. REMOVAL: Dave Claussen recommended removing rivets by piloting a 3/16 hole first to relieve side pressure. Grind the head off, then pound it home. Of course they were talking about a fish-plate, not the spring shackle mount. Would the pilot hole be really necessary? Anything special about this area? Other ideas? REASSEMBLY: From the same post, Grey Beard recounted his actual work experience: "...we just used grade 8 bolts and nuts with lock washers on each side - bolt head and nut and flat washers, and cranked them down". I have no other guidelines as to what might work, what has worked, what didn't work. I open it up to you fine gentlemen. Thanks in advance ts Ref : Starting over again
-
From the album: Frame Build
Don't let your regular grease inspections go by unattended!© MPrutz 2014
-
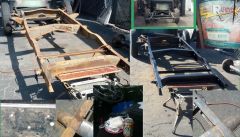
From the album: Frame Build
Just running through some of the documentation photos before we splice the frame together to fix the botched chop job. Looking here at the frame as it exists on the truck, and the new donor before cleaning and splicing.© MPrutz 2014
-
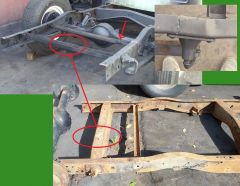
Now we are finally ready for the long haul. All the parts are here to rectify the framing problems thanks to pFlaming and 48Dodger. It also has given me a chance to compare the two parts to understand what when wrong with the previous work. Remember the old - "One of these things is not like the other"? We plan of splicing it forward of the main cross member (under the cab) with a little boxing to ensure strength. It was pointed out that these things are supposed to move under load some amount. That's why the gas tank has springs. We shall be mindful of this. It will be an adventure in any case.