Neira
-
Posts
48 -
Joined
-
Last visited
-
Days Won
1
-
Looks like moparmall.com has the hood release for 46-48 DeSoto. I think the DeSoto has a single hood vs. butterfly. However, it looks very similar to the one in your original post. Maybe they can tell you how long the cable is to see if it'll work. Then you'll need two of them if I'm not mistaken.
-
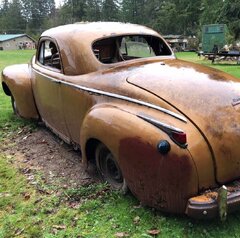
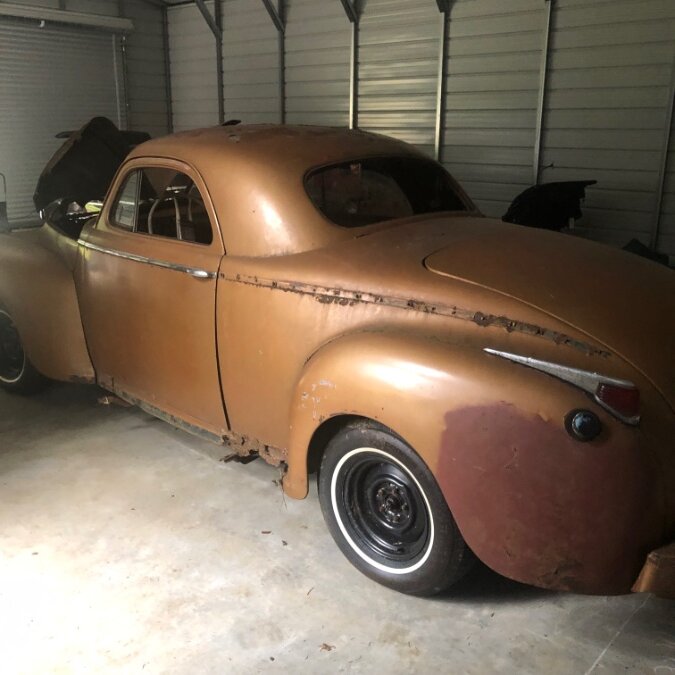
The 41 is still very much a project. It's scheduled to have 2" chopped from the top in May. Then all the other body patch repairs and complete new floor/trunk floor.
-
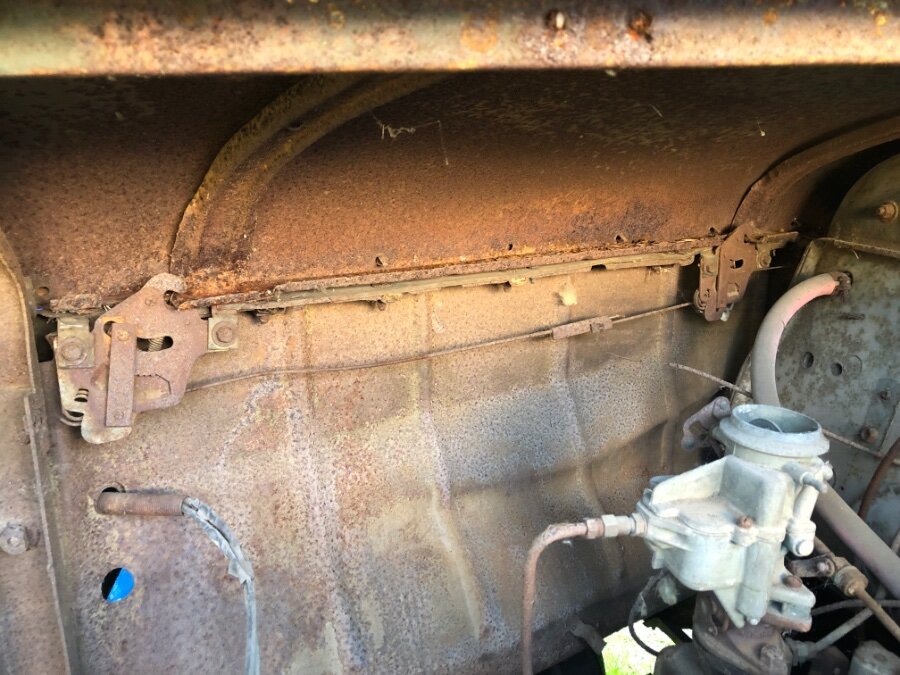
Looks like Dodge upgraded the linkage between the hood latches since 1941. My 41 latches look the same but I have kinda flimsy looking 1/8" rods connecting them. Hopefully your latches are freed up and functional.
-
On their website photos it looks like the budget bracket has a “D10” marked into it and the non-budget bracket has “F15” marked on it.
-
Congratulations on getting her running. Oil pressure gauge looks like it came up nicely. Obviously a good sign. Have you measured the compression in all your cylinders yet?
-
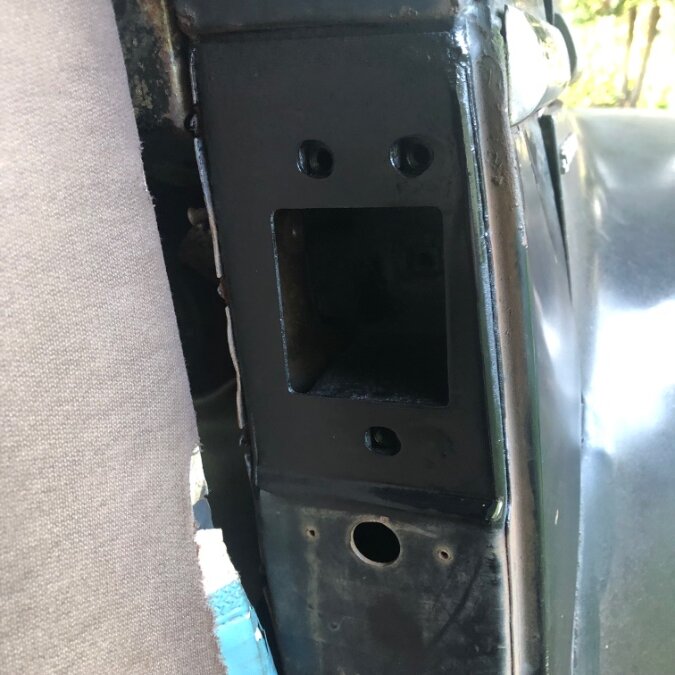
Once these were welded back in and the NOS hinges were bolted to the door, I was able to realign the door to the body and get it reinstalled. Now the door works perfectly. Of course if the hardware attaching the hinges to the a-pillar weren’t so rusted, I would have just been dealing with the actual hinges. Since things don’t always go that smoothly I wanted to show how I dealt with the inner brackets. Hope this helps someone.
-
-
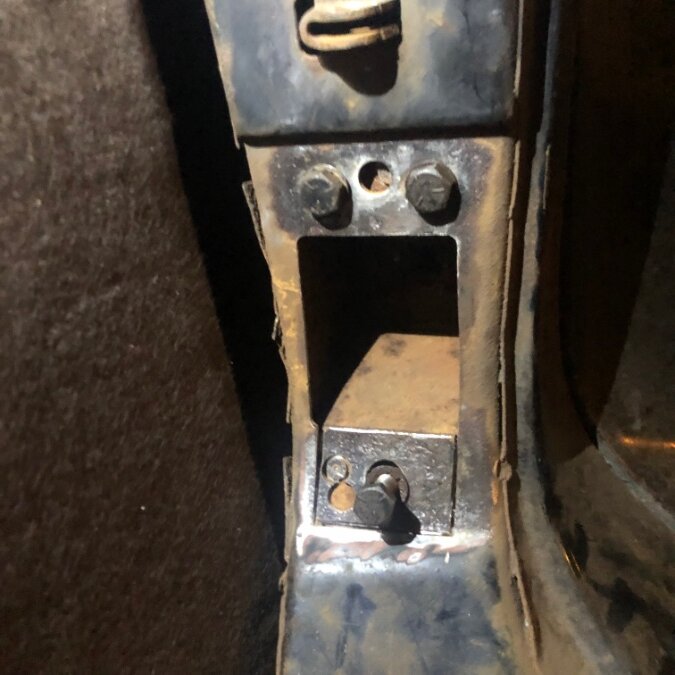
After they were welded back in and ground flush, it was time to paint.
-
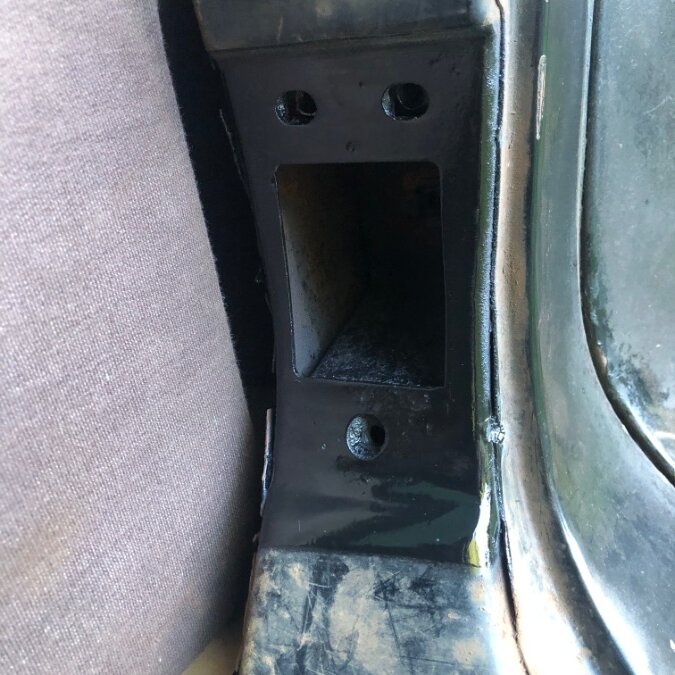
Once the nuts were all installed I was able to move to reinstalling the inner brackets. The way the spot weld cutter works I was able to get them lined up in the original locations with some confidence. Next was welding them back in place. The bolts in this picture were used to pull the bracket flush.
-
It was hard to identify two spot welds on the lower inner bracket. I had to remove some of the pillar to get it out.

-
New nuts installed.

-

-
New cage nuts were ordered (5/16”-24). I was able to reuse the original cages but I had the new ones as a backup plan.

-
Spot welds cut. There are two spot welds on the inside that also have to be cut. They’re by the kick panel. This goes for upper and lower one.

-
Just wanted to share how I tackled fixing a sagging door on my 1948 Plymouth club coupe recently. Maybe it will help someone or motivate someone to tackle theirs. I’ll attach some more photos to show my general sequence. I did end up getting NOS hinges from AMS Obsolete Parts. The pins on mine are severely stuck. First thing I had to do was remove the screws that attach the hinges to the a-pillar. This was done with a smaller bit (about 3/16”-1/4”) and then a 1/2” bit being careful not to gouge the hinges. The inner bracket cage nuts were severely rusted to the screws. I was able to weld a nut to one of the screw threads and extract it but the others were not budging. The inner brackets were removed so I could replace the nuts.