

DrFate77
-
Posts
16 -
Joined
-
Last visited
-
Days Won
1
Content Type
Links Directory
Profiles
Articles
Forums
Downloads
Store
Gallery
Blogs
Events
Everything posted by DrFate77
-
"Ran When Parked" 1954 Dodge C 3/4 Ton
DrFate77 replied to DrFate77's topic in Mopar Flathead Truck Forum
Would it be the Worm Gear cover you're looking at? Sure can't recall, I went back to check my photos but didn't get a good shot of that. I'm pretty sure that everything went back in that came off, with the exception of the paper gaskets. -
"Ran When Parked" 1954 Dodge C 3/4 Ton
DrFate77 replied to DrFate77's topic in Mopar Flathead Truck Forum
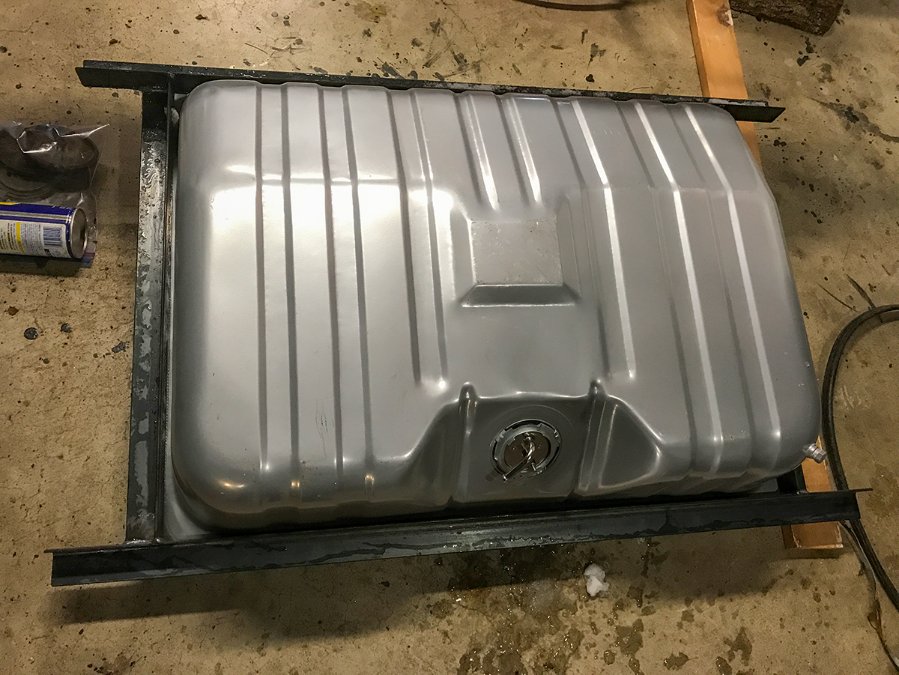
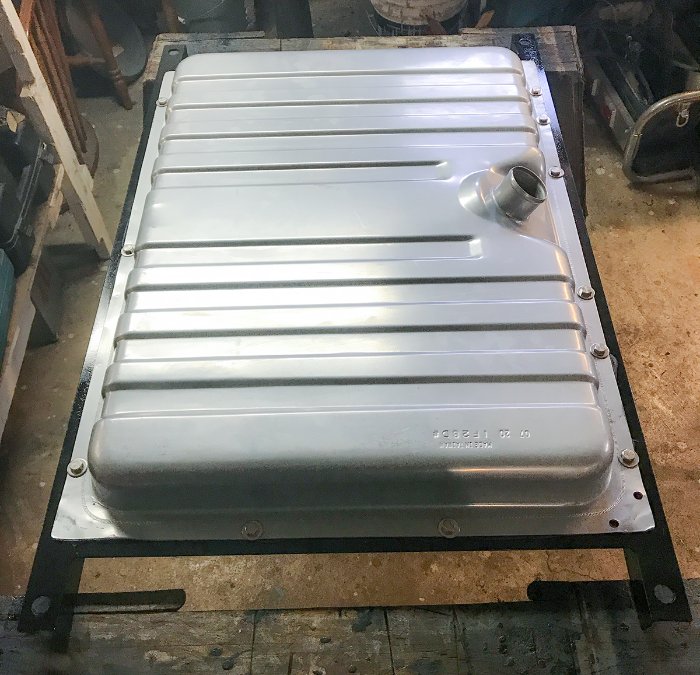
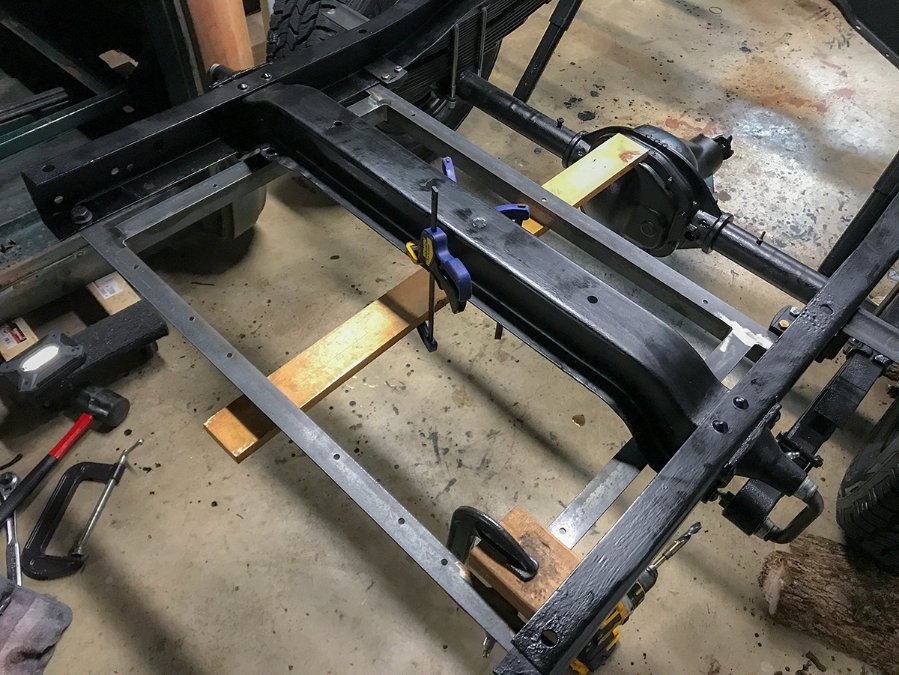
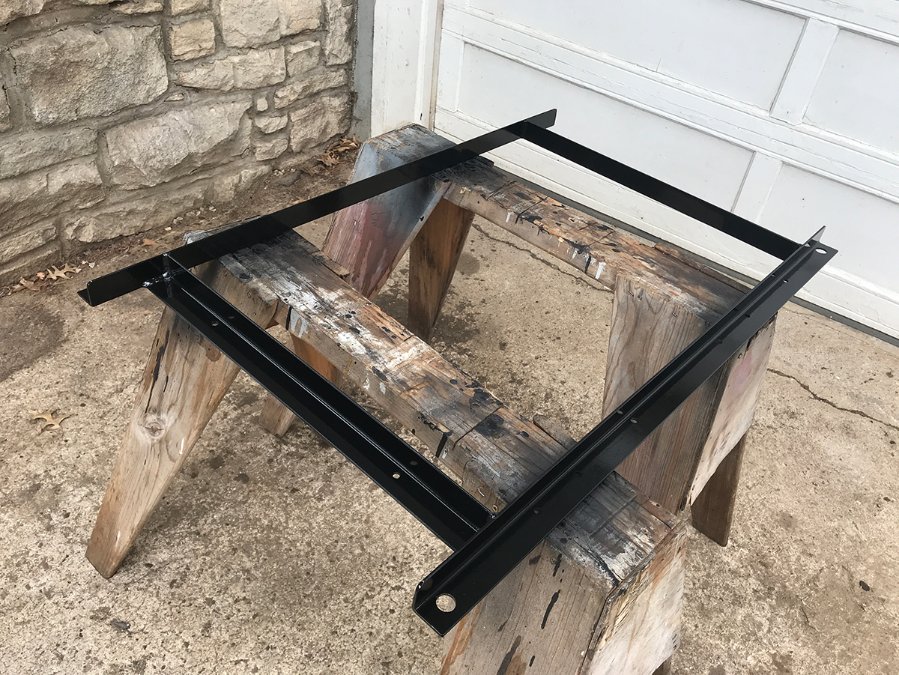
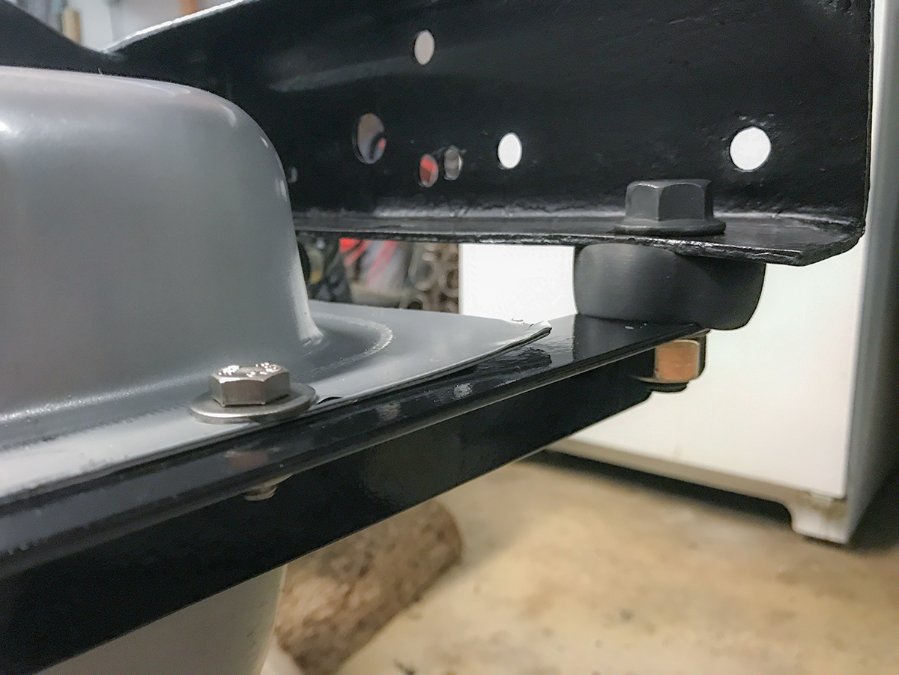
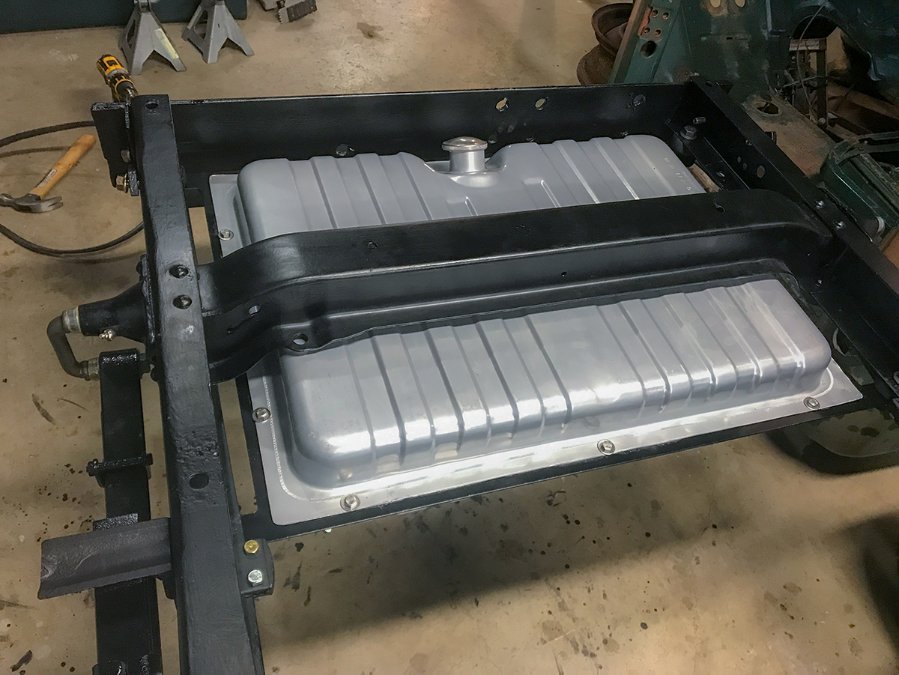
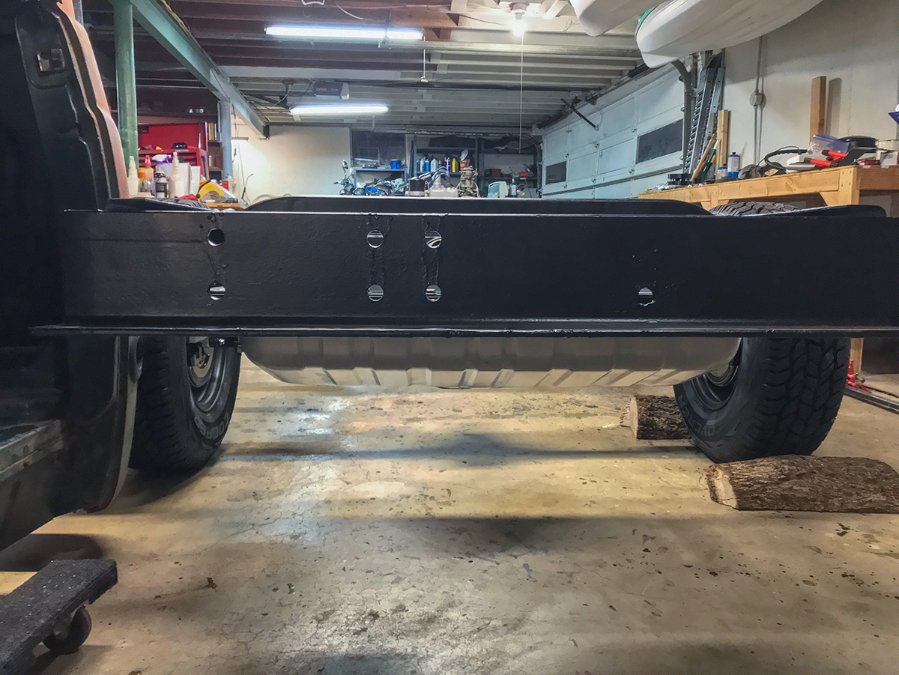
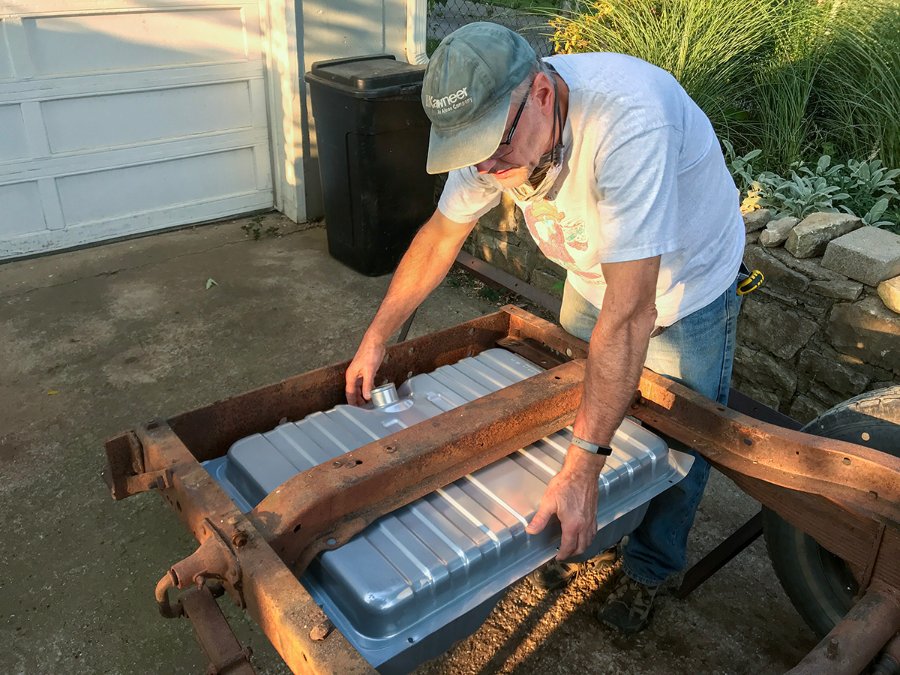
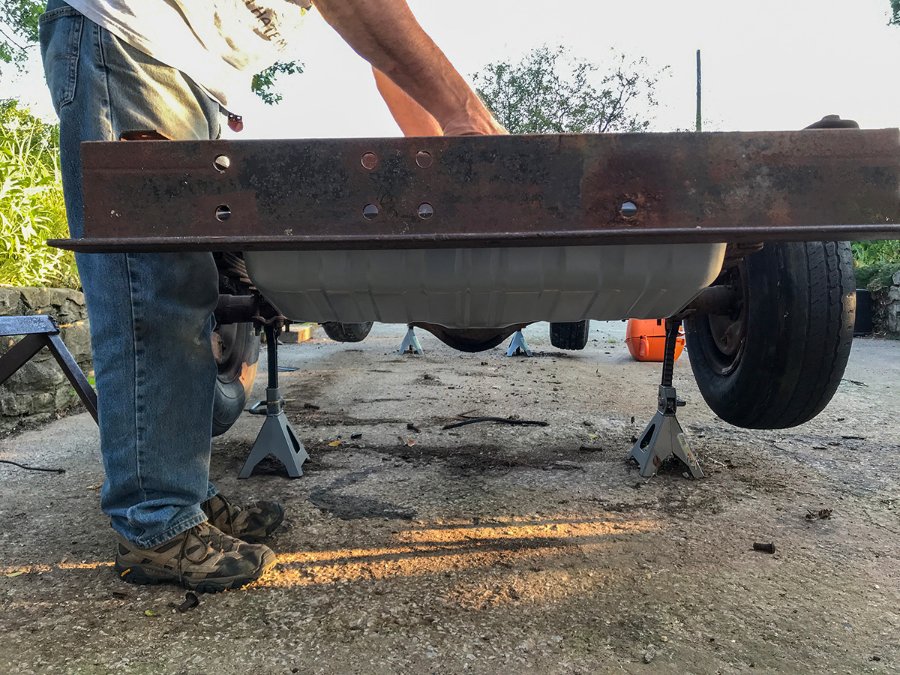
Here's what I ended up doing with the gas tank, let me know what you think. I did some looking around online and as far as I can tell there's no single right way to accomplish this. Most of the rear truck gas tank mods that I was seeing are somewhere between over-engineered and visibly dangerous, hopefully this lands somewhere between the two. The tank is a Liland Global IF28D for a 1970 Mustang. Mustang tanks are cheap, flat, and square, I understand why folks use them on trucks like this. I did some measuring and drew super crude plans for a gas tank cradle subframe thing. It needed to drop down slightly to clear the stock crossmember, which I wanted to leave alone. We decided some thick rubber bushings would reduce vibration and also give it the right amount of clearance. I had our local metal supply shop do the welding. We were going to weld it ourselves in the driveway, but the high that week was like -2 so it was money well spent. The stock mounting holes on the lip of the tank are spaced completely random. Is that to keep Mustang owners from putting their tanks in backwards? I drilled out the subframe to match the tank holes, and then clamped it to the chassis and drilled 5/8" mounting holes in the corners. The tank instructions say to use strip caulk when putting it into a car. Not sure that was necessary on the subframe but I did it here anyway. It may provide cushioning and a bit of a seal for dirt and moisture between the metal surfaces. For mounting hardware I used 2" x 1" rubber bushings from Amazon, with 5/8" bolts and shortened pass-through sleeves. Here it is installed on the truck, looks and feels very solid. It's hard to get a sense of the clearance from the photos, but the bottom of the tank is more or less parallel with the middle of the rear axle.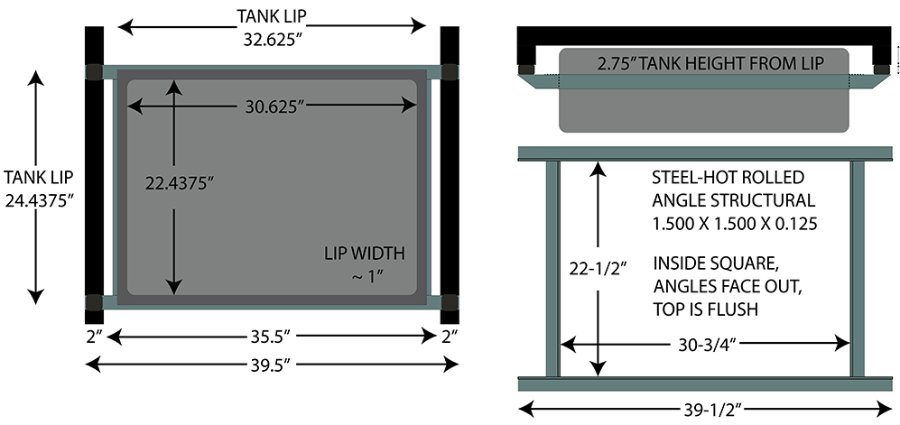
-
"Ran When Parked" 1954 Dodge C 3/4 Ton
DrFate77 replied to DrFate77's topic in Mopar Flathead Truck Forum
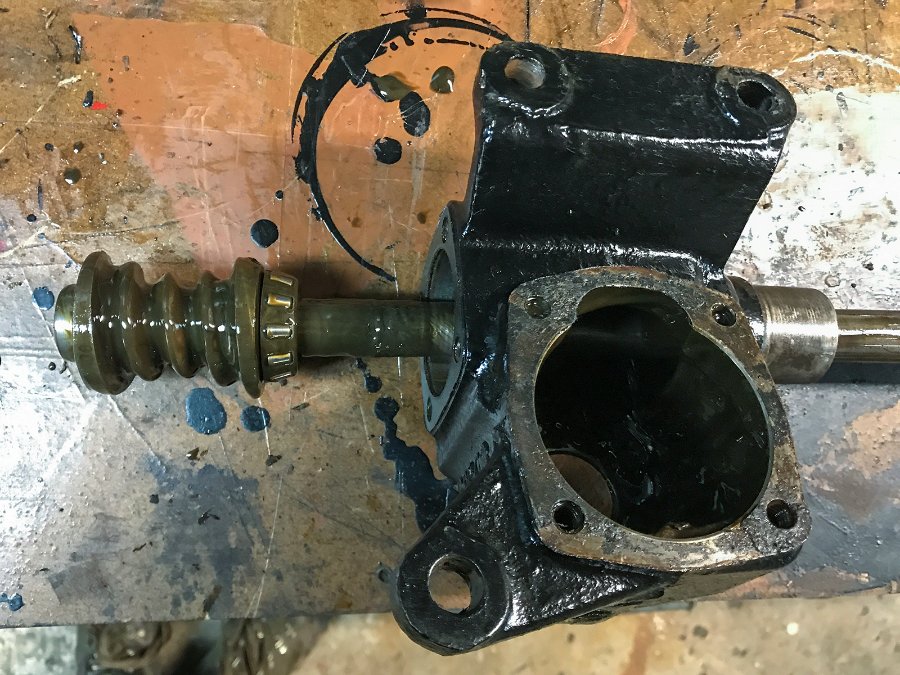
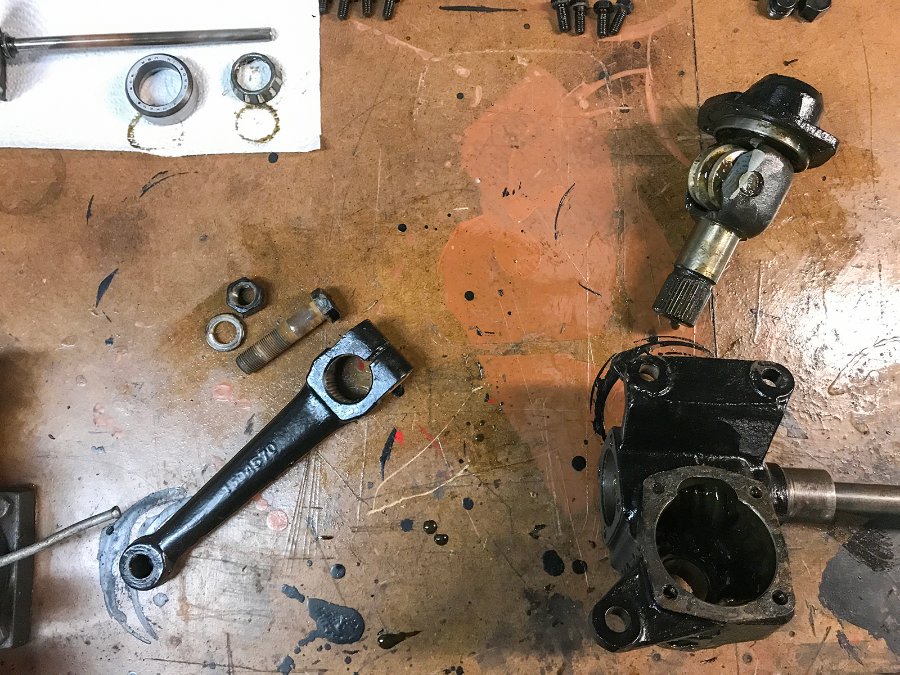
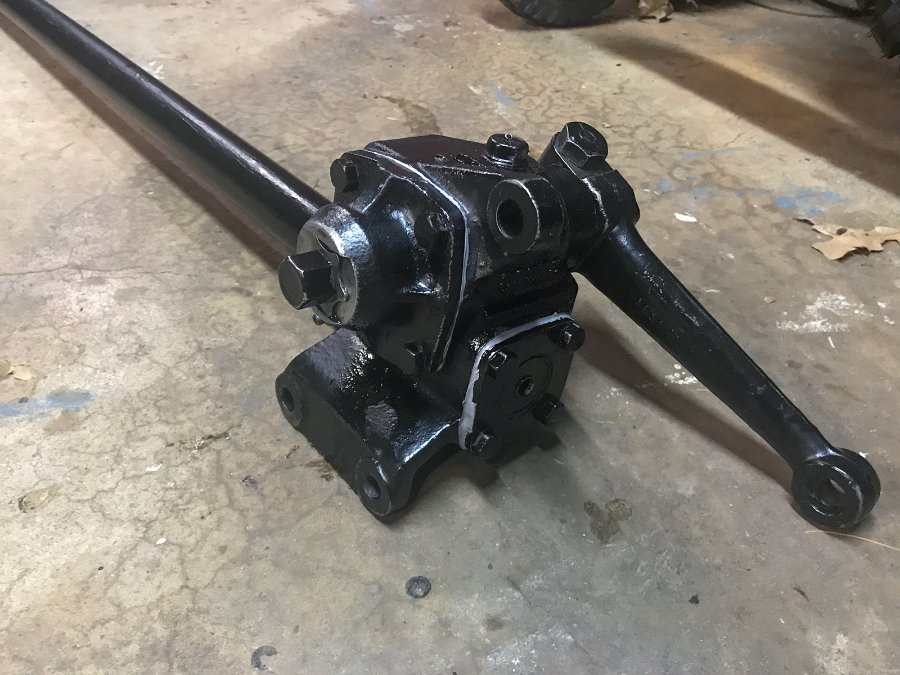
I noticed a bad grind at a certain spot in the steering action, so I took the steering gear box apart and cleaned everything. The parts diagram makes it look intimidating, but there's only one way it can go together and is actually pretty easy to figure out. I omitted the gaskets, but RTV seems to be doing the job. FOR POSTERITY - On this Gemmer steering box, casting numbers 348 / 3DCO3: The pitman arm / side oil seal is a National 240356. The steering shaft / top oil seal can be a National 470954 - It's not quite as thick, but it's a perfect OD/ID fit and will keep dirt out and oil in. The original seal was unmarked and I spent way too long figuring out what to use.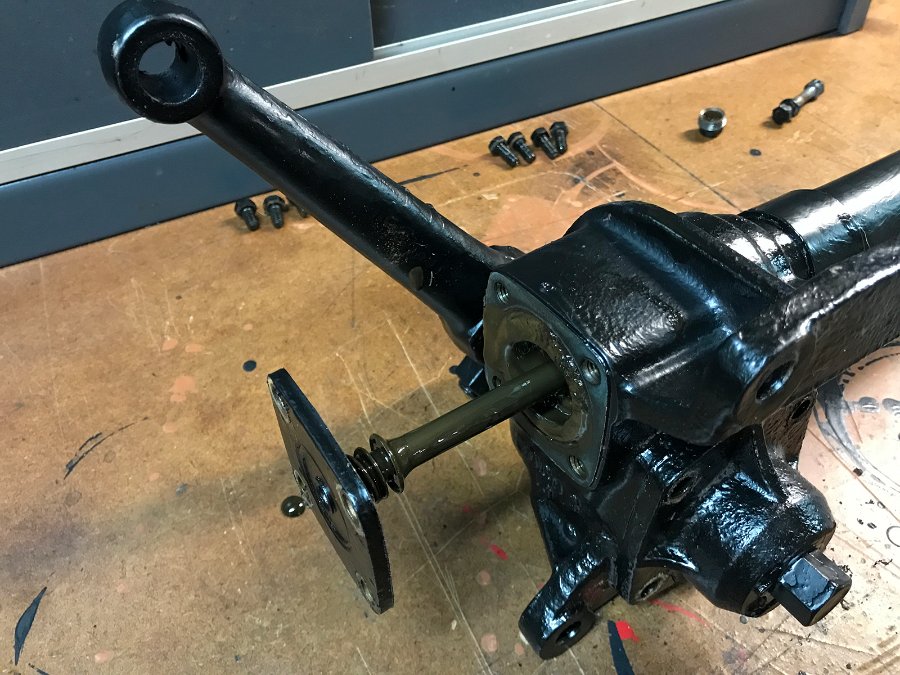

-
"Ran When Parked" 1954 Dodge C 3/4 Ton
DrFate77 replied to DrFate77's topic in Mopar Flathead Truck Forum
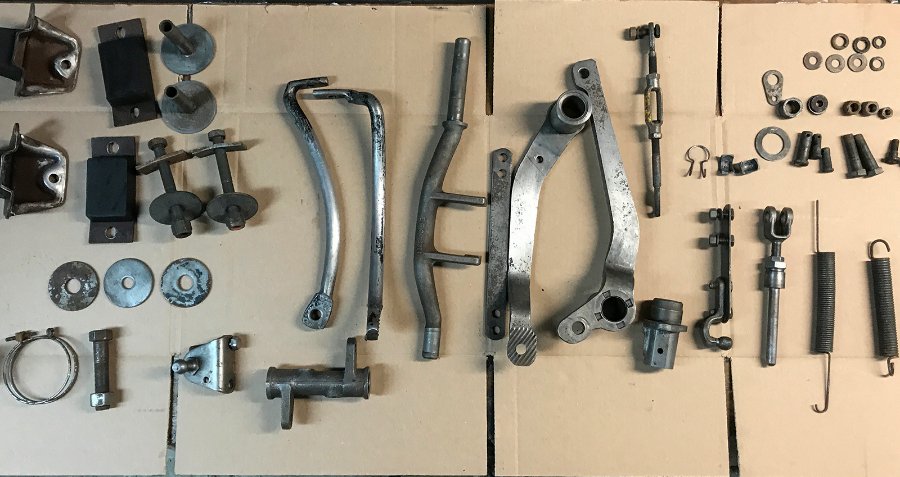
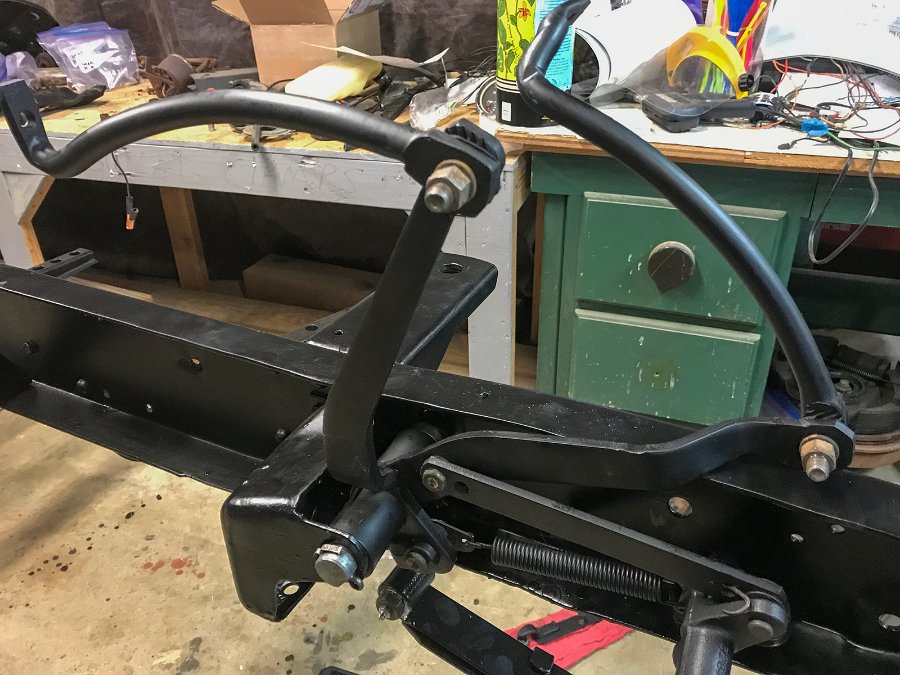
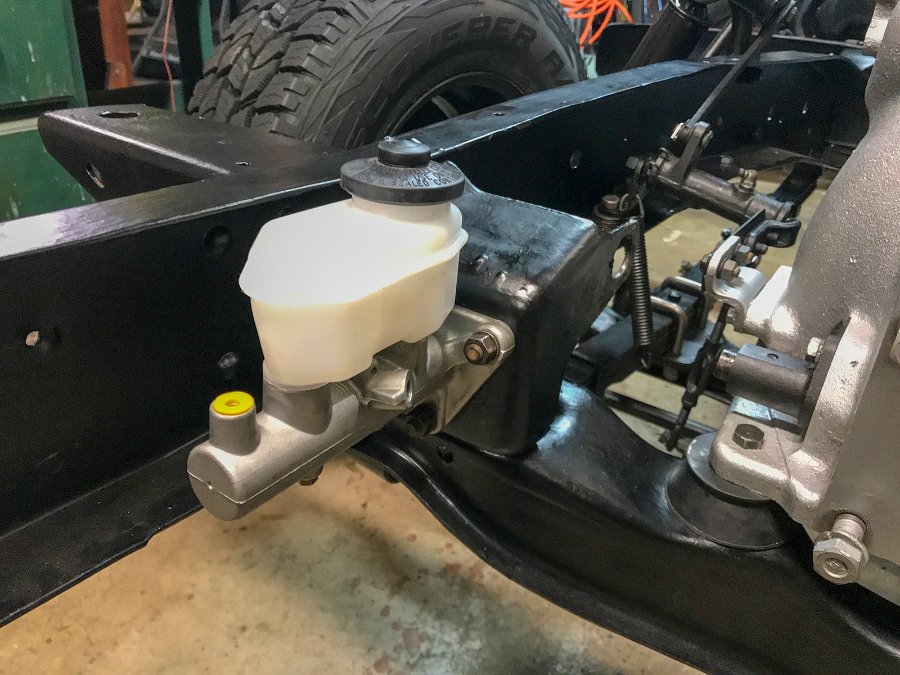
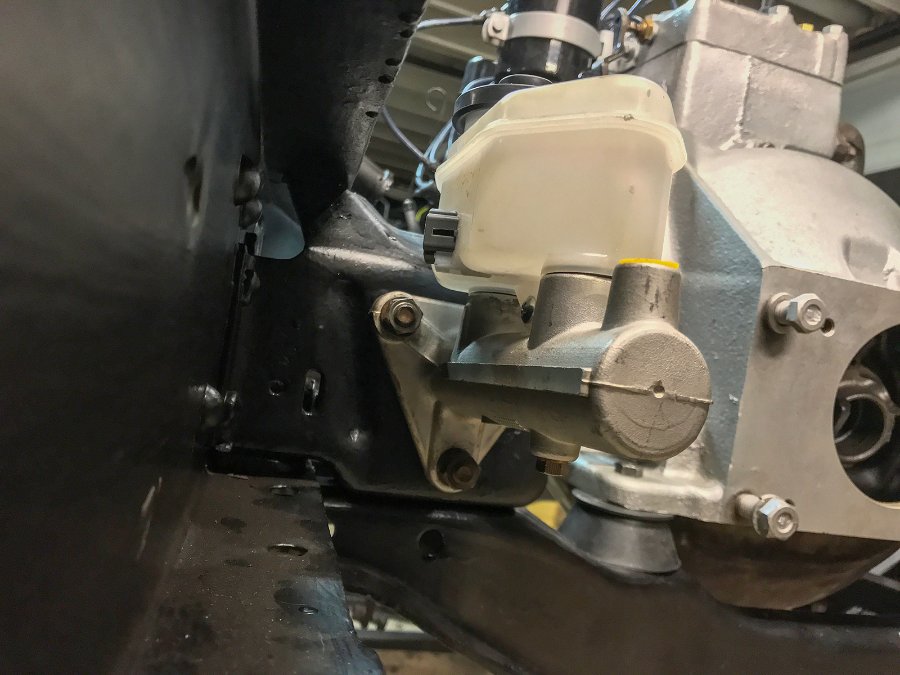
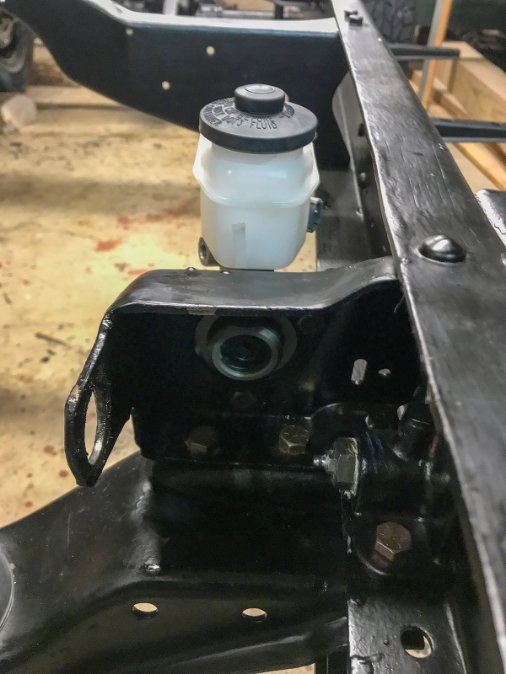
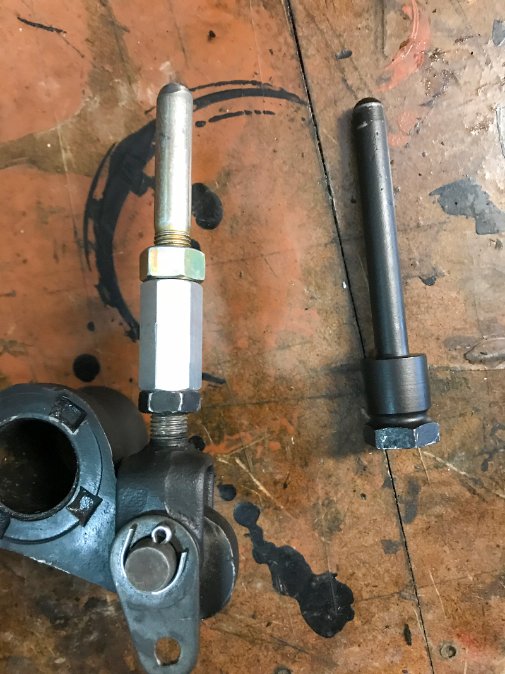
Here's the clutch and brake pedal parts disassembled, cleaned up and powdercoated, and then put back together. After the fact I realized the clutch spring is probably supposed to have hooks on both ends, so that part is on order haha. I did a lot of reading on here and saw that a '94 Camry master cylinder might be compatible. I ordered one and sure enough, the bolt pattern basically matches the stock mounting holes exactly. It is a little taller than the frame, hopefully it will work with the cab but I haven't had a chance to check that yet. I installed the brake pedal without the push rod and measured what the uncompressed length to the new MC piston would be. At 118mm the stock push rod is just barely too long. I wanted to avoid grinding down the stock rod in case plans change, so I made a new push rod with a 7/16-20 coupler and bolt from the hardware store. Seems like it will work like it's supposed to.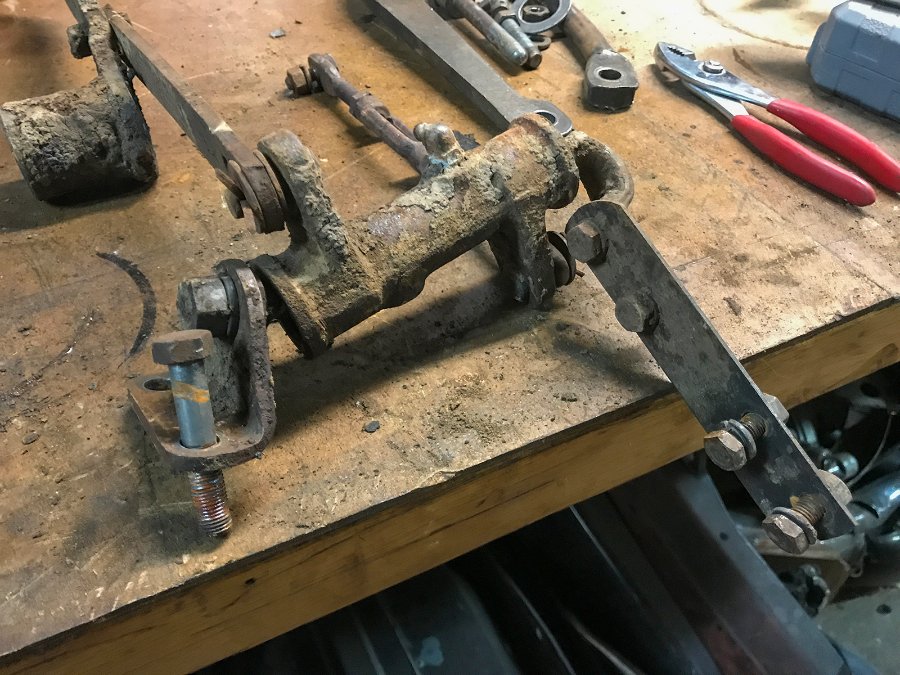
-
"Ran When Parked" 1954 Dodge C 3/4 Ton
DrFate77 replied to DrFate77's topic in Mopar Flathead Truck Forum
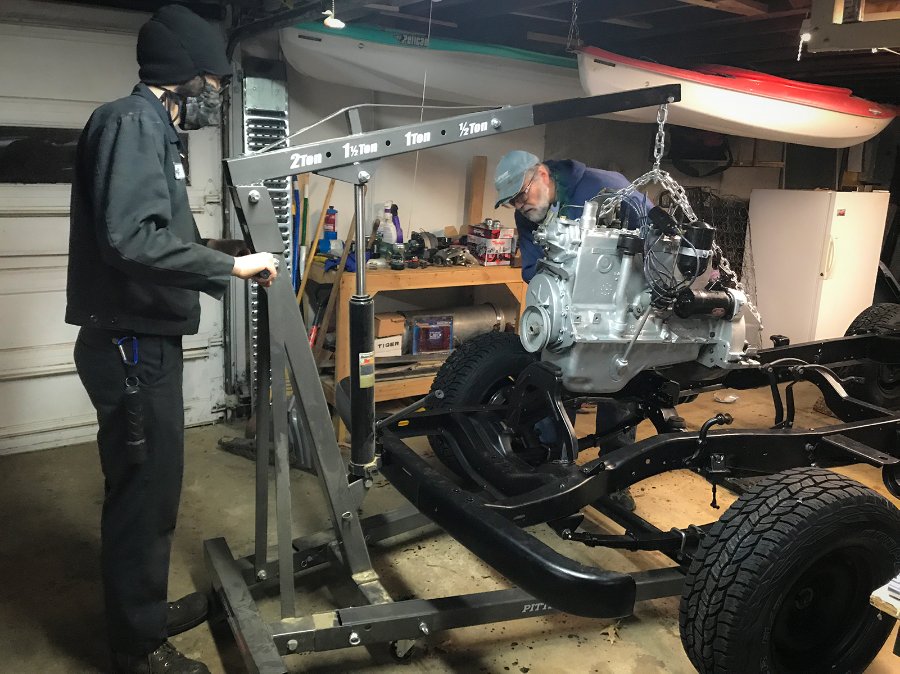
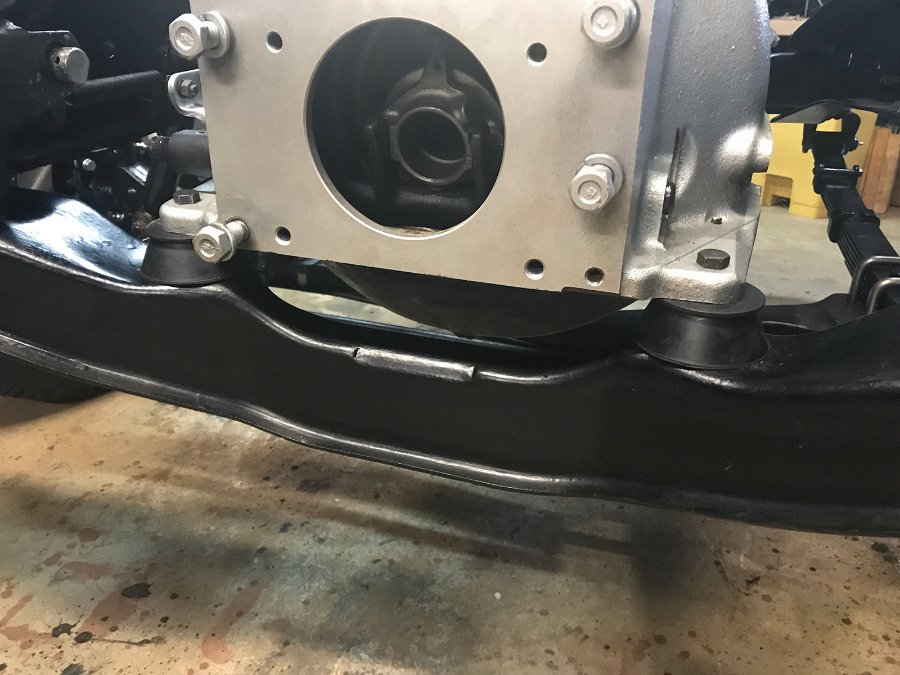
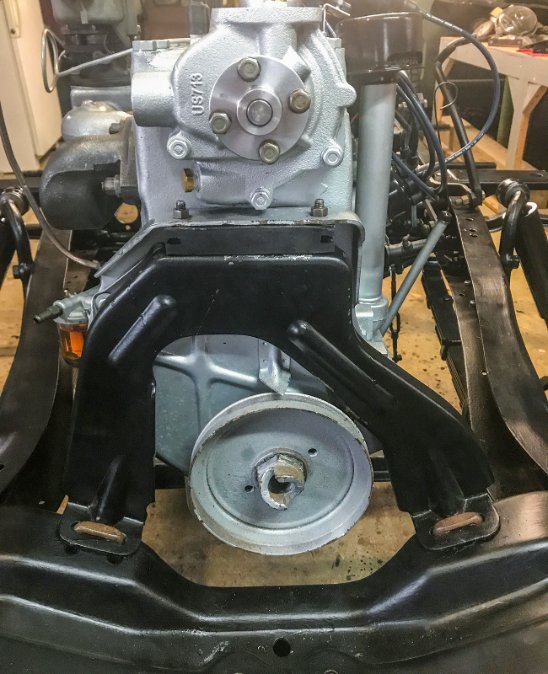
The shop said the engine was ready, and with the truck sitting on tires again we could drop it right back in. While installing we realized how bad the original front and rear rubber mounts were. I ordered replacements from oldmoparts and got them swapped out.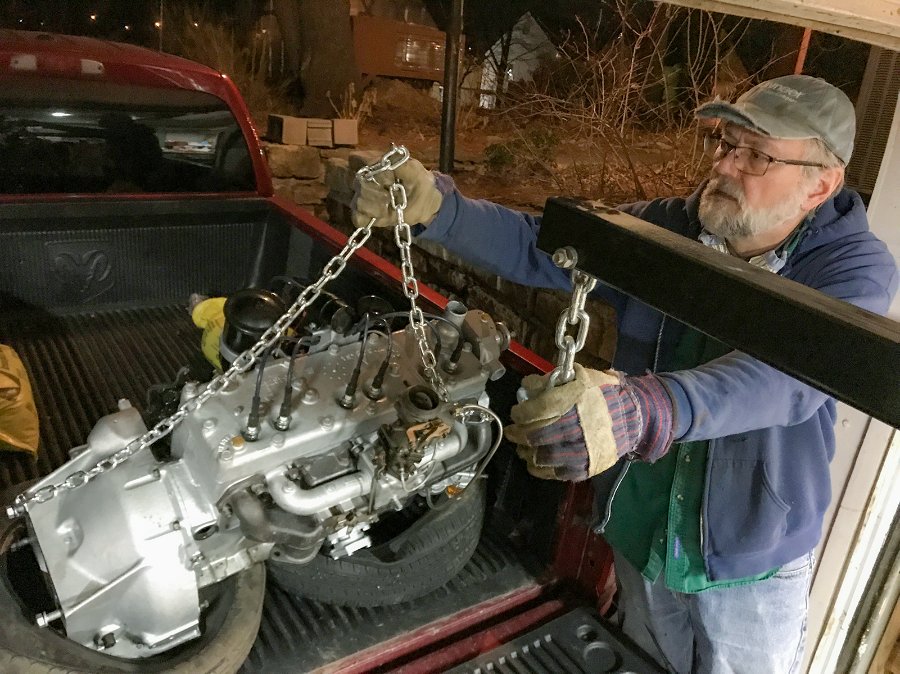
-
"Ran When Parked" 1954 Dodge C 3/4 Ton
DrFate77 replied to DrFate77's topic in Mopar Flathead Truck Forum
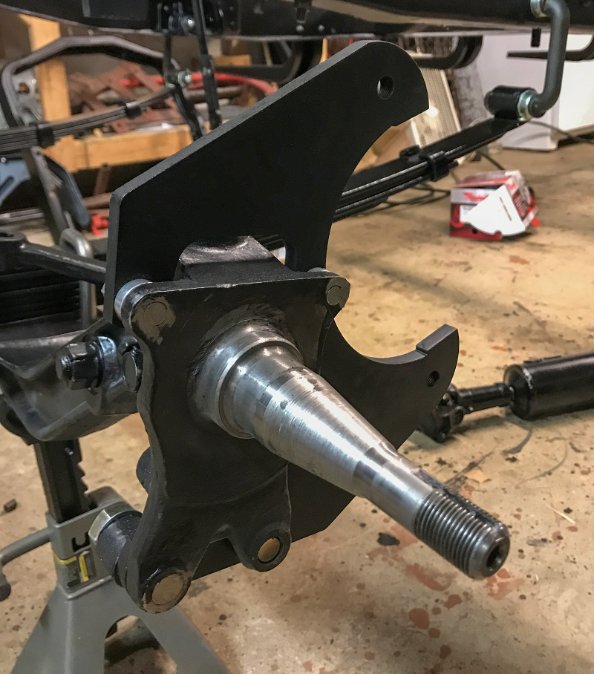
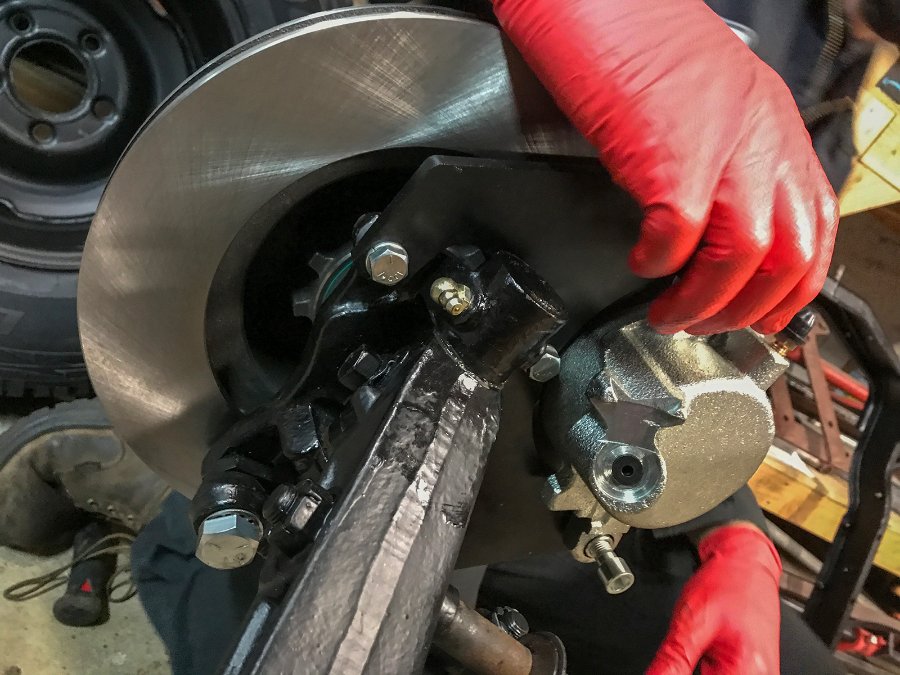
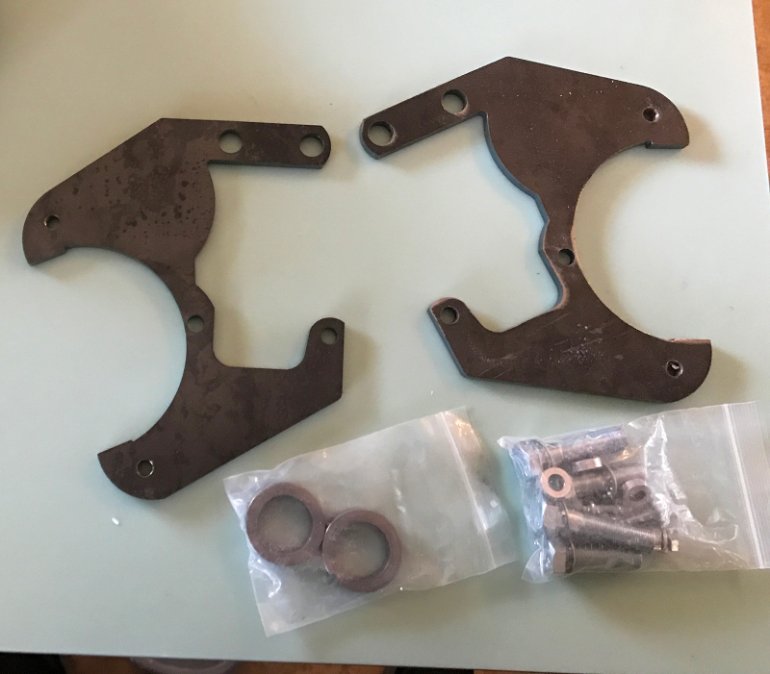
The front disc conversion is the Rusty Hope #2 kit, since I saw other folks were having success with it for this model. We used a drill press to get the steering arms and spindles drilled, and then tapped threads on the spindles by hand. I bet a machine shop could've done it quicker and more precisely, but the parts all bolted together without much struggle. Shopping for the rest of the parts used with the kit is kind of a scavenger hunt of multiple years makes and models, but the prices weren't bad via Rock Auto and everything fits up nicely. On this truck we did learn the caliper brackets have to be oriented forward in order to clear everything.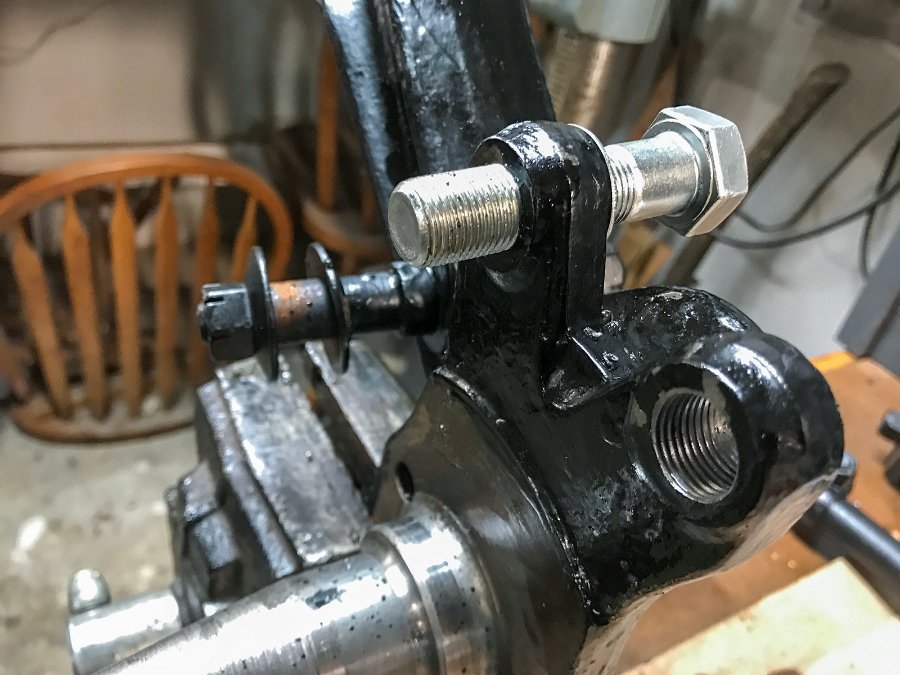

-
"Ran When Parked" 1954 Dodge C 3/4 Ton
DrFate77 replied to DrFate77's topic in Mopar Flathead Truck Forum
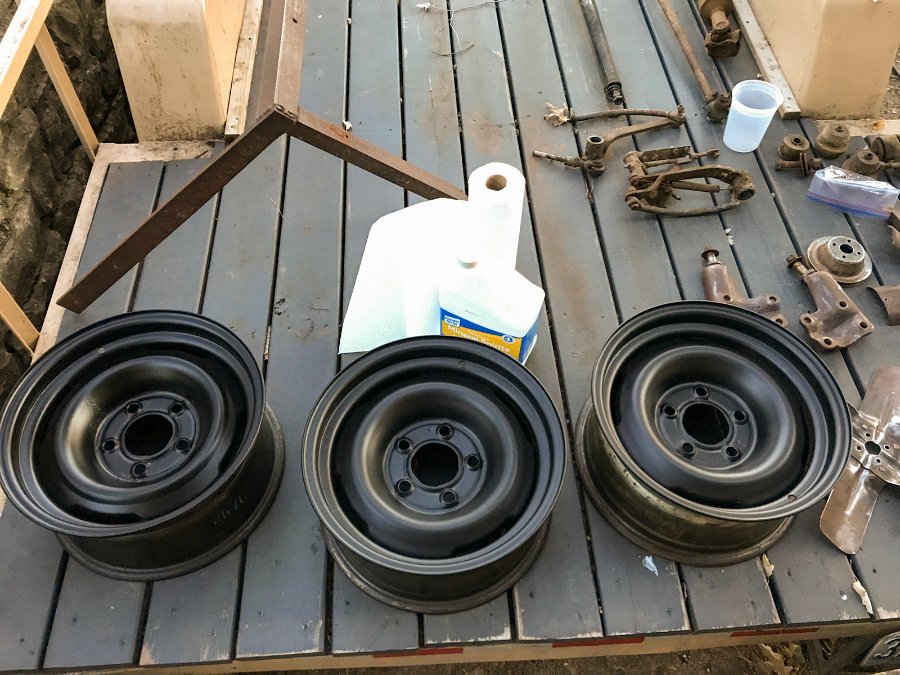
It's been brutal cold here in KC, so I've just been hunkering down and chipping away at this thing when I'm not at work. My garage is in my basement and heated, so I've got that going for me. Here's a few updates - I picked up a set of 15" wheels from pick-n-pull last fall, and already had them wire wheeled and powder coated. We upgraded our oven a few years ago, and the old one got reassigned to the garage for powdercoating duties. It's quick and easy to drag the oven into the driveway, shoot on some powder with a cheap harbor freight gun, and bake it onto parts. The finish isn't 100% perfect on the wheels, but I wasn't going to have them sandblasted or anything so it's good enough for me. The 5x5 bolt pattern on these wheels would've been fine for the stock 3/4 ton, but the Grand Cherokee rear end and front disc conversion both require 5x4.5 wheels. Since I already had these wheels done, I just ordered some wheel bolt adapters off ebay. Should be fine for how this truck is going to be used. Tires are a set of 235/75 Cooper's from Wal-Mart and shocks are Gabriel 82065 Classics. The rear brakes are fresh parts for the Grand Cherokee rear.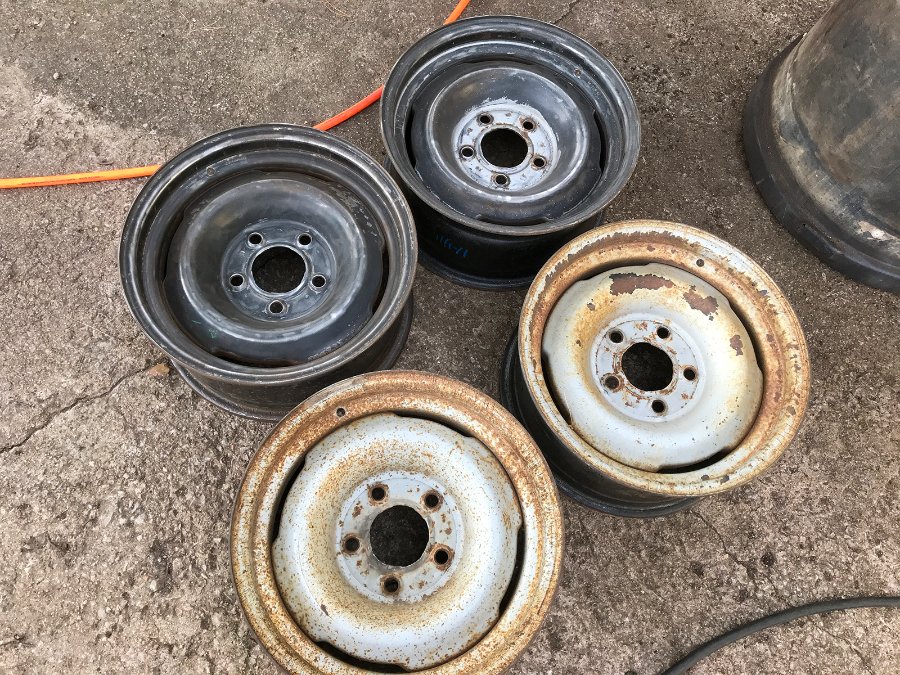
-
"Ran When Parked" 1954 Dodge C 3/4 Ton
DrFate77 replied to DrFate77's topic in Mopar Flathead Truck Forum
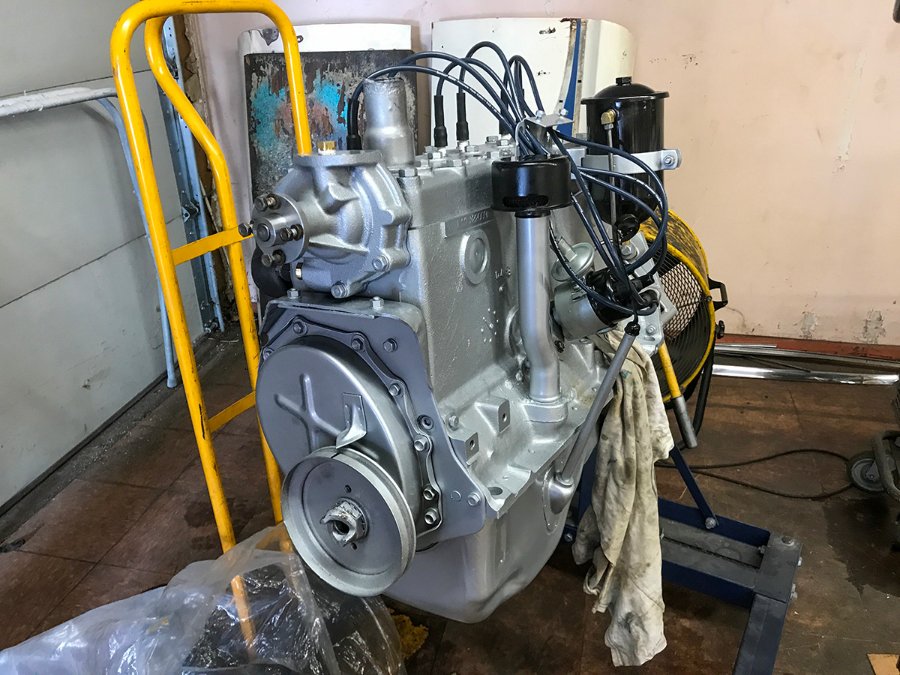
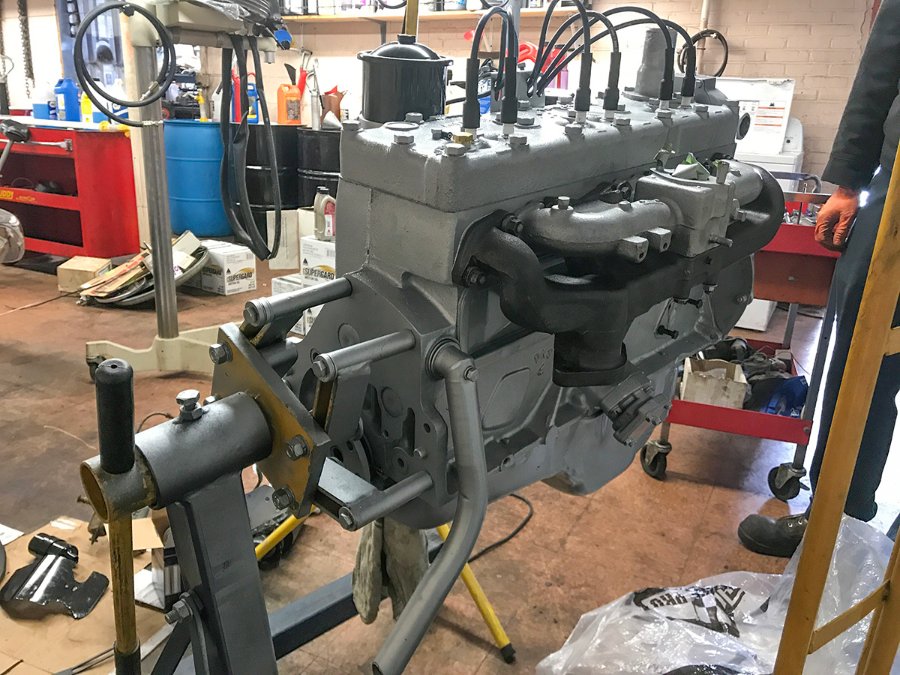
I've been getting occasional updates about the engine rebuild from the folks at the shop. Last week they got it fired up for the first time, which was awesome to see. They were even nice enough to send me a video. Not sure what's left for this to be complete, but I'm hoping to put it directly on the frame whenever we get it back.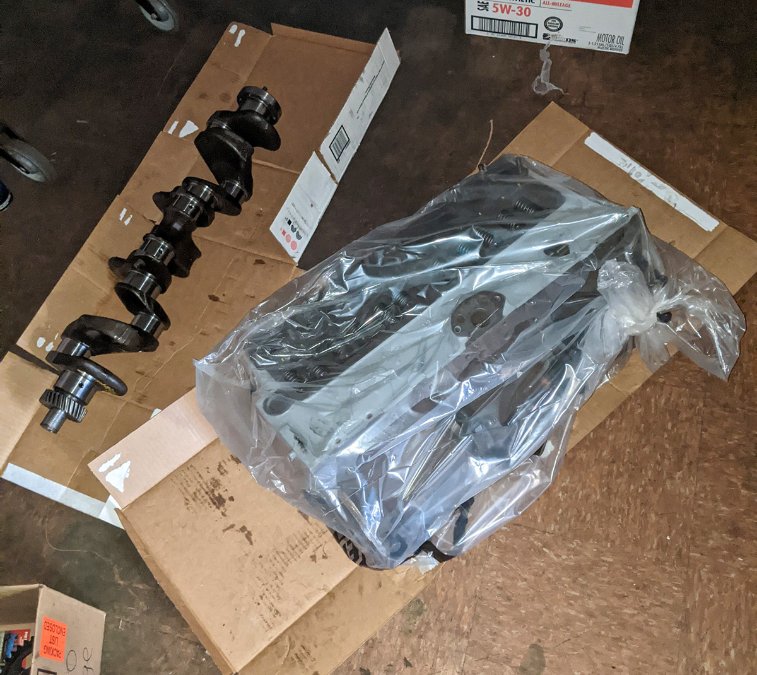
-
"Ran When Parked" 1954 Dodge C 3/4 Ton
DrFate77 replied to DrFate77's topic in Mopar Flathead Truck Forum
Thanks for the lead on the gaskets, those are pretty reasonable. Did you put the full set on? It's always a slippery slope taking things apart but I suppose it's never going to be easier to get at than it is right now. Great that your kids got to benefit from the experience too! -
"Ran When Parked" 1954 Dodge C 3/4 Ton
DrFate77 replied to DrFate77's topic in Mopar Flathead Truck Forum
Hey thanks. I could use some pro tips on the transmission. I scrubbed the outside and rinsed the sludge out of the inside with mineral spirits, now just trying to figure out what else ought to be done. The bearings spin smooth and seem to be in good shape. Are repro cork gaskets the way to go or can I get away with gasket paper and RTV? I'm going to use the Grand Cherokee parking brake, can the transmission brake drum be safely omitted? Appreciate any advice, transmissions aren't my specialty.
-
"Ran When Parked" 1954 Dodge C 3/4 Ton
DrFate77 replied to DrFate77's topic in Mopar Flathead Truck Forum
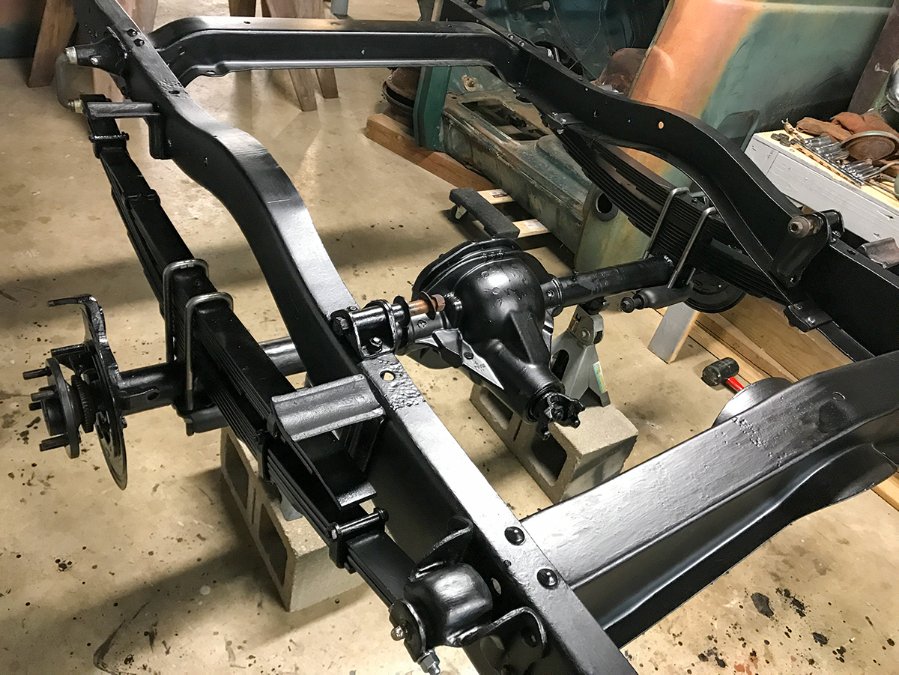
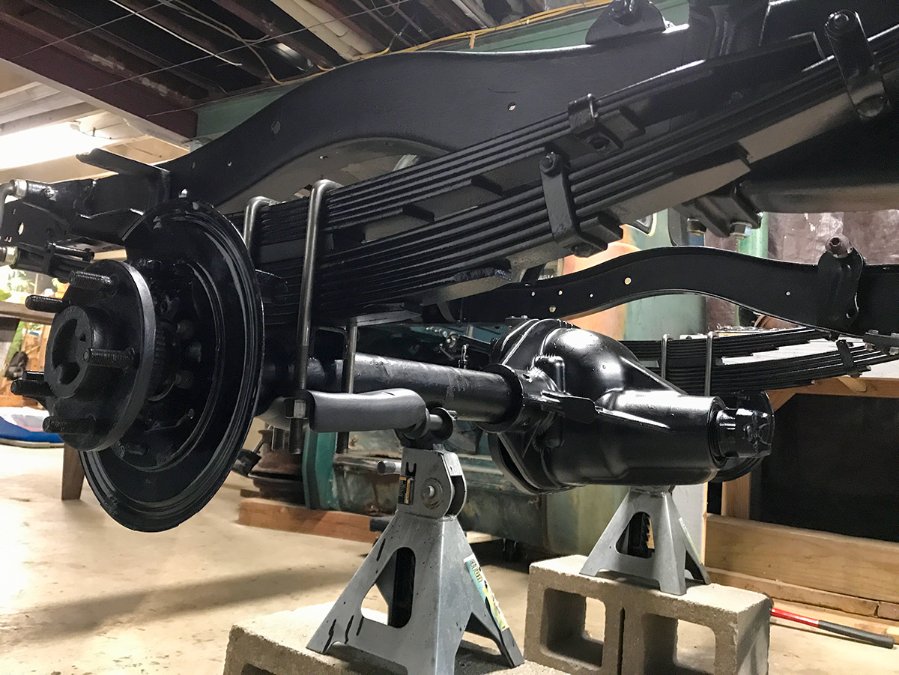
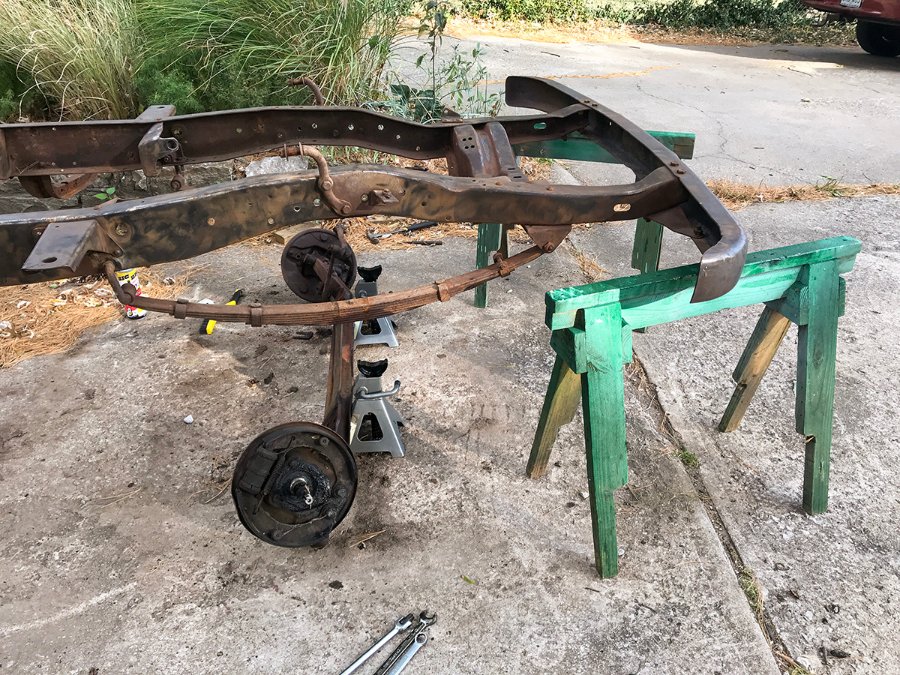
Definitely, appreciate the concern. The frame was on sawhorses and we needed some temporary reach getting the axle in. We're back on solid ground with jack stands now. -
"Ran When Parked" 1954 Dodge C 3/4 Ton
DrFate77 replied to DrFate77's topic in Mopar Flathead Truck Forum
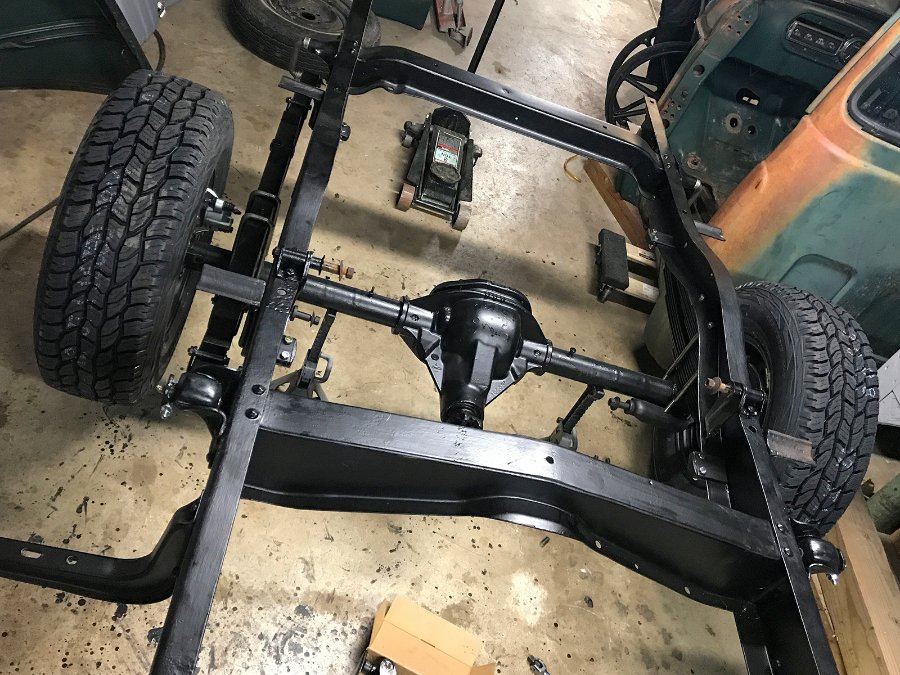
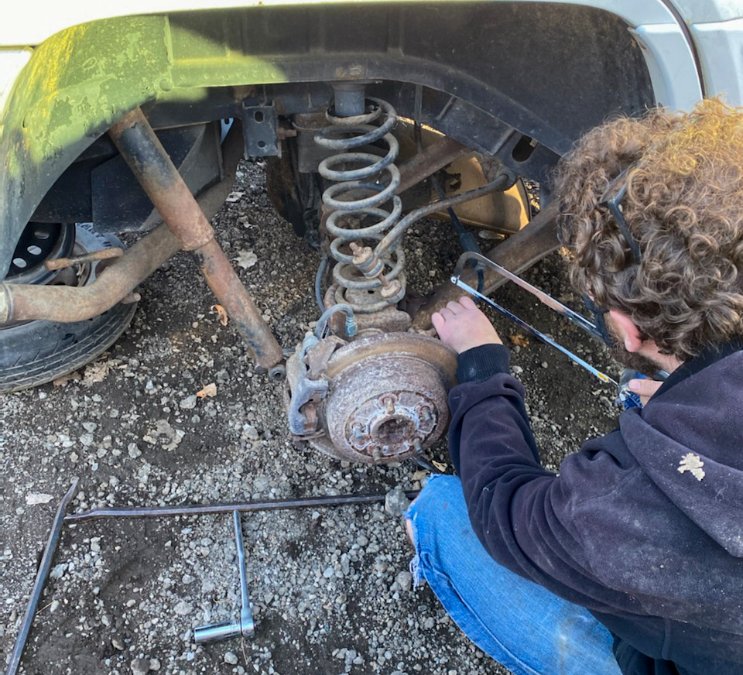
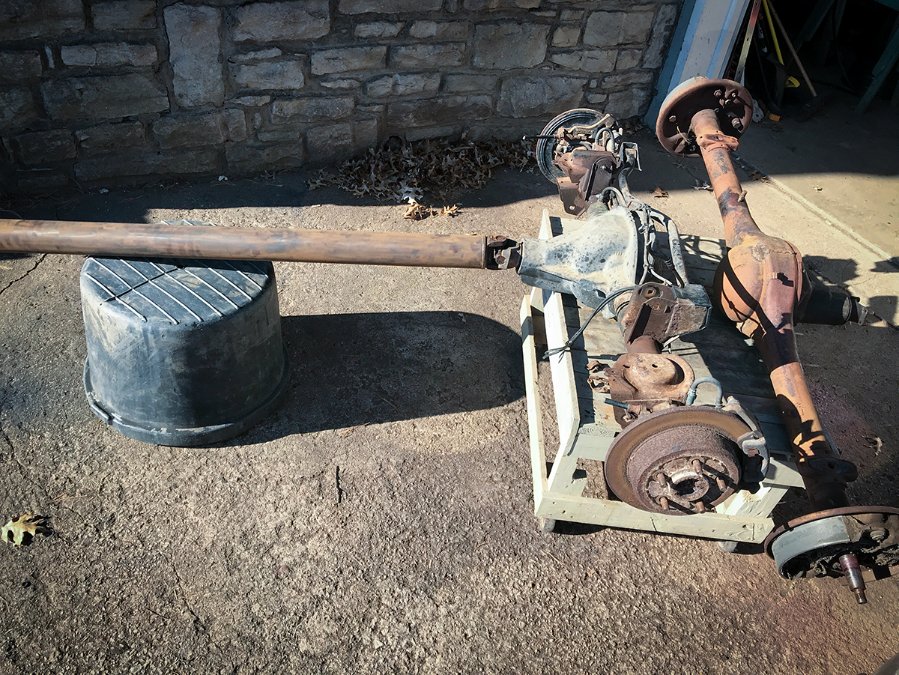
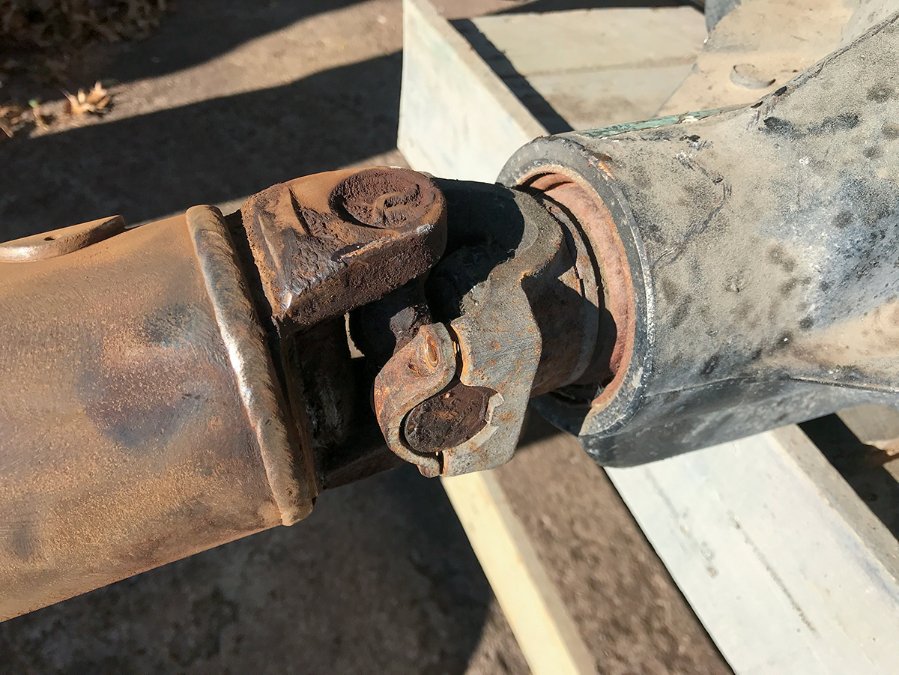
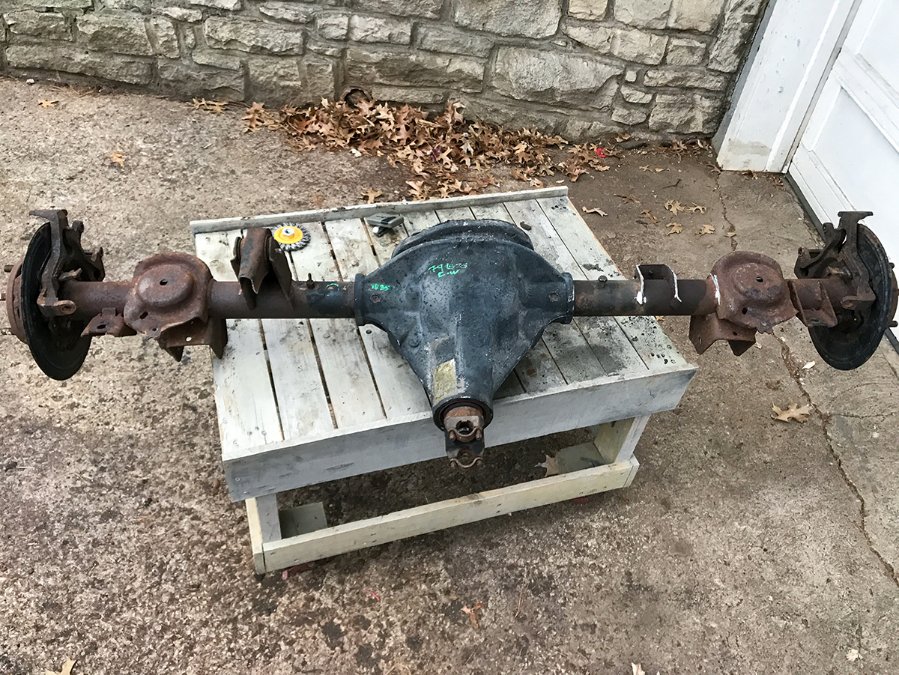
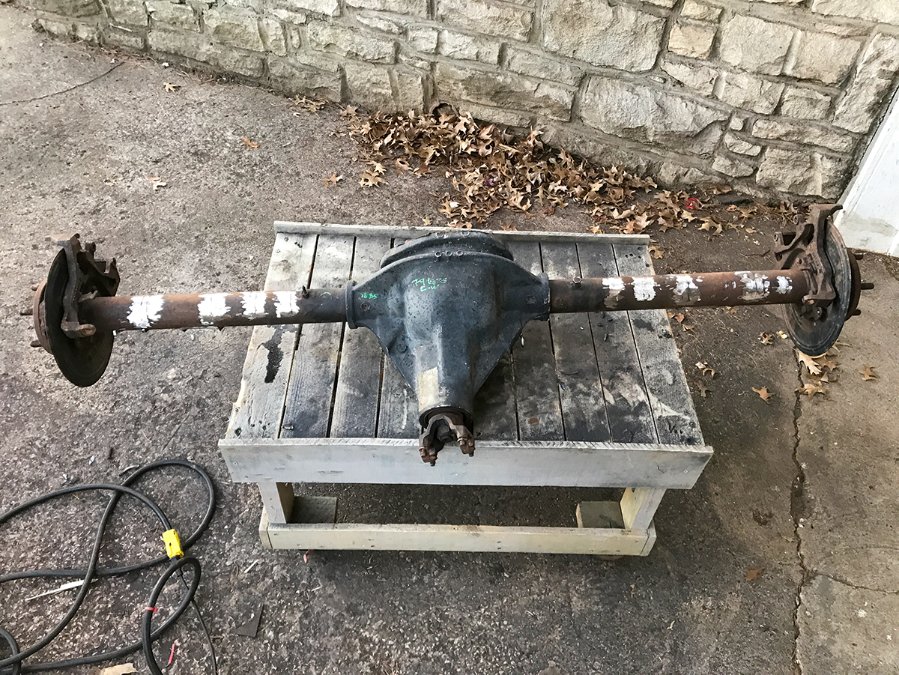
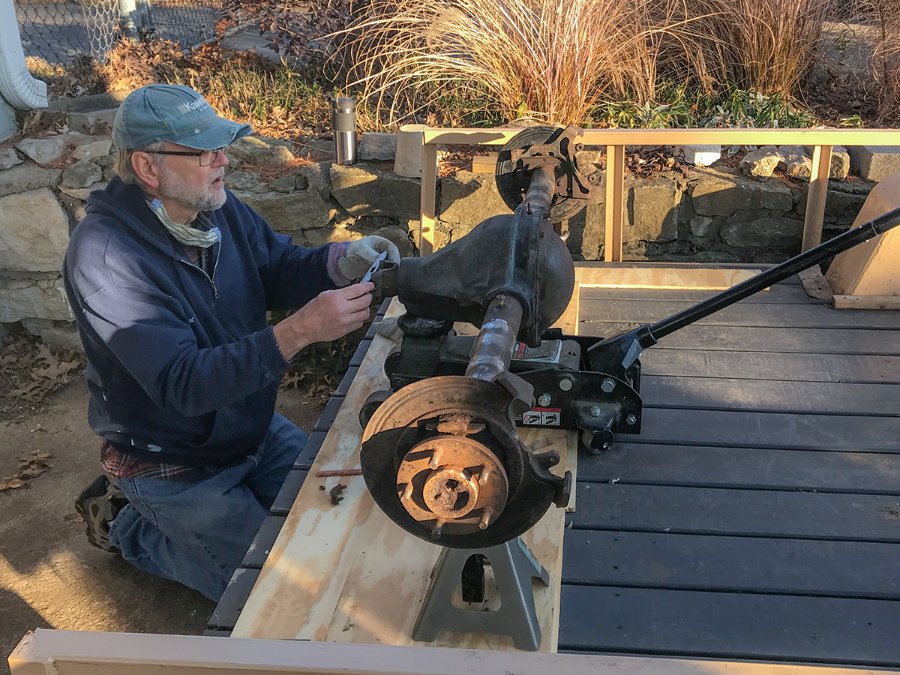
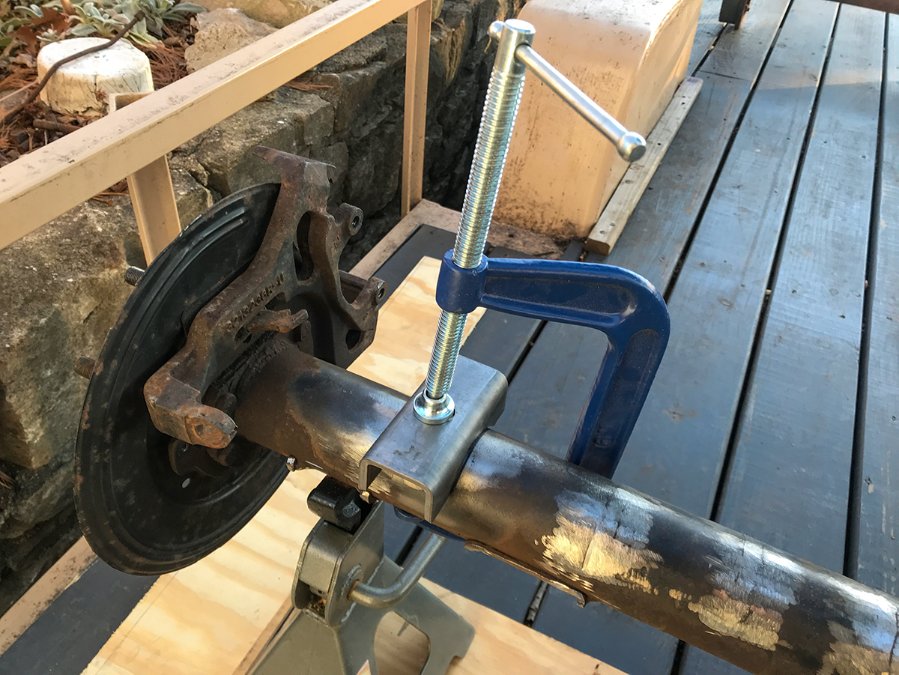
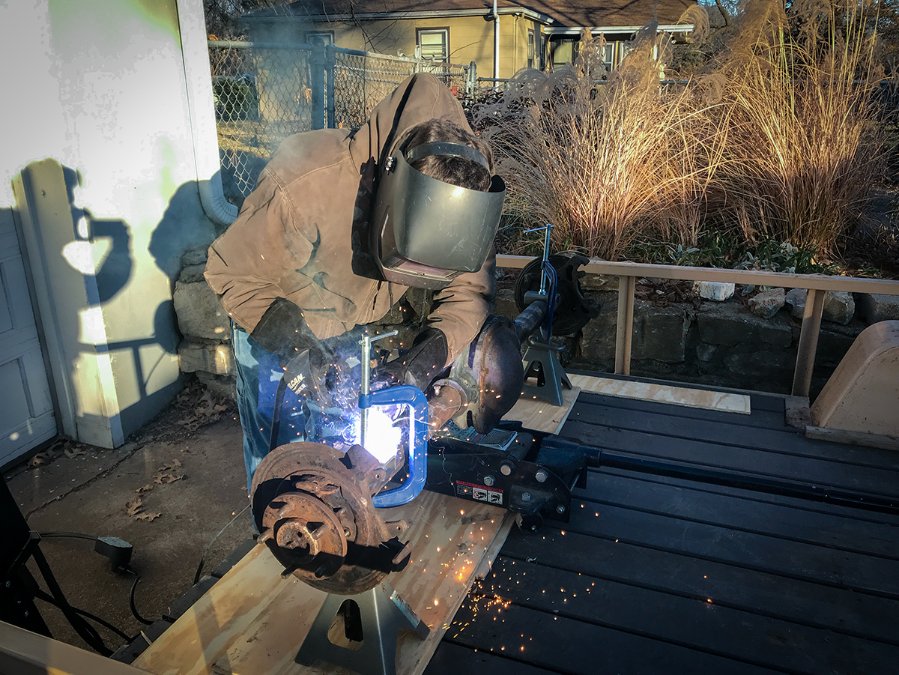
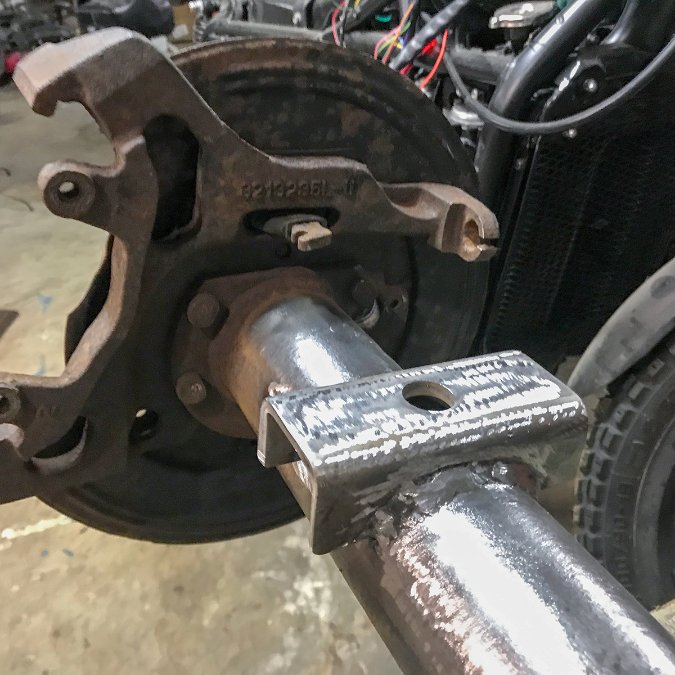
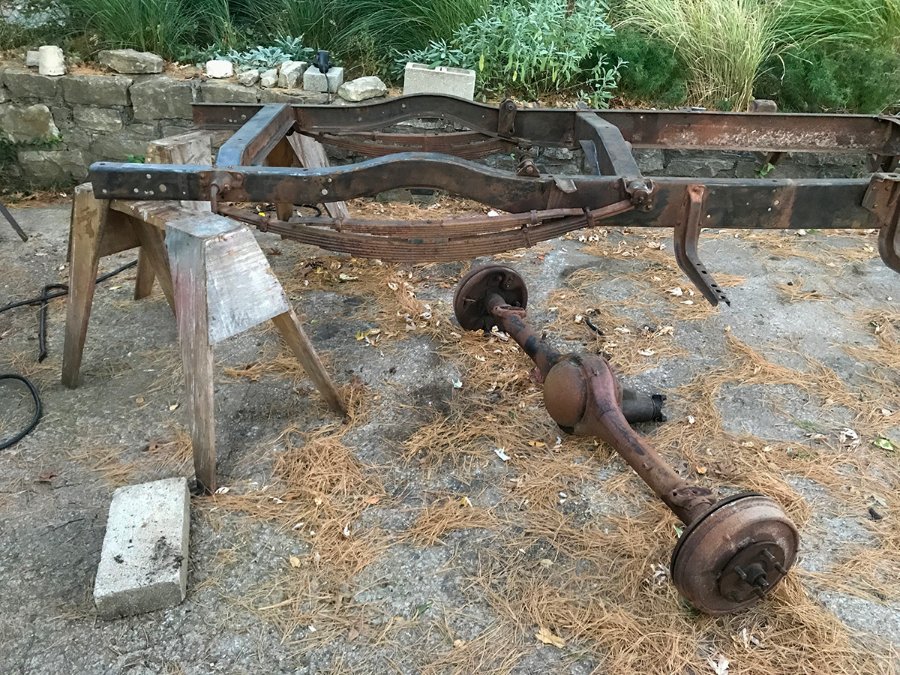
Just wrapped up the rear axle, getting that figured out has taken up most of this winter so far. The original plan was to reuse the stock rear axle and drum brakes, but when we tried to pull off the drums we managed to crack one of them straight through. At that point, getting a newer axle with disc brakes started to make more sense dollar wise than replacing and rebuilding drums. Pick-N-Pull had a few '90s Grand Cherokees, this '96 Laredo had the least amount of rust on it. The number plate is illegible but it would have had a Dana D44A axle, with a 3.73 ratio? Took two trips for us to get it removed. The folks on this site were right, Grand Cherokee rear axle dimensions are more or less spot on with stock and the driveshaft bolts right up. The GC axle is 5 x 4.5 vs the 3/4 ton's stock 5 x 5 bolt pattern, but that's not a big deal for us. My stock wheels are rusted through and unsafe so I'll be looking for different wheels at some point anyway. A half dozen cutting and grinding wheels later and all the stock brackets were gone. My dad is a retired architect, so I brought him in to check us on the perch geometry. We leveled the trailer we were using to work on, put the stock axle on jack stands, raised the front until the perches were level, and got the drop-down measurement from where the driveshaft connects. Then we put the new axle in its place, matched the dropdown, and clamped down the perches level at the right width from center. Tractor Supply's weld-on trailer perches are a good equivalent. My brother knocked out the welding. Doesn't have to be pretty as long as it holds! Then finished cleaning it up and drained the oil. We also took the opportunity to unpin the axle shafts and replace the seals while we were in there. Then painted it with black chassis paint, ordered new U-bolts, and reinstalled everything.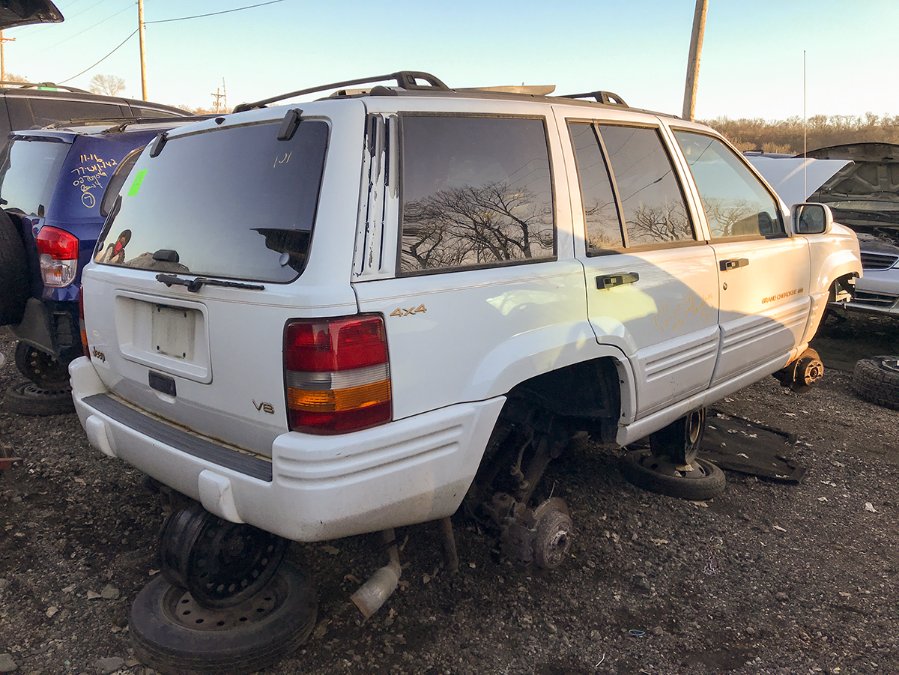


-
"Ran When Parked" 1954 Dodge C 3/4 Ton
DrFate77 replied to DrFate77's topic in Mopar Flathead Truck Forum
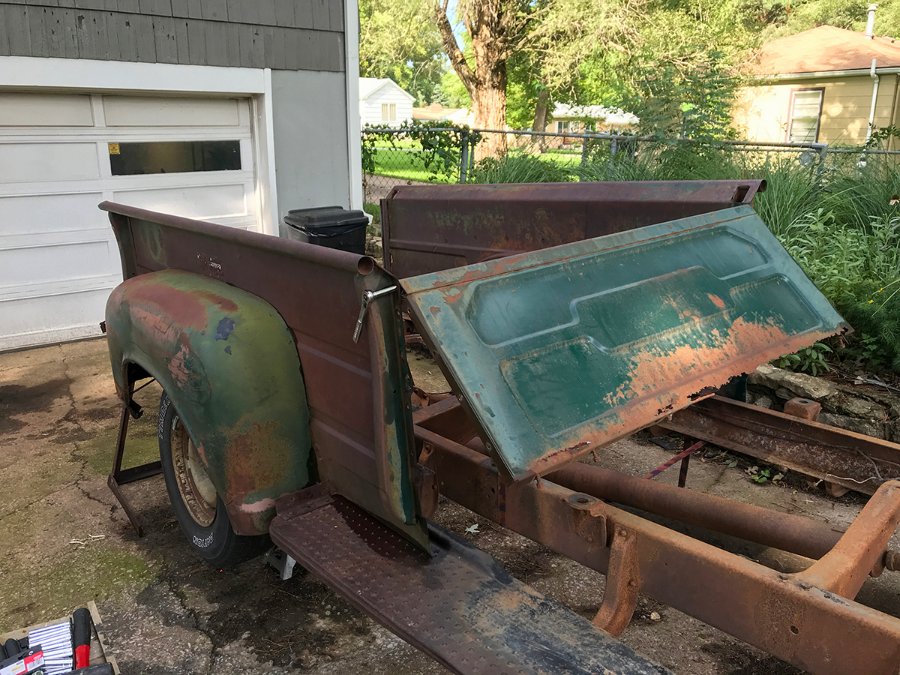
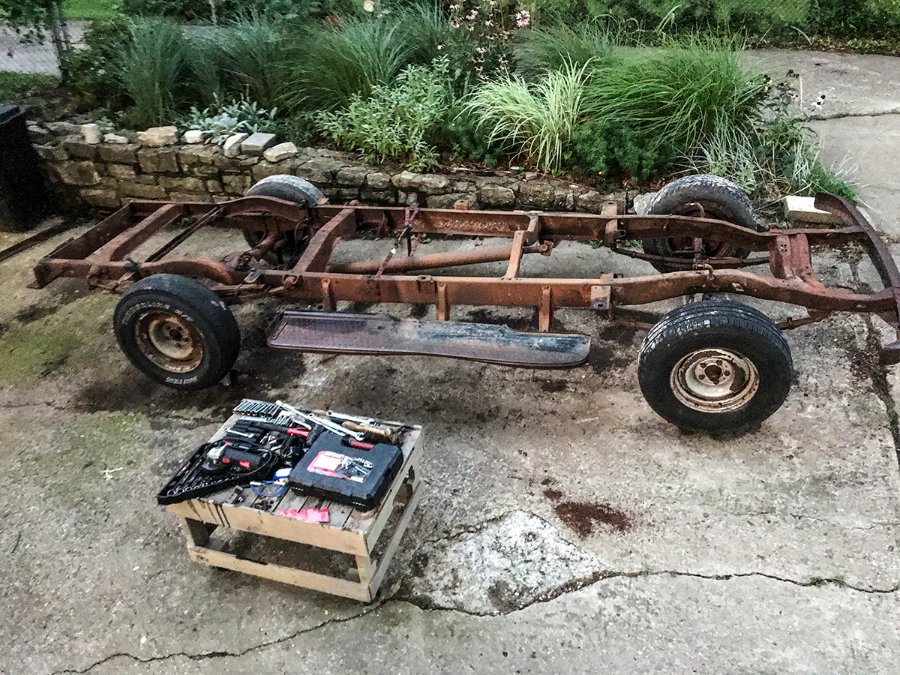
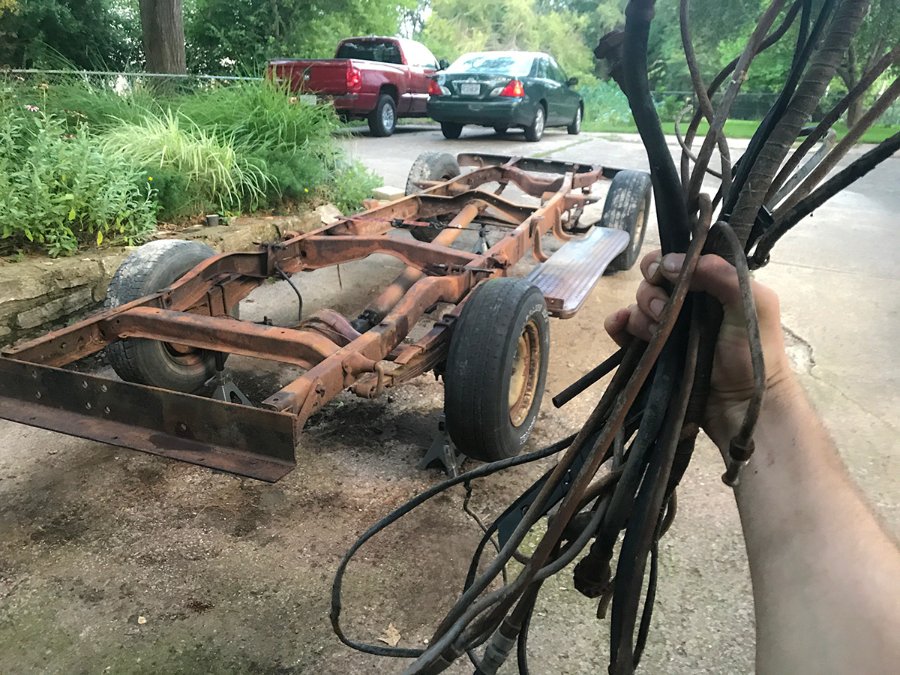
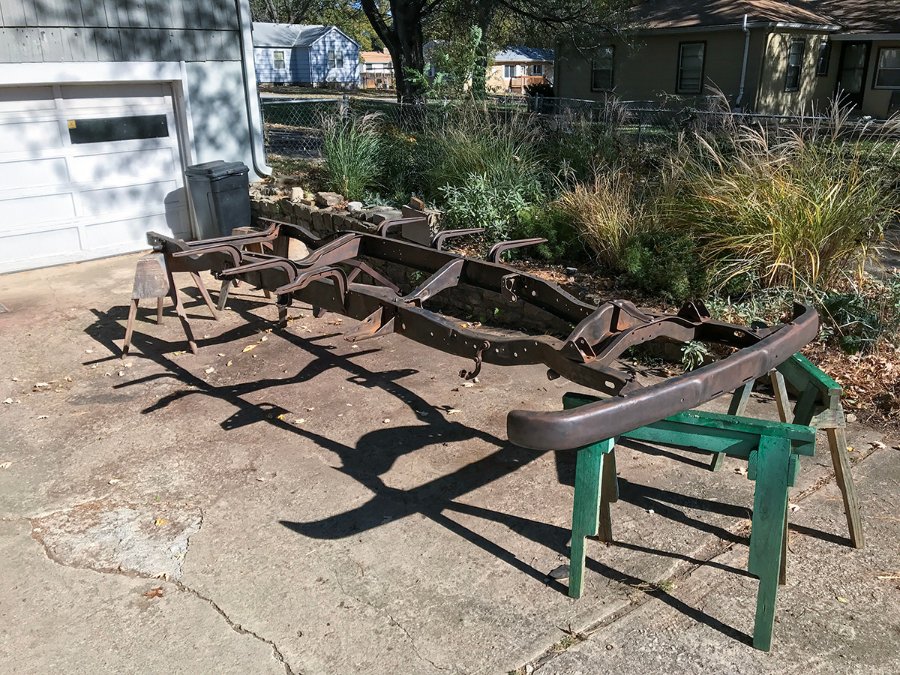
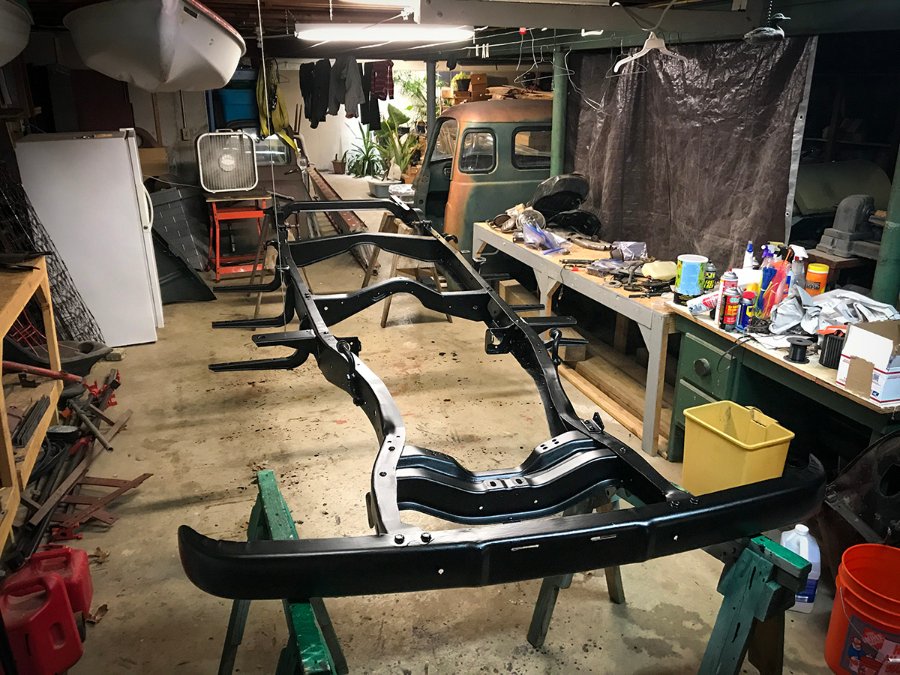
Scope creep set in shortly after getting the engine sent off. The goal was to get the frame cleaned up and painted while it was relatively easy to get to. So the cab, bed, and running boards came off, along with steering column, pedal linkages, brake lines, and what was left of the wiring after the field mice got through with it. Then we realized the spring u-bolts and shackles were in bad shape so we went ahead and took the axles and springs off too. The gas tank and radiator are beyond repair. Not sure what to do about the radiator yet, but I got into the idea of moving the gas tank under the bed so I ordered a '70 Mustang tank from Rock Auto. The fitment seems like it'll do the trick, hopefully soon I can get around to getting mounts fabbed up for it. At some point I was left with just the frame on sawhorses, and I spent a few months with a wire wheel and electric pressure washer cleaning it up in the driveway. Right as cold weather hit, we got it moved inside to brush on a few coats of Eastwood's chassis paint. Those fumes were gnarly, huge credit to my very patient fiancé for putting up with that smell.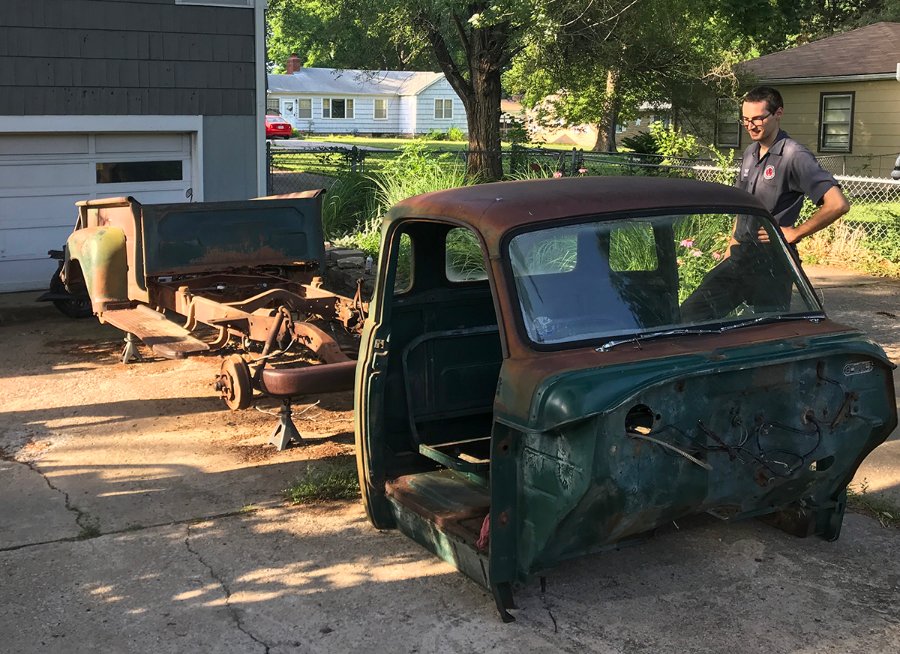
-
"Ran When Parked" 1954 Dodge C 3/4 Ton
DrFate77 replied to DrFate77's topic in Mopar Flathead Truck Forum
Thanks for the tip about the headlights. I dropped the doghouse off with a friend to get some bad cracks welded but as soon as I get it back I can start thinking about what to do with that part. -
"Ran When Parked" 1954 Dodge C 3/4 Ton
DrFate77 replied to DrFate77's topic in Mopar Flathead Truck Forum
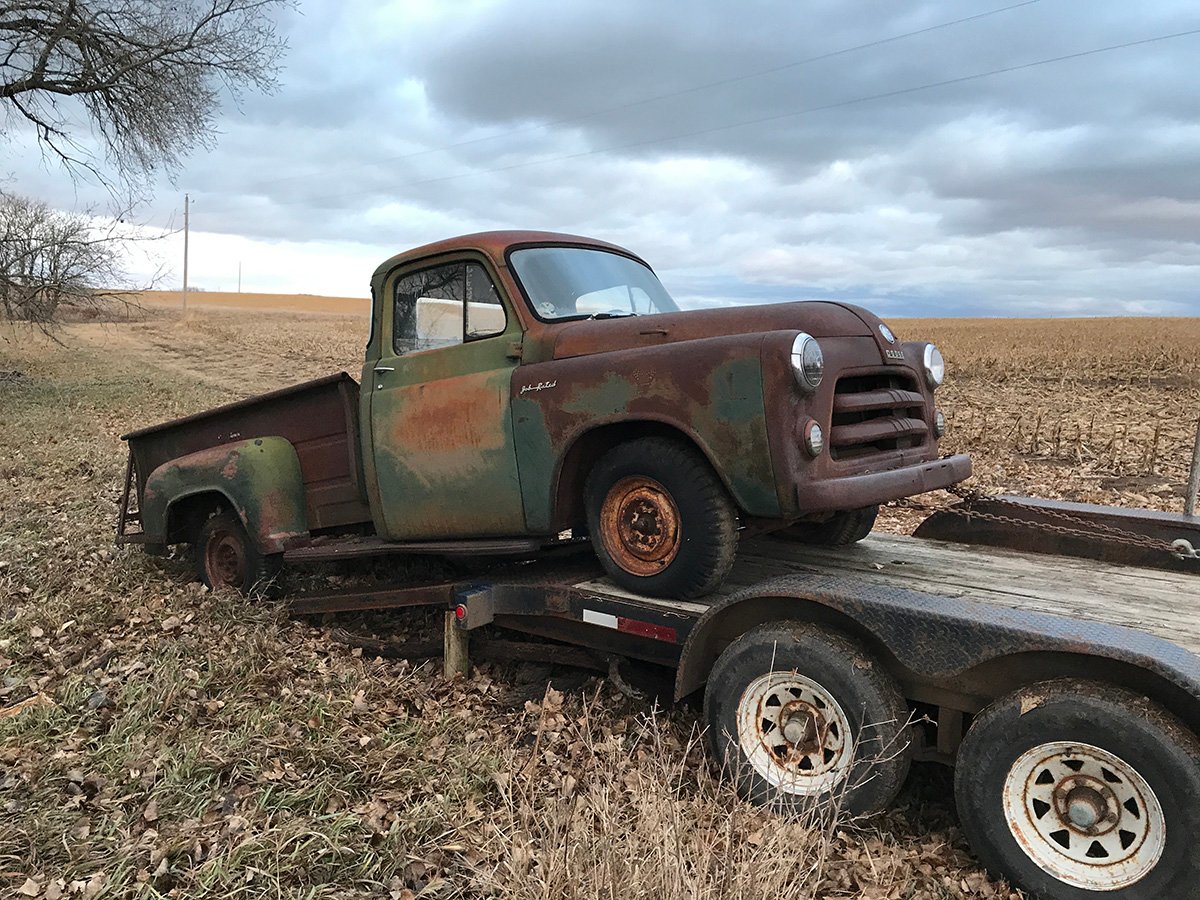
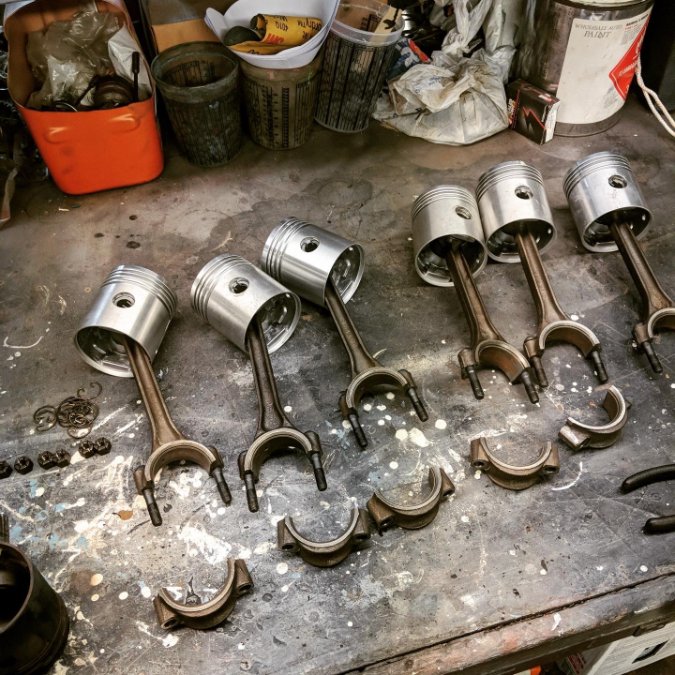
Hey all, thanks for the comments. There probably was an easier way we could have loaded it, lol. I remember we had a hard time getting it to track straight up the ramps and on to the trailer. With the tires in shreds it took a lot of rewinding and fussing to get pulled up squarely. We were all working on it well after dark with the cold wind howling, which made it feel sort of like grave robbery. I think the patina's great even though it's not very even. The side facing the field got stripped mostly bare over the years while the shed side of the truck is actually pretty nicely preserved. All things considered, it's in good shape for sitting outside so long. We're doing disc brakes and rebuilding the engine, new glass, etc but I'm going to keep the rest as stock as possible. The body is covered in dents, welds, and years of farm fixes so I'm inclined to leave it with as much character as we can get away with. First thing was getting it cleaned up, and then found a nice day in February to get the engine pulled. I thought about trying to rebuild the engine myself, but realized the truck would never get finished that way. So we loaded up the engine and sent it to the garage my brother works at to get that part done.
.jpg.1e20aec17ac50a926f149ab49bcc3a28.jpg)
.jpg.a4e7f0ce4661e6860f9e7fe61834acd6.jpg)
.jpg.023b1a8b5401f0e80e028f465fe755c9.jpg)
.jpg.0c98068c0138ad48b4ad38fbcf39e084.jpg)

-
I'd been meaning to get a thread started for our project, this site has truly been a huge resource for me so far. We're about a year in working on grandpa's '54 Dodge pickup - I think the VIN has it as a C-1-C 3/4 ton. He was the second owner, the first being the local mailman. Grandpa bought it from him in '56 and used it as a farm truck on his western Kansas farm, partly to haul sheep to the sale barn. He quit driving it after he got a new truck in the '70s sometime, and it had been parked out behind a shed ever since. I don't think the truck has ever moved under its own power in my lifetime, but grandpa swears it was running when he parked it last. My brothers and I used to play around on it when we were kids and I always thought it would be cool to restore. I finally asked him if he'd sell it to me to try to fix up, but he said I could just take it on the condition that I don't bring it back to him. lol. So two Thankgiving's ago, I borrowed a trailer to haul it back home and start in on it. It was a job getting it unstuck and loaded, it was buried in mud up to the axles and did not come easy. Here's a video for your entertainment. https://youtu.be/R6dHknzmZR8 Most of the last year has been spent getting it tore down and cleaned up, I'll post a few more pictures here to bring us up to today.


