|
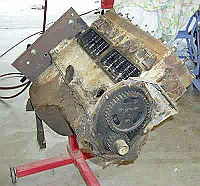
The large steel plate behind the block supports the flathead on a standard engine stand. The block had been partially disassembled last year when I discovered the rust damage to the valve train and set aside in covered storage. The objective is to remove the 230 cubic inch crankshaft and rod set for use in another P23 217 cubic inch block. |
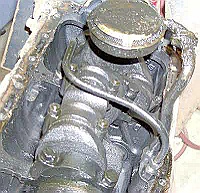
Using an air gun all the head bolts were removed. Note the very rusty water distribution tube. Since this block is not going to be reused I won't have to remove the old tube. |
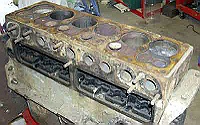
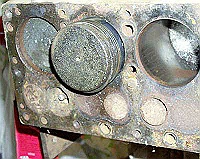
The head is removed and set aside for possible reuse. Cylinders #2 and #3 have substantial rust damage and are frozen in the bores. Note how two of the valves on cylinders # 3 and #4 have completely rusted away. Most of the valves are frozen. |
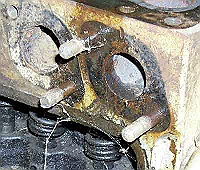
I like to strip spare parts for future use whenever possible. The manifold studs look good and are lubricated with penetrating oil prior to removal. As you can see the oil in the valve chamber is quite dirty and full of sludge. |
|
Using a stud remover I removed all of them out without any breakage. Good example of using the right tool for the right job. |
Using an air powered socket drive I quickly removed all the bolts attaching the oil pan to the block. Screwdriver was used to pry the pan off. As you can see the pan was quite dirty and full of sludge about 3/4 inch thick. |
Next the oil pickup and bypass tube are removed. They will be cleaned and saved for future use. |
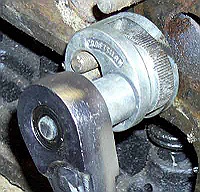
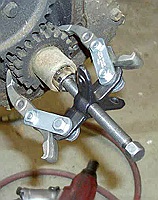
As the timing chain was removed earlier the timing gear comes off next. It has a steel key to keep it from turning on the crank. A six inch gear puller is attached with a socket adapter acting as a stop in the front of the crankshaft. The air gun makes quick work of removing the gear and key. |
|
With the gear off you can see the timing gear oil supply tube. Remove the small attachment bolt and keep the two together for re-assembly. |
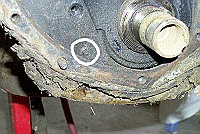
Next the steel plate holding the front motor mount is removed. All of the screws and bolts which hold the plate are visible from the front, except the one circled in white. |
This screw is actually attached from inside the oil pan. Don't try to pull the plate until it is out or you will bend the plate causing an oil leak upon re-assembly. |
Inside the pan area it is easy to see the screw is part of the front seal assembly. Unscrew all of the mounting screws and pull off the front plate and seal assembly. |
|
Next flip the block upside down on the engine stand. Mopar 217/230 flatheads use different rods for the odd and even cylinder locations. The two upper arrows point to the rod offset on cylinder #3 and #4. The lower arrow points to the gear on the cam which drives the oil pump and distributor. |
Next the rod and main caps are removed. This engine had already been rebuild before as all caps were stamped with identifying marks to indicate location. After the caps are removed any bearing sticking to the crankshaft are easily pulled off. |
The last step is removing the rear bearing cap and seal. Once out lift the crankshaft up and out. It weights around 65 pounds so having a helper is not a bad idea. |
With the crankshaft out the rods lie along the bottom of the block while the four main bearing holders are visible above them. |
|
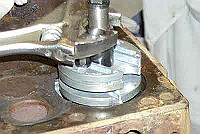
Flip the engine back upright. The pistons are removed from the top so a ridge reamer is used to clean up the top edge of the bore. It also removes some of the accumulated rust. |
Turning the block 90 degrees allows you to work on both sides. Four of the cylinders slide out the top with no problems. However, two are rusted in place and could not be removed. |
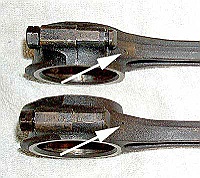
As mentioned earlier, different rods are used for odd and even pistons locations. Note the different offsets on the two rods. The arrows point to the rod oiling hole which will help you correctly align them during re-assembly. |
Surprisingly the two different rods have the same casting number. The number matches what is noted in the Hollanders Interchange Manual, confirming we have a 230 cubic inch crank and rod set. |
|
Success! The crank is now at the machine shop for magnufluxing and cleaning. If the preliminary tests and measurements are good it will be sent to a Los Angeles production shop for liquid magnufluxing. They will then go for rework and return with the oversized main and rod bearings fitted. Once I am sure the crank is good I will have the rods checked and also order 2 replacement rods for the rusted stuck cylinders. The process of tearing down the block took about 3 hours. Use of air tools speeds up the job, but is not necessary. Next step is tear down of our 217 cubic inch donor block. |
|||

