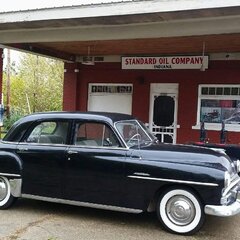
Wood and Steel Posted July 15, 2022 Report Share Posted July 15, 2022 (edited) Hi everyone. A couple of years ago, my '51 Plymouth got side swiped pretty bad by an uninsured driver while parked in front of my house. I got quotes from several different body shops around town. They all seemed to agree that the repair would be obvious compared to the 70's era repaint that was showing it's age, and to repaint the whole car would cost quite a bit more than I paid for it just two years prior. I decided the best economical option was to have someone that specializes in classic cars repair the damage (I wanted to make sure it was done well), scuff the rest of the car myself, and have Maaco shoot the whole car. The professional I took it to charged $1000 to repair the damage from the accident. I didn't look over the work very well when I picked it up, but after inspecting it at home, I realized how bad of a job they did. There was no way it would look decent with paint on it. In the hole already, I decided I had to strip off their repairs and fix it myself. It took quite a while, but I got the car looking pretty good for an amateur. Not wanting to risk spending more money for a result I wasn't happy with, I started researching how to paint it myself. That's when I stumbled upon the infamous Rustoleum roll on job... I don't need a show car. As long as it looks decent, I'm happy. Since I use it as a near daily driver, I loved the idea of being able to repair any future damage myself. It seemed dirt cheap, and although time consuming, not very difficult. Not to mention I thought it would be fun to tell people I rolled it. I rolled on 5 or 6 coats of Rustoleum marine topside and it came out looking pretty decent, aside from the orange peel. Here it is before sanding: I busted out the sanding blocks and started going at it. I sanded to 2000 grit and started the cut. It was shining up nicely. That's when it became obvious... There's a waviness to the paint. Almost like some idiot tried painting it with a 4" foam roller. It's hard to see in pictures, but here's a couple of videos that showed it a bit (You may need to change the quality to 1080p): So now I'm not sure what to do. I'm pretty exasperated at this point, and really just want my car back. I have way, way too many hours into this, but I don't want it to look terrible. What are my options? Is there any way I can get it flat without stripping all of the paint? Am I better off taking it to a professional at this point? Edited July 15, 2022 by Wood and Steel Typo Quote Link to comment Share on other sites More sharing options...
Los_Control Posted July 15, 2022 Report Share Posted July 15, 2022 Just now, Wood and Steel said: So now I'm not sure what to do. I'm pretty exasperated at this point, and really just want my car back. I have way, way too many hours into this, but I don't want it to look terrible. For me is very simple, lower your expectations. I think it looks great for something you did yourself. One thing I like most about single stage paint, you can sand down that area and redo it. Maybe get it better the 2nd time. I plan to spray Rustoleum paint on my hoopty, If it came out as good as yours I would be happy with it. .... I have lower expectations, I'm leaving some dents for now, can come back & work on them later and repair the paint. These vehicles never had the greatest paint job from the factory .... It really is your expectations. Quote Link to comment Share on other sites More sharing options...
Sniper Posted July 15, 2022 Report Share Posted July 15, 2022 This is what Rustoleum has to say about it Quote For best results on large, smooth surfaces, apply using a short nap or foam roller cover followed immediately by leveling off with the tip of a brush. Quote Link to comment Share on other sites More sharing options...
kencombs Posted July 15, 2022 Report Share Posted July 15, 2022 If you want to save it I’d try switching to a much more aggressive grit and sand all the waves out. Then recoat and sand between coats until it’s flat before another coat. once it it is covered well and flat one or. Two more coat thinned a bit more. Let it dry until it sands well the. Cut and buff. lots more work. I think from your description it wasn’t’ cut flat between coats and that led to the issues. But I’ve been wrong before….lots of times! 1 Quote Link to comment Share on other sites More sharing options...
Los_Control Posted July 15, 2022 Report Share Posted July 15, 2022 Just now, kencombs said: lots more work. I think from your description it wasn’t’ cut flat between coats and that led to the issues. But I’ve been wrong before….lots of times! You forgot the "all ya all" But you are 100% correct. Quote Link to comment Share on other sites More sharing options...
plymouthcranbrook Posted July 15, 2022 Report Share Posted July 15, 2022 (edited) I did a lot of touch up with my 52 fixing small areas of rust and some fairly deep scratches. I had no idea what color it really was though it was close to a factory color. I smoothed it as best as I could and used touch up cans that I found that were pretty close. I used to paint cars back in the days of acrylic enamel and I can tell you that the more you look the more you will see. Find a level you are happy with and go. Enjoyment is the main thing. And remember at fifty mph at midnight no one is gonna see a thing Edited July 15, 2022 by plymouthcranbrook 1 Quote Link to comment Share on other sites More sharing options...
47 dodge 1.5 ton Posted July 16, 2022 Report Share Posted July 16, 2022 Need to go back and think 50’s way of life. My grand mother use to talk about painting the model A in an hour with a paint brush, black was the color of choice! From the stories I understood, she did it a couple of times. I think what you have looks period correct. Younger brother of mine just put 32k in paint only (no body work) on a mopar and now it will never see a road. Unless you compare the dollars and hours spent in paint job, would be hard to compare quality. I think they put 10 coats of clear on that car, good luck doing any touch up. Quote Link to comment Share on other sites More sharing options...
p15-1948 Posted July 16, 2022 Report Share Posted July 16, 2022 (edited) 6 hours ago, kencombs said: If you want to save it I’d try switching to a much more aggressive grit and sand all the waves out. Then recoat and sand between coats until it’s flat before another coat. once it it is covered well and flat one or. Two more coat thinned a bit more. Let it dry until it sands well the. Cut and buff. lots more work. I think from your description it wasn’t’ cut flat between coats and that led to the issues. But I’ve been wrong before….lots of times! I agree that it may not have been sanded between coats. Friend of mine did a GMC truck and it turned out great. Most, if not all, couldn't tell it from a spray job. Key was getting each coat sanded out to uniform dullness between coats. That would have eliminated any waves, runs or other issues. It's a lot of work but can turn out nice. edit: I think he thinned each coat a lot and used seven or eight coats. Edited July 16, 2022 by p15-1948 Quote Link to comment Share on other sites More sharing options...
MarcDeSoto Posted July 16, 2022 Report Share Posted July 16, 2022 I really hate it that you paid a pro body man 1K and you had to do the work over again. Did you complain to him? You should even if there's no chance of recovering your money to let him know you weren't satisfied. I don't know if you have an air compressor, but you can paint the car yourself the right way with a cheap spray gun from HF. Even if you buy a cheap AC from HF and a $30 spray gun, it will be a lot cheaper than taking it to a pro. I'm painting my 48 DeSoto right now, and it labor intensive (sanding), but learning to spray doesn't take much time. Watch a few good YT videos like the guy on Paint Society. Acrylic enamel costs about $240 to $340 a gallon. Pic shows a junk fender I sprayed. I had a little orange peel, so I learned how to reduce it. More air and some reducer in the paint. Then I painted the first thing on my 48 DeSoto, the cowl. Just one thin coat. Looks ok. 2 Quote Link to comment Share on other sites More sharing options...
Adam H P15 D30 Posted July 18, 2022 Report Share Posted July 18, 2022 (edited) You can thin and spray Rustoleum with good results. On the can it states up to 10% I think but I mix it 2:1 with acetone and 10% enamel hardener. If it's going to live outside, you can clear it with any good quality automotive urethane clear for the UV protection. Edited July 18, 2022 by Adam H P15 D30 Quote Link to comment Share on other sites More sharing options...
Eneto-55 Posted July 19, 2022 Report Share Posted July 19, 2022 Back in HS I had a friend who didn't want to pay the $29.99 for a cheap quicky paint job (I think I remember correctly the price - it was around 1973.) So he opted for spray cans. 7 years or so later a guy I worked with at the plating shop painted his car with Rusoleum, and a roller. The latter car looked better than the spray deal. There used to be skilled painters who could do a really nice job with a paint brush. Use real slow thinner and a high quality brush that is not going to shed bristles. I would think that it would be the same idea with a roller - use a good one (and short nap like already mentioned), and a slow thinner that will let the paint settle out smooth after you stop rolling on it. Or just get a spray gun and practice first, like Marc did. Quote Link to comment Share on other sites More sharing options...
Wood and Steel Posted July 24, 2022 Author Report Share Posted July 24, 2022 On 7/15/2022 at 5:44 PM, Sniper said: This is what Rustoleum has to say about it... I did try the roll and tip method on a spare panel, but had no luck. On 7/16/2022 at 12:58 AM, MarcDeSoto said: I really hate it that you paid a pro body man 1K and you had to do the work over again. Did you complain to him? I did complain, but it did no good. Lesson learned. ALWAYS INSPECT THE WORK BE FOR YOU PAY! On 7/15/2022 at 6:24 PM, kencombs said: ... I think from your description it wasn’t’ cut flat between coats and that led to the issues. But I’ve been wrong before….lots of times! Thanks for all of the great responses! I posted about this on a few different forums, and this is by far the kindest and most helpful! I probably should have given more information on my process, and less about my life story. I painted a year ago, so my memory might be a bit fuzzy, but as I recall, I cross hatch sanded the whole car (Not sure that's the right term. I used an X pattern) with 60 grit on an 8" block held horizontally and small square soft block where necessary. Some of the car got sanded to bare metal, but not most of it. I did two coats of Rustoleum marine primer, sanding between coats. Followed by 5-6 coats of the marine topside mixed with hardener, Penetrol, and mineral spirits. 24 hours between coats. I sanded between every coat with increasingly finer grit, as youtube recommended, finishing with (I think) 320. The final coat is what you see in the top picture, where the orange peel was hiding the ripples. After the final coat, I progressively sanded up to 2000 with the aforementioned block. It looked flat until I started cutting it. I've only done the cut on part of the trunk and part of the rear fender, but they both came out looking the same. I don't have good accesses to a garage or an air compressor, so all of the sanding was done by hand, stripping paint and body work included. I'm so tired of sanding, but I'm afraid a longer block and few more coats is what it would need to look decent. Is there an easy way out that would still look good that I'm not thinking of? Even if I just cut the rest of the car as it is, I feel like it would take me weeks, so I'm dreading sanding and painting more. Quote Link to comment Share on other sites More sharing options...

Recommended Posts
Join the conversation
You can post now and register later. If you have an account, sign in now to post with your account.