bartenderfloyd Posted November 1, 2021 Report Share Posted November 1, 2021 I have been working on this project for a few months now. I am prioritizing safety over originality so if you are a purist, forgive me. Mechanically, this car is superb. In fact, I found this exact car on this site and an extensive thread detailing the engine rebuild among other things (the user was Aero3113 in case you want to see the old threads). Physically though, this car was pretty swiss cheese with rust. The pics from 2008 have the exact same interior so I'm pretty sure nothing was done to the body. So here goes, this is my attempt to make this car safe so I am comfortable with my family driving it. A few starting pics: It looks really nice on the outside. You can see from the photos though that the rugs were very aged, as if they had never been removed, and the rocker was being held on by the chrome trim. Quote Link to comment Share on other sites More sharing options...
bartenderfloyd Posted November 1, 2021 Author Report Share Posted November 1, 2021 This is what it looked like after I removed all the interior, yes, both rockers fell right off: Quote Link to comment Share on other sites More sharing options...
bartenderfloyd Posted November 1, 2021 Author Report Share Posted November 1, 2021 Ordered floor pans in March, they arrived at the end of June. Next time I will make them myself. They seem easy enough to make. The cross members were shot. Like I said, I am interested in safety, not originality so to make it easy I welded 1/8" box steel to the frame to make a solid base. 1 Quote Link to comment Share on other sites More sharing options...
bartenderfloyd Posted November 1, 2021 Author Report Share Posted November 1, 2021 Time to start welding. Don't worry, it will all be covered by new carpet. Also painted the floor with rust preventative paint. 8 Quote Link to comment Share on other sites More sharing options...
Doug&Deb Posted November 1, 2021 Report Share Posted November 1, 2021 Nice work! 1 Quote Link to comment Share on other sites More sharing options...
JerseyHarold Posted November 1, 2021 Report Share Posted November 1, 2021 I saw this car in person when Aero3113 had it. Good to see you're freshening it up. 1 Quote Link to comment Share on other sites More sharing options...
RobertKB Posted November 1, 2021 Report Share Posted November 1, 2021 Very nicely done repairs! Those "rocker deletes" are as bad as anything I've seen! 2 Quote Link to comment Share on other sites More sharing options...
bartenderfloyd Posted November 3, 2021 Author Report Share Posted November 3, 2021 More bodywork pics. Remember, the goal was to make the car safe so my wife can tool around town in it. I have never done any bodywork before, just watched Fitzy's garage and Lakeside Auto on Youtube. These are the results. I only wanted to fix the swiss cheese rust (especially behind the doors) and do my best to prevent future rust. That POR15 stuff is great by the way! Also tried using fiberglass as well as body filler. That worked well with the small holes, mostly by the mouldings where the water would sit. It was interesting to pull the chrome off and see the grey paint color. I think that was the original color but when I sanded the car to prep for paint there was a creme color paint hidden under there too. The bodywork came out good enough for me although I will not be winning any shows. The car is now at a paint shop awaiting a fresh blue spray. Hopefully I get it back next week. 5 Quote Link to comment Share on other sites More sharing options...
Andydodge Posted November 3, 2021 Report Share Posted November 3, 2021 That work you did on the floor & rockers is commendable.........to be honest I couldn't believe the first pics showing what was rusted out and literally just not there........for someone who says they hadn't done any bodywork before you certainly show what can be achieved by just getting in and doing the work........very nice..........andyd Quote Link to comment Share on other sites More sharing options...
ratbailey Posted November 3, 2021 Report Share Posted November 3, 2021 On 11/1/2021 at 2:00 PM, bartenderfloyd said: Time to start welding. Don't worry, it will all be covered by new carpet. Also painted the floor with rust preventative paint. I'd be feeling pretty darn good about myself at this point...spectacular work. 1 Quote Link to comment Share on other sites More sharing options...
Veemoney Posted November 3, 2021 Report Share Posted November 3, 2021 Should be good for another 20 years. Nice work Quote Link to comment Share on other sites More sharing options...
bartenderfloyd Posted November 3, 2021 Author Report Share Posted November 3, 2021 Thank you for the kind words. It helps to know how to weld. I just had to adapt a bit to thinner steel as I am used to quarter inch and thicker. 1 Quote Link to comment Share on other sites More sharing options...
Worden18 Posted November 3, 2021 Report Share Posted November 3, 2021 Very nice work! Keep us updated ? Quote Link to comment Share on other sites More sharing options...
bartenderfloyd Posted November 9, 2021 Author Report Share Posted November 9, 2021 Just got her back from the body shop today and happy to say she is all one color again. Just some minor work left to get it back to my house by this weekend (put on the new tires, install the back seat, get the bumpers on). Probably tool around town with it for a few weeks and then tackle my winter projects. Door panels, carpet, and headliner. Have to wait a few months before I can compound the paint and really make it sparkle. 4 Quote Link to comment Share on other sites More sharing options...
Waldo Posted November 9, 2021 Report Share Posted November 9, 2021 If you want a spare 1950 Deluxe motor I have one you can have for free, but I'm in Port Ludlow Washington. ser. number #P20-411746, block is not cracked but stuck. Waldo Quote Link to comment Share on other sites More sharing options...
Bryan Posted November 9, 2021 Report Share Posted November 9, 2021 2 hours ago, bartenderfloyd said: Just got her back from the body shop today and happy to say she is all one color again. Just some minor work left to get it back to my house by this weekend (put on the new tires, install the back seat, get the bumpers on). Probably tool around town with it for a few weeks and then tackle my winter projects. Door panels, carpet, and headliner. Have to wait a few months before I can compound the paint and really make it sparkle. You might have mentioned before, but what type of paint did you use? Quote Link to comment Share on other sites More sharing options...
bartenderfloyd Posted November 10, 2021 Author Report Share Posted November 10, 2021 18 hours ago, Bryan said: You might have mentioned before, but what type of paint did you use? Not sure, I get my paint from Allied Paint in Newark, NJ. My fat fingers are covering the name but I wanted to get an extra pint from him so when I go there I'll find out. I do know the paint number is 6B-4958232A. Quote Link to comment Share on other sites More sharing options...
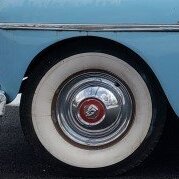
bartenderfloyd Posted November 10, 2021 Author Report Share Posted November 10, 2021 Ran into a minor snag and wanted an opinion. The rattling was the parking brake rivets digging into the drum. I've seen on this forum where people send these out to Tennessee Clutch to get relined. Is that still the goto? I saw the brake band lining at bernbaums. Will that work as well? Quote Link to comment Share on other sites More sharing options...
Young Ed Posted November 10, 2021 Report Share Posted November 10, 2021 Personally I do my own. Looking at your pic there appears to be plenty of material left. I wonder if someone else did it themselves and didn't countersink the rivet heads? You might just need new rivets. 1 Quote Link to comment Share on other sites More sharing options...
Bryan Posted November 10, 2021 Report Share Posted November 10, 2021 1 hour ago, bartenderfloyd said: Not sure, I get my paint from Allied Paint in Newark, NJ. My fat fingers are covering the name but I wanted to get an extra pint from him so when I go there I'll find out. I do know the paint number is 6B-4958232A. Oops, not the brand name but whether it was enamel, lacquer, or a modern paint. Quote Link to comment Share on other sites More sharing options...
bartenderfloyd Posted November 10, 2021 Author Report Share Posted November 10, 2021 3 hours ago, Bryan said: Oops, not the brand name but whether it was enamel, lacquer, or a modern paint. oh, modern. Base with a clearcoat. 1 Quote Link to comment Share on other sites More sharing options...
allbizz49 Posted November 10, 2021 Report Share Posted November 10, 2021 Modern can be single stage too. Urethane single stage solids look great. I prefer them to be honest to base/clear. Metallics and pearls I always shoot two stage. Your car looks good either way. 3 Quote Link to comment Share on other sites More sharing options...
bartenderfloyd Posted February 6, 2022 Author Report Share Posted February 6, 2022 I've been dragging lately waiting for the weather to break. Did some rewiring and got the dome light to work. Then realized the headliner was wrong and ordered a new one, which I posted about here. But now I'm onto the rug. I have garage space now so I removed the seats and prepped to install the rug. I am going to put the sound deadening in tomorrow but wanted to test fit the rugs before I put them in. Now I am confused. Do these look right? Do I just need to cut a lot of rug? I got them from Kanter in Jersey and it looks like the instructions but if I install they way the instructions say there will be no rug under the rear passengers' feet. Any thoughts? Quote Link to comment Share on other sites More sharing options...
Bryan Posted February 6, 2022 Report Share Posted February 6, 2022 On the 2nd picture (or first picture showing carpet) you need to move the rear carpet forward where the front slot cutouts are fully up to the front seat mounts (and surrounding the mounts). Would not be a need to have carpet under the rear seat. 1 Quote Link to comment Share on other sites More sharing options...
Rusti Posted February 6, 2022 Report Share Posted February 6, 2022 grate work on the floor. the new color looks nice 1 Quote Link to comment Share on other sites More sharing options...

Recommended Posts
Join the conversation
You can post now and register later. If you have an account, sign in now to post with your account.