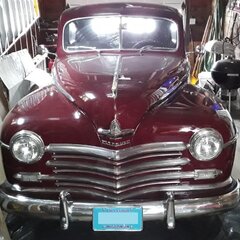
ccudahy Posted August 25, 2021 Report Share Posted August 25, 2021 (edited) I am trying to wire my turn signals on my '47 Plymouth it is still 6 volt / postive ground. I am NOT an electrical genius, but I have a shop manual, laminated wiring diagram, and the instruction sheet. One of the previous owners split the wire for brake lights to all 3 taillights and have dual element bulbs in the rear fender sockets. These will be dumb questions, but bare with me. My big question is do I have to extend the wires from the turn signal switch to the light sockets for wires #1, 2, 3, & 4, or is there a place to tie into under the dash or in the car interior? How does the wiring harness typicall run through the car interior to the trunk? This is what I know. I get that #5(Red) is going to the brake switch and needs to be extended. #6(Black) & #7(Blue) go to the flasher and the fuse link is coming from the ammeter. In front all I saw was 1 yellow wire and one cut off on each socket and in back was 2 red to the Left rear fender sockets and 1 red and 1 black to the right rear fender socket. Also, have a #51 - 6V bulb to replace the 12 volt bulb in the switch. Any help is most appreciated! Edited August 25, 2021 by ccudahy Quote Link to comment Share on other sites More sharing options...
Ed McDermott Posted August 25, 2021 Report Share Posted August 25, 2021 Had a similar situation on my 48 Dodge. If the bulbs sockets you will have to run the 4 new wires from the turn signal to the respective bulbs. For the front go thru the firewall you can usually find room. wiring on my dodge goes to the rear by traveling up the driver side A column and under the roof liner and along the roof line and down into the trunk . It was impossible to snake additional wires along this path. For the rear wire along the main frame member and up into the trunk at the rear. takes some time. unless the car has existing turn signal wires you have some work to do but its doable. 1 Quote Link to comment Share on other sites More sharing options...
ccudahy Posted August 25, 2021 Author Report Share Posted August 25, 2021 (edited) Thank you Ed! To the best of my knowledge the car never had turn signals. I think I am going to have to, put new dual contact sockets in the front since that one wire has been cut. Then I will have one wire for the yellow connection from head light switch and then I can hook up the #4 (yellow) and #2 (green) from the turn signal to the other wire. Run the extended wires along the front wiring harness up the near the juction block for the headlights, then to each of the parking lights. I believe like, @Ed McDermott is saying. If my thinking is right? The rears have two wires to them already. Do I use the brake light wire or the headlight switch controled wire to get turn signals to work in the rear since I only have 2 wires? I guess I am still stumped on how to do the tailights? I will have to see how to run wires along the frame. Edited August 25, 2021 by ccudahy Quote Link to comment Share on other sites More sharing options...
LazyK Posted August 25, 2021 Report Share Posted August 25, 2021 you use the break light wire. you will run three new wires wires (1,3,5) from the turn signal switch to the rear of the car. seems your laminated sheet shows the wiring for the "factory optional turn signals" and that is where the confusion could be 1 Quote Link to comment Share on other sites More sharing options...
ccudahy Posted August 25, 2021 Author Report Share Posted August 25, 2021 (edited) Thank you LazyK! Yes are correct. It does show the "factory optional turn signals". That doesn't help things. The biggest thing messing with my mind now is all three taillights are brake lights, which is great. I am just not that good at this stuff to wrap my mind at how to get 3 circuits into 2 contacts, without looking for a tripple contact plug and tripple element bulb. Which I don't think they make or do they?? Edited August 25, 2021 by ccudahy Quote Link to comment Share on other sites More sharing options...
Plymouthy Adams Posted August 25, 2021 Report Share Posted August 25, 2021 you have only to understand that the brake light circuit is also the turn signal and the function of the switch is to route the brake light for the direction you are are turning through the flasher switch also connect the brake to the opposite side direct....just follow the wiring instruction.....as ole Balis always told me, point your nose...your butt will follow. 1 Quote Link to comment Share on other sites More sharing options...
LazyK Posted August 25, 2021 Report Share Posted August 25, 2021 (edited) my thoughts and someone will correct me if I'm wrong. 1. remove the previous owners wiring connecting all three rear lights 2. connect turn signal switch #5 to your rear center brake light. (center brake light mandated by the federal goverment in 1985, again chrysler was ahead of the times) 3. run wires #1 and #3 from your turn signal switch to the appropriate rear lamp sockets what happens is in normal mode, power from your center brake light goes thru the turn signal switch and powers the right and left lamps when you move the turn signal switch to turn left you are disconnecting the left light from the brake light and the left light now get power from the flasher circuit right turn the same, right lamp removed from the brake light, and power now from the flasher circuit Edited September 8, 2021 by LazyK 1 Quote Link to comment Share on other sites More sharing options...
ccudahy Posted August 25, 2021 Author Report Share Posted August 25, 2021 (edited) @Plymouthy Adamsthanks for the sage advice, and along with @LazyK explaining to me what is happening with the turn signal switch and the brake lights. I was thinking about it the wrong way. I was thinking the turn signal was "feeding" not "blocking" electricity. It actually makes some sense now! I will let you all know how it turns out. Edited August 25, 2021 by ccudahy Quote Link to comment Share on other sites More sharing options...
LazyK Posted August 25, 2021 Report Share Posted August 25, 2021 1 minute ago, ccudahy said: I was thinking the turn signal was "feeding" not "blocking" electricity. I actually make some sense now! I will let you all know how it turns out. does both, depending on what position the switch is in. took me a while to wrap my head around the functions Good luck Quote Link to comment Share on other sites More sharing options...
LazyK Posted August 25, 2021 Report Share Posted August 25, 2021 when you get this working, I have a way to add 4 way emergency flashers to our old cars but that is another topic for another day LOL Quote Link to comment Share on other sites More sharing options...
ccudahy Posted August 25, 2021 Author Report Share Posted August 25, 2021 (edited) This turn signal switch is suppose to have it built in, that's what it said in the ad. ? Edited August 25, 2021 by ccudahy Quote Link to comment Share on other sites More sharing options...
ccudahy Posted September 8, 2021 Author Report Share Posted September 8, 2021 (edited) I just want to say thank you to @Ed McDermott,@Plymouthy Adams, and @LazyK . For their advice on wiring the turn signals. Ed for telling us where the wire ran through the car. Plymouthy Adams for telling to follow the instructions. LazyK for telling us to ignore the brake light signal to make all three tails brake lights. I ran 2 wire up front (yellow & green), dropped 1 wire (red) right in front of the firewall, and ran 2 wires (brown & orange) down the kick panel - under the door jamb rubber - under the carpet - under the back seat - to the trunk. Initally did just as Plymouthy Adams said, but all 3 taillights blinked. Remembering what LazyK said, cut the additional wire on the taillights. It worked out well! Thanks again. https://www.youtube.com/watch?v=YFxYxhxviN0 (Emergency Flashers) I also would like to give a big thank you, for the idea of a Harley Davidson cable clamp to @3046moparcoupe ? Next on the agenda is maybe headlight relays?! Edited September 8, 2021 by ccudahy Quote Link to comment Share on other sites More sharing options...
Plymouthy Adams Posted September 8, 2021 Report Share Posted September 8, 2021 third brake light, added high mount brake light should always run separate wire from switch to this lighting unit....sorry if I caused you any confusion. I am running a 55W halogen on mine....you WILL see this.... 1 Quote Link to comment Share on other sites More sharing options...
ccudahy Posted September 8, 2021 Author Report Share Posted September 8, 2021 (edited) 9 minutes ago, Plymouthy Adams said: third brake light, added high mount brake light should always run separate wire from switch to this lighting unit....sorry if I caused you any confusion. I am running a 55W halogen on mine....you WILL see this.... No confusion, maybe misunderstanding. I don't have a high mounted or seperate 3rd brake light. My 3rd brake light is the Mayflower ship center light. Someone split that signal and ran it to the fender lights and to make 3 brake lights. The confusion was how to wire the 3 circuits intially, but doing like you suggested got it started and going in the right direction. It all worked out. I also got the 55w bulbs... VERY NICE! Edited September 8, 2021 by ccudahy Quote Link to comment Share on other sites More sharing options...

Recommended Posts
Join the conversation
You can post now and register later. If you have an account, sign in now to post with your account.