sidevalvepete Posted March 6, 2021 Report Share Posted March 6, 2021 Above pic shows vent trim from my 38 Dodge. Has four steel vanes with stainless edge pressed on mounted on cast blocks that also are the fixing points to secure to side curtain panel. There is one for each side. Am looking for advice on how to dismantle them so the steel vanes can be rejuvenated. If you enlarge pic, details where vanes are secured show possible separate pieces of the cast block next to each vane and holes in the adjacent vane. Any knowledge out there on how to dismantle this? Following pics show different perspectives of same part. Also appears to be a pin on the end edge of the cast block probably securing the adjacent vane. Ideas please. Don't want to wreck them in getting them apart. Quote Link to comment Share on other sites More sharing options...
westaus29 Posted March 7, 2021 Report Share Posted March 7, 2021 I would not risk taking it apart. I would try mild chemical cleaning plus a mini wire brush to remove the rust deposits, followed by a rust stabliser, primer and paint. The simplest would be to get some phosphoric acid based rust remover and paint it on the steel strips, several coats, each followed by wire brush or stainless steel wool.. It attacks the rust and puts a phosphate coating on the steel, while it wont hurt the stainless if you take care. Use rubber gloves and safety specs. Dont drop it in a bath and leave for a week, anything could happen. Another mild cleaner is phosphamic acid which is sold as a radiator cleaner, looks like sugar and mild on steel. Diluted molasses or lemon juice may also be used but they both attack the steel and have to be watched carefully. A final option is a caustic bath, about 4oz caustic per gal of water, immerse part and connect to -ve terminal of battery charger, positive to a steel bar immersed in the bath, full safety gear needed as caustic is nasty to skin and eyes. 1 Quote Link to comment Share on other sites More sharing options...
Sniper Posted March 7, 2021 Report Share Posted March 7, 2021 I do know some acids will blacken stainless. I want to say sulphuric (battery acid) does it though. So be careful in your choice of acids as they are not all the same. Looks like it's actually hydrochloric acid, same as stomach or muriatic acid. So don't just grab any old acid if you don't have phosphoric. Might not hurt to double check even that by testing it on a small spot that is not seen normally, probably the backside of the trim. AND WEAR THE PROPER PPE. Gloves and goggles at the least, maybe a face shield and have a neutralizer handy just in case. BTDT. 1 Quote Link to comment Share on other sites More sharing options...
sidevalvepete Posted March 7, 2021 Author Report Share Posted March 7, 2021 Thank you Jim and Sniper for the advice. Saving anyone having direct knowledge of how to safely disassemble them it seems like the best strategy. Will post how I get on. Quote Link to comment Share on other sites More sharing options...
Marcel Backs Posted March 7, 2021 Report Share Posted March 7, 2021 If you can get some Pete, try "RUST BLAST" by KBS coatings. Using aforementioned precautions, keeping the surface wet with a spray bottle for 15 minutes with this product and you're good. Rinse the heck out of the trim in a tub of water. Any corrosion is arrested. I would scotchbrite the metal bits prior to treatment and carefully mask off the stainless with a plastic tape impervious to the acid. The stainless can be polished later. The stainless bits are crimped and removing them looks dicey at best. Sorta like them crimped covers they use on hub caps which makes me wonder why they did that. Your stainless actually looks pretty nice. Best regards! M Quote Link to comment Share on other sites More sharing options...
plymjim Posted March 8, 2021 Report Share Posted March 8, 2021 Not that it will be of any help but just as a point of info the vent trim on my '38 is all pot metal. No stainless. Another difference in USA car & those built in or for you-all in Oz. Also, mine is designated a D-8 Quote Link to comment Share on other sites More sharing options...
sidevalvepete Posted March 8, 2021 Author Report Share Posted March 8, 2021 36 minutes ago, plymjim said: the vent trim on my '38 is all pot metal. No stainless. Another difference in USA car & those built in or for you-all in Oz. I would be interested in seeing some close up pics of those if you are able. And measurements if possible. Quote Link to comment Share on other sites More sharing options...
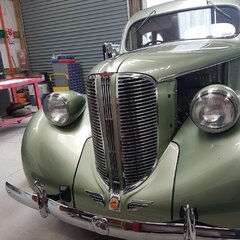
plymjim Posted March 9, 2021 Report Share Posted March 9, 2021 23 hours ago, sidevalvepete said: I would be interested in seeing some close up pics of those if you are able. And measurements if possible. Here ya go. These are 40 1/8" X2 5/16". Five attachment points on the back & if the pics show up you can clearly see that they are pot metal. First pic is my ride with an identical set installed. 1 Quote Link to comment Share on other sites More sharing options...
sidevalvepete Posted March 9, 2021 Author Report Share Posted March 9, 2021 Many thanks. Nice car. I find it interesting that your front door lock is on your passenger side - right hand door. Mine is also on the passenger side, but the left hand door. Would make more sense to me if mine had your version and yours had mine!! Quote Link to comment Share on other sites More sharing options...
Dan Hiebert Posted March 9, 2021 Report Share Posted March 9, 2021 (edited) Our '37 Terraplane has the same lock configuration, lock on passenger side. Back then you were expected and encouraged to get out of your car at the curb, not onto the street. Here in the U.S., some States had traffic laws specifying that as well. Edited March 9, 2021 by Dan Hiebert typo 1 Quote Link to comment Share on other sites More sharing options...
RobertKB Posted March 9, 2021 Report Share Posted March 9, 2021 In Alberta, the province in Canada where I live, if you open your driver's door and it is hit by a passing vehicle, you are at fault. Makes sense to me although I see lots of people getting out of cars without a thought for passing vehicles even in narrow streets. I had a colleague who opened his door and it was hit by a passing bus. Luckily he was uninjured but was found at fault, not the bus driver. My '38 Chrysler, which I have since sold, had the only door lock on the passenger side. Quote Link to comment Share on other sites More sharing options...
Andydodge Posted March 9, 2021 Report Share Posted March 9, 2021 The factory RHD 41 Plymouth I had had the door lock on the Oz passenger side as shown, same with the Oz assembled 1940 Dodge sedan.......andyd Quote Link to comment Share on other sites More sharing options...
plymjim Posted March 9, 2021 Report Share Posted March 9, 2021 Since we've changed the topic anyway I'll add to the bits about exiting on the traffic side. Many years ago a driver's safety film shown to new telephone employees (me) pictured a guy getting out of a '46 Pontiac in traffic. Someone wacked his door leaving him with a puzzled look on his face & nothing but a door handle in his hand. It as funny then. Come to think of it, it's still funny. Hope the pictures were of help, Pete. That's a good looking car you have. Quote Link to comment Share on other sites More sharing options...
sidevalvepete Posted March 10, 2021 Author Report Share Posted March 10, 2021 I am guilty of changing the topic here. Perhaps I will start a new one highlighting the interesting and sometimes quirky differences in the right hand drive vehicles. Back to topic. I will update on how I sort out the refurbishment of the trim when it is done. Thanks all. Quote Link to comment Share on other sites More sharing options...
Andydodge Posted March 10, 2021 Report Share Posted March 10, 2021 Apologies for changing the topic, will go sit in my corner again.................andyd Quote Link to comment Share on other sites More sharing options...
sidevalvepete Posted January 27, 2022 Author Report Share Posted January 27, 2022 A months later update. Scratched the itch and carefully cut out one of the alloy/pot metal cast mounting blocks. It revealed that they were fixed to the vanes by a stamping process so were not going to be able to disassemble without destroying them. Sat for a while mulling the next step.....found a local shop that was game to make something up. Pics show the result. Bit of design work involved as the new blocks can now be put together with grub screws and therefore a reversible process. Will make it way easier on assembly. Trial fit is ok. Just got the final refurb to finish with the vanes before reassembly and installing on the side curtains. Not pushing my luck and attempting to take stainless trim off. Should get a real good result leaving it on. More pics when finished...... Quote Link to comment Share on other sites More sharing options...
RobertKB Posted January 27, 2022 Report Share Posted January 27, 2022 Looks good! Necessity is the mother of invention! It’s doing jobs like this that really makes the car yours. Quote Link to comment Share on other sites More sharing options...
Andydodge Posted January 27, 2022 Report Share Posted January 27, 2022 I too am impressed Pete, little things like this make a huge difference and whilst we, ourselves maybe the only ones who know this has been done it gives us a sense of pride in a way that few things do, we truly know what makes up our cars and the work thats gone into it................andyd Quote Link to comment Share on other sites More sharing options...
Solution sidevalvepete Posted April 6, 2022 Author Solution Report Share Posted April 6, 2022 Have finished the vent louvre task. Reinstalled in the side panels. Ready for final placement when a few final tuning jobs done. Quote Link to comment Share on other sites More sharing options...

Recommended Posts
Join the conversation
You can post now and register later. If you have an account, sign in now to post with your account.