52b3b Joe Posted April 10, 2012 Report Share Posted April 10, 2012 I though I'd show all of you what I've been up to this past week. My dads desoto has been getting tired. When (possibly factory) the engine was assembled last, the rear thrust bearing cap was put on backwards and it wore into the crank beyond reasonable repair. He has been driving it like this since the late 70s and has put 30,000 miles on it with the bad crank. Last year I found on our local craigslist an add for a 1941 Desoto drive train, from the fan to the parking brake with every part that bolts on in between for $200. We couldn't pass it up. The 41 it came out of was a business coupe with only 33,000 mile on it. The owned was chopping it and making a street rod, the car was and all original survivor with low miles and NO rust, original shinny paint and in great shape. Kinda makes me sick to think about it, BUT we got a good deal. He paid less that $2000 for the car from the original owner....why couldn't have I found it first? Anyway, my dad went through the engine, and it looked great and was still well within specs, so he cleaned it and painted it over the year. We finally made time to swap it last weekend. It took us 3 days, and it runs great, better than the other engine ever ran. The fluid drive unit that was in the car was leaking fairly bad, and the new one doesn't leak a drop. We couldn't be any happier! I'll try and post a video of it running later this week. 2 Quote Link to comment Share on other sites More sharing options...
54Illinois Posted April 10, 2012 Report Share Posted April 10, 2012 Looks like a winner...my dad and I worked on mine together as well. Great times! Quote Link to comment Share on other sites More sharing options...
fstfish66 Posted April 13, 2012 Report Share Posted April 13, 2012 great story,,,nice find congrats on the great drive line find,,, question,,,maybe you can help me out,, all tho my 40 isnt stock,, it looks like i am going to have to remove the front end sheet metal,,to get at the motor,,,i didnt build this car,,and ide like to remove all the front sheet metal with out destroying the paint,,,any tips on what came off first?? last ??? ive been told its posssible to remove the front end minius the hood in one piece,,, thanks in advance Quote Link to comment Share on other sites More sharing options...
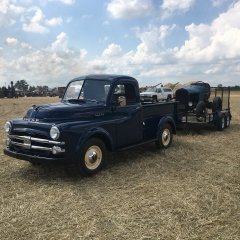
52b3b Joe Posted April 14, 2012 Author Report Share Posted April 14, 2012 great story,,,nice find congrats on the great drive line find,,,question,,,maybe you can help me out,, all tho my 40 isnt stock,, it looks like i am going to have to remove the front end sheet metal,,to get at the motor,,,i didnt build this car,,and ide like to remove all the front sheet metal with out destroying the paint,,,any tips on what came off first?? last ??? ive been told its posssible to remove the front end minius the hood in one piece,,, thanks in advance Yes, its easy to remove the front clip as a whole. First take the hood off, then you need to disconnect all the wiring on connected to the front end (should be a harness block on driver side inner fender). Take the horn off. Then you need to remove all but one of the front clip bolts by the hood hinge on each side. Now take all the front fender to body bolts off (5) and the one running board bolt. If the lower inner fender panels are still on the car, I would take out all the bolts for them and try and get them out too. Now you need to take out the front brackets that connect the the radiator to the front sheet metal, should be 4 bolts if I remember correctly. You then need to move the cross over harness from the front tin by the radiator that goes to the passenger side headlight and parking light and etc. Last get a friend and remove the two bolts you left in by the hinges. I believe that's most of it, I may be forgetting a few details but with a modified car, you may find more or less of that, that needs done. I hope this helps. In the last picture in the original post you can see the entire front clip as a whole in the background. We just looked at it and started unbolting what was holding it on, its not too hard and the front clips are very light, so the lifting part isn't even bad, we had it off in 30 min with an air ratchet. Quote Link to comment Share on other sites More sharing options...
Andydodge Posted April 14, 2012 Report Share Posted April 14, 2012 Fastfish, what 52b3b218(whew!...whats your name?.lol) said is right........unbolt the hood and lift it outa the way then theres one bolt on each fender/running board, 5 or 6 on each fender/cowl, 2 on each side of the inside sheetmetal onto the side of the radiator support accessed thru the wheelwell, 2 on the side panels at the cowl and radiator....undo the bumper bar iron bolts from the front of the chassis and take the bumper & irons off in one piece, also up under the Ram mascot there should be a couple there also....I'sd try & get 2 friends to help, its possible with just 2 people but 3 is more better.........tho me & my brother used to do it ourselves when we were young & stupid.........lol.................andyd. Quote Link to comment Share on other sites More sharing options...
52b3b Joe Posted April 14, 2012 Author Report Share Posted April 14, 2012 (edited) Oh yeah, I did forget about the few up front under the hood latch mechanism (which you also need to take off) and the two on top by the radiator support. Good catch! We did ours with the front bumper still on, we just lifted it over. We ended up taking the bumper off anyway to get the engine lift back far enough to pick the engine. We are actually putting the front clip back on ours later today, so I'll let you know what else I forgot. Edited April 14, 2012 by 52b3b218 Quote Link to comment Share on other sites More sharing options...
fstfish66 Posted April 17, 2012 Report Share Posted April 17, 2012 andy,,,,,lol thanks to both of you for your input,, i have not looked at all the attaching locations yet,,,figured ide ask a few around here,,, i hope to remove it as one clip, minus the hood,,,i havent looed yet anoter guy told me there are 2 bolts/nuts under the radiator,,,as soon as i decide whats wrong with the motor,,and get my plan of repair ill see whats its going to take to get it off,,, i dont want to wreck the paint,,,thanks again and ill let you know how i make out soon ,,, don (*&^$$##%&*(* lol, Quote Link to comment Share on other sites More sharing options...
52b3b Joe Posted April 20, 2012 Author Report Share Posted April 20, 2012 We finished the swap, and we have come across and issue with the car now. The car is surging a little in the mid-range on the throttle. I know its not the timing, the carb is off the old engine that has never gave us that problem. The fuel pump is the original off my 52 dodge truck. The distributor is off the old engine. I did notice that when I had the timing light on, the mark seemed to "jump" every once in a while. The engine runs GREAT, but i cant figure out the surge. I adjusted the valves yesterday to the book while running, and the vacuum gauge is flawlessly steady. So what do you guys think? Could it be the pump? Under heavy acceleration, it seems fine. Also, I've notices a very quite "psh" / hiss randomly near the carb and the engine stumbles faintly. I've ran the car in the dark to see if a plug wire is arching through, but no signs and the plugs and wires are only one year old. Any help is appreciated! Thanks, Joe Quote Link to comment Share on other sites More sharing options...
greg g Posted April 20, 2012 Report Share Posted April 20, 2012 check for vacuum leaks at the base of the carb and at the manifold to block area. Quote Link to comment Share on other sites More sharing options...
52b3b Joe Posted April 20, 2012 Author Report Share Posted April 20, 2012 No vacuum leaks anywhere. I decided to try a different fuel pump...I'll know as soon as the high temp sets and I take it for a drive....I also reset the mixture so time will tell. Quote Link to comment Share on other sites More sharing options...
52b3b Joe Posted April 22, 2012 Author Report Share Posted April 22, 2012 I took it out this morning and all is good. It was the fuel pump causing the issues. I adjusted the valves to the book while running hot. I set the time to 4 degrees and set the mixture and idle speed for the final fine tuning after I adjusted the dwell. The car drives better than it ever has and runs a smooth as quiet as if it wasn't even running. To add to the success, the car has much more power and the "new" fluid drive unit and trans is a major improvement. The car takes off the line like a modern automatic trans and is down shifting flawlessly. We are VERY happy with it! Quote Link to comment Share on other sites More sharing options...
littlemo Posted April 22, 2012 Report Share Posted April 22, 2012 That's great!! Keep us posted on the progress. I can't wait to get mine running; maybe this summer?? Cass, alias littlemo... Quote Link to comment Share on other sites More sharing options...
52b3b Joe Posted April 19, 2021 Author Report Share Posted April 19, 2021 Thought I'd bring up an old thread! We ended up putting around 10,000 miles on that engine. Not too long after we started driving it, it started with a wrist pin knock. We pulled the rods and fitted new pins and rings. It ran well until it got a lower end knock last year and parked it. We ultimately decided to have the original engine for the car rebuilt. I got ahold of George Asche and we made the 4.5 hour trip to his place back in September. He did the rebuild for us and we picked up the engine 2 weeks ago. The stock 228ci is now 250ci. It has a 251 crank and it is bored .030 over with a shaved head. We wanted a stock appearance and we wanted it to sound stock with a very smooth idle and George pointed us towards his .380 cam. I wouldn't be lying if I didn't say we were a little worried about the quality of the idle, but George definitely pushed us in the right direction. It idles nice for a mild cam. The exhaust note has a lot more of that Chrysler flathead burble which is one of the best sounds on Earth if you ask us! As far as power, I'm guessing it's around 120-125hp and it has a fair amount of added torque. It's a noticeable increase over the stock advertised 105hp and most likely less with the old tired engine. It has chrome rings, so per the break-in requirements, we've been driving it hard. It seems to be gain more power the more we drive it and it actually lifts the front end when you floor it due to weight transfer (something that car has never done). Next on the list is a new exhaust. The original sized 1-3/4" tailpipe really feels like it is choking it now. I bought aluminized mandrel 2" bends and some aluminized 2" pipe, so we can make our own exhaust. I called around to shops and I can't dream of paying any of these local shops what they want for a fairly simple single exhaust system, so we'll make one ourselves. I might regret the decision, so wish me luck. I figure with my 4 post lift and MIG welder, why not try? Here are a couple short videos of how it runs/idles. The first one is at around 1200 rpm when we first started it. Second is at 675 rpm. 2 Quote Link to comment Share on other sites More sharing options...

Recommended Posts
Join the conversation
You can post now and register later. If you have an account, sign in now to post with your account.