


chrysleritis
-
Posts
23 -
Joined
-
Last visited
-
Days Won
1
Content Type
Links Directory
Profiles
Articles
Forums
Downloads
Store
Gallery
Blogs
Events
Classifieds
Everything posted by chrysleritis
-
ANSWERED 41 Dodge - what’s this switch/ ignition lock question
chrysleritis replied to GTfastbacker's topic in P15-D24 Forum
Often on these things, the starter will spin no matter what position the switch is in, but the ignition switch switches on the ignition. So unless the ignition switch is in the "ignition" or "run" position (clockwise, right), there's no current flowing through the ignition coil to make spark, so it will not fire up. Little toggle switch under the dashboard there should control the brightness of the instrument panel lights when the headlights are on. It's usually 3 positions: off, dim, and dimmer. Assuming the instrument panel bulbs and the wiring are still good... -
Andy Bernbaum has started carrying reproduction, original style rubber floor mats which aren't original looking for the trunk, but they do have the right era look, in my opinion, and you might be happy. Not cheap for a trunk mat, but your other choices are pretty clear. Lots of places to get ridged rubber matting by the yard that are close to the 1941 pattern. https://www.oldmoparts.com/parts/c-interior-rubber/reproduction-floor-mat/ Restoration Specialties has a pattern which is pretty similar-looking and not too expensive https://www.restorationspecialties.com/MAT017-WS-Sold-By-The-Foot_p_36898.html
-
Just giving a heads-up that someone is selling a lot of seven door rotor repair kits over on the ebay. They do give new life to old door latches. https://www.ebay.com/itm/204584409457
-
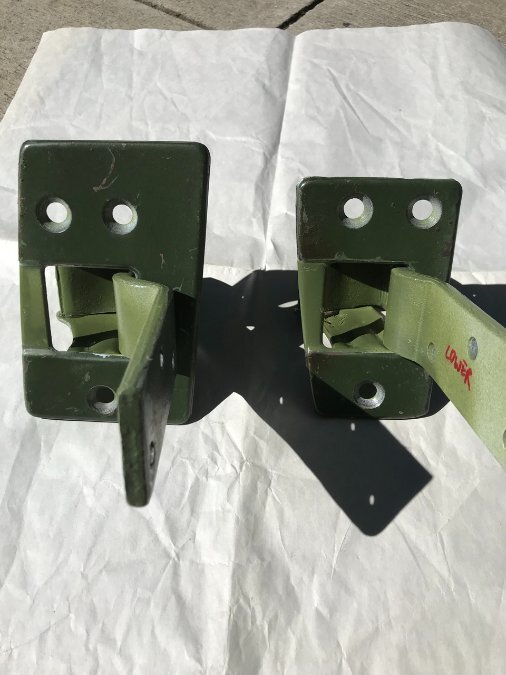
Yeah, I've read through your reaming and bushing schemes! It does sound like you might have to back up a bit and re-think. There was some failing paint and surface rust on the back side of the hinge frames, so I cleaned and re-shot, since I hope to not have to get back in there for a while.
-
Ditto for Restoration Specialties. They have them. They have lots of weird fasteners.
-
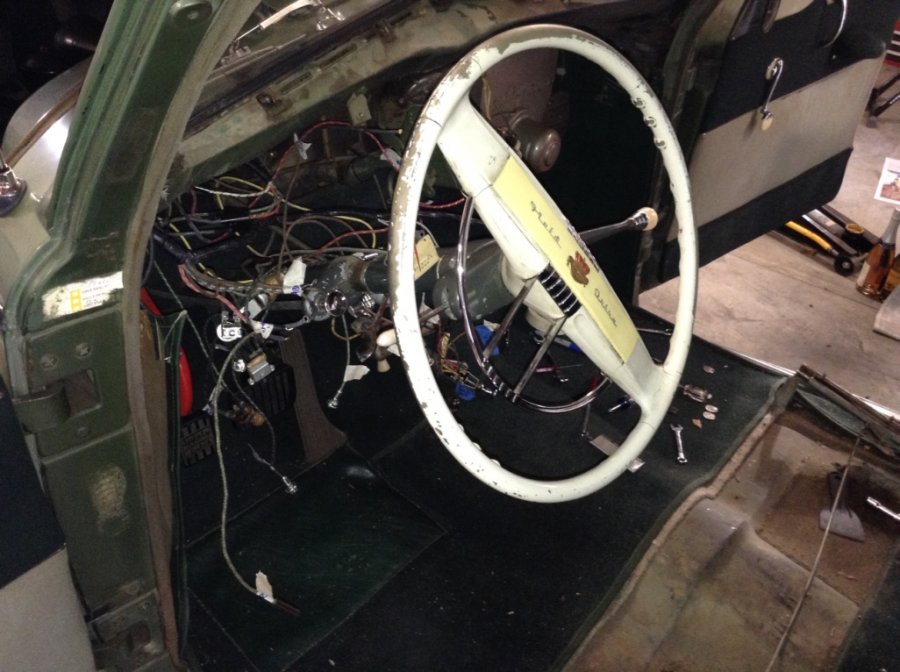
I thought I'd share the experience with my front driver's side door alignment issue on my 1941 Chrysler New Yorker (C30). It had been one of those doors where it hadn't closed right in years, you had to slam it just so, and it would latch only every once in a while. It was to the point where to save trouble, I usually climbed in the passenger side and slid across. Not a good look. So for this winter's rainy season project (but then it didn't rain for the last couple months anyway, but that's a different issue...), I thought I'd tear into it. I last had it apart a couple years ago while putting in new door panels and windlace and window channel, and I improved things a bit by adjusting the door position at the hinge straps and the striker plate on the B pillar, but it didn't really last. I figured it was either: worn latch mechanism (most likely, very common), "frame sag" at the pillar (not likely on a 4 door with minimal rust issues) or something else. I did not suspect the hinges, because the door, when opened, did not wobble or rock on the hinge pins -- it seemed snug, but the door would just not swing closed into the B pillar. You really had to push on it or slam hard and it wanted to spring back open. I figured I would just tear down the whole thing and start from the frame. The car has the pocket hinges with the pins recessed into the pillar, shown in the Master Technician booklet at https://www.web.imperialclub.info/Repair/Lit/Master/025/page15.htm Very helpful booklet. I also read through all the posts I could find on the forums about doors and latches and hinges. Also helpful. I lurked on eBay to find Roto Lokit kits or latch mechanisms. Remove garnish molding, window crank, handle, armrest, door panel, lower window channel, window glass. Remove door check by drilling out 1/4" rivet at door pillar, then remove check from inside door. Remove door by removing hinge plates from door. Set aside door. Remove hinges from pillar -- these required phillips head impact driver and penetrating oil. The floating nut plates in the pillar were all stuck in place -- no adjustment had been possible, but those worked loose with penetrating oil. These adjusters had not been moved in many decades. The hinges moved freely out of the car, but I thought they bore investigation. I had a tough time trying to drive the hinge pins out and finally had success with an impact wrench turning the screw on a hinge pin removal tool and mangling through a couple of dowel pins to drive out the hinge pins. Both upper and lower hinge pins were really bent, but not particularly rusty, which explains why the door just did not want to swing fully closed. It's tough to see how they still functioned, and I'm not sure how they got that way unless someone really swung on the door or wrenched it badly. Clean and repaint hinge parts. I had trouble finding suitable replacement pins. They are nominally 11/32" diameter and 2 1/4" long. They measured 0.341" actual diameter (on a straight section). There are lots of pins out there in Dorman land which are nominally 11/32", but most of those come in at 0.337", which was too loose. A couple of old Mopar places have things which claim to be 0.340". I ordered three different Dorman hinge and bushing kits at $4 a pop, and one of them had good steel pins that were 0.3425", which was what was needed after driving out the old pins and reaming the hinges. I had to cut the pins to length and grind a bevel on the ends. They pressed in just fine. Plenty grease. The latch mechanism, which I suspected was trouble from the beginning, just needed a little cleaning and fresh grease. I used a dremel tool to smooth off the worst of the ridges on the star wheel. The door is now amazing and swings perfectly closed and will latch with the slightest push after adjusting the striker plate, and finally is aligned in the opening and with the rear door and the belt line molding pieces. The takeaway here is that it was the hinge pins which were badly abused, and not the latch mechanism, which is still fine, but which is often the center of attention on these old doors. The other moral of the story is that the pins were terrible to drive out, but they did yield and the other hinge parts came through just fine. Other moral is that you may wind up hand-selecting pins of correct diameter or else re-drilling and reaming to a new diameter. Now just have to put the rest back together.

-
I've played with LED bulbs a lot for fun. I'm stock, 6 V positive ground, generator with the old-style voltage regulator. In general, the products are good for 12 V applications, not so much for 6 V. They would work much better if you are running an alternator as opposed to a stock generator. With a generator and old-fashioned voltage regulator, they flicker annoyingly. It's true what they say about turn signal flasher bulbs. You'll never get the LED's to work with the old mechanical (bimetallic) flasher. They don't draw enough current. Your problem with the bulbs sort of working depending on how they are installed in the socket may also be related to how the wiring is in your car at this point. Lots of times, people get the two-filament bulb sockets wired up wrong in re-wiring work. I do have LED bulbs in the dashboard and indicator lights, where they work very well and really brighten up the dash after dark and save a couple of amps of current. Stuff like the high beam indicator, turn signal tell-tale bulbs, radio, they're great and colorful. The third brake light add-ons are good. But the main exterior lights on the car -- not so much. Not enough of a market for 6 volt, positive ground LED bulbs for the products to really be good.
-
I just replaced the 6 volt coil in my 1941 8 cylinder Chrysler. It took me a stupidly long time to diagnose the bad coil, because in my mind it was a relatively new replacement coil -- I put it in in fall 2019, and have only driven it maybe 1000 miles since then. Anyone have an opinion as to why a relatively low-miles coil would fail? It was a new 6 volt coil from the local auto parts store, not old stock. Junky part? Bad condenser overtaxing the coil? I replaced the condenser while I was at it, and disassembled, checked, and cleaned the distributor -- the breaker plate was really sticky on its bearing anyway. But I'm curious as to why the coil failed so soon.
-
The fluid drive temp should be no problem. The radiator and cooling system, if in good condition, should also be no problem. I have had problems with fuel flow/vapor lock/heat soak in stop and go, parade type traffic. Many of our cars are now missing the heat shields that kept the fuel pump, filter, and carb base cool, and over the years, owners may have gotten a little sloppy with fuel line routing in the engine compartment. Depending on your setup, you might consider worrying about this issue. Of course, the real problem in heavy traffic is that someone will dent your big fenders. Driving would be a lot more fun without all these other knuckleheads on the road.
-
Check your ignition coil. I'm glad I did. It's cheap and easy to replace. Mine performed about like your problem sounds. Started with effort, idle a little rough-ish, but the main problem was stumble coming off idle once it was warm.
-
Check the generator output. If the brushes haven't been service in some time, they may be worn out. Could be all filthy inside. May be putting out no current. Check the "Batt" terminal of the regulator to see what the regulator is putting out to the battery. Would bet one of the two is in need of attention.You can get new regulators pretty easily. I'd be pretty suspicious of the change over to negative ground. Could be full of gremlins now.
-
Groan. That's a bad deal they've done to the bottom of that manifold. I just removed my heat riser valve as it was rusted open in the "preheat" position, blasting the carb base for the last dozen or more years. I didn't weld anything in to the manifold to blank it off, I just got a piece of 18 gauge steel and cut and bent a piece that would mostly block the direct exhaust path to the intake "stove". If it rusts in there, it will be easy to replace in a few years. Doesn't seem to hurt anything at all without it, but I live in a very easy climate. Your welded solution will be tidy.
-

-
Second the comment about the link pins from the cylinders to the shoes. There is a lot of variation in what you get with the new cylinders and kits. Save your old pins. Also, go through the major adjustment and alignment procedure for the shoes mounted with the eccentric bolts. It may be that you don't have the shoes' "heels" or "toes" close enough to the drums. Also, you can set stuff up with the drums mounted not gorilla tight on the axles to make sure that you have the brake shoes set up right, removing the drums as you need to, and putting them back on, and then finalizing the castle nuts down when you've got it close to right. The first time doing this is always confusing, for sure.
-
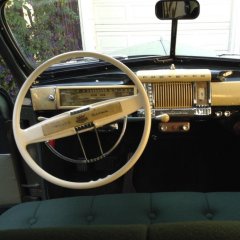
That switch is supposed to be wired so that you can dim or turn off the instrument panel lights. In one position, the instrument panel lights are off, in another position, they're dim, and in another position, they're bright. The instrument panel lights come on when you turn on headlights. Those courtesy lights under the dash there may be wired so that the left side is a flasher warning light that the parking brake has been left on, and the right side one should perhaps be connected in the circuit with the dome light. It may also be the case that those wires are not yellow with black trace, (which is more typically a fuel gauge or starter circuit color) but might have originally been red. Have you got the wiring diagram and manual?
-
Referring to the schematic, which is often inside the radio case, and is pretty easily available on-line, what you want to do is provide an extra audio input to the circuit right before the final amplification and output section of the unit. The schematics are usually helpfully arranged to show which section and tube do what. But all you need to do is add in a capacitor in parallel with the signal as it enters final amp or final volume control potentiometer. As input to the capacitor, you use the audio signal from your mp3 player/device through a 3.5 mm audio input jack. You'll need to have a little stereo-to-mono audio jack converter, which you (used to) get at Radio Shack for a couple bucks. I took a headphone audio extension cable and used the ground sheath wire to connect to the chassis ground of the radio **, use the center connector to connect to the capacitor (tens of nanofarad, I think), and then the hard bit is just making it look nice and strain relieving the cable and getting it out of the radio case. You turn on the radio, tune it to some quiet place between stations (or remove or disconnect the antenna), and run the signal from your phone/device. You get the AM radio warm tube speaker sound in mono. ** You need to be a little careful about how the grounding and polarity works. You can also do this without grounding the input audio source. But you need to keep track of everything if you have a 6 volt positive ground car. You can get in trouble if your external device has a metal case which you touch to the car's ground. Your device has polarity-sensitive chips and capacitors inside which may be unhappy. Use some caution.
-
The wire from RI Wire and Naragansett is just copper, not tinned. The ends are very professionally done, though. Sounds like you have "way too much spare time".
-
Have used RI Wire for four harnesses over the years. High-quality work. A couple of minor idiosyncratic differences from what was originally in the car (although sometimes hard to tell what's "original") required changing out a couple of connectors. Not the cheapest, but great stuff. 48 DeSoto should be no problem for them. Naragansett Reproductions I bought a bit of stuff from off and on over the years. Lesser quality and attention to detail there but would still recommend.
-
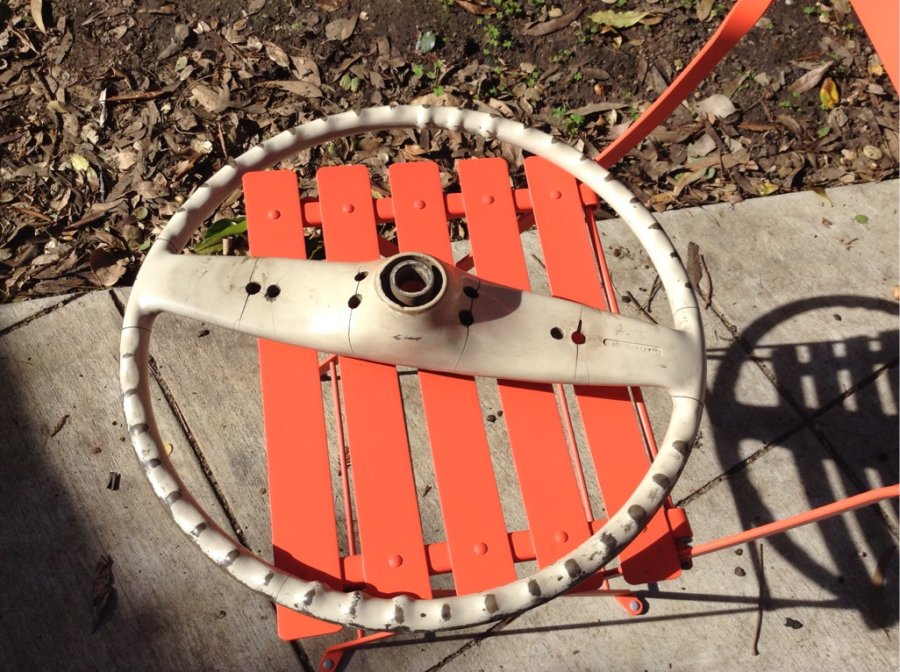
Couple of before, during, after. Grind and fill with JB Weld plastic epoxy putty and another, runnier JB Weld epoxy. Sand, sand, sand. Prime, sand, prime, sand, sand, paint, sand, sand, paint, Final gloss coat and buff. Very satisfying results. Lot of sanding.

-
I just wanted to share the latest problem so that others could benefit from my stupidity experience. I had been chasing a performance problem for a couple of months which had prevented me from driving my 1941 Chrysler New Yorker very often. It had a moderately rough idle, difficult hot-starting, a bad stumble when coming off idle once it was warm, and it kept getting worse over time. It had started stalling when coming off idle once in a while. These fluid drive cars with the throttle guard are supposed to be impossible to stall, so that was the final straw. I had been avoiding driving it because of the lack of power when taking off from traffic lights -- couldn't guarantee it would actually go. I tried a lot of different things -- initially I worked on plugs and timing, cleaning plugs which were still relatively low miles, but admittedly 10 years old and had minor fouling. Tweaked the timing to try to advance it to get a little more power -- that just made it tough to start. Cleaned and re-gapped points, which seemed like they should still have plenty of life left in the wear block and the points dressed up nicely. Nope. Checked fuel system to see if was starving for fuel in coming off of idle. Had to run the idle speed a bit high to keep it from stalling, and it required a lot of nursing the throttle while stopped in traffic. I had replaced the fuel tank over the winter, mostly because the drain plug had been frozen in place forever, yet it dripped pretty steadily ... And the tank was not in terrible shape, but I could really never properly drain it easily, and it was pretty nasty on the outside, with some minor dirty stuff on the inside. Replaced scungy fuel line; replaced old fuel filter, realized I was doing the glass bowl fuel filter wrong; re-installed fuel filter; checked the carb, which had only a small amount of sediment in the bowl, but I had thought that a clogged accelerator pump circuit could have been the source of the stumble. Even though I could visually see that the accelerator pump was giving a squirt. Nope, that wasn't it either. Carb is now very nice, but tuning the (2bbl) carb with the idle mix screws was puzzlingly not responsive. Was it fuel flow problem? Did the new gas cap I got (after I left one on the pump last year after a fill-up) vent properly (i.e. prevent a vacuum in the tank from working against the fuel pump)? Nope, gas cap is properly vented for vacuum. Gas caps taste pretty nasty, too. Fuel bowl level? Nope. Checked distributor some more. Free play acceptable. Cleaned vacuum advance, it was basically working, if dirty, and the diaphragm was sound and the spring good. Mechanical advance was basically within spec using a timing light. Distributor slightly dirty inside. Condenser checked out okay with a multimeter. It's about 300 nF, for those who want to know. Finally went to poke around more with timing and I said to myself, "You know, self, what do you really know about that ignition coil? How long's that been in there?" and I figured I didn't have much to lose checking that out. It does require crawling under the dash to get the coil out, because it's got one of those coils through the firewall with the ignition lead to the coil primary on the back side of the coil inside the car. So I pulled that out, and put the coil on the bench with the voltmeter, and it looked "funny". The primary read unsteadily at between 0.3 and 1.3 ohms, rather than a steady value somewhere around 1.5 ohms. The primary-to-secondary resistance was not the expected 7000 - 10,000 ohms, either. It was mega-ohms or open-circuit. It wasn't really a definitive answer that the coil was bad -- I mean I had checked spark previously, and while it might have been intermittent or missing a bit, it still put out a basically good spark, I thought. One of those cheap spark-gap checkers is a nice tool instead of zapping yourself by holding the lead near the engine block. But the local auto parts joint had a 6 volt coil in stock for only $20, so I figured I may as well just check that out, for all the time I'd been dumping into this. It required a little gimcrackery to get the ignition lead to the front of the coil in the engine bay. But it just fired right up and I could not believe how smooth the idle sounded. Quick check to tweak the timing back to TDC. I let it warm up for several minutes, come off the fast idle cam on the choke, and it runs much nicer now. Drove it for a half-hour on a warm day, and it just pounces off the idle now. Whole different car, seriously. Drove it straight up the hill that has the stop sign in the middle of it and no hesitation or stumble now. Where did all this power come from? It's still a heavy car and underpowered by modern standards, but it drove like I remember it running. Practically leaps off the line. Finally. Now re-check the carb tune, and it is very much more responsive to carb adjustment, and the idle speed can be adjusted all the way down to the 500 rpm given in the manual without any trouble. What's the moral of the story? Well, "99% of carburetor problems are electrical," that's for sure. And the coil check was simple, but the annoying firewall installation of the coil discouraged me from checking it earlier. Have to stop getting suckered into checking and fixing things just because they're easy and accessible. I think I'd do almost anything to avoid crawling under the dash. And I also should have trusted my ear when it was telling me that it was missing intermittently (and not on any one cylinder). Smooth running is a good thing to pay attention to. But also, I want to thank the forum for being here and full of questions and for the people who have the good sense to answer "Just keep at it, you'll figure it out. Track it down, these cars aren't rocket science." Of course, I went down some blind alleys based on irrelevant questions... Now I have to make the coil install look a little prettier. There are a few people on the web who have the original style 6 volt coils with the primary lead on the back, but boy, do they want serious money for them. Cheapest I saw was $140, and it's NOS, so who knows how sound it is and how long it'll last? Others want $200. I'm gonna stay with the off-the-rack coil, I reckon.
-
I have worked on the old Philco radios myself -- they are completely fixable if you have patience and some experience with electronics and schematics. The vacuum tubes are not too hard to find, there are a couple of outfits which sell the proper vibrators and the caps are all replaceable with modern stuff. And while you have it open, you can install a jumper to allow a 3.5 mm audio input plug from your favorite audio source, e.g. mp3 player, 8 track tape player, ... I find it a lot of fun to drive around listening to whatever I want if there happens not to be a ballgame on the AM radio station. The rest of the AM dial is pretty slim pickings. I got a tiny, very cheap mp3 player with a huge storage capacity that just plugs right in. I also second those who advocate keeping it 6 volt. Putting in a new harness is not at all difficult except when crawling around under the dash, and you WILL want to replace the wiring instead of chasing down new shorts every month. It's great peace of mind, new wires.
-
That was an interesting video, not least because of the cutaway fluid drive unit. And by the way, I just checked my fluid drive fluid level (for the first time in probably 7 years or so), and it was adequately full of fluid, although the fluid did have a rust tinge to it. But what Professor Kelley had to say about oxygen absorption had me thinking a bit about the advisability of draining and refilling the unit after many years. Anyone have opinions about the advisability of draining and refilling with fresh fluid or is it best left alone until the seals show signs of failure? I mean "lifetime fluid," sure, but maybe the Chrysler engineers never really foresaw 80 year old units still in service.
-
I have two grill bars in my pile of stuff for 1941 c30. Would you be interested in just two if I check to see which they are? It'd be two more than you've got now... They usually come up in ones or twos on ebay.


