


Worden18
-
Posts
2,151 -
Joined
-
Last visited
-
Days Won
100
Content Type
Links Directory
Profiles
Articles
Forums
Downloads
Store
Gallery
Blogs
Events
Classifieds
Everything posted by Worden18
-
Stopped at the builder's today to drop off the intake and exhaust manifolds. He will clean the carbon out and sandblast each one. I will spray them with high-temp paint. I took a peek at the bare block, which was really cool to see. Its mostly clean now, but he said he'll do a bit more cleaning by hand. After inspecting all the parts he will go .030 over with the pistons. He'll polish the crankshaft and the camshaft. All new main and rod bearings, and bushings. All the valves look good, including the one we originally thought was cupped. He said he will grind them and see if they remain in spec. Should be fine. He will put in new valve springs. He'll also put in hardened valve seats. When inspecting the bottom side of the block I found a number of symbols and letters stamped into it, which I thought were interesting. My friend pointed out that they're likely inspection stamps for a particular job finished or tolerance held as the block made its way along the assembly line. I don't think any of my pics show the stamped letters and symbols close up; I apologize for that. One stamp was a "P", another an "M" or "W" depending on which way you look at it. The symbols were unique. I'd like to find out more about what those meant. Anyone have any ideas they'd like to share? Here's some pics of the block:
.jpg.82e602e16b9761da9a174f4288f52d7b.jpg)
-
No doubt about that. This last visit the guy had a convention to attend so he had to run. I walked and talked with his brother for a bit and then he let me wander the yard at my leisure, which was awful nice of him. Next visit I will be negotiating prices on these two 47's. I think they can be had reasonably. The guy is ready to sell. He and his brother have just accumulated quite a bit of stuff/junk over the years and its time to realize they're not going to get to it all. That's where I come in
-

-
-
-
-
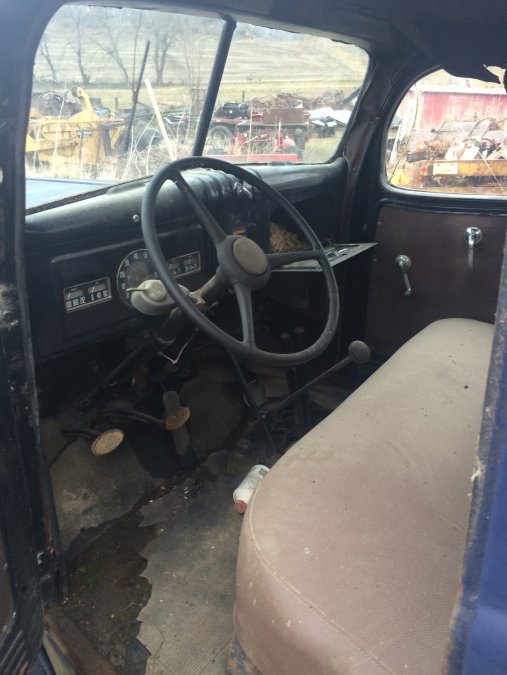
Not sure if the seat had been recovered at one point in its life. Hard to tell.

-
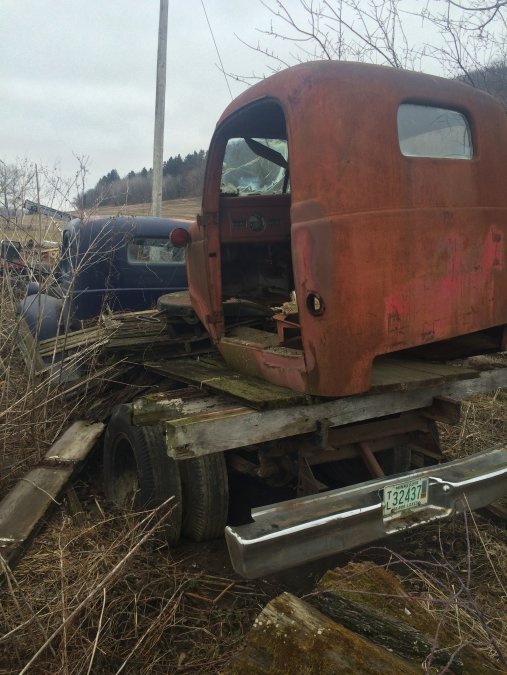
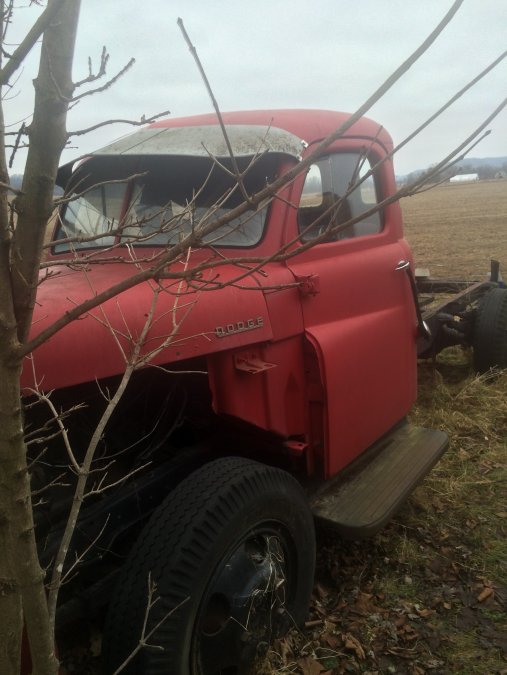
Here's the other one with the longer wheelbase that has a Dodge cab sitting on the back. Not a bad interior on this one, and no rust holes I could see. The wrecker had some rust but not too bad.
-
.

-
.

-
This is the one that used to be a wrecker. Still has the PTO driven winch on the back.

-

-
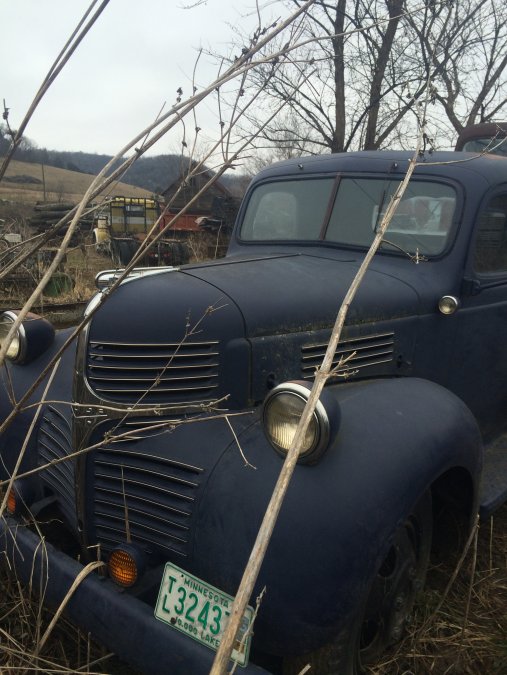
I don't think the visor is original, although I could be wrong.
-
Grill shot....

-
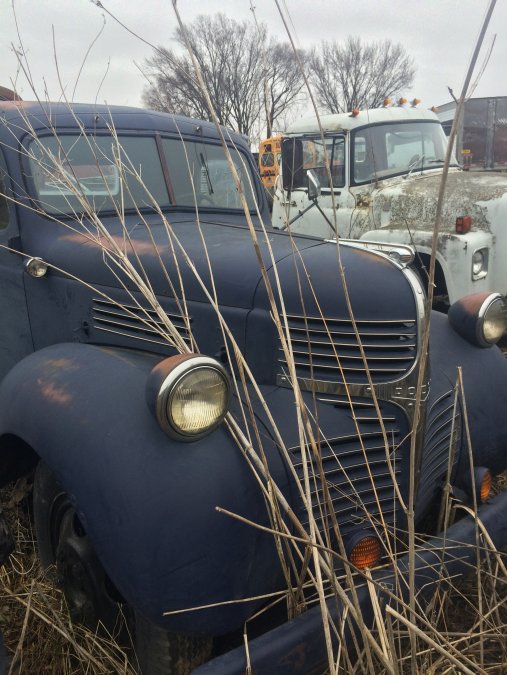
Visited the "junkyard" again on Saturday. Took a bunch of photos for you guys. Here's the 48 I was telling you guys about. The guy doesn't want to sell this one. He has the fenders off and in his shop for paint. The truck does run. I couldn't find any rust on it. Interior is fair. It has a 2 speed rear axle. Not sure if its a 1 1/2 ton or not. Its certainly not bigger than that. The front grill is really interesting. Is this a factory option? Was it put on there by whomever originally purchased the truck? Its hard to tell from the angle (I couldn't get a straight shot pic because the truck is up against a pole shed) but that center part is definitely a "D" for Dodge; or at least that's my take on it. I did find a YouTube video that shows a 48 with the same grill. Anyone know anything about these grills? I didn't see any pics or information about them in Don Bunn's Pilothouse Dodge book. Just curious, its very interesting.
-
Taking things apart is the more difficult part IMO. Jumping into some things that I haven't seen apart before, etc. is always a challenge. I'll have to say, it would've been a lot more difficult without the help of my friends, whom have the talent it really takes. I have taken a lot of pics, written notes, and labeled and bagged bolts, clips, washers, etc. Its just the way I do things. I will be the first to admit I likely wouldn't be able to do any of it without help. Thank goodness for friends
-
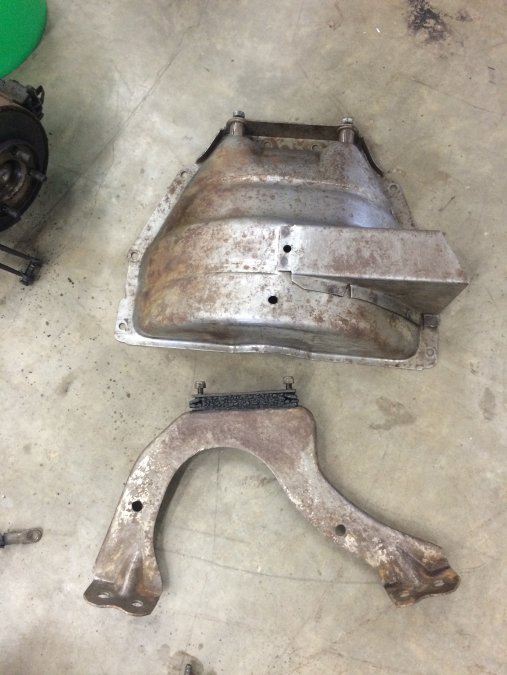
I also got help from my 7 year old son (he is really into this stuff with me) cleaning up the motor mount bracket and Fluid Drive/ clutch cover. Both were really caked with gunk so we had to scrape them first and then scrub them down in the parts washer. I suppose I will hit them with some paint before reassembly. We also sandblasted the head bolts. My son did a few of them and I did the rest.
-
Well I was wrong about the starter. One of the bushings was just a bit too tight. My friend advised to take everything back apart. Doing it for the second time in so many days was a lot easier. We tried to ream that bushing but it ended up spinning. So we pounded it out and put a different one in and then reamed it. That worked great. I put it all back together and set it up on the tester and now I see how its really supposed to spin. I didn't realize the starter is an Autolite.

-
Starter on the tester
-
Today I learned how to rebuild/service the starter (my old timer friend does that for a living, so I was in good hands). The brushes were in excellent shape, so we left those alone. Both bushings were bad, so I got them out and pressed in new ones. After pressing them in they somewhat tighten up, so my friend showed me how to mate those pieces and gently tap with a hammer as you spin it around. That helped loosen them up a bit. I trued up the armature (commutator) in the lathe, then put it in an undercutter to shave down the mica (which then keeps the brushes from bouncing). Then back in the lathe to hit it with a little emery paper. I cleaned the other pieces in the parts washer and got down to the good patina . Then I put it back together. Holding the springs back and guiding the brushes down into the slots was a little tricky at first. Then we put the starter on the tester and checked the field for magnetism. We then hooked up the leads and spun it on 6V. The bushings were a little tight so we spun it a number of times on 12V, let it cool down, then repeated the process. They turned out okay after cycling it a few times. Can't say I didn't learn anything today. I also cleaned up the oil pump which was caked with 65 years of gunk. My friend checked the pin for slop/tightness (that thing did not budge at all, which is good). I had good oil pressure in the car, and the mechanism turns smoothly, and the teeth on the gear were in nice shape, so we left it alone. I think it will be fine. Tomorrow I will sandblast the head bolts. They are pretty well caked and beyond soaking in diesel fuel and trying to use a wire brush. I also have the transmission and a number of other parts yet to clean up. I have to disassemble the manifolds from each other and sandblast and paint those. Looking forward to it. Next week the engine builder is going to bore the block, and he invited me over to watch the process.
-
Here's the 800 dump
-
I know this isn't a Dodge with a flathead but I just had to post this for you guys. When's the last time you seen one of these, if ever? Has a big Cummins in it. Part of this guy's collection. He also had a 63 or 4 D500 dumptruck and a 63 Power Wagon 3/4 ton longbox sitting in the weeds. He also had 2 of the swing out fender Dodge trucks, one an 800 tandem axle dumptruck, and one 700 chassis cab.
-
Hi Charlie, there was so many things to see I was just flabbergasted to say the least. It would NOT surprise me one bit if he had something like that lying around, not even on a truck. Its insane how much stuff he has. I will ask him when I return, which will be soon. He mentioned to me that he will be attending this year's convention (not something I was familiar with, but I am now) this year because it happens to be in Iowa which is close to us, and not in one of the coastal states which is so far away. I will get back to you on this...
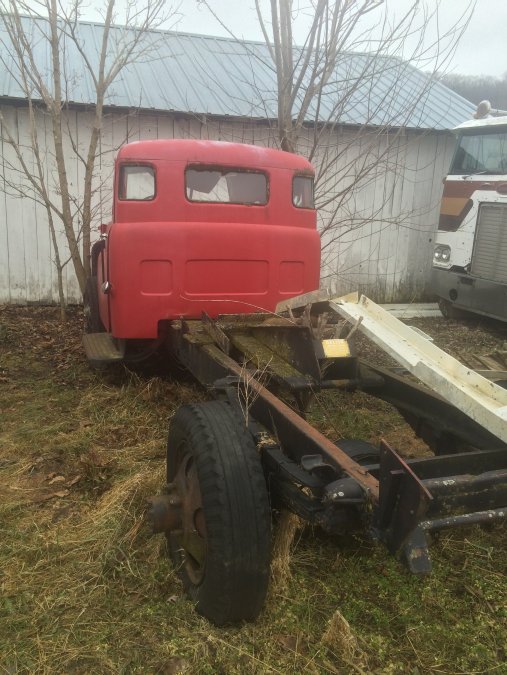
-
-
Here's the blue one, which was just a chassis cab. There is another Dodge cab resting on the frame rails of this one. I couldn't get a good pic because the sun was so bright. He also has a 48 1 1/2 ton Dodge that absolutely blew my mind. NO RUST at all. He had the fenders off of it (had been working on repainting it). He said he had it running good at one point, then it got set aside. It has a pristine brush guard on the front, which neither of us knew if that was original to the truck. He had removed the flatbed, so it was just the chassis sitting on what looked like to be original tires. They still held air. I didn't get a pic of that one, but hope to on my next visit.

