


Hubler13f
-
Posts
69 -
Joined
-
Last visited
Content Type
Links Directory
Profiles
Articles
Forums
Downloads
Store
Gallery
Blogs
Events
Classifieds
Everything posted by Hubler13f
-
PA, I know what your saying, I walked past 90% of the cars there, not that they weren't nice in their own right, just weren't my thing. I'm more into the 30s and 40s stuff. Some of the guys there knew nothing and couldn't answer any questions about their own cars, some cars looked like they were bought at a dealership a week ago and brought there. It's the guys that work, cut, weld and grind on their own stuff that I am interested in talking to.
-
It could be, I talked to him for a little bit but didn't catch his name. There are a ton of Adams in this area. It was in Osceola Mills, PA the hometown of Matt Adams former St. Louis Cardinal and first baseman for the Atlanta Braves.
-
Thanks, I think I'll reach out to them in the next couple weeks.
-
Well I just looked him up, I found 2 numbers on the net so Im assuming one is a typo. One is 814-345 number which is definately my area within 15 minutes anywhere with that prefix. The other was a 814-354 number which is Tionesta, PA, still only about 1:30 away, so I'll probably look him up either way.
-
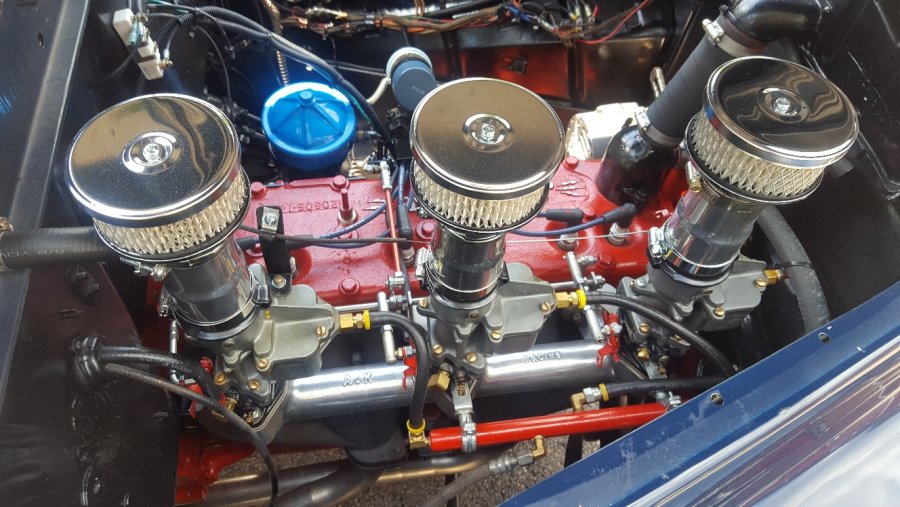
I forgot to add that I had talked to the owner of the triple carbed 25 inch spitfire Plymouth. He lives about 10 miles from me and said a local guy used to make the intake he has, I guess he made several of them mostly for the 25 inch block. He also mentioned it was bored .060 and he had a cam ground for it. He was also running a split manifold and I know it sounded healthy.
-
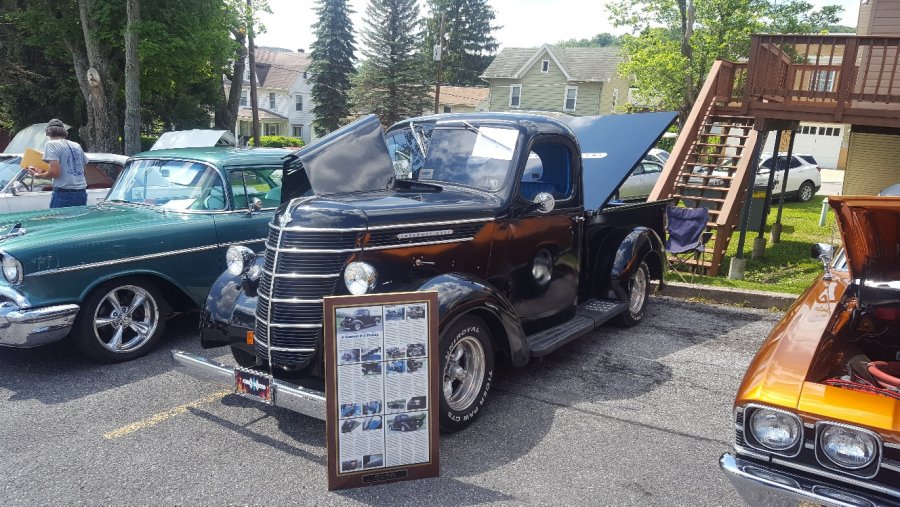
An International And one of my favorites that showed up too late to be judged.

-
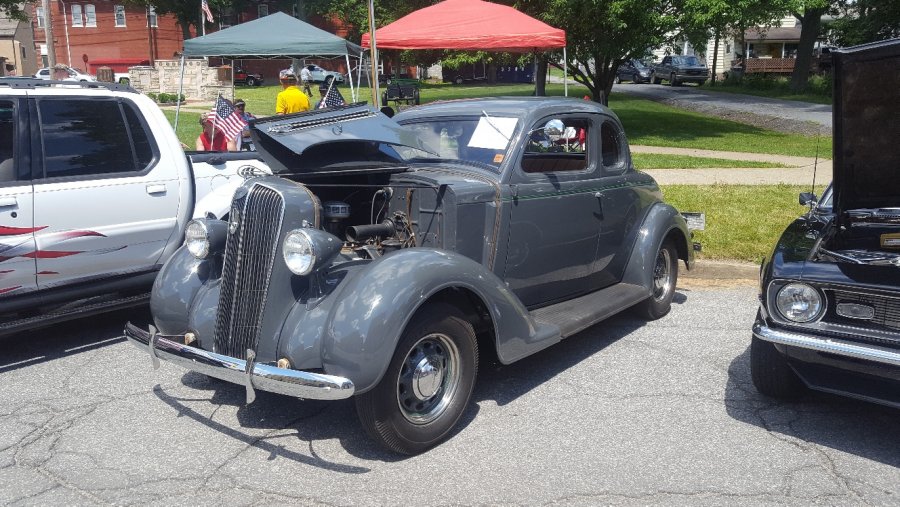
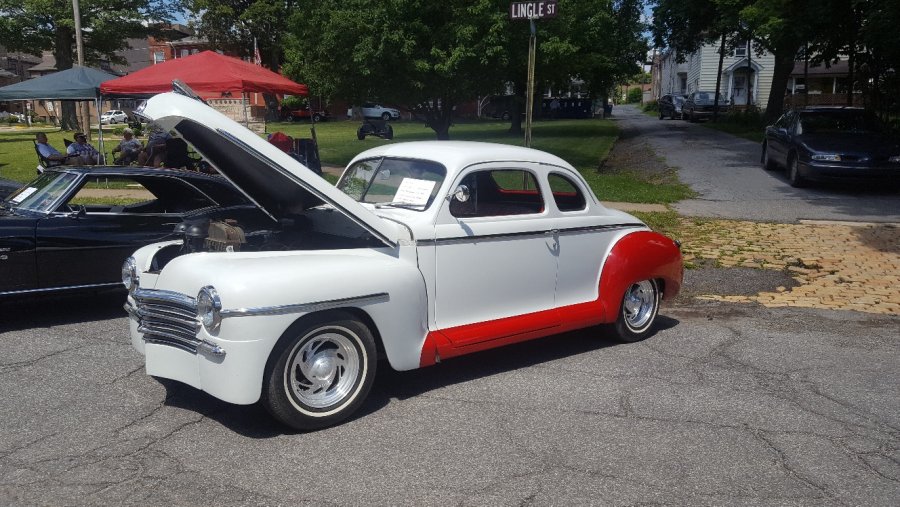
I went to a local car show yesterday, there were lots of nice vehicles from all over PA. No trophies for me I had to enter into the street rods to 1948 class and unfortunately my rather stock 218 wasn't as eye catching as the chromed out 350s in many of the other cars. Here's some of the Mopars My P15


-

New radiator - experience with the champion offer
Hubler13f replied to Thomba48's topic in P15-D24 Forum
I have one in three core for my 47 IHC KB1, the quality looks good and it fit and bolted right in. Couldn't beat the price. -
Hesitation And Stumbling Under Load and Starting Out
Hubler13f replied to Hubler13f's topic in P15-D24 Forum
All good info, and to Dpollo, your absolutely right. I'm not sure what made it stick, but it was running great before the head gasket blew it only sat for about a week until I got parts, maybe it backfired through the carb upon start up and lodged it up and open. Who knows it's always something. I have 3 other carbs tore down, 2 are soaking in carb cleaner buckets. So on a rainy day when I'm feeling patient I'll sit down and rebuild one, taking my time and honing and polishing everything. For now it's back to running good. -
So, I finally solved my problem after a week of researching and reading I must have read 100+ threads about Hesitation, Timing, Sputtering, Hard Starting, Plug Gap and so on and so forth, so I figured I would add my experience to maybe help someone out in the future. My issue began after I had blown a head gasket and replaced it. After I got it started it was running like crap, like you know when you spent all night out drinking keg beer and eating junk, Yeah that kind of CRAP! It was hard to start, and sounded like the timing was retarded and the starter could barely turn it over. When it would run, I could stand there and it would idle smooth I could blip the throttle and it would respond beautifully. But on the road it would run hot and would jump and buck and sputter starting out and going up hills or under any load at all. On the flats it felt like I was towing something with it. So at first I figured it had to be related to the head gasket problems, long story short it wasn't. I messed with the timing and it would get somewhat better when advanced but still wasn't good. After a week of trial and error I went through all of those threads and made a checklist and hit it hard. The following are things I read and did to try to solve the problem not necessarily in that order. Static timed, Timed with light, Timed with vacuum gauge, Road timed it, Cleaned the distributor, Replaced the tiny ground wire in the distributor, Checked the cap, Checked the rotor, Checked the wires, Re crimped the wire leads, Checked everywhere possible for vacuum leaks, Re torqued the plugs, Tightened every screw bolt and stud from the top of the carb to the block, Dumped Seafoam down the carb and let it sit over night, Cleaned the fuel filters, Unhooked my electric pump when the car was running allowing the mechanical to do all the work (my electric runs a 2.5-3 lbs. and seems to do pretty good at assisting the mechanical) Checked for black smoke, Smelled for gas in the oil, Watched the oil fill tube for steam or smoke, Broke the nose cone of the starter and replaced it with a spare, Pulled the plugs and they were all black and sooty, very sooty. So I opened up the carb and looked at the valve that is supposed to be pulled down by vacuum, I pushed very lightly and it was stuck in the up position so I pushed just a bit harder and heard it click as it dislodged and slid down, I exercised it a little, cleaned out the fuel bowl, just a little fine powdery dirt in the bottom, then made sure my float was adjusted right. Static timed it started it up and ran down the road and it ran like a dream. So all of that just to find out that little valve jet was stuck in the up position and dumping extra fuel into the motor. It was a lot of good reading and I appreciate all of you fellas for posting your previous problems. So here is my post I hope it helps someone some day. Edit: I forgot to mention I also checked and tested the vacuum advance and it was good.
-
Nope different Philipsburg, this one sits on the Clearfield county and Center county lines in central PA 30 minutes west of State College, PA
-
Thanks good to know, I just didn't want to knock it loose after I got everything back together and have it get lodged or block a valve open. I'm sure if it's carbon it wouldn't last long, just made me nervous.
-
I pulled that plug the other day to find TDC and found it to be filled with carbon build up or something, I carefully replaced it trying not to dislodge whatever is blocking it, I didn't see anything out of the ordinary while the head was off, but mine is definitely blocked.
-
And an update on what I am hoping is the last of the Head Gasket Saga. The stud I made didn't hold, I should have known not to believe the rating on epoxy containers no matter what they say. So instead of pulling the head again, I tried putting a 1/2-13 bolt 3 inches long in the hole in the head and it fit perfectly. So I ran a 27/64 bit down through the hole and into the threads in the block then a 1/2-13 tap using the head hole to center it all and it went through like butter. I then coated the threads with permatex #2 and torqued it to 70 lbs. So there you have it if anyone else strips a headstud hole, or gets a little crazy removing a broken head bolt its an easy fix to drill and tap it to 1/2-13.
-
I know it sounds like a lot but if you do a search on here. Many guys have had as much as .125 taken off. That's why I wasn't worried about .025. I had it running before I broke the head bolt and had to remove the head. There are no signs of anything hitting.
-
I have my stud installed and the epoxy is curing, I used the permatex steel weld epoxy. I probably really didnt need the epoxy but I wanted something to take the tiny bit of slop out. Upon closer inspection I can see .040 stamped on each piston so i am thinking this engine has been dug into before.
-
I grew up in and live near Philipsburg, PA. A guy named Jim Verost has probably 50 of these thing in every configuration sitting in a lot. It used to be a Junk yard but he scrapped everything except these.
-
This is very similar to what I am going to do. I checked again this morning and tested a grade 8 bolt at 70 lbs torque in the hole and it holds. I have about 2 to 3 full threads in the bottom, and half threads almost all the way up. So if I can find grade 8 7/16-14 all thread somewhere I will make a stud and use epoxy as thread sealer and screw it in the hole. 7/16- grade 5 all thread can only be torqued to 50 lbs, grade 8 to 70 lbs. If not I'll get a grade 8 7/16-14 bolt 4 inches long and ill cut the head off and thread both sides. Edit: I called around and found some 7/16-14 grade 8 allthread so I'll be making a stud out of that.
-
Well I got it! I let one of my stepson's friends come over and when his dad came over and I told him my plight, he brought back a couple of carbide bits for a die grinder. Hes a car guy too and has a 56 chevy and a 67 or 68 chevy truck. I ripped the head off and worked at it for about 30 minutes and the bottom 3/8" of the bolt dropped down into the water jacket. I could tell when i made contact with the broken drill bit by the bright orange sparks it made. Unfortunately I lost most of my threads but at least now I can drill and tap it to a bit larger size or install a heli-coil. All new bolts going in this time!
-
My luck I would break that baby off in the block too. Thanks though, I went and spent about $100 for hard bits, left hand bits, and easy outs yesterday, so if that thing works as the testimonials said, it might be worth it.
-
Yeah, the IHC KB1 I posted was bought in August 2011, I walked away from it after the entire chassis was done, motor trans and rear end installed, 2 inch chop was done all within 6 months, now I get to it once in a while, i should have kept on it while i had the motivation. The wife and I love to ride, we don't get to it very often now with 3 young kids there is always something going on. Also I used the 3/8 angle and plate trick on my outdoor boiler. It froze and cracked so i plated it, along with about 3 tubes of red RTV and it hasn't given me a problem since.
-
Exactly, this is my hobby not a job. And this car is not my main means of transport. I walked away from it until I can think for a while. I dug some pits with my back hoe today, played in the pool with the kids for the last couple hours. It will be there when I want to get back into it.
-
It wasn't bad at all I took each of the 21 head bolts and put the head in the vice and wire wheeled them then took a die and ran it down the bolt to clean the threads, maybe 45 minutes work total. In hindsight though I should have opened up my wallet and bought new bolts. I was hoping someone here would say heck with it run it til it blows again, but i know the right thing to do is tear it down again. I am thinking i will tear it down and cut the head of the bolt at the correct depth so it just touches the broken half then drill the head out to about 5/16, put it in the hole and try to mig it together and plug weld it. Then slowly turn it out.
-
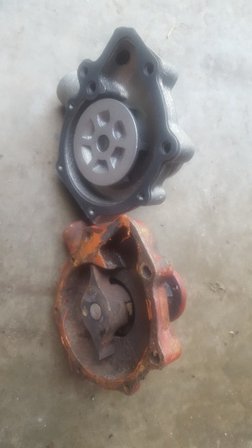
Well, it started out a good day I got parts late yesterday and tore into the garage early this morning trying to get it done. I remember another thread where some of the differences of the newer vs. the older water pumps. So below is a picture of the innards. You can see that the impeller design is totally different, also notice the threaded bung for placing a fitting for a heater hose to the of the new pump, this would be below the lower radiator hose connection. Also the mounting flange under the lower radiator hose connection is much thicker, the new pump came with a longer replacement bolt though. So I got everything put together, I used permatex copper spray on the head gasket and permatex #2 to seal everything else. I checked and rechecked everything to ensure I had it all together right. I checked the oil again, it seemed a little high, but not bad so at this point I wasn't to worried that any water had gotten down into the pan. So I turned the key, pushed the button and the car started immediately. It seemed to be idling a little high so I began going to work with my screw driver, vacuum gauge and timing light. As on cue the car started steaming as soon as it started to warm up and lasted about 10 minutes all as experienced and predicted by DPOLLO This is where things begin to go south. As I was adjusting the timing I removed the fill tube and could see the oil looked a little thing and somewhat like chocolate milk. I thought no big deal, I probably did get a little coolant in the oil. So I shut it down and was thinking I'll just run into town get a couple gallons of oil and do a couple oil changes over the next couple days. Then I thought while I have it up to operating temp I might as well re-torque the head bolts to 70 lbs. as stated in the service manual. Here's where it goes really south!!! I got to bolt number 8 in the sequence and snap, my heart sank. The bolt snapped deep in the hole, past the head and just below the deck, I have tried everything from easy outs, left hand twist drill bits, everything and it has not budged. And to top it off I really screwed myself when I snapped a 3/16 bit off in there. So now I am faced with having to tear it all down to try to extract this bolt by trying to weld a nut on it. I cleaned, wire wheeled, ran them through the die to clean the threads, checked and double checked these bolts. I have never before reused head bolts except on this engine and now I remember why. Part of me wants to say %&#@ it and just run it, until the next time I need to tear it down.
-
Now that I think about it again I was just out in your area the other day I took the head out to Finches Machine Shop to get it shaved. When you turn off of rt. 253 at the red white and blue tree and head back there maybe a mile and a half, to the right there is what looks to be a couple of 40s mopars, one is dark blue and the other is light green and patina.

