wolk625
-
Posts
24 -
Joined
-
Last visited
Content Type
Links Directory
Profiles
Articles
Forums
Downloads
Store
Gallery
Blogs
Events
Classifieds
Everything posted by wolk625
-
So this has been a sore subject for the duration of my ownership of my P11... I bought the car 99.999% complete, with that .001% missing being one of the two itsy bitsy teeny weeny little knurled wiper adapter caps. I at first believed that this would be an easy to source part, but soon realized the disappointment that my wiper armature ends aren't compatible with the vast majority of adapters on the market - I have scoured ebay, oldmoparts conversion kits, classified ads, and haven't seen anything in 6 years that will fit these "flat spade shaft" type of armature ends... At this point I am debating yanking out the original, functional Trico wiper system for something else that has a more common "round shaft" armature ends, which seems ridiculous just to avoid finding one single part but I'm not sure what other route I have forward at this point.. Do any wizards of the mopars of old have any advice on how to obtain the correct fitting version of these, or is it a lost cause and I'm better off switching the arms to something more common? Thanks in advance,


-
Thanks for the sources, definitely sounds like the easier route to go. I think I'll still call or email them regarding the specifics on their kits, like if they include the dome light and tank sending unit wiring, and what gauge they're using where. I might also just buy some extra grounding ribbons and start going to town strapping all body panels together.
-
Hey guys, Been lurking for a while, and finally have some time to really give my car the attention it deserves. First up on my list to redo is to address the original wiring - although still mostly functional, I'd like to replace it all with some nice new braided wire before finishing off the interior, and was wondering if anyone else here has a ballpark idea of how much (length) of wire I'm looking at to order? I have the schematic from the service manual but it doesn't seem to mention length anywhere. Also, where are some critical areas where I should consider adding or replacing body grounding straps? Thanks in advance. (P11 business coupe, still original 6V)
-
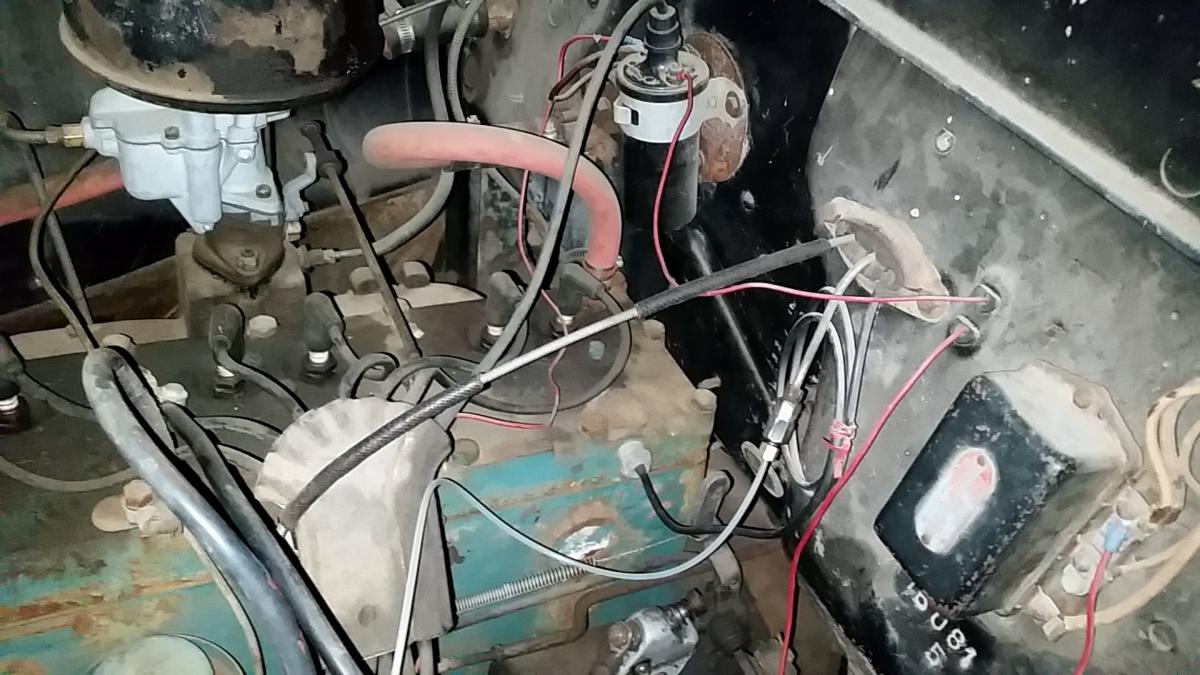
Reviving a pretty old thread here, but I just recently got some more time to work on the car and today - recently acquired Another set of fresh points (gapped to spec), scored a "donor" IGS distributer from a '47 Desoto (actually fits but the vacuum advance is in an annoying spot), fresh coil, fresh plugs, and I also bought an in-line spark plug test light to see what's really going on, and I noticed this - while cranking, in addition to the main "spark"/bigger flash I'm also seeing a smaller/dimmer flash at each one of the other plug's lobes? (this is directly at the plug on the engine, not on the coil wire) - so it looks like I'm getting interference from somewhere, maybe bleeding my spark's strength back and forth through some leak. The small wires to the points were in better shape on the Desoto dist so I tried swapping those over, but I'm still seeing this strange spark behavior. Does this sound like any particular phenomenon? I'm starting to wonder if my plug wires are chaffing in the "wire loom manifold"(metal piece that organizes the wires from the distributor to the plugs)..
-
Apologies for a confusing first post - my car has an IGS-4111-1 distributor. This car was a normally functioning, running and driving car for the majority of the summer, but just how these things always seems to go I let it sit for about 2 weeks and suddenly this problem came up. I replaced the previously working cap with another IGS-compatible distributor cap and rotor on it (tried an Autolite pair first, then Borg Warner), also minding to align the notch in the cap with the slot in the distributor, but am still experiencing the same symptom.
-
So I've been battling various distributor problems for a while, most I've been able to adjust out or rebuild, but this one has me stuck - the rest of my ignition parts seem to work fine, have spark from the coil into the cap, but can't seem to get spark out of the cap after 3 different cap and rotor changes.. (Latest parts are BWD C123 and D103) I've tested that the cap is getting current through the center, the center is touching the rotor, and the rotor is coming in very close proximity to the outer nodes. Is there another fault that I might be overlooking on the distributer side of things, like the rotor grounding/not grounding, distributer itself having poor ground, etc? Also considering a full distributor replacement from the previous problems, are there any good aftermarket replacements that fit a 218? As always, thanks ahead of time
-
I also am going through the brakes on my 41 Plymouth, and what I have found - I tried the rebuild route on all of my wheel cylinders (seals, springs, etc), tried honing them to the best of my abilities, but the pistons themselves were just too far corroded and pitted, and just leaked/didn't work. For the fronts, I got really lucky and figured out there's a really close NAPA equivalent (bottom row on the first page organized by photo in their "brake bible", don't recall the exact part numbers at present but can try to find them). Only thing different on them is the inlet port points straight out/down rather than angled to the side like on the originals, so I had to be careful with my flexible hose routing. However... What I'm still stuck on sourcing is a compatible set of new cylinders for the rears, which I couldn't find in their book. What I noticed for trends is that the rears for this year range seem to have an uncommon layout for mounting bolt location vs the bleeder port location, I could find quite a few that measured almost the same but would be flipped upside down for mounting.. Yes, I know the original part number is a 678323/678324, with OLD equivalent being the EIS 6127/6128, which seem to be unobtanium now, what I'm hoping to find is something I can order/buy new like I did for the fronts. If anyone knows a lead on something that'll fit back there I'm all ears.
-
Since I've gotten the '41 fully streetable, I've noticed that while rolling at a pretty good pace and under throttle/load, there's a pretty intense/loud vibration sometimes, but when I let off throttle and coast it goes away. Is this most likely bad u-joints on the driveshaft, or should I be looking elsewhere?
-
Might as well share my story on this - My car was running "okay" for a while last year, when suddenly it quit getting fuel. I had a new fuel pump, new rubber line, and the tank I had cleaned out myself, but I had an especially hard time getting the pickup tube in the tank clear when I was working on it. I had to take it to a radiator shop to remove it and clear it out on a bench and reinstall the tube. While I had the tank out and had the rubber flex line unhooked from the pump, I could easily blow air through the line, so it seemed fine at the time. Fast forward to losing fuel, and I was freaking out because I thought all of my stuff was fresh. I started back-tracing, and found that my rubber flex line had become incredibly clogged with a wad of rust flecks right at the fitting. The joint at the fittings internally had enough of a lip on it for all of the junk to get snagged on and build a big clot. Pretty sure all of these flakes came from my line, so I just put on a new fuel line all the way front to back just for precaution, no issues since May or may not be the same as your issue, but I would just start working your way back from the pump and see what you find
-
Finally got a chance to put hands on the car again today, I decided to try just swapping out the condenser with the original one I pulled out, and sure enough, all of my issues went away... So my new condenser I bought was junk. It was this "BWD" brand, only thing anyone around here had in stock. Out of curiosity, is there another easy to obtain brand of condenser that anyone can vouch for?
-
There were some bare chunks on the flexible leads down in there. I took a donation from a similar sized speaker wire and dropped those in. It's firing pretty consistently at idle but under load I'm getting a lot of popping. Probably carb stuff? I'll play with it more after the holiday weekend
-
just for the update, yes, runs (ran as of now, different thread explains haha) idles in driveway at about 150-160, driving in this 95ish weather stays around 180. Pretty much right where I was hoping to be, but now some other fun gremlins have got me sidelined again.
-
Back again, So last week, I was originally asking about a months-old overheating problem, only to find that my distributer was off-the-map in timing. After setting it somewhere in the neighborhood of correct, it ran great/cool, but raced in idle - traced it up and the idle adjustment screw was snapped off - extracted it and it idled great too. Drove it pretty much every day this last week with a mile wide grin. But of course, maybe being dumb, yesterday I felt that it still wasn't tuned right - it was tough to start, stalled after letting off on a long straight. I had assumed that maybe the distributor had slipped back a little out of time, since that was the last thing I had adjusted. So I grabbed my timing light and went back at it - it was a little off, but not wildly out of time like before. After centering it to my line, it ran okay for about 2 minutes, then started to sound like a heavily cammed v8.. Wouldn't take throttle, and eventually would hardly stay running. In an attempt to diagnose, I turned on the timing light again and saw large gaps in time of no flash, then a few flashes, then no flash. I moved the pickup lead from wire to wire and saw the same thing. I then moved it to the two coil wires (signal and output), expecting to see very fast flashes, and again saw rapid flashing, no flash, intermittent flash, no flash, etc. uuuuug...... Where do I need to start in my diagnosis to find this problem? Parts that are new - coil, dist cap, rotor, points, condenser, plug/coil wires, spark plugs. Other factors that may have played a part - this problem started happening right before an unexpected rain storm came through, and once I started getting soaked I pushed it back in the garage as fast as I could. I'm pretty confident that no water got in the engine bay, but I'm wondering if the air being soup may have played a factor. The distributor shaft I noticed has quite a bit of free play, but I would think that it would just drive to one side of the slop, and I'd be able to account for it in timing. Do I just buy a new one and cross my fingers, or will patience prevail? Anyways, your favorite antique mopar millenial thanks you for all your help. Any suggestions are welcome.
-
So I think this is the root cause of all this.. Thanks a million for that chalk trick, I would've never thought of that in a million years. My timing at idle was off the scale, and when I did bring my idle back to roughly center, the idle speed was racing. I went to go turn it down on the screw and noticed the idle adjust screw head was snapped off, the throttle linkage had about 5 washers shoved on it and the arm is all bent up. So I think some dingus in the past snapped the screw off at some weird idle, tried pulling the arm to extract it, bent it, then tried washers on the linkage to account for the bend, then when that didn't work, they gave the distributor a twist to bring idle down.? At least that's what my mind thinks what happened haha
-
As for the timing, this is what I'm working with. I dotted it with a sharpie in an attempt to see what's going on down there, but to no avail.. Does this look like a stock pulley or aftermarket? I can't figure out a zero point to work from - none of the lines are really any different than the others. Ideas? <a href="http://s89.photobucket.com/user/wolkinator/media/Mobile%20Uploads/20160622_192419.jpg.html" target="_blank"><img src="http://i89.photobucket.com/albums/k214/wolkinator/Mobile%20Uploads/20160622_192419.jpg" border="0" alt=" photo 20160622_192419.jpg"/></a>
-
Cylinder compression test shows good on all cylinders, spark advance was something I was planning on getting around to at some point. Definitely will do now. There was an aftermarket temp gauge added below the dash when I bought the car. I do realize this doesn't mean that this gauge is any more or less accurate than the one in the gauge cluster, though. My new radiator has a 1.1atm cap on it, if I decide to throw it in, do I risk blowing anything else off or is the radiator the most "fragile" component here?
-
Rebooting this ancient thread.. Life got busy, and I had a full world of fun rebuilding the brakes and axle seals before this was really an issue again. First off - Don, after the first post I did realize that my system was overfilled, and it was overflowing when I would shut it off. However, with the correct level of coolant, I was/am still seeing temperatures in the 210-215 range... So the catch-up: I put in a new water distribution tube, and to my surprise the one in the block was in remarkably good shape, just one very small rust hole on the end closest to the water pump. The original water pump did look a little worse for wear, but was still functional. I didn't want to gamble it and just got a new one for insurance. Popped out the front, rear, and one of the bottom freeze plugs and flushed and flushed and flushed.. lots of lil chunklets came out from here. Flushed the radiator, and as described above, got 5-6 inches of blast out of the bottom outlet, so there is at least a direct unobstructed path from the top to bottom outlet. Upon full reassembly I tested the thermostat that I had (had 171 stamped in it) and found it to be working properly, but for experimentation purposes tried running with and without it but had the same results. Frustration ensued when it was still getting just as hot as before. On the HAMB, I had read a forum about someone having an especially difficult time staying cool, and someone suggested vinegar: flushing empty and filling with a gallon of vinegar diluted to the rest of the system capacity in water, and run until overheat or 20 mins, whichever comes first, then letting it sit overnight, then flushing in the morning and replacing with normal 50/50. I did this, and after sitting overnight I decided to start it, temp rising well above 180 as I was used to seeing, but suddenly to my surprise, the needle dropped down to 150 and stayed there for 5-7 minutes. Excitedly I drained and flushed the vinegar concoction and replaced with 50/50 and tried it again, but to my dismay, on the light drive around the neighborhood saw 200+ degrees, and did not shoot down to a normal range like it did 20 minutes earlier. The curveball: when I had the vinegar in it and the temp fell, I was running without the thermostat (some weird concern that the vinegar would harm it in a way it wouldn't perform correctly or deteriorate the diaphragm). Pondering now what's left at this point, I have to ask - how likely is it that I'm still just pushing around a massive blockage somewhere, maybe in the head? Are there coolant passages on the bottom side of the head? Or is there a chance I've just got a really big bubble somewhere that I can't seem to empty, and my temperature drop was that bubble burping out? Or, am I still stupidly overlooking some fundamental of these coolant systems? Besides overflowing, can these systems be "too full" without overflowing on shutoff? How big of an impact could the hoses to/from the heater, and the heater itself, play in this system? (my heater is electrically dead, won't turn on, but the lines running to and from it are getting plenty hot). Could I gain significant enough heat radiation if I got it working again and just blasted it all the time? Most people I ask in person still suggest throwing on a higher pressure cap and just let it bake, but I know the original radiator probably wouldn't be able to take it. Is it possible that I'm just immediately boiling from a very large leak somewhere in the system nulling all system pressure? Maybe pressure test the whole thing and see what's going on? Anyways, if you're still sticking around, this newbie appreciates it. It's been a long adventure, and I've learned a lot, but I'm still thirsty to learn more. Thanks for any and all suggestions so far.
-
Thanks for the replies guys, I'll be draining the full system this weekend to take a look, and I'll be taking out the water pump and freeze plugs to see what I'm dealing with. I do have a replacement radiator on standby if it is all chunked up, but I'd like to try saving the original if at all possible. Will report back soon.
-
Hey guys, Super excited to say that I finally got all the necessary parts to get my P11 running! With that first step out of the way, I can now focus on all of the bits to get it running right and reliably. The first and biggest issue I've found is that it gets hot, and when shut off it pukes out cold water. I originally thought this was just the thermostat stuck, so I removed it but still experienced the same symptoms. What I'd like to know is what my next steps should be: I do plan on flushing the whole system just to see what I'm really working with, is there an easy way to test if the water pump is functioning properly? Is there anything else that I'm overlooking that could be preventing coolant flow? All original everything. I actually got all of the original electrical equipment to work and charge, save for the horns, haven't successfully troubleshooted that.. any advice or tips would be greatly appreciated!
-
So I'm getting ready to get my P11 running and back on the road again, and I made the startling realization that I can't find where my oil filter should be? I've read a few different things about different options or styles of oil filter, but I would think regardless it would be in this spot, or is there some other method of filtration system that i might not be aware of? The only thing the service manual mentions about it: REPLACEMENT OF OIL FILTER. 1936-42-Install a new oil filter, or a new oil filter cartridge (if equipped with the replaceable cartridge type) every 8000 miles. In dusty areas, it may be advisable to change filter, or cartridge, at any time when the oil appears to be excessively dirty. Am I just missing the whole thing, or am I barking up the wrong tree here?

-
ANSWERED Difference between a P12 and a P15 dash clock??
wolk625 replied to wolk625's topic in P15-D24 Forum
NICE! I knew it could be done! I'll still keep scrounging around for a while to see if i can find one for a little cheaper but you've got me thinking now!! thanks a bunch! -
ANSWERED Difference between a P12 and a P15 dash clock??
wolk625 replied to wolk625's topic in P15-D24 Forum
- For clarity, The guy selling the "1941" clock actually has the one intended to go into a P11/P12, but he calls out "p9/10" in his ad. It has the raised portion for the numbers. They can be found in the brown like the one shown above and also a lighter beige color - The P15 gauge I can only seem to find in black, and the lines and numbers are on the same surface - For whatever reason why, I can find the P15 clocks for a LOT cheaper than the P11/P12 clocks. I just need to know if they changed the size of the physical clock as they moved on in years and I'll have to pony up the $800 bucks for the correct one or if I can fit the P15 clock in there and get by until a better deal comes along for the P11/P12 clock? Anyoone? -
ANSWERED Difference between a P12 and a P15 dash clock??
wolk625 replied to wolk625's topic in P15-D24 Forum
I do notice that the 1941 has the raised level for the numbers. I also found it amusing that between the two of them the guy selling the 1941 wants DOUBLE of what the p15 clock is going for.. They look to mount the exact same way but without knowing the actual outside dimensions of the '41 it's a tough call if I could get away with using the p15 clock or not. Is there a generally accepted "value" of these clocks or are they at the whim of demand and the seller?? -
So, first post here (wooooo) - what I wanted to try asking is if anyone here knows if there's a size difference in the clocks that ended up in P11/12's and the P15's? In pictures, they look about the same size, but I have heard people say that they are not compatible and one won't fit the other. Once all said and done I hope to also add a Philco 802 radio, P12 center dash and clock to my P11. (wish me luck....)