Tresmaddox
-
Posts
9 -
Joined
-
Last visited
1 Follower

Recent Profile Visitors
728 profile views


-
How is the Conversion going? I have a 4 door 1948 dodge that I would love to do that to it. Your in luck.
-

Introduction and 48' P15 4 door build thread
Tresmaddox replied to Tresmaddox's topic in P15-D24 Forum
Yes, I can either work you through it via PM, or make a more detailed guide with lots of pictures in the Off-Topic section of the forum. I'd also do the same with my tank setups. If enough people are interested, I could have that all posted up by the end of the week. -
Introduction and 48' P15 4 door build thread
Tresmaddox replied to Tresmaddox's topic in P15-D24 Forum
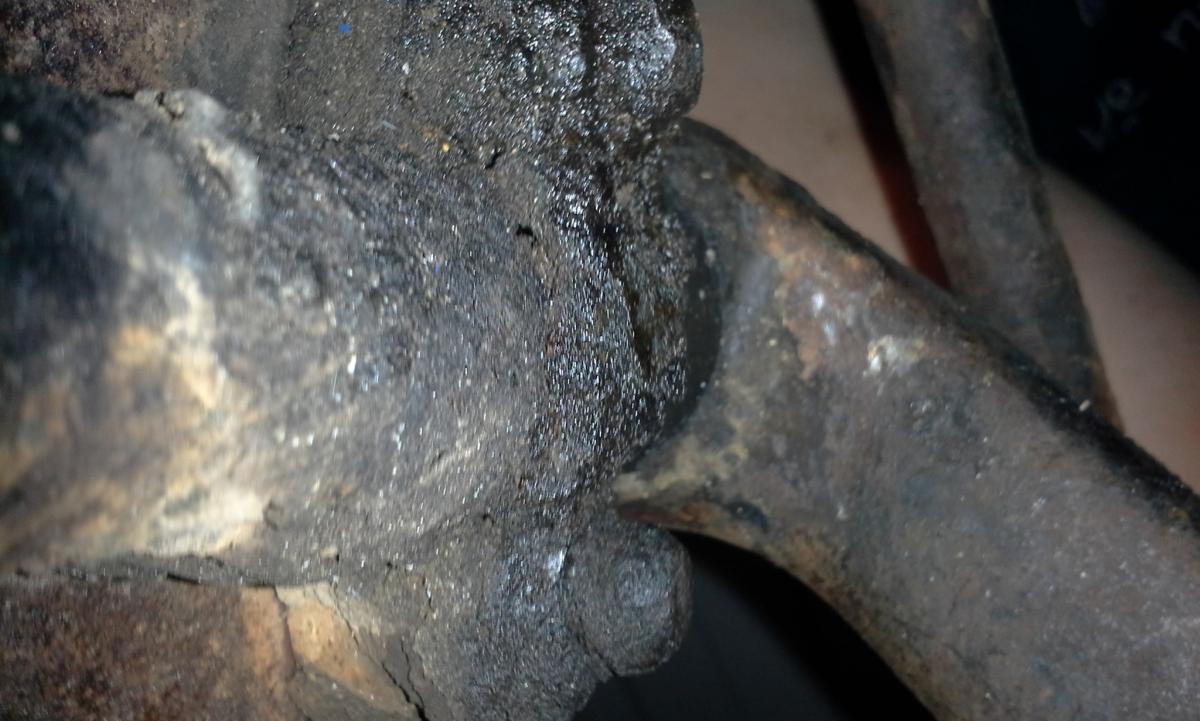
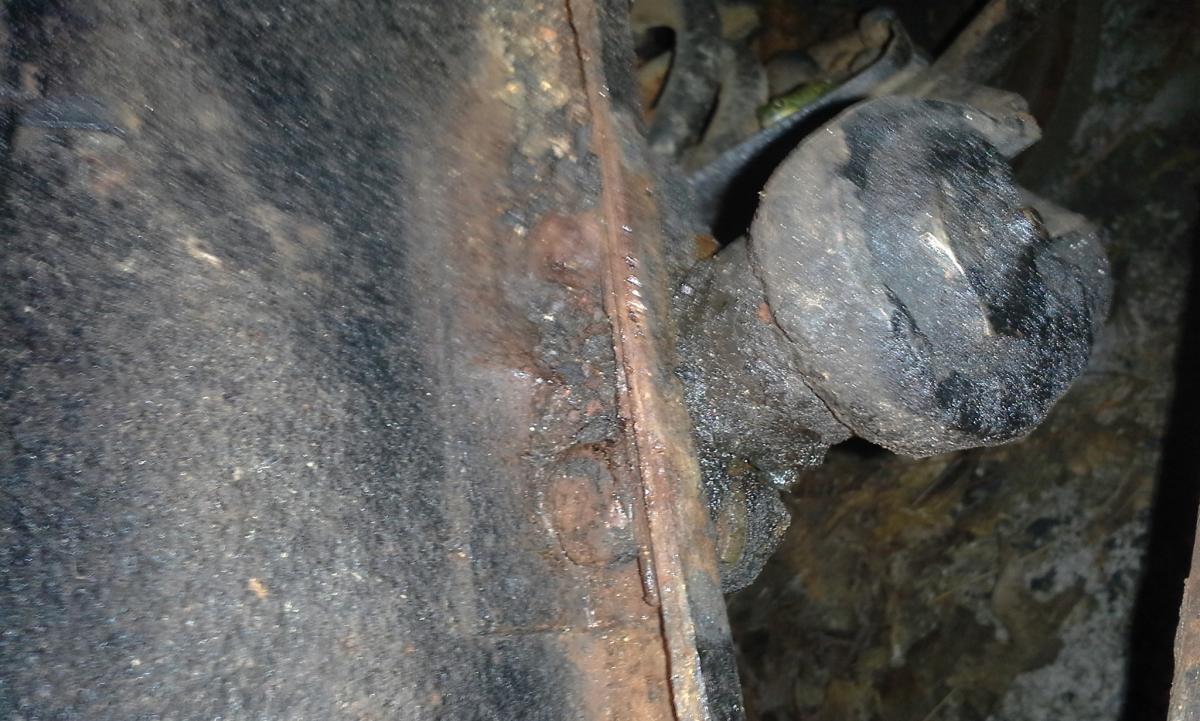
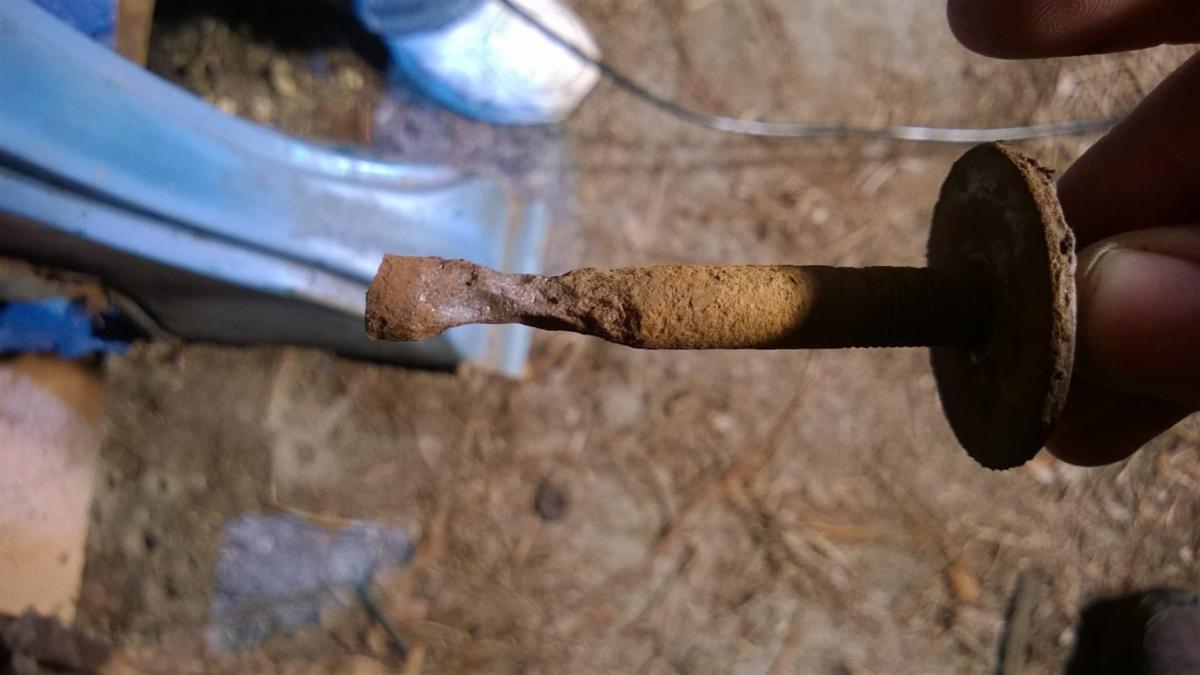
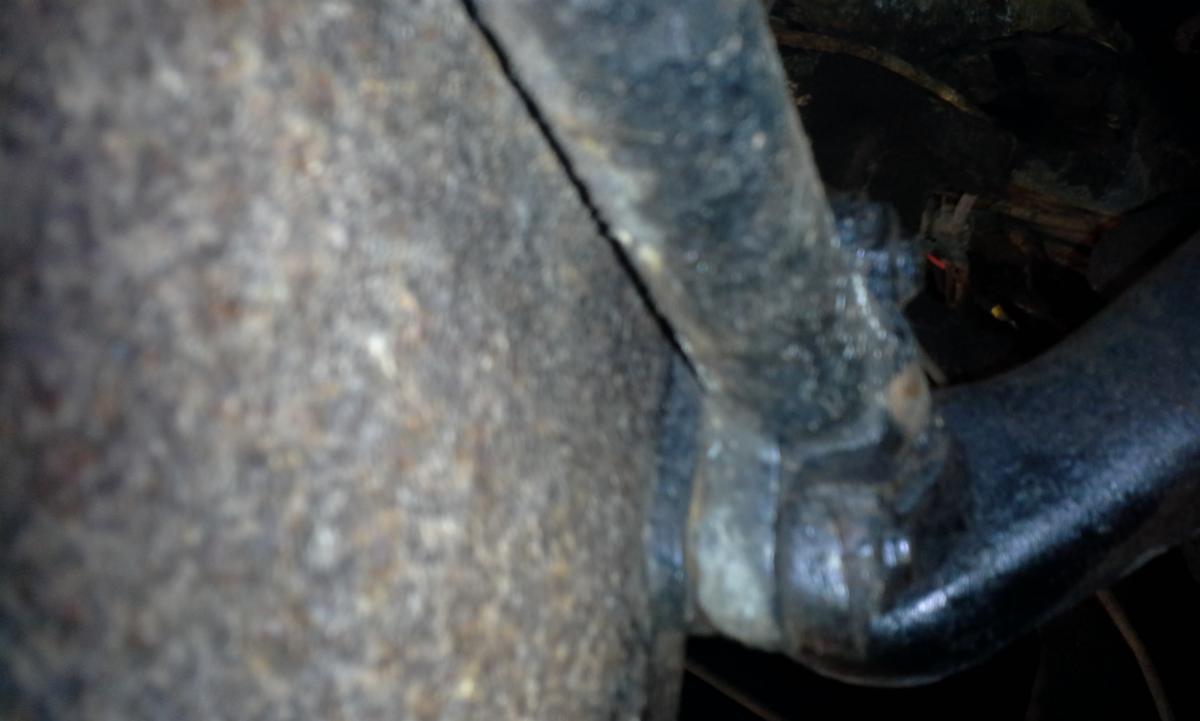
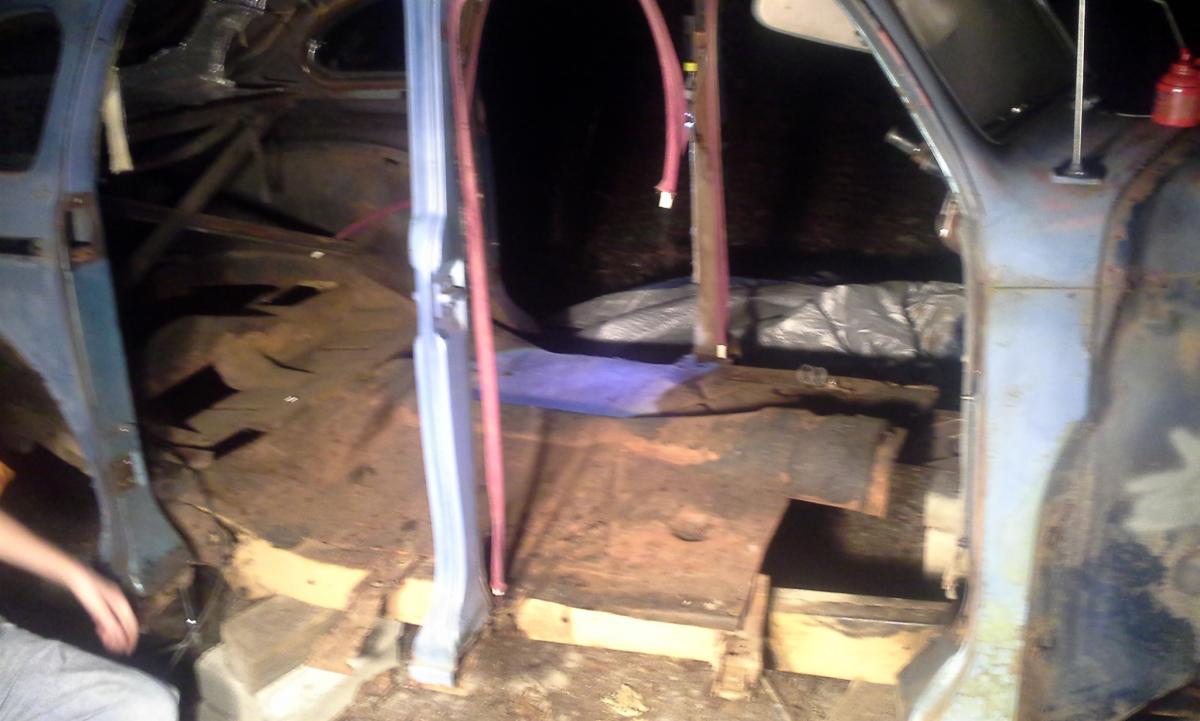
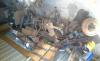
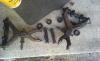
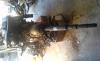
When i first got the car, I found that the floorpans consisted solely of appliance/computer side panels, and were completely slathered in some sort of tar and trunk liner type rust proofing that would only come off in sticky globs with a chisel. These patch panels were held in place with a mix of machine and wood screws. The tattered remains of the rocker panels were held to the car by galvanized tin roofing strips, again, held with a mix of random screws. So I wasn't too surprised when i found that one of the cotter pins used in the front suspension assembly was a trim nail, and that the body-to-frame bolts and brackets were in appalling condition. Attached are some pictures of all the fun stuff I find while working on this car.


-
Introduction and 48' P15 4 door build thread
Tresmaddox replied to Tresmaddox's topic in P15-D24 Forum
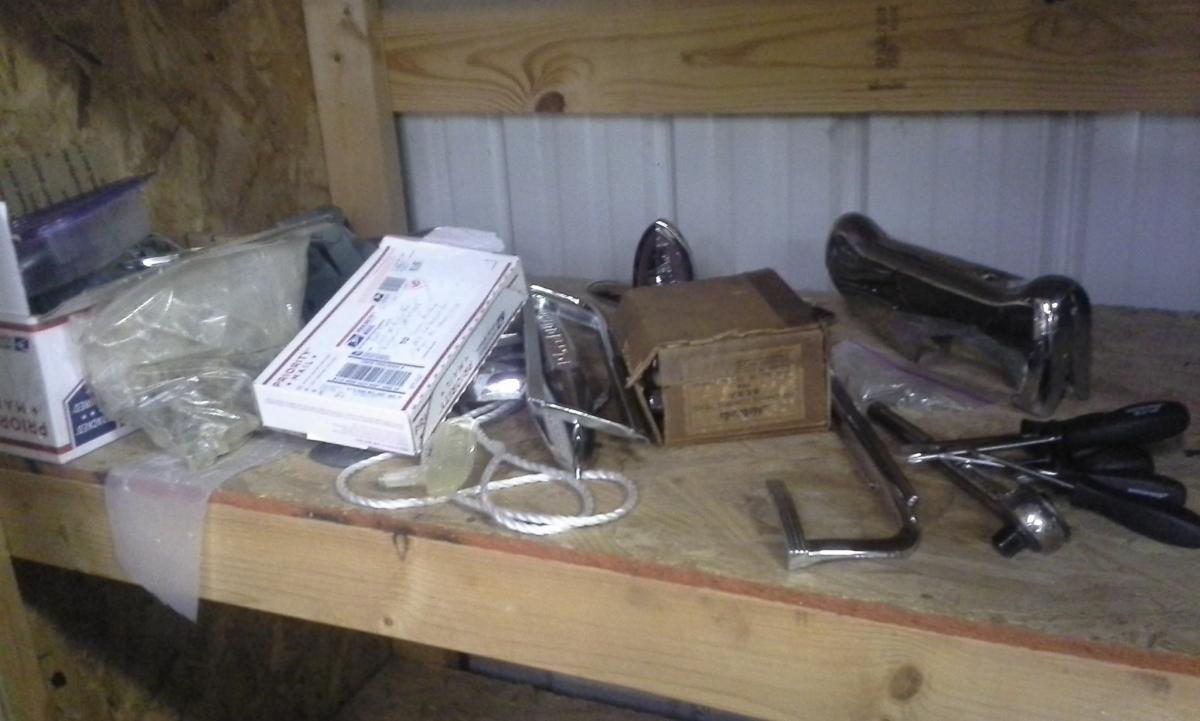
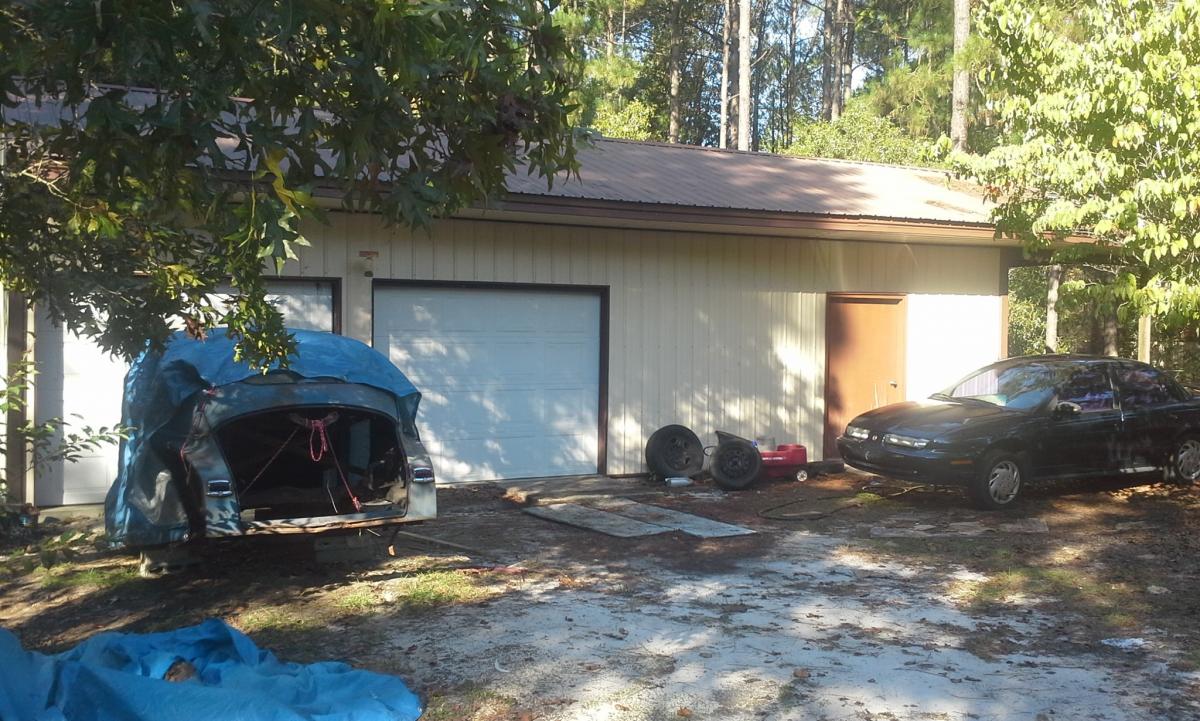
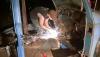
Some more photos in this post since I can only upload a few per post. The shop I'm using. Its soon to get a 24'x24' concrete pad in front of the two garage doors with overhead cover that ties into the existing building support beams, and features overhead flourescent lighting, air hoses, extension cords, and most likely support for electric hoists. Should be a nice addition. This means I gotta build a rotisserie and get my body moved to the side, and my frame on atleast one axle to move it back from the front of the shop. I'm also using a storage shed for body panels and big stuff in what used to be a llama pen that the previous owners had built. It keeps my parts out of the elements pretty well. I'm very friendly with my grinder, There will be a lot of grinder usage in this build thread. I'm keeping all the nice nearly perfect NOS and such parts I buy inside. I've also gotta go through all the parts from a huge bulk plymouth p15 parts purchase i made earlier, and decide what to keep, and what to give away/sell.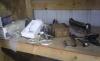


-
Introduction and 48' P15 4 door build thread
Tresmaddox replied to Tresmaddox's topic in P15-D24 Forum
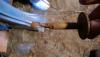
In the past two weekends I made some decent progress on my plymouth. I removed all 4 doors (had to order a special #4 Phillips bit to remove those hinge bolts), the trunk lid, the front and rear suspension assemblies, and freed the body from the frame. I also disassembled the entire front suspension assembly and began the restoration process on the parts I intend to reuse. My cleaning process for parts to re-use is currently the following: 1) Wirewheel any large globs of grease/rust scale/rustproofing/mud off of the parts 2) Soak the parts in a tank filled with Simple Green (i'll upgrade to a hot tank filled with marine-clean later) to remove remaining contaminants. 3) If the parts are rusted heavily or in areas that are difficult to reach, clean them electrolytically (i'll be posting a better dual 5 gallon bucket setup + single 25-35gal drum setup this week) 3a) brush the black oxidation off of the parts with a stiff wire brush, and wipe them down with phosphoric acid until satisfactorily clean, then dip a rag in the basic electrolyte solution and lightly wipe the parts off to neutralize any remaining acid 3b) heat the parts in an oven at like 180 or 200 degrees to remove any moisture and prevent flash rusting 3) Apply a protective finish. For most parts, especially hinges and suspension components, this will be a powdercoated finish to ensure durability and longevity. Powdercoating equipment will be my next equipment purchase. For parts that won't receive wear and aren't typically visible, i will spray them with etching primer, and coat with a durable paint of my choosing. 4) wrap them in brown paper and store them away until needed. The hot tank setup i'll probably end up using is going to consist of a roaster oven filled with marine clean. Should be able to get that cheap on craigslist or at goodwill, and I expect it to work out pretty well. The electrolytic cleaning process is available all over the web, and the operation process behind it is fairly simple and straightforward. Get a plastic container, and mix one tablespoon of washing soda (dehydrated baking soda) per gallon of water. This creates an electrolytic solution. suspend your sacrificial electrodes in the solution, and place them around the inner perimeter of the container. Wire your electrode(s) to a single point above the solution that is easy to clamp your power supply to. Suspend your part completely in the solution, and in the middle of the container. Clamp the negative (-) side of your power supply to the part, and the positive (+) to your sacrificial electrodes. Apply some current and you should see a lot of bubbles, and eventually a lot of rust in the tank. It does a great job, and is ideal for complicated or fragile parts that are too weak or difficult to clean using other methods. It does a very thorough job as well. For electrodes, I use rebar. For the power supply, i've used a battery charger, but will be switching to a pair of modified PC power supplies (Fan-cooled SMPC type) for each of the 5 gallon tanks, and a larger old-school computer mainframe power supply for the larger drum tank. The removal rate is a function of the current passed through the water, the distance between the part and the electrode(s), the exposed electrode surface area, the quality of your electrolyte, and the types of metal used. Higher amperage is better (faster) 1 TBSP per gallon is good, re-using electrolyte is fine, just stir it up and add water and electrolyte as needed because the solution will evaporate off over time Regular mild steel electrodes work just fine. You can bend up some cookie pans, or use thin steel sheet. I use rebar because it's super cheap and lasts a long time. No complaints from that. Don't use stainless steel, because that creates cyanic compounds that you don't want to have to try and dispose of. Don't use regular table salt as an electrolyte, because that produces chlorine gas that is very hazardous in confined spaces. Don't use the tanks near an open flame, because the electrolytic reaction produces flammable gas which is most definitely explosive. For the suspension removal and cleaning, one of my younger brothers was kind enough to help me wire wheel and air-chisel the suspension assembly down so i could find the bolts. Everything was caked in more than 1/4" of grease and sludge.


-
Introduction and 48' P15 4 door build thread
Tresmaddox replied to Tresmaddox's topic in P15-D24 Forum
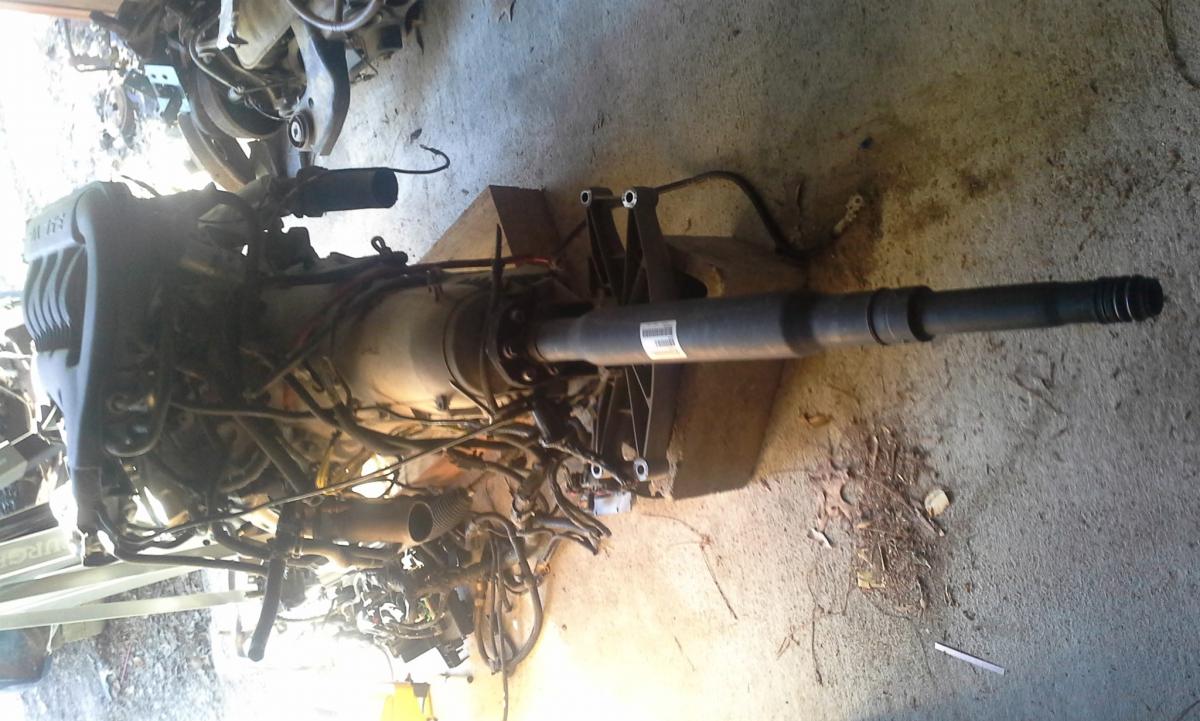
My engine selection introduces a series of issues that can mainly be divided into two groups: size and electronics. Size: 1) V-type motors don't clear the stock steering shaft and box assembly. It is too close to the center of the engine bay 2) The dimensions of the 5 speed automatic requires a larger dog house, which entails floor and firewall modifications 3) the width of the V-6 creates clearance issues with the stock inner fenders 4) the motor mounting style of the V-6 requires a custom cradle with mounting towers 5) More power requires better brakes and steering. I'll need atleast front disc brakes and an upgrade to power steering Electronics: 1) The awesome stock mechanical gauges don't work with the modern CAN bus system. While I can use the manual gauges for oil pressure, amps, and temperature, the speedometer with its amazing color changing needle will need some clever modifications to allow it to function. 2) Modern wiring harnesses are very complicated, I can expect to spend a couple months studying the harness diagram and programming to figure out what I can omit (ABS braking and the interior control computer mainly), what will need to be programmed out (or what signals i will need to 'spoof') and plan out the harness modifications I will need to make. I intend to do this during the summer of 2015 when it is too hot to be outdoors working on the car. 3) Modern wiring harnesses are pretty car-specific, there isn't much slack in the harnesses, so a lot of the harness will have to be duplicated in the appropriate lengths. Since I have to disassemble the harness to duplicate it, it gives me no excuse to not redo it appropriately to include the necessary modifications and omissions. 4) One of the benefits of modern systems is the ability to diagnose issues with the use of an OBDII scanner. In order to retain this functionality without cluttering up the underside of my dash, I plan to install it with the computers in a firewall 'box' of some sort. A modern car is complicated, but it isn't magic. There is nothing but cold hard engineering behind its operation. So with enough time, money, and thought; any issue can be resolved. 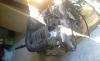
-
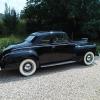
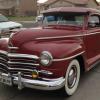
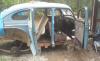
Hi all, I live in Lexington, South Carolina. I'm 20 years old, and I study mechanical engineering at UofSC and work at a private engineering firm in Columbia. I've been on the forum for a while, but didn't have enough pictures and progress content to justify starting a build thread until now. I purchased my car in November of 2013. It came with no motor or transmission (there was nothing at all in the engine bay), most of the interior was missing, and almost all of the floors needed to be cut out, including both rocker panels and the entire trunk. Since I had no motor or transmission to work with, I decided to replace it with something a little newer. I pulled a 2006 dodge charger drivetrain (3.5L V6), including the entire rear subframe, exhaust, and wiring harness with computers. Project goals: Full car dissassembly and 'restomod' 1) Safety first! 40's era cars are deathtraps. No seatbelts, a non-collapsable steering column that is a steel pole inside a steel pipe, no crumple zones or strength anywhere aside from the frame (which is a mild steel ladder type with no X-bracing), mild steel bumper braces and poor quality bolts all around. I've been in enough car accidents to appreciate the advances made in car safety, and plan to incorporate several changes where sensible and effective. 2) Sheetmetal replacement on floors and body. Both rocker panels were totally shot. The front flloor pans, toe board, trunk, and a few patches by the rear hump were also shot. All of this will need to be replaced. Two of the doors had rust issues on the lower curved section. I bought a huge lot of Plymouth p15 parts, and with luck, these two doors were included and in good condition. 3) Glass is damaged. Two windows are broken, and both front glass panes have laminate contamination issues and will need to be replaced. I would also like to install power windows and I plan to retain the stock window cranks for use as the window switch handles. The stock window regulators need to be cleaned and serviced, and the channel felt and seals all need to be replaced. 4) No drivetrain was included, so I decided on a modern drivetrain that is powerful, considerably more reliable, and offers amenities like power steering and AC (which is a necessity in South Carolina). Installation and operation will be challenging, but very rewarding. 5) 40's era cars have crappy brakes and sloppy suspension, body roll is also very prominent due to the undersized sway bar and high center of gravity. To rectify this, I will be doing a series of modifications that have been performed successfully by many members of this forum. Explorer disc brake conversion, shock bracket relocation, and the jeep cherokee inverted sway bar. 6) All my chrome is pitted. Since chroming costs are ridiculous, I've been buying NOS parts as I find them offered at great deals, and this cuts down on the parts that i will eventually have to chrome 7) No rear bench seat/frame was included, and the front seat is just a frame, so I'll need to hunt down a frame and possibly springs and go from there when I get to interior work. 8) Rust removal and prevention. With the car completely disassembled, it will never be easier to remove rust or make modifications than right now. Everything I do under the body and on the frame will be done with the intention that it should last for a very long time, and be able to handle regular driving. This entails complete rust removal, proper treatment with phosphoric acid, and the proper coatings on parts that are too large for me to powdercoat. EDIT: I will update all of the postings with their respective pictures once I can get home and resize them all to be less than 1MB. I will also make a post that discusses the body progress i've made thusfar


-
I'll be swapping to an offset box to bring the steering under the motor, and using the power rack from the charger
-
Yes I will as I make more progress into it. I'd like to do the laser scans of my front end first and cad up some motor mount brackets before I start a thread.
-
Hi, this is my first post on this forum. I've got a 1948 Plymouth sedan thats getting a 2006 3.5L dodge charger drivetrain swapped into it. My plymouth came with no motor or transmission, so this will be a full drivetrain swap from the engine to the rear subframe. I've got the entire wiring harness and all the computers as well.