

MBF
-
Posts
1,851 -
Joined
-
Last visited
-
Days Won
5
Content Type
Links Directory
Profiles
Articles
Forums
Downloads
Store
Gallery
Blogs
Events
Classifieds
Everything posted by MBF
-
I have the original door cards from my B1D that I put in my B2JA. There is the hump, but no embossing. I made new headliners, door cards and kick panels for both trucks using 1/4" luan sheets and vinly material that my wife picked up for me a t the fabric store. The one ton is black inside, and the 2.5 ton I did in brown. I had to make my own patterns. I did 1 piece for the headliner for each, and since the 1 ton is the std cab w/o the corner windows I did a single sheet across the back which was easier than the big truck w the windows. The rear window gaskets have a flap that helps hold the panels in place and gives them a nice finished look. They aren't perfect, but I'm satisfied. The panels along w the dynamat really quieted things down in both cabs.
-
There is a return spring that goes back to an eye of a cotter key poking through the passenger side floor toe pan. Check the tension on that spring it may need to be replaced. Other possible problem areas could be the ball pivots on the bottom of the gas pedal, and the ball mount on the rod that comes through the firewall to the pedal. Clean and lube them as well and look for an obstruction or something rubbing where the rod goes through the firewall to make sure it isn't rubbing on something. My 2 ton does the same thing because it doesn't get driven that much so the spring ritual is to lube the pivots.
-
I would think the p/n's that I provided in an earlier post would be correct then. I wasn't sure if your's was a H or J series. Mine is a JA (2 speed rear) but I would imagine everything else in the axle housing except for maybe the axle shafts themselves would be the same. FYI-my overhauled brakes with the original vacuum booster are WAY more brakes than are needed for the truck's current mission. They're much more effective than those on my B2D 1 ton. Mike
-
On these vehicles w a 3 on the tree I'm pretty sure there is a cable mechanism that separates the 1-R and the 2-3 shift positions with only 1 actual rod going to the transmission. If what DJ19491950 suggested won't work you may have to look at adjusting the throw of the cable. I could be wrong because I no longer have that setup in a truck.
-
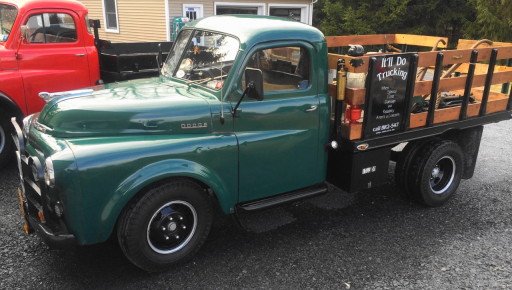
Acquired a 1950 Pilothouse to go with my '50 Meadowbrook
MBF replied to mmcdowel's topic in Mopar Flathead Truck Forum
I've got new 7.00-16's on my one ton that I bought 2-3 yrs ago. As with any of the bias plys-they flatspot when sitting for any period of time, and round back out after a short drive. -
RH71-I apologize-I completely forgot about this over the holidays. I hope this helps. Rear cyls Lockheed casting #FD31187 (or NAPA p/n 28803 that were $80 ea. The seals were NAPA p/n's 33807. My truck has 16" x 3" wide rear shoes if that helps at all. The front cyls were NAPA p/n's 3595 (left) and 3596 (right). The relined shoes came from an outfit out west: Northwestern Auto Supply at 1-800-704-1078 and were $75.00. I worked w a fellow named Gene who was very helpful. Good luck. Mike
-
If a locking ring 20" Dayton rim clamps to those hubs, you shouldn't have any problem with the 22.5" drop center Dayton tubeless radial rims. You could also run tubed 20" radials on your rims, but if it were me I'd go w the 22.5's. I wish my ex-firetruck had Daytons on it instead of Budds-a lot easier to find tires for today. Nice looking truck, and if you do go the radial route they'll do wonders for your ride and handling. I had a GMC Brigadier tractor that originally came w bias ply tires on it, when it was time for tires I went the tubed radials (this is back in 1980) and what a difference it made. Mike
-
Painted hubcaps information 1955 c-series 3/4 ton
MBF replied to Rjpond's topic in Mopar Flathead Truck Forum
I vaguely remember that my dad had a NY telephone installers truck. The hubcaps were painted silver with white DODGE lettering, and maybe a red ring around the circumfrance. You may have some luck googling 1955 Dodge truck pictures. -
Paul, I've never done one on a flatty, but I've done several V-8's and a slant 6. If you remove the radiator (which when I did mine involves removing the hood), water pump, and crank pulley you're now at the timing chain cover. This needs to be removed to get at the chain and gears. I'd replace the chain and both gears along with the front crank seal. I don't know if the crank pulley on the flattys is keyed or a tapered fit but you'll likely need a harmonic balance puller (not a jaw type of puller) if it is the later to avoid damaging the pulley assembly. Make sure you line up your timing marks correctly and doublecheck everything before putting it back together. Mike
-
The straight piece on the bottom of your photo was replaced on mine '49 about 20 yrs ago. It is like a canvas covered strip-there is no actual wiper that is held in place w 3 or 4 clips that snap over the canvas. . I think that there are 3 rubber bumpers that go in the inside side of the glass that actually make contact with the glass to keep it from ratting. Each is about 1.5" long and they fit into punched tab on the inside edge of the door frame. That truck doesn't have vent windows so I'm not sure if this helps or not. I got these items from either Roberts or Bernbaums.
-
RDHot71 I'll check the paperwork in my garage tomorrow and get back to you with the p/n's that I used and anything else I can find. Mike
-
On my 2.5 ton, the front ones were the same stepped cyls used in my 1 ton, but they're specific as to what side they go on. For the rear I got relined shows and new cyls, and seals. The cyls were the same side to side if I remember correctly. I know I have the pn's written down in my garage and I will get them for you if you need them, but mine is a B2JA with a 2 speed rear with I think 16" brakes. While you're in the rear, you may want to replace the inner seals to avoid having to take it apart again.
-
I've got a 49 B2D-no vacuum adv either. You may want to check your linkage to make sure that you're getting full throw at the throttle shaft from the pedal. Several places where there could be loose, bound, bent, or missing pieces. I'm not familar w the Stromberg for that model, but do you have the arm that attaches to the carb lined up properly on the shaft?
-
If you do decide that you have to replace the seal, you'll need to disconnect the driveshaft from the rear, and remove the drive pinion (large nut in the center of the pinion). Since the tightness of this nut determines the pinion bearings preload, I'd put a mark on one of the edges of the castleated nut, and one on the pinion threads to line it back up as an approximation of how tight the nut needs to be. If you take the drive pinion to a reputable auto parts supplier (NAPA or other) or a machine shop they should be able to order the correct sized speedi sleeve that you need-if you actually need one. Sometimes these old sleeves really fight back when you go to remove them so patience is a good tool to use. I lost mine!
-
I'd be leaving NY state right after the New Year's Holiday if I was driving this out to the barbecue. She cruises at 45!
-
35-40 in my 1 ton (all new tires and tubes) , 40-45 in the 2.5 ton on the front (near new) and 35 in the rears.
-
The Phoenix is awakening / B3B Rises from the Ashes
MBF replied to pflaming's topic in Mopar Flathead Truck Forum
I think that the T-5 conversion involves drilling and tapping the bell housing for the mounting bolts, machining the opening to accommodate the front of the transmission, a different clutch disk, and finding a rear with parking brakes as you lose the rear mounted brake found on the original transmission. I think the O/d may make the process worthwhile as far as roadability. -
The rims in your photo look like split rims that someone has cobbled together. I wouldn't use them, and I'd be careful on 9" wide tires on a 6.75 locking ring rim.
-
Taking the tree to my local volunteer FD for our Christmas party

-
Vet Doc-if you're talking about the pump jet at the top of the carb behind the steel plug, I had the same issue on one of mine. Mine was plugged solid and gave up trying to remove it while it was still salvageable. I ended up using a piece of guitar string to clean out the opening which is still working well. I'd also suggest soaking the pump plunger in oil overnight, and then gengly prying the bottom edge away from the plunger body. If these have been sitting on the shelf for an extended time, they don't open up properly. Good luck!
-
Take the rubber cups to a local NAPA dealer and they will match them up for you-they also have the kits. The only parts unavailable for the rebuild are the aluminum pistons.
-
I did what the others did-drill, cut out, weld in repair panel and use turned down carriage bolt. I then seam sealed the plate behind the fender, and around the bolt heads. It'll last longer than the original setup and keeps the original look.
-
I have 2 49 trucks. The old firetruck had them parked next to the divider strip, and the other had them parked on the lower edge of the windshield. If you've had the wiper wiper transmission arms disconnected from the rocking arm on the motor, they will fit on either the top or bottom positions. The position that you mount the actuatiing arms determines where your wipers will park. Both of my trucks now have the wipers parked in the center. If you remove the speaker cover it a lot easier on your body to see what you are doing behind the dash.
-
I had the same problem w an accel pump I just did, and I used the same method to "convince" the plunger it was time to get into shape.. After getting the plunger to actually push fuel, I found that the jet at the top of the carb was badly plugged. In order to access it you need to remover the round steel plug at the top of the carb opening. A fine banjo string was needed to get it opened. Never saw one plugged as badly as this one was.
-
Both the original 3 & 4 speeds have a 1:1 ratio in the highest gear. You can't just swap in a 4 speed w/o swapping the bell housing-the bolt patterns are different.


