

MBF
-
Posts
1,851 -
Joined
-
Last visited
-
Days Won
5
Content Type
Links Directory
Profiles
Articles
Forums
Downloads
Store
Gallery
Blogs
Events
Classifieds
Posts posted by MBF
-
-
Yup, but I've got the entire nose off the truck and the trans sitting on a jack. It isn't bad working over the fenders of my 49 1 ton, but this 2.5 ton is a bear, and it came off pretty easily. While I have the nose off I'm replacing the fender fillers and doing some cosmetic work in the engine bay. I'm going to put the bell housing and pedals in and leave the floor out so that when I install the engine I can easily get to those top two bolts that the accelerator linkage mounts to. I think the most aggravating part of this job was the pedal return spring and pedal removal. I can't imagine doing this job on a PH COE!
-
Thanks for the response. I did pull the trans w a trans jack (did it 2 yrs ago too when I did the clutch. I did pull the floors and pedals. Mine was a former firetruck and all of the original fasteners came apart easily. I think I'm going to mount the bell in the chassis and start buttoning up the pedals/floor. This was the longest engine pull I've done-did a Chevy 235 in less than an hour, and my slant 6 in less than two. Really appreciate the info and pics. Thanks again! Mike
-
I'll post some pics when I get them. I have the 251 engine out of my 49 B2JA. Crank broke at #6 rod journal. Pulled an engine out of a parts truck to salvage the crank. While I'm waiting for machine work I'm doing some of the stuff that wasn't done before like painting the firewall and inner fenders. On both engine pulls, I removed the nose assemblies, then pulled the engine with the bell housing still mounted to the engine. With the front inspection cover off of the bell, can I install the bell into the frame, and then when I get the engine back together install it into the mounted bell housing? I know the flywheel will need to be installed afterward as it'd be a tight fit trying to sneak it up between the front of the bell while hanging from an engine hoist. Anyone done it this way? Trying to use up some of the painted parts while waiting for the machine work to be done.
-
Make sure your heat shield is in place over the fuel pump. I covered my pump to carb line with some rubber hose to provide some insulation for it.
-
Did the adjusting collar come loose on the pivot shaft or is the keyway missing from the collar?
-
I’ve been running my blower motors on 12v w a ballast resistor mounted on the firewall for years. Granted they arent daily drivers but they do go out on nice winter days when the roads are dry and salt free.
-
IH and Ford both used those 6 lug Budd rims up through the late 60’s. They also made a 17.5” drop center rims with that bolt pattern. I’ve got a 1 ton that has 16.5” lock ring Budds. The .5” tires are hard to find.
-
Make sure that your vacuum valve is getting full travel throw at the firewall mounted valve. I had this problem w mine and it was just that the cable had slipped in the clamp. Also check the cable housing to make sure it isn’t sliding in the clamp in the shift lever. Simple stuff first.
-
 1
1
-
-
I’m going to go through the 251 in my B2JA. I’ve got a good running 230 that is ready to bolt in. How much of a deal is it to make this swap from the longer to shorter block? I want to take my time on the build and of this is a fairly easy swap I’d rather not keep the truck down. Will the 230 bolt to the bell housing on the 251 so that I can leave the 5 spd? I know the exhaust is different, but I’ve got a complete setup for the 230. Thanks folks!
-
You need a Runtz type resistor that doesn’t require a lot of amps to function. If you’ve converted to 12v + ground you’re probably going to need to reverse the wires on the gauge to make it work properly
-
1
-
-
A late member of this forum Grey Beard had a PH that he painted w a brush and roller. He chronicled the project on this forum. I had the pleasure to meet and talk to him and his brother at a truck show in Macungie, PA. You could not tell that the truck hadn’t been sprayed and it had a nice old looking gloss. I got tired of mine being in primer so I rattle canned it and rubbed the heck out of it 15 years ago. Still looks good and gets a lot of compliments.
-
There was a guy on another forum that removed his Budd center from his 20” rims and had them welded into Dayton 22.5 hoops. This should be fairly doable given that the 22.5 Daytons are a bolt on replacement for 20” locking ring hoops on Dayton hubs. The biggest issue would be getting them true and then find a certified welder willing to accept the liability.
-
I bought 7.50’s for my truck this year from Simple Tire. Nebraska Tire has them too. As long as they’re locking ring rims are serviceable any truck tire shop will mount them for you. I did 3 of mine myself, and found out the local truck tire shop would do them. Cost me less than $25 per tire. Where are you located?
-
1
-
-
ESPO Spring should have the pins and bushings and likely the shackle pins too. I'd look for a white haired guy at NAPA or a machinist to match up the king pins. They can order by dimension not just application. Good luck!
-
 1
1
-
 1
1
-
-
I'd lap them (always do) and look at the pattern on the face when you're done just to make sure the seat and valve face are going to seat properly and are making contact around the entire circumference of the face. I think its referenced in the service manual what the contact area is supposed to look like.
-
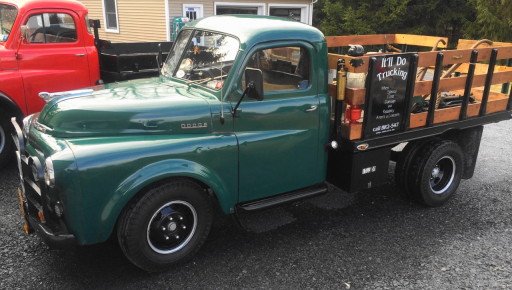
Nice looking truck who or where did you get the 6 lug Budd drop Centers from?
-
I bought one for each of my trucks this past year off eBay from MoParpro. Good seller, they’re the proper ohm rating, and work as designed.
-
Converted my B1D and 36 Plymouth to 12v years ago. No problems w either I’m just careful not to grind on them a long time to avoid damaging the starters. They’re both great starting engines so that isn’t normally a problem.
-
If it’s like the B series, the wire exits the bottom of the box through a standpipe at the bottom end of the steering shaft. There should be a loop on the bottom of the box. If you have to replace the wire that runs up through the steering shaft, do it from the bottom. The horn button on these provides the switched ground that closes the horn circuit.
-
The wire on the sending unit in the tank goes to one post on the back of the fuel gauge. The other gauge post is hooked to keyed power from the ignition switch. The sending unit provides a variable and progressive ground for the gauge.
-
Just a heads up guys. My fuel sender stopped working awhile ago so yesterday I went under the seat, pulled the plug and sending unit to test. MAN, there is something on that saturated cork float that stinks, and I mean STINKS. As soon as I walked into the house my wife noticed the smell, and when I went back out to the garage that now smells too. I didn’t spill anything just testing the sweep of the arm w an ohm meter. I’m thinking of disassembling the sender after disposing of the float to see what happened. I can hear the arm rubbing on the windings, but no continuity on the meter. What are you guys using for sending units? Mine has the single wire 2.5” plate w the 11 “ arm. If I can’t fix this one I’m going to be looking for another.
-
I have a 5 spd in my 49 B2JA. Only 4th and 5th are synchronized. Same final drive ratio as the 3 spd in my 49 1 ton @ 1.00-1. You should check the front mounts to see if you need to swap bell housings, and the location of the parking brake handle. Then there is the drive shaft length and yoke size. Not trying to be negative, just pointing out the things that you may want to check.
-
1
-
-
I modified the road draft tubea on my 2.5 on. I cut it off at the fitting and welded a nipple on the end. That nipple has a hose with a PDV valvle in it going to a vacuum source on the intake manifold. The sintered oil cap was replace with one from an early slant six that also had a nipple on it. I ran a hose from the fill cap to the air cleaner to hopefully assure a cleaner source of air for the crankcase. So far, so good.......... to be continued..
-
1
-
-
Just did the points/condenser in mine as part of a distributor swap. Haven’t touched the ones in my one ton other than to gap them for the 25 yrs I’ve had it.
1936 P2 windshield wiper switch
in P15-D24 Forum
Posted
It's a short rod that pokes out through the panel over the windshield. Each motor has one as they're controlled individually. Has a rubber button/bumper that slips over it. You can control wiper speed by how far the lever is pulled (well somewhat). Must have cause a lot of forehead injuries in the days before seat belts!