


9 foot box
-
Posts
628 -
Joined
-
Last visited
-
Days Won
15
Content Type
Links Directory
Profiles
Articles
Forums
Downloads
Store
Gallery
Blogs
Events
Posts posted by 9 foot box
-
-
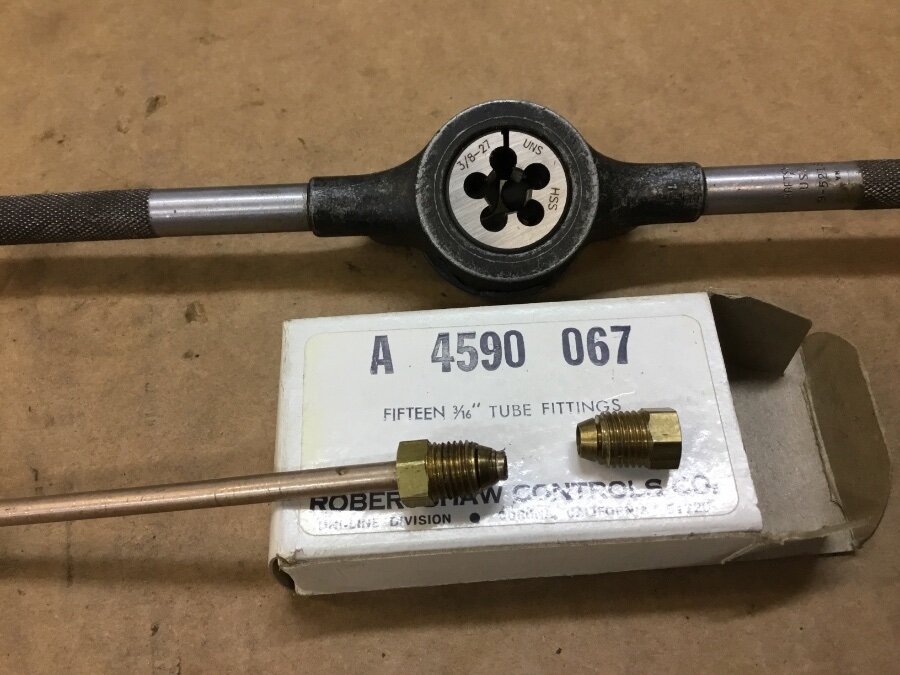
The last time this subject was mentioned, the consensus was that you buy the fitting available and chase the threads. I did that and tested the fitting attached to the gauge @ 40psi with soapy water, with no leakage. I wouldn’t use the gauge to chase the threads from 24tpi to 27tpi on the fitting. All other connections are inverted flare with double flare line ends.
-
 1
1
-
-
This is what I have used for temporary starting and running a few vehicles. It fits on the cowl and is gravity feed. Rick D.

-
 1
1
-
-
My guess would be a valve or valves sticking. You could de-carbon the combustion chamber with an application of Sea-Foam. I’m at 4550’ and have 17 in/Hg. That can be decreased with a timing adjustment either way. Rick D.
-
My replacement steering box had too much play after doing a minor adjustment to the cross shaft. I pulled the column and the roller on the sector shaft and the worm were in good shape. The problem was the tapered ends on the worm gear were worn from excessive end play. I couldn’t find a worm gear. I bought two new top and bottom bearings, gasket set and a seal from Dennis Carpenter. I built up the ends of the worm gear with a mig welder and turned the ends down in my Atlas lathe. Luckily the shaft fit in the spindle. I had another worm gear and the bearing races to determine the degree of angle for fitting in the box. I turned down both ends equally from the measurement at the base of the taper and ended up with .060” lower bearing race protruding. I used the gaskets that I had to allow for free movement and set the major adjustment to the worm gear bearings. Then I tightened the cross shaft sector screw for free movement of the steering wheel, left to right, for the minor adjustment. The wire in my welder is .024” 7018, CO2 shield gas set at the high heat and I used a slower wire feed than is recommended. I sent a message to Cavallero for a worm gear, but for now, it has taken the free play out of the steering and I have a gaskets to remove if it wears in on the 7018 weld. I chose not to heat and quench it to harden the weld, in case I need to do any additional lathe work. I refilled with corn head grease. This project made me aware of the fact, that the steering gears are overlooked for lubricant, so I checked and filled the steering boxes on all my drivers today with GL1. They all had sufficient lubrication. Rick D.
-
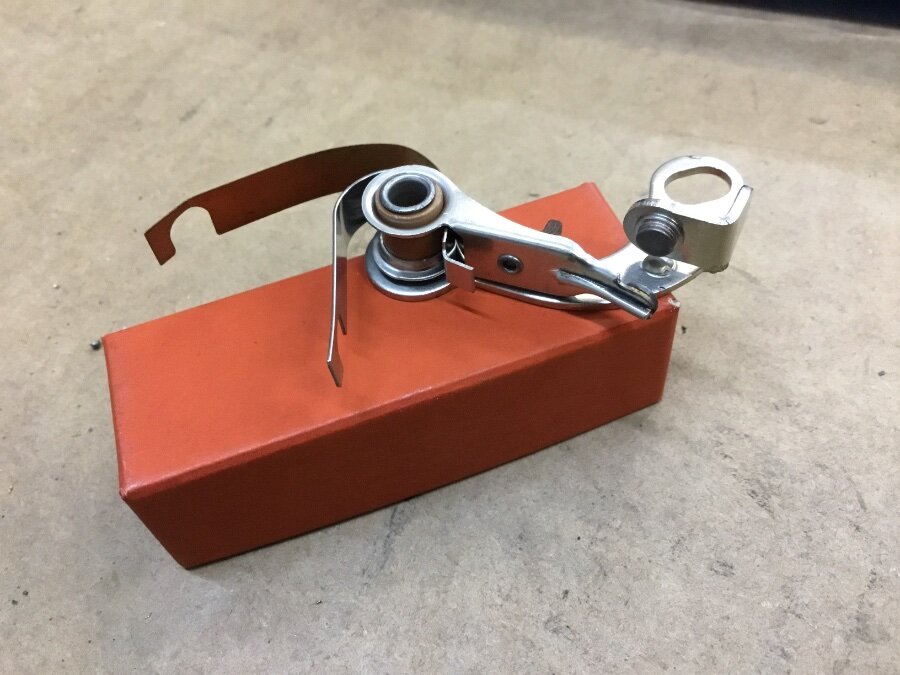
I would check that the points are installed correctly. The tension has to go under the copper lead. If you have a vacuum gauge, the vacuum will read normal and drop to zero then slowly build vacuum, if you have a choked exhaust. There are left and right points, it depends on your distributor. This is picture of what I had sent someone with a similar problem. It is easier to pull the distributor and work on it in a vise, just note which way the rotor points for reinstall. Rick D.
-
I don’t know if this helps, but a C49 and C50 Chrysler 8 cylinder used a IAR-4101-1 distributor. Rick D.
-
I looked at the Tod Fitch ply33.com site. I assume that you have 18mm plugs. A Champion W16Y/561 plug might work better for your new engine. The number doesn’t cross over to an Autolite plug. It appears that the Champion plug has a 5/8” reach, and your 389’s are 1/2” reach. Plug gap would be different with resistor or non resistor plug, so maybe regapping your 389’s would give you a hotter spark. On a P15 it’s .028” non resistor and .035” resistor. Does a 29 Desoto have a spark advance on the steering column? Just some thoughts Hickory. Rick D.
-
The engine in the car is a 51 or later with the internal bypass thermostat housing and six blade fan. I would need the serial number on the engine to determine if it’s a 218 or 230. There is a 48 Plymouth Business Coupe in the classified ads on this site. The nice thing about the business coupe, is that it is all flat glass. Rick D.
-
1
-
-
Terrill Machine, Inc. De Leon,TX rebuilds vacuum advance units. (254)893-2610.
-
In all fairness, kencombs mentioned the points spring in the third post of this thread. Luckily, nonstop asked for a picture. I just posted a picture of how the tension spring should be installed. Now you can concentrate on getting ready to drive to the Desoto convention. Happy Trails to you. Rick D.
-
4
-
1
-
-
Your points return spring isn’t installed correctly. You only need one. It goes under the copper strap and puts tension on the points arm. Hope this picture helps. Rick D.

-
2
-
1
-
-
The nice thing about swinging pedals is that you can put a master cylinder, and even a vacuum booster, on the firewall. The clutch adjustment is simplified by the elimination of a clutch overcenter spring adjustment. Your clutch release arm in the picture looks longer than a 54 Savoy that I have on a pallet. If you’re not concerned with originality, and you can mount the swinging pedals as firmly as they are in the 56 parts car, I think I would update the pedal arrangement. You have all the parts, you might have to fabricate a pivot point for the clutch on the frame to engine mount. Rick D.
-
1
-
-
Your Pertronix ignition required carbon core plug wires. I run points and prefer copper core wires with 295 non resistor plugs set @ .028”. Go start your car when it’s dark out and see if the plug wires are showing any arcing. If you are able to that tonight, it might point to why you are having this problem. I don’t know what plugs you are using, only that you gapped them at .035”. Tomorrow you can do an ohm resistance test with each wire and the coil wire. You can buy copper core wires for a six cylinder tractor. Rick D.
-
Nice job. I’ve made a few springs with piano wire. After bending, I put them in the oven when my wife bakes a frozen pie. 425* for an hour and leave them in the oven after the pie is removed, to cool slowly. Rick D.

-
5
-
-
You might have a 68-73 Mustang or Mercury Cougar rear axle. I would look at drums for those cars. They used the same wheel cylinders as the trucks, but the trucks had 11” brakes and drums, larger bolt pattern axle, and wider axle than those cars. Rick D.
-
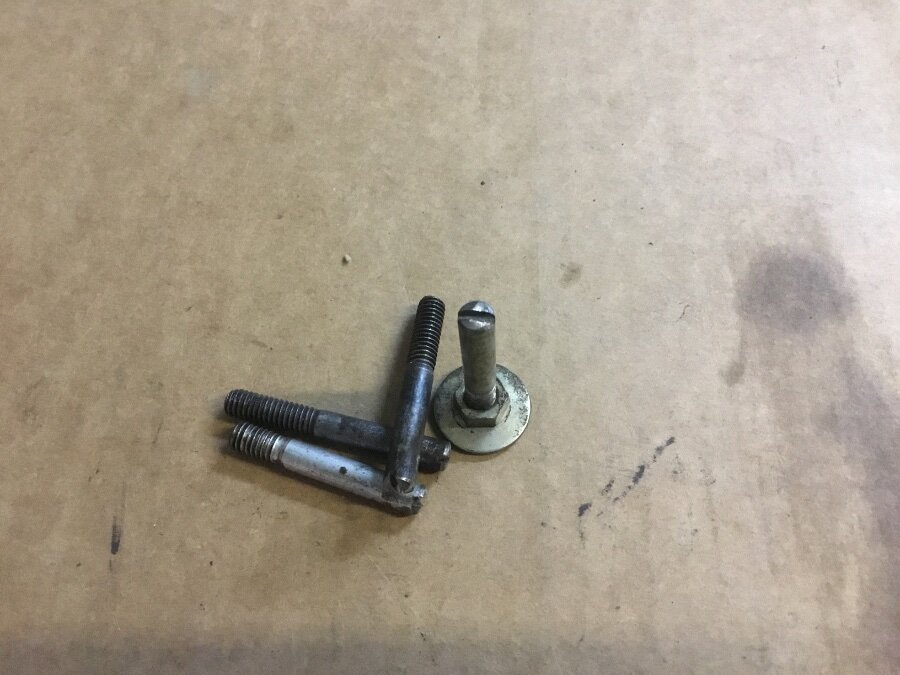
My 46 came with new aftermarket sill mats, without the pins that my 49 has. My plan is to use these panel fasteners with new sill grommets. I was going to prep the head of the fastener and apply contact cement. Set the mat on, and let the cement set. That’s my basic plan anyway. Rick D.

-
2
-
-
About 15 years ago I installed an electric tankless water heater. Your family could all have a hot shower, and never run out of hot water. I can turn the temperature down to 95 degrees and run it through my pressure washer. It’s on demand, so there is no waiting to heat a tank of cold water. There are special valves that should be installed, so you can flush out the water with air or pump a vinegar solution through it. I suppose it would depend on if you have a large enough electric service box. Two new elements should fix your problem but it’s something to think about for the future. I had to replace one element a few months ago. I disconnected the three elements to check them individually with an ohm meter for an open circuit on the faulty one. Rick D.
-
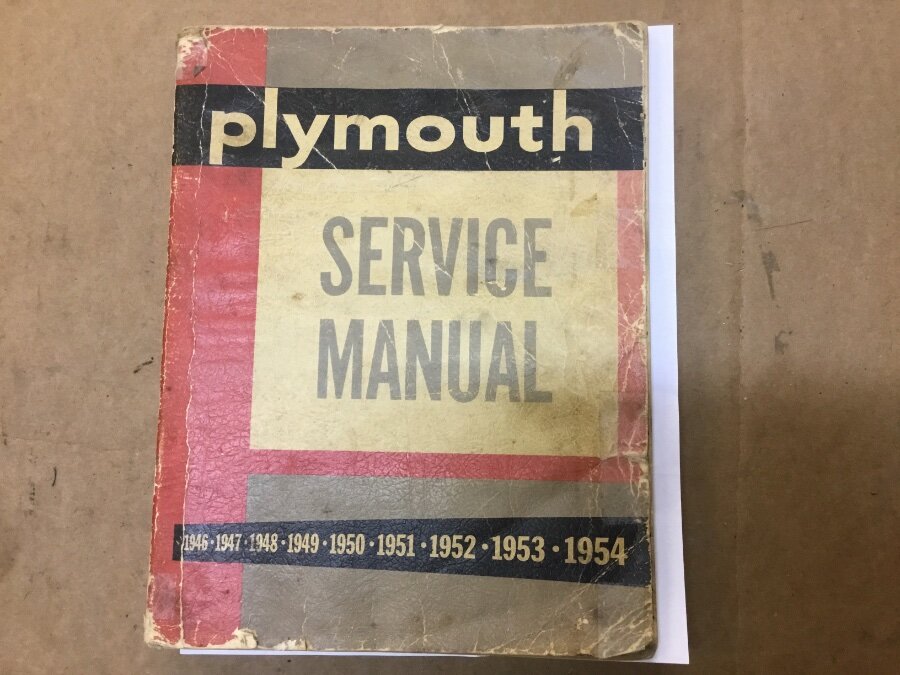
When you look for a used original manual, the cover should have a grainy texture. I bought one that has the pages loose leafed. I have the one that came with my 46. It works, but is just too crude, the pictures are good though. Rick D.


-
I have bought a couple of the original print versions. The pictures in the reprints aren’t very good. I gave a reprint copy to the man that got a 48 P15 Club Coupe from me last month. Rick D.

-
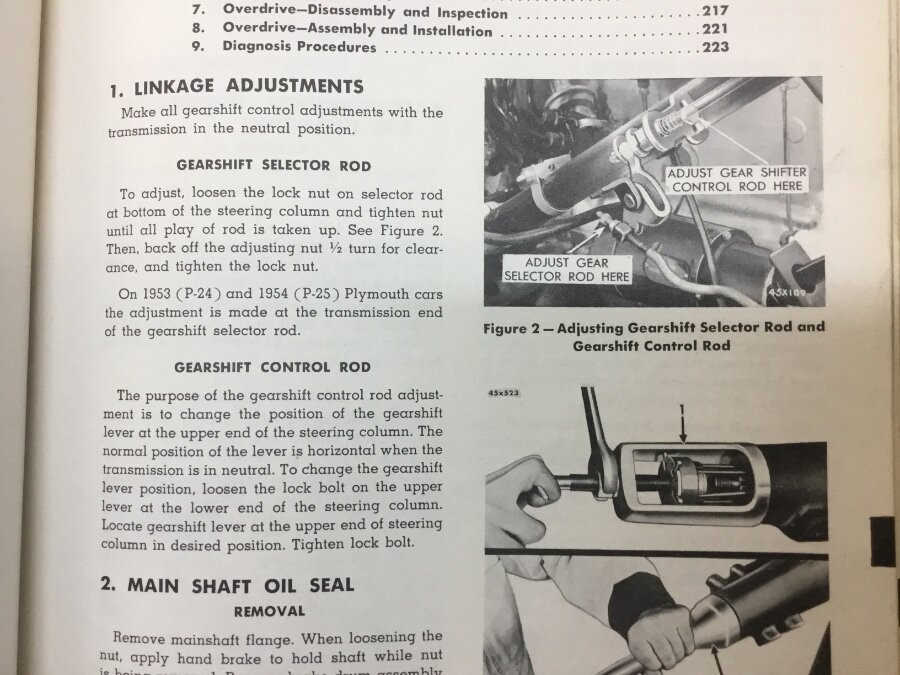
Like Sam said, the linkage needs adjusting. The gear selector rod is too tight, it needs to be backed off a bit to get a good H pattern on the column shifter. If your rear mounts have collapsed over the years, it would have changed the linkage to operate correctly. I think this from my manual might help. Rick D.
-
I’m assuming you mean a pinion seal, with a 1.875” i.d. measurement. My parts book lists a 663602 as the original seal. My research a few weeks ago had me save an SKF 99187 as the Speedi-sleeve, to repair the flange/yoke. Rick D.
-
The picture I showed was posted by dodgeb4ya on Nov.15,2018. I would do a test try with the six guide studs in the block. I had a little trouble clearing the lower timing cover bolts. I must have used four guide pins, with a slot to remove with a screwdriver. Rick D.
-
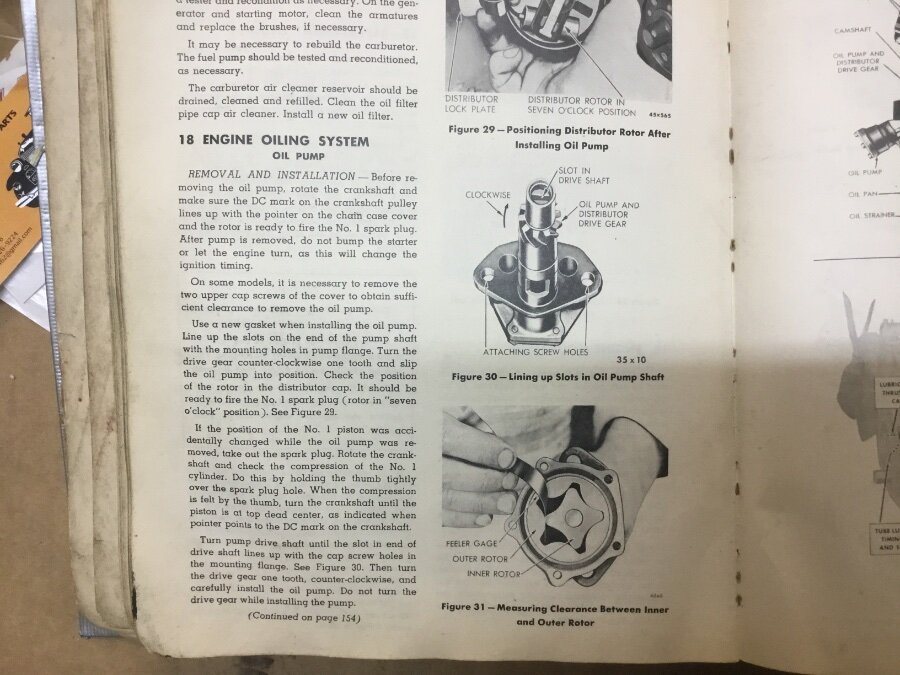
This is how I put my pan back on. Rick D.

-
When I got my 41 WC it had this monster installed. I cleaned a couple stock distributors and will probably use one of them with a ballast resistor and put a plug wire loom on and mount the coil on the firewall. Right now, the plug wires are resistor (and too long) with 295 plugs set at .045”. I have some RJ12Y plugs that might burn cleaner with a correct gap for HEI. This is all temporary, to be able to drive locally. I have another project, but I had to address a few things on the 41 before I was going to drive it. I like the post though and it is a fairly easy adaption to a newer slant six distributor. So I appreciate the information and options provided. Rick D.

Lewis and Clark Caverns
in P15-D24 Forum
Posted
Took a ride to the caverns today. I enjoy the three mile climb of 1400’ from the base visitor center to the cavern site. High gear to the top and you have to appreciate the torque of a flathead six with the three hairpin turns in the road that slow you down. I have 4.1 gearing, I’ll try it in my 49, it has 3.9 gearing. These are the only pictures I could post, the others were too large to post from my IPad, although the site seems to have made them from mB to kB. ? Whatever assets I have, computer skills isn’t one of them. But you didn’t need to see my car in front of the visitor centers. It still looks the same, only has more bug kills. Rick D.