ssnowden
-
Posts
340 -
Joined
-
Last visited
-
Days Won
4
Content Type
Links Directory
Profiles
Articles
Forums
Downloads
Store
Gallery
Blogs
Events
Classifieds
Everything posted by ssnowden
-
I'm in Badgad, near Frankfort.
-
Welcome from a fellow Kentuckian!
-
Congrats on your project. My first car was a P15 and I still have it. I just got it back on the road after 30 years in a barn. These things come apart much easier than they go back together. In a weekend, I blew it pretty apart and it sat for over 3 years in pieces because it was a bit overwhelming once I was staring at a pile of parts. It really wasn't a car at that point. As others are saying, resist the temptation to turn a manageable project into a massive project. What I finally decided to do was go with the Roadkill philosophy and just get it running, and only fix structural rust and then figure out what I really want to do with it and then work on that part. Don't care what car looks like, just get it on the road. As soon as I got it running, it was a car again instead of a pile of parts. It motivates you. Now I drive it around with a piece of cardboard covering the master cylinder hole, zip ties to hold open the vent window and I work on smaller projects of a running car. I have the parts to fix both, but neither stop me from going to the parts store in it. One day I may even paint it. :) IMG_1615.mov.mp4
-
It's really interesting to see the distribution. At 52 I figured I would be one of the younger ones on here, but I see there's a good number younger than me. It's awesome news to see that this hobby and these cars may be around longer than I was fearing it would.
-
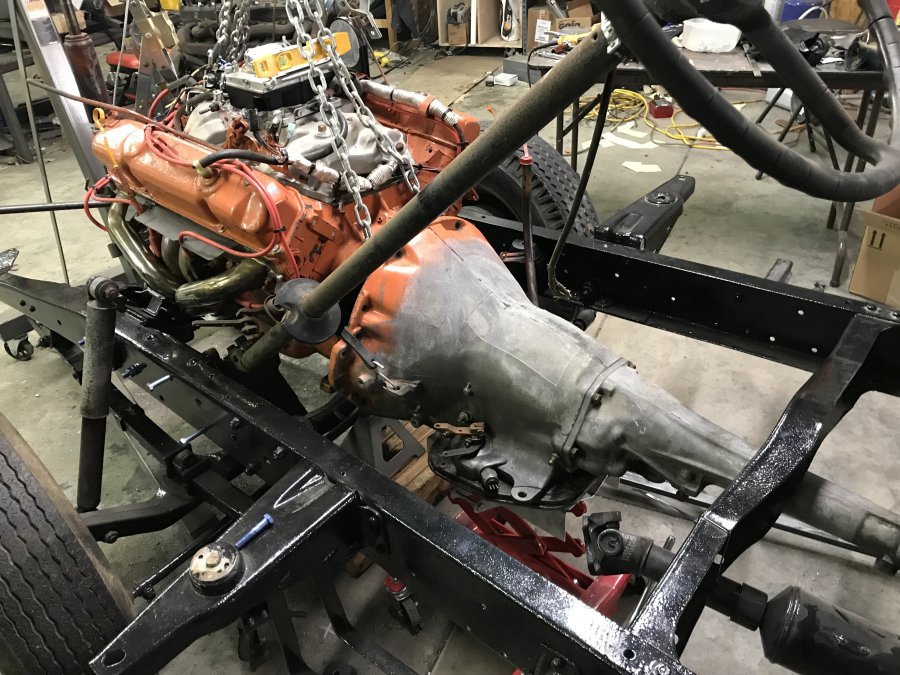
I’ve got the engine and transmission back in so I can fabricate the cross member. I also put the mini starter on and checked the stock steering box fit. It looks like I will have to move it down and forward about 3”.

-
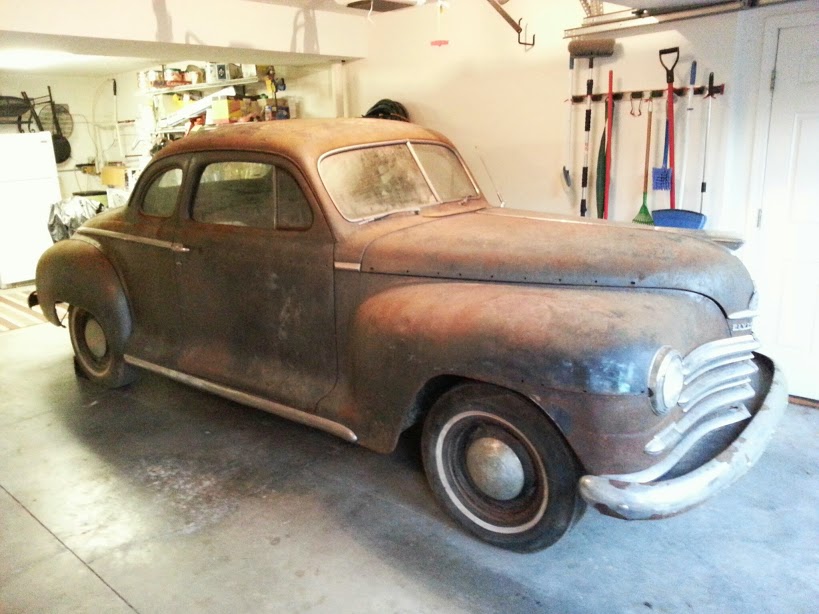
The frame boxing is done. I’m glad to get that knocked out. I’ll clean it up and put some KBS rust seal frame coater on it.
-
Thanks. I'm learning as I go. It's the Hobart Airforce 12ci. It's quickly becoming one of my favorite things in the garage. https://www.amazon.com/Hobart-500564-Airforce-Plasma-Compressor/dp/B014V4LJWS
-
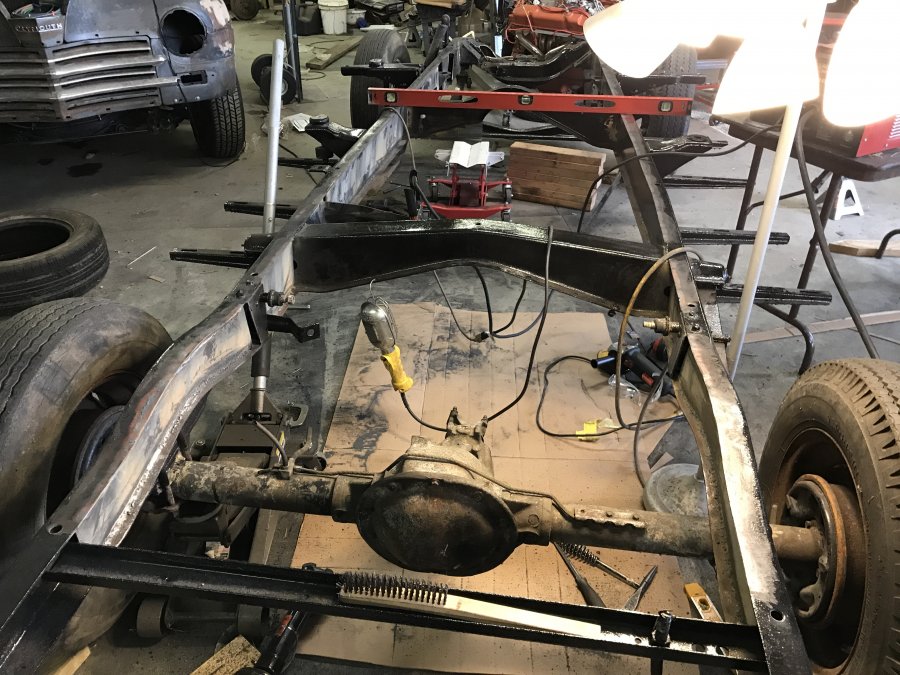
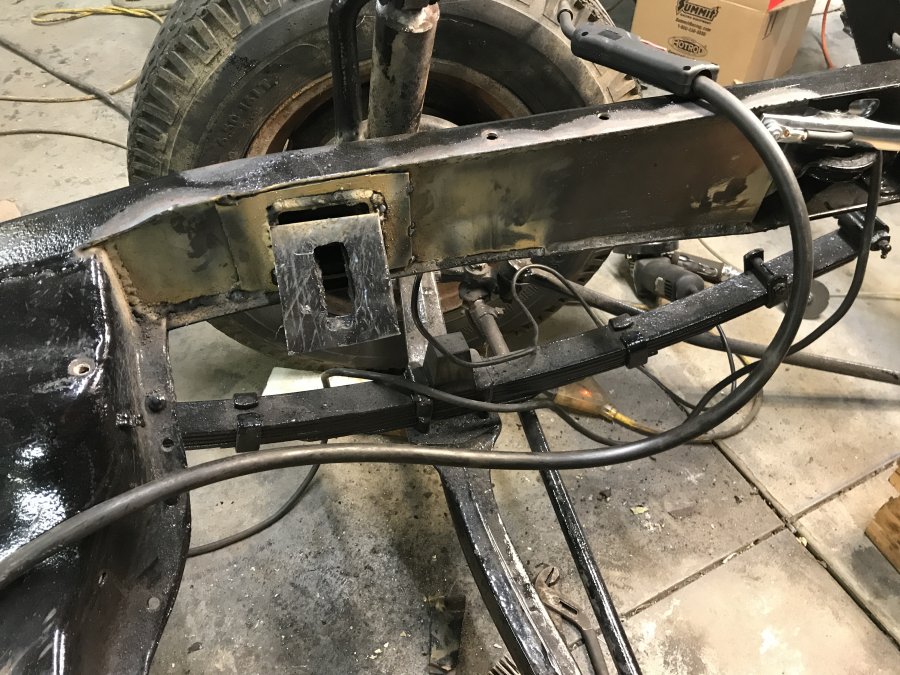
I got the “Tanks” gas tank brackets fabricated and spot welded in place. The tank is for an earlier version of the truck, so you have to modify the brackets. A couple of pieces of 3/16 angle works good.
-
Merry Christmas! I was able to get out and do some boxing on the frame. The little Hobart plasma cutter really made cutting the boxing go much faster.
-
I have the engine mounted and now will start working on the transmission cross member.
-
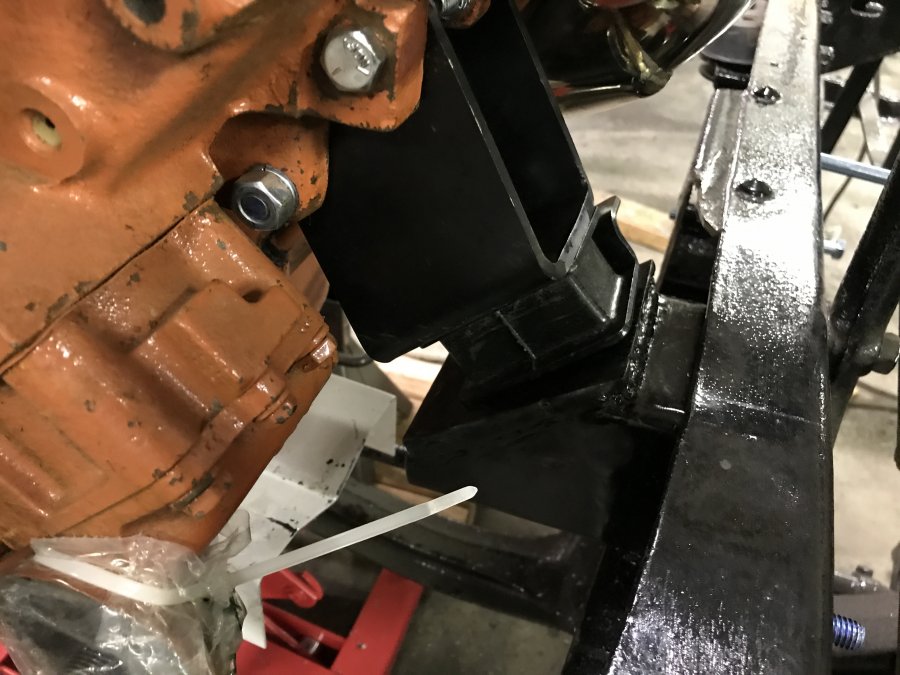
Doing a test fit on the new bracket.
-
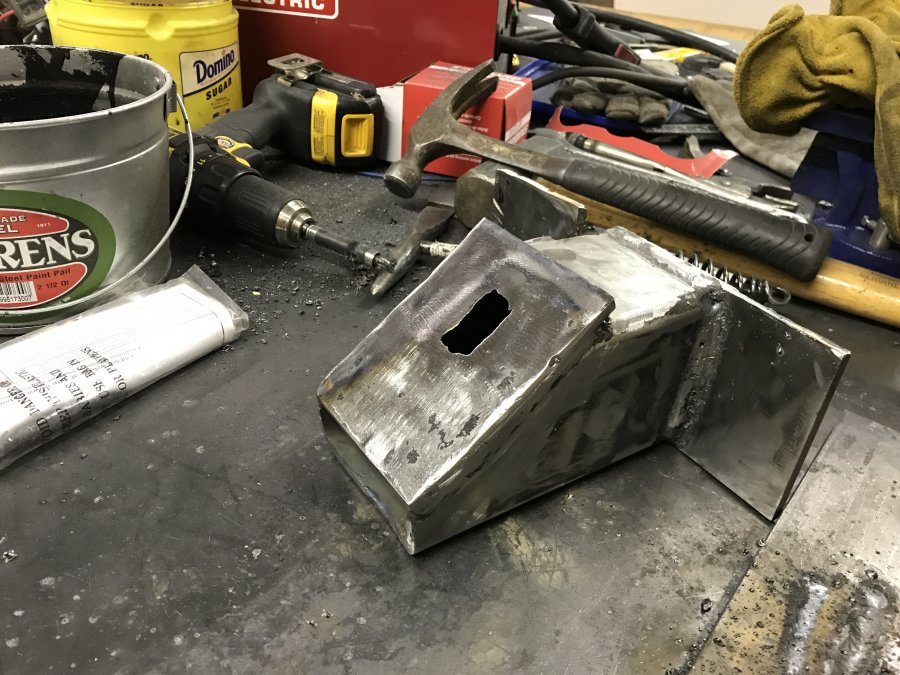
I got the first frame mount created for the motor mounts. I’ll get it ground down a bit more then paint it.
-
I think we all can agree that we hope Pilothouse trucks fetching $50K becomes the norm.
-
Yes. I plan on boxing the frame. Given this my first build, any other insights are appreciated.
-
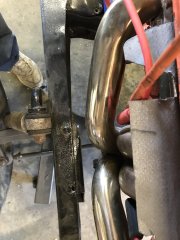
I'm starting the fitment for the mounts. Surprisingly there is plenty of room for the big block. I think it's going to fit in there nicely. This first pic is the engine is hanging higher than it will actually sit. I had to remove the oil filter and will need to do a little cut to make the remote oil filter connector fit. I think the radiator can go in the same mounting bracket as the original as I placed the engine pulley in the same location as where the flathead sat. With the down draft stainless headers, a mini-starter and moving the engine over 1 1/2" to the passenger side, I think the original steering box, or one that size will fit in there too. I was able to keep the original mounting plate for the steering box intact.
-
From the album: Truck
-
From the album: Truck
-
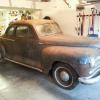
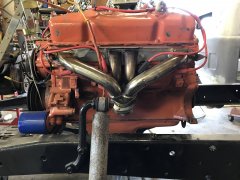
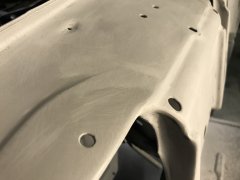
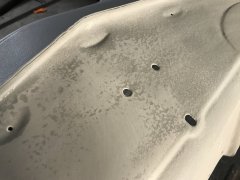
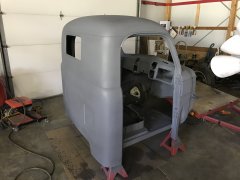
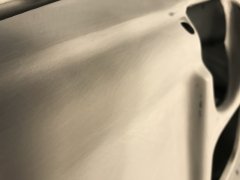
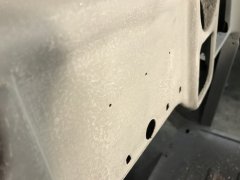
It's been a while since I provided an update. I had another project (48 plymouth) that I put ahead of this one, but now I'm back on the truck. The cab is in primer and I've stripped the paint off the outside doors and front fenders and front. For the most part, the cab is in great shape. The dash had some heavy pitting though. I hadn't used it before, but I shot some Slick Sand high build polyester primer hoping I wouldn't have to skim coat the whole dash. I built it up where I thought I got the thickness of most of the pits. I sanded on it for about 4 hours and I was very happy with the results. You can see from these first two photos, the pitting was bad. I have one more coat of Slick Sand to put on after I finish sanding the whole cab, and I'll use a finer grit sandpaper on the next coat to eliminate the sanding marks left with the 220, but the dash is going to go from rough as a cob, to velvety smooth. Next, as we all are prone to do, I changed my mind on the drivetrain. I've decided to put a little more power under the hood. The flathead is cool, but I didn't find myself wanting original as my end result. I want more of a resto-mod with an automatic and more power. So, I happened upon a guy locally via CL that had just pulled this 400 big block and A727 transmission from a 69 Satellite. His customer that has just bought the car decided to upgrade to a modern Hemi drivetrain from a wrecked Challenger. This 400 has about 3000 miles on a rebuild, new carb, stainless headers, a Purple Shaft camshaft and the transmission was just rebuilt too. So, I'm looking forward to having a bit more pep under the hood when it's done. Well, that's about it for this update.
-
From the album: Truck
-
From the album: Truck
-
From the album: Truck
-
From the album: Truck
-
From the album: Truck
-

From the album: Truck