


1952B3b23
-
Posts
993 -
Joined
-
Last visited
-
Days Won
5
Content Type
Links Directory
Profiles
Articles
Forums
Downloads
Store
Gallery
Blogs
Events
Classifieds
Posts posted by 1952B3b23
-
-
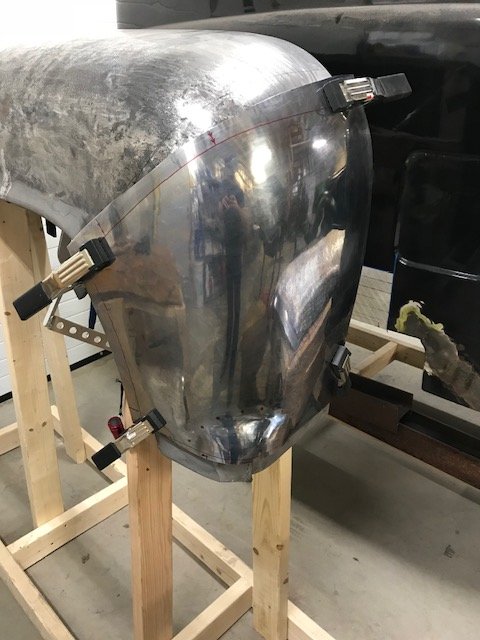
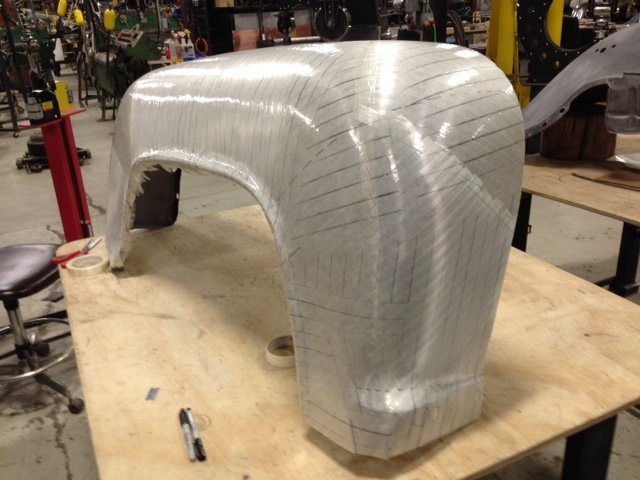
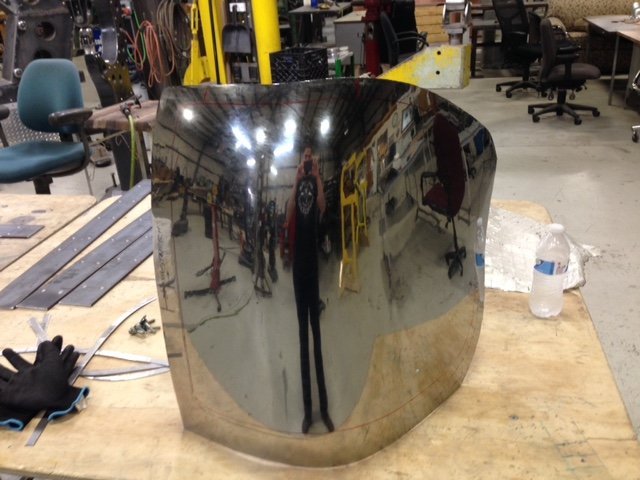
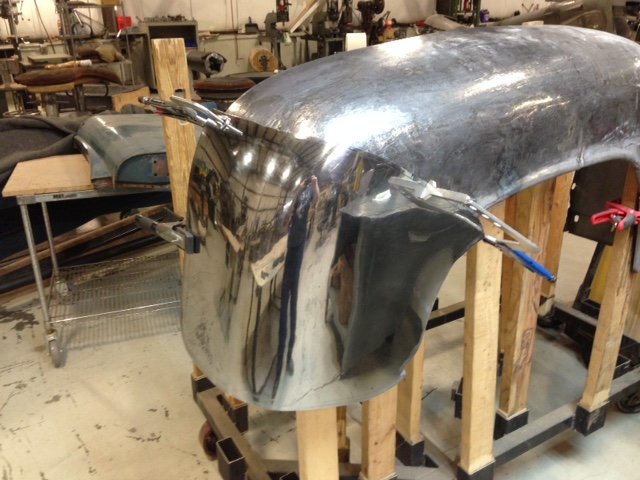
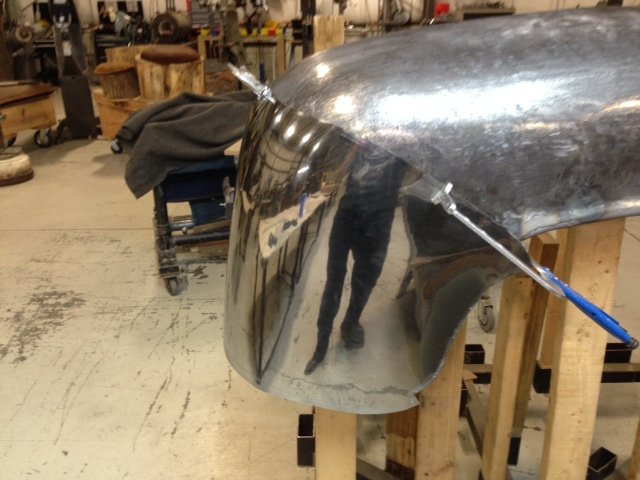
Well I've been chipping away at the fender slowly. The top section of the fender is shaped and i am currently working on the front portion which has the reverse curve section. Once I'm finished with that panel it will be time to add the bead detail to each of the 3 sections and weld them together. I'll keep adding pictures as i make progress. Maybe this will inspire some other folks to take a whack (literally) at shaping metal!
-Chris


-
 2
2
-
-
Cool, thanks for sharing the pictures. In what town is this located? I live in western, MA and hadn't heard of this show till now. I usually go to the Ty-Rods fall swap meet at Stafford Motor Speedway.
-Chris
-
1
-
-
10 hours ago, wayfarer said:
Good to see that this project will continue!
Thanks. I'm actually glad I was working on a different project for all that time. I learned so much on the '39 and my skills have gotten better. So the work done on the truck will be much higher quality than what I was able to do back then. All I can do is get a bit done at a time and keep improving.
-Chris
-
Well i'm finally back to working on this thing, boy it's been awhile! Since i last posted i got my '39 Plymouth coupe (see my avatar) back on the road after buying it in July of 2014. That turned into way more of a project than i expected. But i learned a ton in the process and the new skills will help me on the truck.
The cab needs a lot of metal work so i decided i'd start with the drivers side door jamb. I had removed the rusted out section a few years ago so i copied the passenger side jamb using the flexible shape pattern method. This method is something that was created by my friend and top notch metal shaper/coachbuilder Wray Schelin (check him out at proshaper.com). Using this method i was able to take the passenger side pattern and turn it inside out and i instantly had the pattern for the drivers side. I then used a combination of bead roller, hammers, dollies, chisels, and sand bag to form the jamb section. It still needs to be gone over one last time to tune up the surface and also to do the final fitment. For now i just clamped it up so i could get an idea of how it was looking.
Thanks for looking,
-Chris


-
My technique is this:
1. Wire brush or scrape the lose rust off the panel. You can do this by hand or with a wire wheel in a drill.
2. Buy Naval Jelly, available online or Home Depot, Lowes, etc. Here's a link to the stuff i use: http://www.homedepot.com/p/Loctite-16-fl-oz-Naval-Jelly-Rust-Dissolver-Bottle-553472/203009241
3. Forget about the part in the directions that say the stuff will work well in about 20 minutes, it doesn't. Unless the part has very very light surface rust. Apply it to the area you would like to de-rust using a small paint brush. Apply liberally.
4. Get yourself some of the cling wrap stuff you use in the kitchen and cover up the naval jellied areas. Then let it sit for 24 hours. The cling wrap will keep the naval jelly from drying out as quickly and it will do its job much better.
5. The next day scrape and wire brush the rust and dried up jelly off. It may be necessary to repeat the process so that you can get it right down to bare metal.
This works well but it requires patience and some elbow grease. I used this process on all the panels i needed to weld on my '39 Plymouth coupe. Good luck.
-Chris
-
1 hour ago, sleepy said:
Chris
Looking good! I need to make fenders for my Plymouth pt105. I have the tools but not the time. Too many cars the wife says. I have met Wray and you are right. Master craftsman and all around great guy.
Brian
Thanks. I hear ya on the time issue. Thats why in the three years since taking the class i hadn't done much shaping, no time for it. I spent all my time trying to get the '39 Coupe back on the road. It involved making some small patch panels but that was it. I now told my self that i need to do more shaping and i really want to learn. So theres no other way but to get out there and do it. Did you take Wray's class? Yea he is a great guy. Im happy to call him a mentor and a friend.
49 minutes ago, RNR1957NYer said:Awesome craftsmanship! Keep at it - only three more fenders, bed sides and a cab to go!
Thank you. It's funny that you bring that up. The two front fenders that i have now are fiberglass. I might end up recreating those in steel.
-
Thanks for the kind words guys!
-
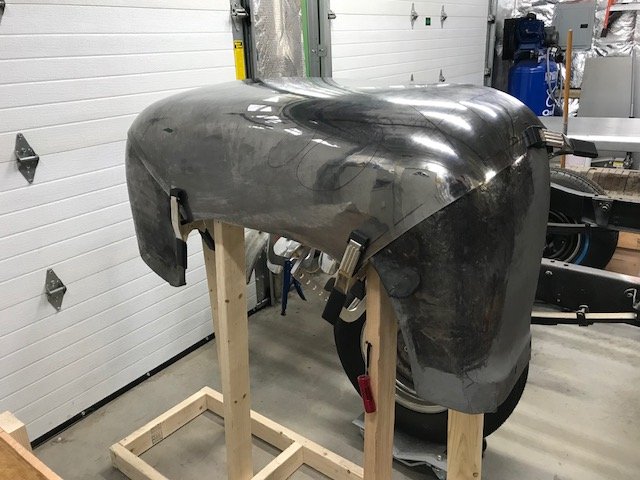
Here is another picture that i forgot. The fender will be made in 3 pieces then welded together. The tools used so far are, stump, mallet, sandbag, and english wheel.
-Chris

-
3
-
-
Hey Guys,
I picked up this '54 Dodge fender off of Ebay awhile back to use on my project. It's in really sorry shape with lots of damage and paper thin metal. I figured i'd try my hand at recreating it. It'll be a great learning experience and lots of fun.
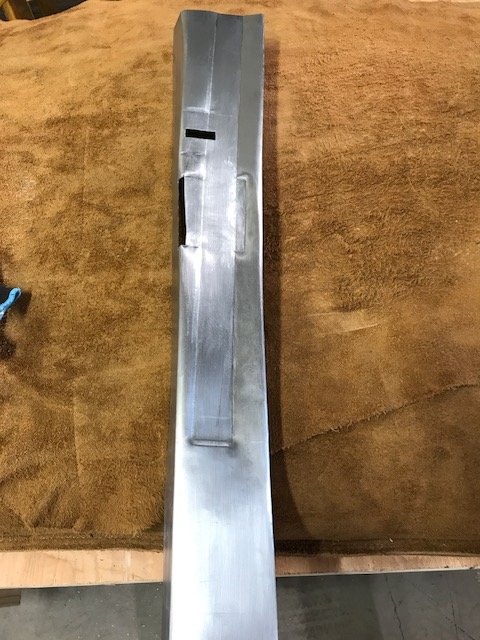
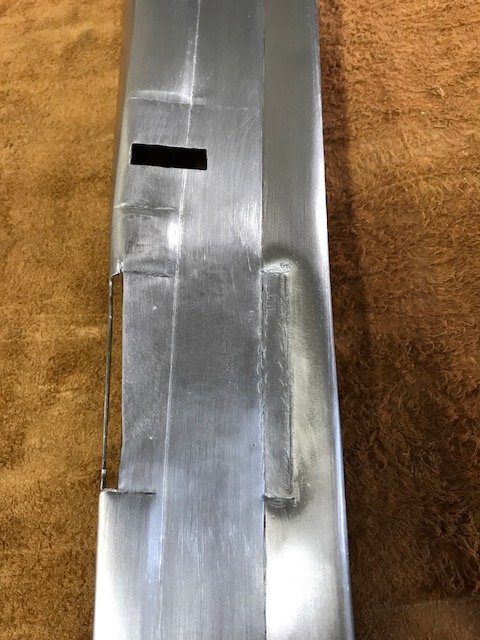
I'm fairly new to metal shaping but i did take Wray Schelin's class back in June of 2014. It was a great investment, i learned a ton and would highly recommend his class to anyone wanting to learn. Wray is a master at the craft and an all around nice guy! Since then i've made several small patch panels but no large panel shaping like in this project. I've been doing the shaping at my house and going up to Wray's shop in Charlton, MA for help when im stuck. He's really been a huge help and i can't thank him enough for passing on his knowledge. Check out his website if you're interested, http://www.proshaper.com/I'll update this thread with my progress as i go. It'll be slow going since im still learning and make lots of mistakes. The attached pics are of the first corner piece i'm making.
Thanks for looking,
-Chris


-
5
-
-
Here's a link to a site that list different stations in TX, as well as other states that sell ethanol free gas.
http://www.pure-gas.org/index.jsp?stateprov=TX
I did some research on this in my area of MA and found one station closest to me wanted $75 for 5 gallons of "pure" gas. That's way more than i was willing to pay. So i've stuck with the regular ethanol blended fuel from the pump.
-Chris
-
You can call Pertronix customer service and they will help you with finding the coil you need. I believe that depending on what the coil is filled with dictates if it's orientation sensitive. Meaning if it can be mounted horizontal,vertical, or maybe it doesn't matter.
-Chris
-
1
-
-
9 hours ago, belvedere666 said:
Dont feel too bad. I've done this before as well. I had a friend pumping the brake pedal while i bled the front brakes (with the drums off). Next thing i know i hear a funny sound and see a ton of brake fluid pouring out of my drivers side front wheel cylinder. Duh, the wheel cylinder basically over extended because the shoe had no drum to contact. The fix was easy, put the drum back on and start the bleeding procedure over. I did feel like an idiot though lol.
-Chris
-
1
-
-
I just replaced the plug wires on my '53 flathead and i used Taylor Street Thunder 8mm set from Summit racing (P/N: 50047). I'm happy with the quality and how they look, maybe those are an option for you as well. Do you think that miss under load could be caused by the fuel that you are using? I've heard that this ethanol blended fuel can cause some wacky stuff with our old engines. Ethanol free gas is hard to find around me and quite expensive. So i've actually switched to running the "Plus" grade of ethanol blended fuel that they sell at the pumps. I believe that the octane rating is 87, instead of the 83 i use to put it. I think this actually had a positive effect on my cars performance. It could all just be cause I've installed the dual carbs and dual exhaust, but i dont know it sure feels like its helped. I'm just throwing out ideas maybe something will spark an "ahhh-haaa" moment for you. Good luck.
-
Maybe Rich Hartung will chime in. He is a member on this forum and i believe he owns one of these tools and knows how to use it. The service manual for the car doesn't tell you how? I think my '39 Plymouth manual says what to adjust the brakes to using the Ammco tool.
-Chris
-
13 hours ago, Kool48 said:
I finally got the distributor and timing where I think it should be. I reset point gap .020. Reset plug gap .035 ( resistor) type plugs I have. Damper dead nuts TDC. Rotor pointing at 7 o'clock positioned. Dialed in distributor with the neon tester. Car fires up. So I put my timing light on it just for the know. It's running and timing is right on TDC and maybe 1 or 2 degrees BTDC. But vacuum is only around 11 inches which isn't good. So now I'm gonna remove the carb and double check my rebuild and make sure I have the correct gaskets. I'm thinking now more along the lines of vacuum leak. ??
Yea i'd think you have a vacuum leak somewhere. I did a vacuum test on my car the other day and it's pulling about 19 inches at idle. Good thoughts on checking the carb. You do have the vacuum advance port on the carb blocked off for the test right?
-Chris
-
On 3/23/2017 at 1:13 PM, 50 coupe said:
Done! Quality reamer from Chadwick and Trefethen. Kingpin tapped in easy, fits tight and moves smoothly. Wish I would have done this myself in the first place.
Im glad you finally got it solved. That looks like a nice reamer. Just curious on how much it cost? I've toyed with the idea of getting one but usually i just bring them to a local machine shop and they do a great job.
-Chris
-
9 hours ago, Kool48 said:
Well I've had some issues lately with my 218 in my 48 Plymouth. I rebuilt carb a month ago or so. But something just isn't right with my timing. I have a timing light. That got me no where. So I set timing with vacuum gauge about a week or so ago. Set fuel idle mixture with vacuum gauge as well. Had about 16/17 inches of vacuum. But with a timing light. I was running about 10 degrees or more after TDC TDC was at the 11 o'clock position looking at engine from front. But like I said I timed it with vacuum gauge. Car was running great so I thought. Not even 4 days later my new condenser went bad so I think. Had to have car towed home. I put another condenser in it and it started right up. But something went wrong again. Engine wanted to surge in 3rd gear. So back to the timing I went. Had to turn it counters clockwise as much as possible even getting the max outta the adjustment plate on bottom of distributor. So I've left it alone. Last night I pulled all the plugs. And opened carb up , checked compression. All is fairly good 1 to 6. 95 , 110, 115,115 118,120. So then I bring timing mark to TDC at pointer. The rotor button sets at 7 o'clock. So I did the setting by the method mentioned in tech tip. Using the neon outlet tester. So yes I can get the tester to flash while adjusting the distributor at TDC. So my question. I should be able to lock distributor down at this,point and it should be set and done correct ? Because I haven't started engine since setting timing as,explained. But I can almost guarantee it won't run right and vacuum will be way low. If I'm correct what else could be making the vacuum so low when timing is set to where it is now ? Could it be the carb. Vacuum leak ?
Have you checked for vacuum leaks at the intake manifold with the engine at idle? You can take some starting fluid and squirt it on the gaskets where the intake bolts to the block, and at the base of the carbs. If the engine revs up then you've found your leak. Just use very small squirts, obviously starting fluid is very flammable. I would plug the vacuum port that goes to the vacuum advance as well. Just in case thats leaking. I've also heard of guys doing this same test with an unlit propane torch. I tried that before but i found that the fan blows the gas away so it didn't work well for me.
Have you changed the exhaust/ intake manifold gaskets at all recently? I just put dual carbs and dual exhaust on my car and i found that it required a lot of heat cycles and re-torquing of the nuts to totally seal up the exhaust and intake. The gaskets will creep and settle in with the heat cycles.
-Chris
-
If you contact member "Tim Kingsbury" on this forum he may be able to help you with finding a replacement. Or maybe he knows of an overseas version that will work on the engine. Good luck.
-Chris
-
Here's another source for rebuilt vacuum advance that you might consider:
http://www.classiccadillacwaterpumpsforsale.com/19divaadrese.html
I had them do the one for my '53 218 ci last year and it works fine. They do require that you send in your old one as a core.
As far as your timing issue goes, i was having troubles with my car last week too. It would start but run rough as hell so i started by loosening the distributor and adjusting it while the engine was running until it sounded better. Well after i did that i shut off the car. Tried starting again and got nothing. So i popped the distributor cap off and realized that some how the lead that connects the points to the distributor had come off. I have no clue how this happened, i hadn't touched the distributor or tried starting the car since last fall. I was amazed that the car even started at all. So i pulled the distributor and fixed the issue as well as checking the point gap. Then i reset the timing to 2 degrees BTDC per the instructions in the manual. The car started right up but still sounded a little bit funny. Next i put on the timing light and readjusted. This made me realize how my initial 2 degrees BTDC setting was actually quite off. Once i dialed it in with the light it made a world of difference. You probably checked all this stuff already but sometimes its the most obvious things that can be causing the most havoc. Good luck and beautiful car!
-Chris
-
1
-
-
I have new rear leaf springs on my '39 Plymouth coupe from St. Louis Spring and they work great. I think you'll be pleased with your choice.
-Chris
-
1
-
-
So i almost have the steering box completely removed from the car. Im now thinking about the rebuild process. Are there any old manuals you guys know of that might be helpful? I've never rebuilt one before. Or i may just see if my mechanic friend can help me out. Thanks in advance.
-Chris
-
17 hours ago, casper50 said:
I believe it was Krylon paint and color was Almond but I no longer have the can.
Cool, thanks.
-
21 hours ago, casper50 said:
Pretty easy to fix. below shows how I fixed mine. Starts at #379
Thanks. You did a nice job. Whats the name of the color you painted it? I like it.
17 hours ago, classiccarjack said:In the future, if you need a nut or washer for the Intake/exhaust manifold.... I am a slant six wierdo, and it appears that the same fasteners carried over from the flatheads to the slant six. Sometimes slant sixes can still be found in junkyards to obtain this hardware. I may need to put the parts side by side to compare to see if the studs are the same length.... But by eyeball they appear to be spot on.
Thanks for the heads up. I bought 4 exhaust manifold nuts from AMS Obsolete on ebay.
-
1
-
-
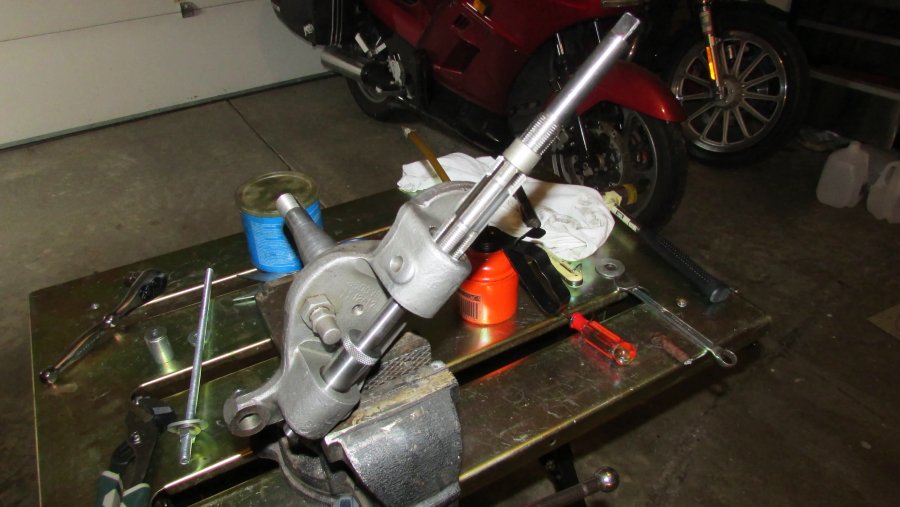
So along with doing the dual exhaust on the car i'm going to remove the steering box so it can be rebuilt. It's extremely sloppy and can't be adjusted any more. I made a simple steering wheel puller yesterday out of some .25" steel plate, three 3/8 bolts, and a 1/2 bolt. It worked great and the wheel popped right off. My steering wheel feels pretty sturdy but it does have a lot of cracks unfortunately.
-Chris


'39 Dodge Truck Wheel Cylinder
in Mopar Flathead Truck Forum
Posted
Hello Everyone,
I was wondering if anyone knew where i could find front brake wheel cylinders for a 1939 2-Ton Dodge truck? What i really need is basic measurements and photos, not the actual cylinder at this point.
My reason for asking is a bit peculiar. I am currently working on restoring a non-mopar chassis, it's a 1936 Triumph Gloria saloon. The brakes on that car are Lockheed brand. Automotive Products (AP) purchased the rights to build USA Lockheed hydraulic brake parts in England around 1928. So my car would have British built Lockheed wheel cylinders and master cyl. According to the British Lockheed manual the same wheel cylinders where used on 1939 Dodge 2-Ton 124" W.B. trucks. I'm assuming the Dodge trucks they are referring to are ones built in the UK at that time. It may be a long shot but I'm hoping that the American trucks used that same front wheel cylinders.
My cars wheel cylinders are missing so I'm hoping to be able to cross reference them to some American makes which would make them a fair bit easier and less expensive to get. I've tried googling this and can't seem to find photos of the wheel cylinders for the heavier trucks. Here are the measurements off of the wheel cylinders that should be on my car:
Bore: 1-1/4"
# Mounting Screws: 2
Center line distance between mounting screws: 2-1/8"
Diameter of casting boss: 1-5/8"
Side Note - The drum diameter is 12 inch.
If someone has one of these cylinders and is willing to make the above measurements and take a few photos. I'd be very grateful.
Thanks,
Chris