-
Posts
55 -
Joined
-
Last visited
-
Days Won
3
Content Type
Links Directory
Profiles
Articles
Forums
Downloads
Store
Gallery
Blogs
Events
Everything posted by 1940 Dodge VC
-
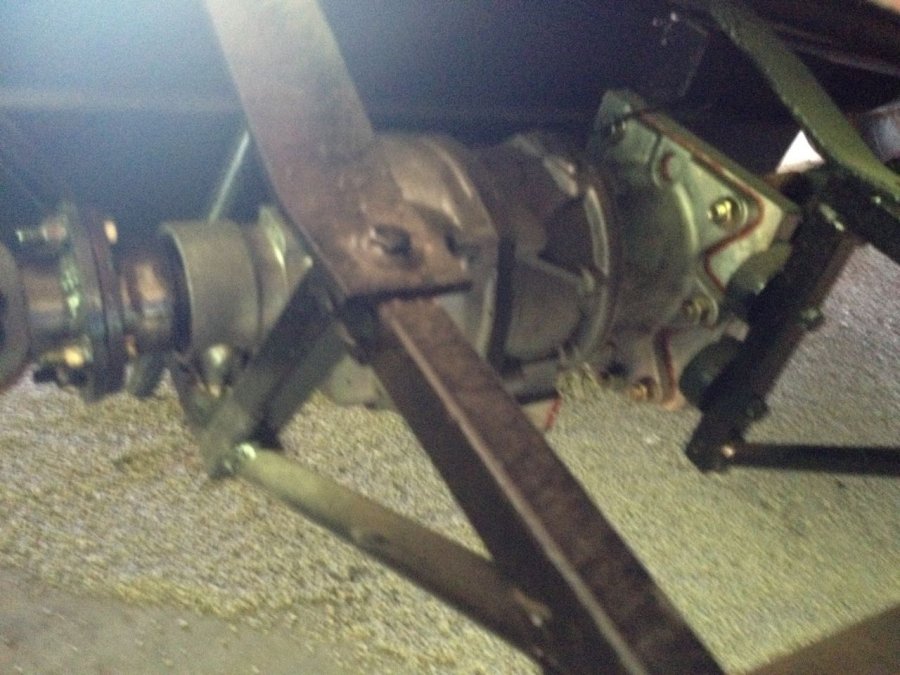
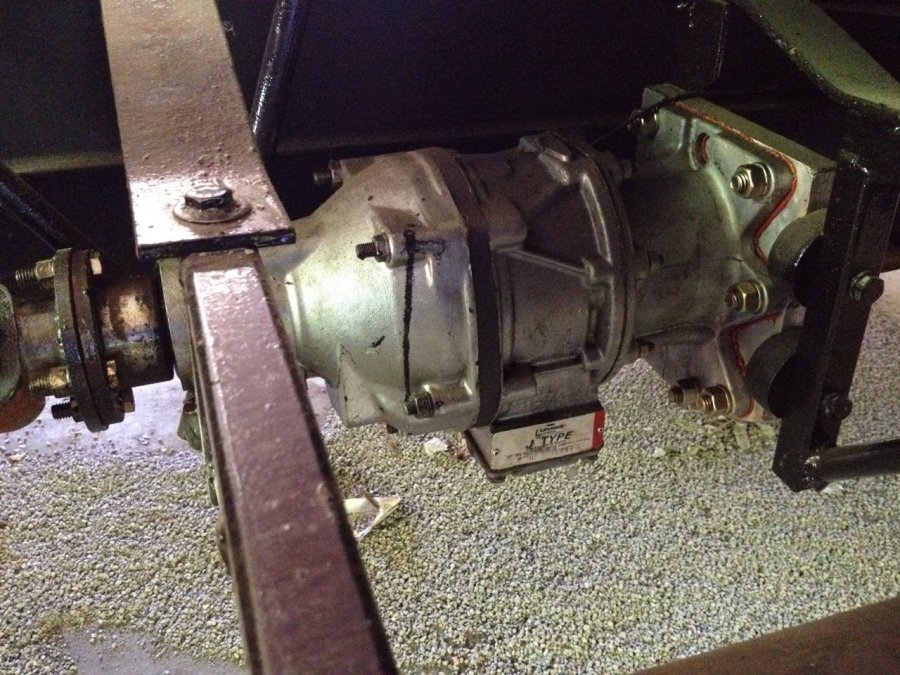
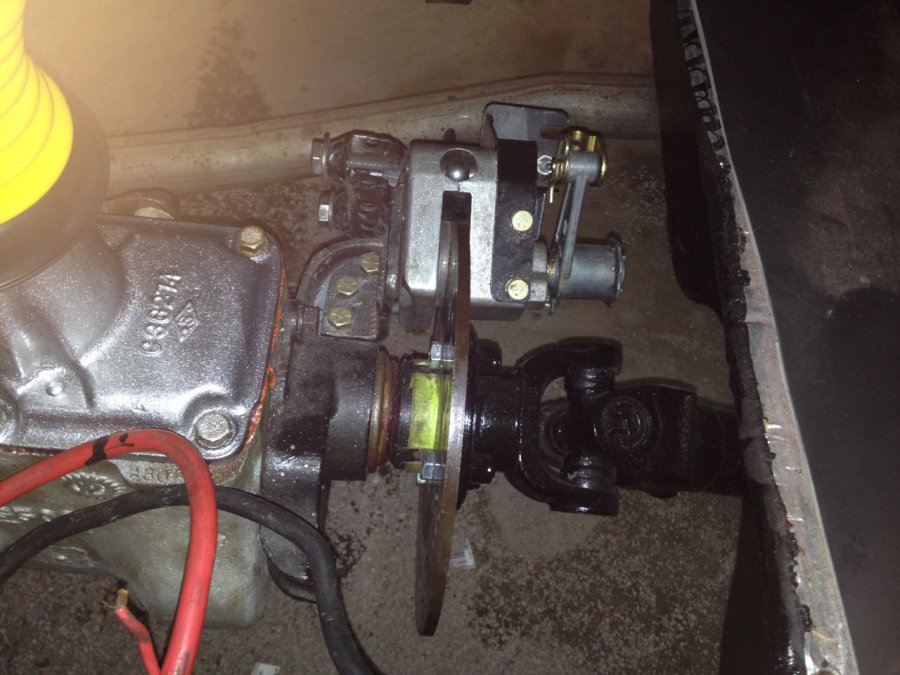
A lot of us want to keep our trucks as original as possible and, at the same time, improve the safety and performance to drive comfortably on today's roads. Along with brake upgrades, wringing more horses out of our flatheads, adding seatbelts and tightening up our suspension components, many of us have asked--how can I cruise at 65 while keeping the RPMs in a decent range? The three "big" solutions that stand out are a- swap transmissions for something with an overdrive, like a T-5 or an A833, b- swap rear ends, or c- add an overdrive, such as a Laycock. The problem with a- is that the engine may need to be pulled, an adapter plate might be required, a new hole in the floor must be cut and then there is the clutch... and what about the parking brake? The second option, b- presents the problem of gearing that is too tall for the torque output of the engine, especially if the flathead is wimpy, such as a 201. So... c- was the option that I was most interested in. No modifications needed for the parking brake, transmission or engine. Gear Vendors sells a unit, or you can opt for the route I followed: find a Laycock J-type from a donor Volvo. Here are the modifications that I did: The old truck came with the factory optional, slightly more desirable 4.10 ratio rear end (as opposed to the 5.63 stock rear end), so it could putter happily at 45 MPH and, sounding like a manic sewing machine, hit 65 MPH. I wondered about switching out the rear end—and had picked up one that was a 2.80:1 ratio. After doing a few calculations, I realized that the rear end would make the underpowered engine even more so. Maybe an overdrive would be better? I began a search that led to a Laycock model J overdrive, about the size and shape of a small watermelon. It fit nicely in mid-frame. I installed two drive shafts, one from the to transmission to the overdrive, the second from the overdrive to the rear end. It is important to mount these with the correct angles to preserve the u-joints. I also had to move the gas tank over by about an inch to fit around the overdrive. That wasn’t such an issue—the tank needed to be replaced, anyway. The Laycock overdrive is common on older Volvos. These are often listed on ebay—without the front drive shaft. I found a complete one, cut off the end of the shaft, and had a local machinist weld a u-joint receiver onto the end to accept a short drive shaft connection to the transmission. I fitted an aluminum plate with an oil seal for the front end of the overdrive unit. Ran a 12 volt wire to a fuse and button mounted below the dash--and added a pilot light that shows when the overdrive is engaged--and that was it. Simple! (an aside: make sure that the overdrive isn't engaged when putting the truck in reverse) My biggest issue was with the speedometer output shaft. The truck cable housing wasn’t long enough to reach and the knurled connector didn’t fit. I am working on an alternative, though. A sensor connected to an Arduino, to read the speed and drive a little electric motor connected to the speedometer head… I’ll probably use a GPS to provide the speed signal. BTW, in the process of putting the overdrive in, I discovered that the parking brake drum had developed a number of fractures and was close to exploding into fragments, so I replaced the whole arrangement with a snowmobile mechanical disc brake. That set up works very well for my purposes. Another tip: I put Lucas transmission oil additive—the stuff that you see on the car parts counters—into the non-synchro transmission and it worked so well that, for most of the gears, I can shift as if the transmission is synchro. Very nice. So, does the new setup work? Oh, yeah--I say with a big smile on my face. Oh, yeah, it is very, very cool. My 201 has no problem running the overdrive, and as a side benefit, I get an extra gear in 2nd and 3rd that makes puttering around town a lot more fun. Plus, the overdrive makes it easy to downshift without double clutching. I can wave to people as go around corners! Here are the pictures:
- 47 replies
-
- 11
-

-

-
-
Jeff, I'll start a separate thread about the Laycock setup. I'm very happy with it. Yesterday my wife and I did a lot of touring around the countryside. It is so great to have the truck back on the road, and all of the upgrades are working very well. Here are a few pictures.
-
Two outlets, that is, two circuits. One for the front, the other for the back. Will try to get a better picture for you.
-
Okay, I just checked on my setup. 2 lbs residual valves to front and back. Baby blue color from CCP. The picture shows my original setup with disc brakes in front (2 lb residual) and drums in the back (10 lbs residual). I updated the rear to discs and changed the residuals to match.
-
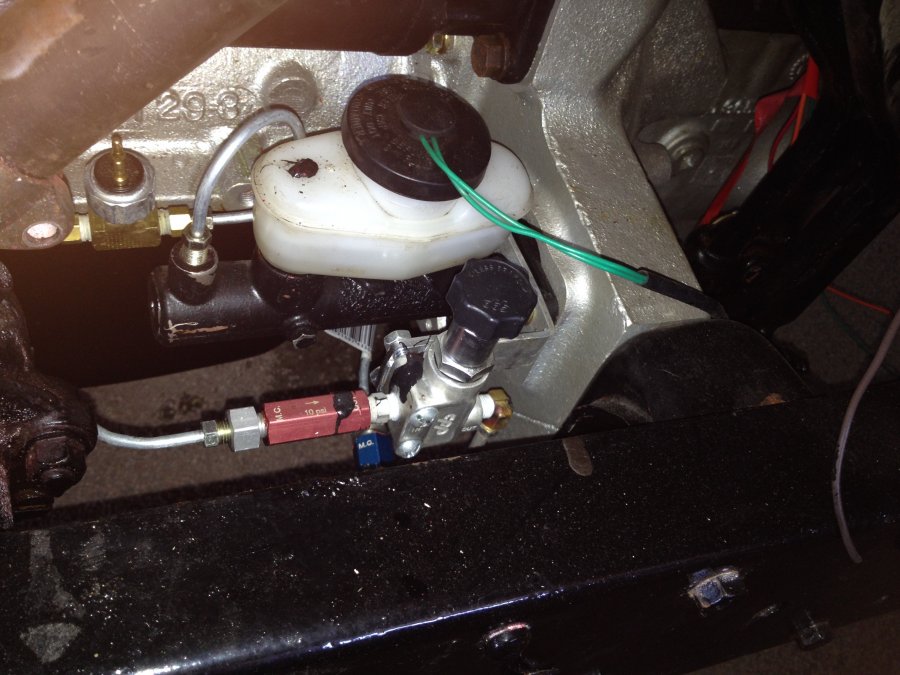
The old single cylinder MC featured a three-eared mounting bracket that bolted directly to the bell housing. After a lot of research, I found a newer dual MC that bolts on with little modification. It was used in Toyota Celicas from the 1980’s. It cost $40 and has standard 3/16 flare SAE threads and an 15/16ths bore. The one I purchased was listed as a New Qualitee 6679750 Brake Master Cylinder 86 - 89 Celica incl. GTS w/o ABS. Last summer I worked on a 1994 Toyota Camry. From what I could see, the master cylinder is the same configuration as the Celica, so that might be another alternative. Each of the mounting holes had to be elongated by about 1/8” to fit the existing pattern on the bell housing. I used a rat tail file to make the adjustment and it fit in perfectly. The push rod had to be shortened by about an inch and a half. The 86-89 Celica master cylinder bore is 1”, while my old Dodge MC is 1 1/4” in diameter. The slightly smaller diameter provides more leverage, and the result is a pedal that feels and functions like a power brake. I mounted a proportioning valve and the residual valves. The MC is not much higher than the discs, so the residual valves help prevent back-filling of the MC. To prevent uncontrolled skids, a metering hold-off valve was added. Its purpose is to engage the rear brakes first.
-
-
I don't know if anyone is following this thread anymore--want to give a brief update on the Toyota m/c and how my brake project turned out: I installed disc brakes on the front and back of the truck (thanks, Rusty Hope!), and used the Toyota master cylinder along with the appropriate pressure and metering valves. The m/c fit like it was made for the truck. No need for power brakes, this setup has plenty of power for stopping, with little effort on my part. So if you are looking for an m/c upgrade, I would strongly recommend the toyota version. The overdrive was well worth the effort, too. The cab is much quieter, my rpms are much lower, and I get the added benefit of easy upshifting/downshifting with the press of a button.
-

Help - Disc Brake Conversion - Who is the supplier????
1940 Dodge VC replied to ol'skool's topic in Technical Archives
I'm putting rustyhope's (aka Charlie's) kit in now. He's is very cool to deal with. -

clips to attach trunk/passenger compartment divider
1940 Dodge VC replied to jcmiller's topic in P15-D24 Forum
I found something similar at a hardware store called MACS in Fargo. They were in the upholstery section. -

king pin replacement tips and tricks
1940 Dodge VC replied to gufnstuf's topic in Technical Archives
I'm working on the same thing. Replacing kingpins. You are ahead of me. Mine are apart and now I have the job of pressing the old bushings out, pressing new ones in and reaming. The bearings on mine had the flat portion of the inner race facing down, between the lower bushing, the shims and the axle. This is the order, from top to bottom: Upper spindle, I-beam, bearing (with the outer race up), shims, lower spindle. Dust caps were fitted on the top and bottom and punched in. I found some helpful advice on the following site: http://www.secondchancegarage.com/public/kingpins.cfm BTW, if you are replacing kingpins, have you looked into www.rustyhope.com about doing a disc brake swap? I picked up the kit a little earlier this month and am excited to get it swapped out for the old drum brakes. My wife's excited, too. -
Here are some comparison pictures of the Toyota and original master cylinders.
-
From the album: 40 VC
Original master cylinder and specifications -
From the album: 40 VC
Wagner M/C for 1988 nonABS Toyota Celica. 1" bore, three hole mounting pattern. Might fit the Dodge "Job Rated" 1/2 ton series (VC, WC, etc.) 1939-1947. -
I did some research on master cylinders--Jeff Balazs has a great thread on the Cherokee M/C. Another option that looks promising is something out of an early 70's Dart. That one comes with four mounting holes and a lot of clearance, plus it is quite inexpensive (around $20). It would be a good candidate for Jeff's mod. I also found a dual cylinder with three mounting holes and a 1" bore that came stock on non-ABS 1987-1988 Toyota Celicas. It might bolt up without any modifications, though the lines will have to be modified. It is a little pricey, though, ranging from $65 to $125 online. The model numbers are Cardone 11-2240 or 13-2240, or Wagner MC122610.
-
From the album: 40 VC
This is pretty cool, actually. Not that the wood looks that great--I'm trying to keep things looking somewhat old--yeah, the wood was originally black, but the grain is nice to see. The cool part is that it came from the molding in the science classroom that I teach in. The school is over 100 years old and they did an upgrade last summer. I grabbed some of the trim and made these boards over the winter. Somebody posted the specifications... let's see... -

How to remove a headlight button
1940 Dodge VC posted a gallery image in Individual Member Photo Albums
From the album: 40 VC
Hmm. I haven't figured out whether to push the tab in or pull it forward. Neither effort seems to have any affect on things. Maybe some Kroil is needed... -
From the album: 40 VC
Just a reference shot. -
From the album: 40 VC
Trying to keep everything stock. -
From the album: 40 VC
More work than I wanted, but now that it is in, I will be cruising in style and low RPM's! Now I need to upgrade the brakes... first with a dual circuit master cylinder and proportioning valve, second with disks up front. -
From the album: 40 VC
-

Seat belts and sound dampening
1940 Dodge VC posted a gallery image in Individual Member Photo Albums
From the album: 40 VC
The seat belts are government surplus upgrades for their humvees. Look for them on eBay. Very inexpensive, and lots of extra pieces that make mounting quite easy. Started a big sound dampening project. First step: POR-15 all of the surfaces. Then rubberized deadening material. I used Eastwood. Nice, heavy stuff, works great, very sticky! After that, thinsulate acoustic fiber. Then an outer shell followed by the cab material. Here's where I got the material and help: Don Sambrook Sound Deadener Showdown, LLC 410.458.6418 don@sounddeadenershowdown.com http://www.sounddeadenershowdown.com -
From the album: 40 VC
Sad day when the truck started overheating. Radiator guy said the old honeycomb got plugged up and couldn't be repaired. So much for the "all original" truck! There go the trophies... -
From the album: 40 VC
Thanks for the great manifold, Moose! -
From the album: 40 VC
Leaky looking MC!


.jpg.4b5afc7ba3a8c980b1212cef1b9c7150.jpg)
.jpg.5a8da475075b4d7ec6a8322c9020cb67.jpg)
.jpg.206ed872d7a4764261f1c3a0a0c9a02b.jpg)
.jpg.42b6713e2fb7f0a8327b3fb8422ab898.jpg)
.jpg.8a8e80b2c98ec12a9fd361a3582093da.jpg)


