

Tom Skinner
-
Posts
1,372 -
Joined
-
Last visited
-
Days Won
3
Content Type
Links Directory
Profiles
Articles
Forums
Downloads
Store
Gallery
Blogs
Events
Classifieds
Posts posted by Tom Skinner
-
-
Way back in another time and place I knew a man named Jim Petrellas, he owned and drove a 1956 Crown Imperial 8 Passenger Sedan. He was in his 50's in the 1970's so he is probably gone now, however, I asked him one day what his gas mileage was. His answer? "My boy Gas is small potatoes" When you drive a large Chrysler Product my question is: Isn't Gas small potatoes?
I drove a 1948 Chrysler Royal with the 250.6 cu. in. six in it then as I do now. I guess us older guys just don't get it? To me gas will always be small potatoes. Particles of unburned Particles? Who Cares? If removing this Thread is Politically Correct then so be it. You'all try to have a Merry Christmas and a Happy New Year here at the Forum. For the Sensitive Crowd - have a happy holiday and save gas while your'e at it every chance you get - so I can drive my Large Chryslers around and have more gas for me.
-
Well if that Ammco Company still exists out there it would behoove them to start making this tool again and selling it to us at a decent price.
Or as Hank just said, if, thats a big if, someone on our forum could or would make a version of this tool for a fair price they would sell every one of them.
Tom
-
Big John,
Steele Rubber Products are the best and they are proud of their products rightfully so (pricewise).
So here is the best - and when the best is around they call these guys - better.
When better is around they call these guys - mo better.
800 544-8665
Steele Rubber Products
6180 E. NC 150 Hwy
Denver NC 28037
-
Have you got a manual? Somewhere in it should be an exploded view of your Carburetor showing all the parts. I think there are 2 places that it could have come from besides the accelerator pump/shaft. For instance at the Dash Pot area, under the Spring (If equiped with a Dash Pot) or in the Fuel Bowl Area near the bottom at the Pump Check Plug. It seems like a real pain but if you go on line looking for Carter Ball and Ball Carburetors there are some exploded views to look at as well. In addition to that a rebuild kit should contain the same "exploded view" picture. Good Luck and let us know what you found out.
Tom
Huntersville NC.
-
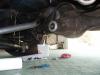
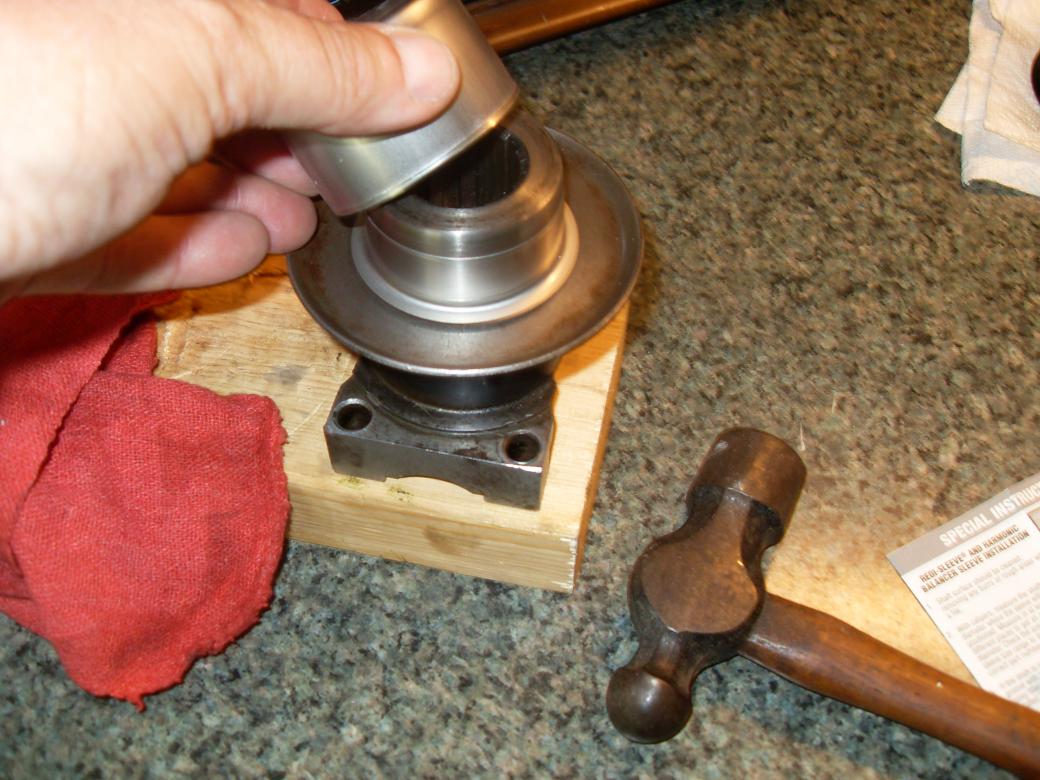
Note ho wthe Tail Pipe was being sprayed with 90 wt for a short time until I made this repair. By the way I think the Yolk is 1-7/8" diameter. The Sleeve ends up being Slightly smaller and once the Yolk is Frozen it Bumps right on.
It was fun. They are however a little bit proud of Speedy Sleeves $35-$40.
Tom
-
Aftera Pinion Seal was installed it still leaked.
I was able to sneak the Yolk off and Speedy Sleeve it withought messing with the Seal again.
Tom
-

I put a Speedy Sleeve on my Pinion Yoke and it stopped Leaking.
Neat little Trick. Just Freeze the Yolk then use a block of wood or the Sleeve tool to bump it on place with some sealer and Presto no more Pinion Seal Leak.
Tom Skinner
Huntersville, NC
I tried this thread as a test to attach apicture so if I messed up please allow me some grace. I might have a picture too large.
-
Congradulations!
That was a lot of work!
Tom
-
I'm with Don, that stuff is expensive and just hides what needs to be fixed properly. I would weld in new and paint it.
There is a couple of old guys in Booton NJ, they are the Kanter Brothers,
they have a saying it goes like this "Do it once and do it right".
POR - to me - will just will hide stuff/rust.
That causes more work later on down the road.
Just MHO. Everyone has got one.
This is not to offend people whom have used this product and like it.
Even the Kanters sell POR. I just avoid it as a personal note.
Tom
Huntersville, NC
-
Hey You'all
Them Thar Tires are good up to them make May Pop status.
When you are runnin 4 May Pops, then is a good time to consider purchasin some new used tires. New Tires are for city folks.
Tom
Huntersville, NC
-
Todd,
Tighten the Bolts to about 25 ft lbs for the Pump to Block (2) Bolts.
Wipe all clean and observe after a ride.
If the Pump Bolts don't have Lock Washers on them they work themselves loose after time.
I tighten mine from time to time, or maybe the oils coming down off of the Valve Cover gaskets? Snug the wing nuts on them - but not too tight.
Observe again after a test drive. Its probably just a little slow leak.
Nothing to get excited about. You can make a Gasket for either very easily.
Tom
-
Rodney,
Those Breaker plates are on ebay regularly for about $30-$40 S&H included.
I bought one and put it in my Distributor and everything runs Great now
Tom
-
Group Hug?

-
I will indeed!
-
Richard.
There is a Gasket between the backing Plate and Pump that needs gasket sealant also - do both sides - then bolt it to the pump. Then butter up the gasket between the Pump and Block and then bolt to the Block.
That Backing Plate needs Gasket Sealer on the Gasket between it and the Pump. I first put a Water Pump on a Flat Head back in the mid 70's and didn't seal that "inbetween" Gasket and then learned it must be done also.
Good Luck! You can make your own gaskets from a roll of Water Pump Gasket Material with Sicsors and a Hole Punch real easy.
Tom
-
Crazietj,
You have come to the right place. We are the largest Mad House Forum out there - loaded with all kinds of crazies.
We are cut from the same cloth. This Plymouth you have bought is nice and
complete. Anything or way you want to go with it is fine with us - its your car.
But just as a side note, that car could come full circle as is, its pretty damned intact. So here is wishing you all the patience, luck, and energy you need to accomplish your goals.
Tom
Huntersville, NC
-
Great Tool! You are a lucky man!
I test mine with a 9v battery and some wire alligator clips if they snap shut
with that they work. Just take a small 9v Battery and clip one end to the body of the Sisson Choke and the other lead to the Brass Screw where the wire hooks to atop the Choke. It should snap Shut - then you know they work.
I know this is just an ignorant man's way of testing them but it works.
Then follow the instructions in your manual on proper Choke adjustment and you should achieve sucess.
I recently bought 2 sissons for $12 on ebay and they both work.
I cleaned them up with a wire wheel.
On ebay now some one is trying to sell one for $189 - way too much in MHO.
Tom
-
Mr. Bob,
Ouch! you mean you took apart all your brakes?
I thought one should do one side at a time and if - if - having forgoten how to re-assemble, one could then go around the car and examine one that was still together as an example to jog ones memory to continue installing brake parts in the wheel they are working on. I have always found the best learned lessons in life are the hardest learned.
I'm sorry for your dilema and hope you have a service manual.
Good luck with your repair.
Tom
-
I buy ZDDP 4oz. Bottles (Zinc) additive and add to my Oil Changes.
It only adds about $9 to an Oil Change and gives me peace of mind.
As Don C. has pointed out in the past though its all a matter of personal prefference - a snake oil remedy some say. Marvel Mystery Oil was my old favorite until recently.
ZDDP can be purchased on ebay. Some do, some don't, some will, some won't.
Oil is in fact better today than in 1948. Das ist mir egal -
(Its all the same to me)
Tom
Huntersville, NC
-
I always thought Cast Iron Heads got Torqued Hot and Aluminum Cold?
Oh well, I think there is probably just a little break in Lub dust etc floating around in there.
Good luck and I hope everything works out for you now that the oil is changed.
Tom
-
I shot a 90 once.
That was on the front nine holes:D
-
Donald,
Have you checked if its Polarized correctly? Polarize the Generator with Jumper Wires at the Regulator? cut a wire (Short Scrap Jumper Wire)and jump between the Bat and Arm Contacts.
Firmly hold end of jumper wires to strike a flash between these terminals on your Voltage Regulator. This will Polarize your Generator to recognize a charge at the Ammeter - if this helps.
You may have inadvertantly un-polarized it, jumping or disconnecting stuff.
A Cheap Checks to save money. One more thing are the brushes in the Generator still good? Do they have any meat left to them or are they worn to a nub? Good Luck with your repair!
Tom
-
Powerhouse,
I know any advice now might serve to rile you, however,
If the Generator is the problem, perhaps removing it and having it bench tested would help.
Just a thought, I am not an Electrical wiz Kid.
Good Luck.
Try Static Timing her, maybe she's to advanced??
Tom
-
Dear NosDan85,
If after checking those things you may want to static time it.
That will tell if your getting juice to the plugs at the specified/required time.
A good book for Trouble Shooting is: Automotive Trouble Shooting for WW2 Wheeled Vehicles by Robert V Notman. Contact him for a copy at: notman7@comcast.net.
Its worth the $30 or so to have around and wil leave no stone unturned.
Trouble shoots Electrical - Fuel - All things - Checking Coils, Condensers, Timing - Static and Dynamic etc. etc. Spiral Bound w S&H @ $35.
Saves alot of time going straight to a problem. It was designed to Field Repair WW2 Vehicles in emergency Situations and is Re-Edited by him with Modern Caveats and Tips - A MUST READ for most of us. I have started everything from old mopars (1940's) to old Ford Jeeps (1940's) with this book.
Tom Skinner
Huntersville, NC

Ammco brake gauge
in P15-D24 Forum
Posted
Truth be told I have done Brake jobs on a couple of 1948 Chryslers several times over in the past 36 years and never used the tool and "eye balled it" every time and never had a bit of trouble. So the question begs - who the hell needs one of these tools???????
Tom
Huntersville, NC