Built in America
-
Posts
39 -
Joined
-
Last visited
Content Type
Links Directory
Profiles
Articles
Forums
Downloads
Store
Gallery
Blogs
Events
Classifieds
Everything posted by Built in America
-

47 Dodge Oil breather cap smoking
Built in America replied to Built in America's topic in P15-D24 Forum
That’s true - I should have. It’s a shame we can’t trust where things are made nowadays. Pretty sure we made sure that the replacement was made in the US. Regardless will give the corner flush as it likely needs it, easy enough to pull the temp gague. -
47 Dodge Oil breather cap smoking
Built in America replied to Built in America's topic in P15-D24 Forum
Thank you that’s a good point as well. I’ll double check with our team but I think when we cleaned out all fluids in the beginning they did a vinegar soak but will confirm - they might’ve just done a flush with water. -
47 Dodge Oil breather cap smoking
Built in America replied to Built in America's topic in P15-D24 Forum
That makes sense. Thank you again for the clarification. You’re right, although I’m definitely a compassionate guy, not quite sensitive enough to properly gauge the temperatures with my hand. ?. In our 41 GMC I could typically feel a significant difference between coolant flowing out of the block and into the radiator, compared to the line of coolant flowing from the bottom of the radiator up into the water pump = seems not as significant of a difference in our 47 Dodge. -
47 Dodge Oil breather cap smoking
Built in America replied to Built in America's topic in P15-D24 Forum
Thank you! Good point. I should’ve gone back to kindergarten mechanics before looking past the basic logic of a newer thermostat going from no reading to 115 degrees 5 months later ?. Thankfully we didn’t have to remove the water pump so I’m not quite sure what degrees the T-Stat is currently. I’ll look to pick up a different gauge. Would really like to know what we’re running it. To the touch it’s not so hot that I can’t hold my hand on the top of the block for three seconds before needing to remove. If I recall these engines were designed to run a bit cooler than most given they stand idling and running at slow speeds working farms all day long. -
47 Dodge Oil breather cap smoking
Built in America replied to Built in America's topic in P15-D24 Forum
Thank you Sniper! Very much appreciate your professional input. That was just us troubleshooting every area possible within our “YouTube university” degree lol. Your explanation also helped us remove one other item off the list in regards to the optimal running conditions and if the new exhaust could be hindering. -
47 Dodge Oil breather cap smoking
Built in America replied to Built in America's topic in P15-D24 Forum
@TodFitch Brilliant. Thank you for the elaborate explanation of how the components work together, their intentions, as well as what occurs when the vehicle is stopped. Definitely learned a tremendous amount about why the geniuses designed this engine in a manner that they did; as well it’s connecting the road draft tube with the oil breather cap = we had no idea. I don’t mind the minimal misting. Just wanted to make sure there wasn’t something going bad inside that was causing anything to overheat, burn, etc. -
47 Dodge Oil breather cap smoking
Built in America replied to Built in America's topic in P15-D24 Forum
Thanks Joe, Hopefully that’s the case. I’m going to drain out the old oil, and replace regardless. -
47 Dodge Oil breather cap smoking
Built in America replied to Built in America's topic in P15-D24 Forum
Thanks again! The gauge is an aftermarket that we temporarily have mounted below the dash until we have the original gauges restored. Thermostat runs directly into the side of the block where the original was. Strange that the gauge didn’t read anything up until about a month ago when we started running it during hotter temperatures outside. I didn’t notice that the intake tube running into the head of the block from the water pump is equally as hot as the exit line that runs from the top of the block into the top of the radiator = tells me the radiator is not cooling the coolant. Going to clean out the radiator fins (The original ) and possibly give the radiator a flush to see if maybe there are cloggs. Hopefully the water pump has not gone bad. Seems like it’s working. When we come to an idle and I press on the Excelerator the temperature drops slowly by 3 to 5° = assuming this is indicating that the water pump indeed is working and pushing more coolant back into the block when I idle up. Thoughts? -
47 Dodge Oil breather cap smoking
Built in America replied to Built in America's topic in P15-D24 Forum
Good question. 120°F (where in the US / California) I noticed our water temperature gauge was staying at zero for quite a while just up until the beginning of July. That was after about two months of running it on the road frequently. Currently it takes about 20 to 30 minutes to reach 115°. it’s about 120° if we’re running it for longer distances and it’s a hotter day. We did put a different exhaust on it. Wonder if that is not allowing the proper resistance in the exhaust manifold thus letting out too much pressure/Heat too fast.? -
47 Dodge Oil breather cap smoking
Built in America replied to Built in America's topic in P15-D24 Forum
Thank you! I had a feeling but wanted to double check. I’ll definitely change out the oil knowing that it’s likely lost its intention. Oh yes, that actually was what apparently the old farmer did for the overflow. When we found it we figured we will leave it as is give me love the history as well as the Classic field. Old fan belt and a mason jar! -
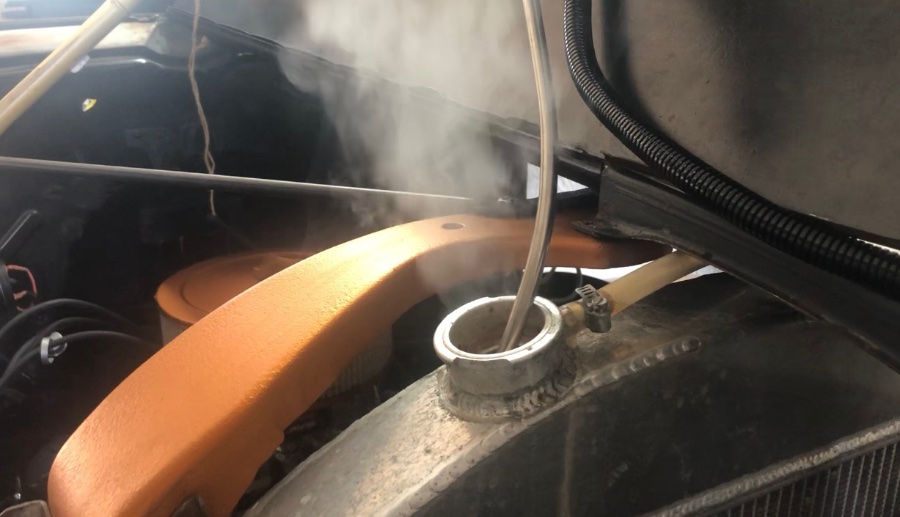
Oil breather cap smoking. Thank you again for everyone that has helped to give us tips to get our 47 Dodge 2 ton beast on the road running and stopping. Keeping her strong we noticed smoke starting to slightly come out of the oil breather cap either after about 30 minutes of running, or on days that are hotter than 80°. Should we be concerned or is this part of the design and purpose of the oil breather? We do not smell burning oil, engine block is tight, oil pressure is ideal, all audio lines through oil filter canister are clean and running, oil pump seems to be operating correctly, etc. In-line six runs at about 115° to 120° on Hot days. Runs below 115° that on days that or less than 80° outside. Oil may need to be changed. Changed about eight months ago, and topped off last month. Only reason I haven’t changed in 8 months is because once we changing the oil we ran the 47 maybe 20 miles over the period of time of getting her up and running. Thoughts?


-
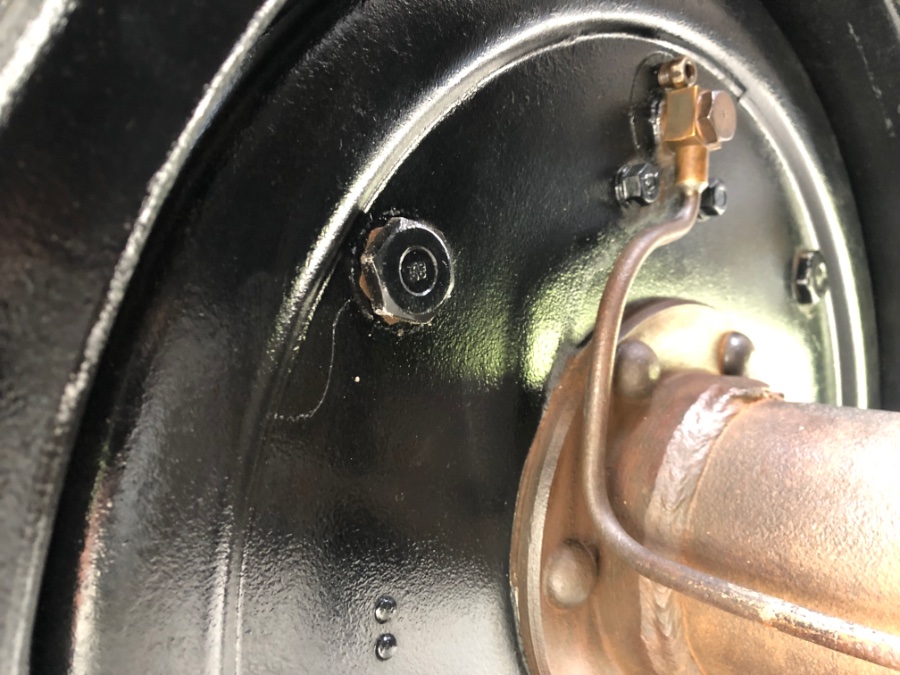
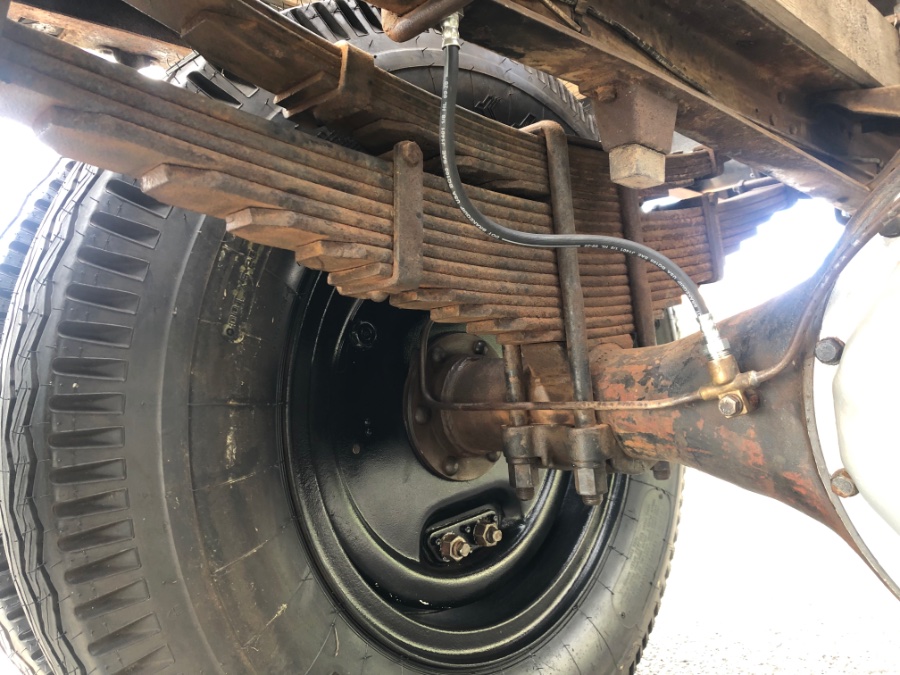
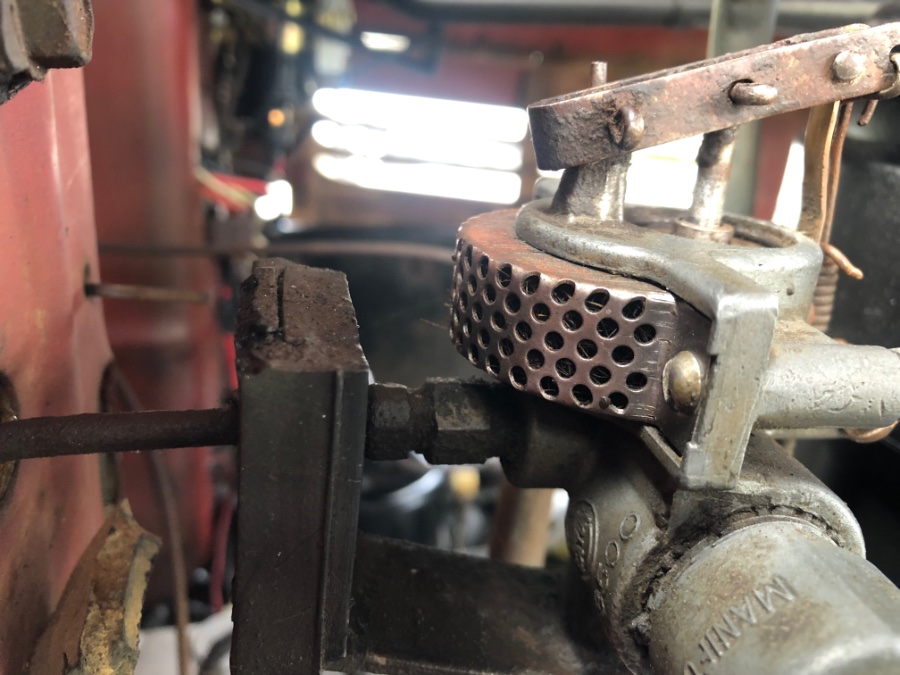
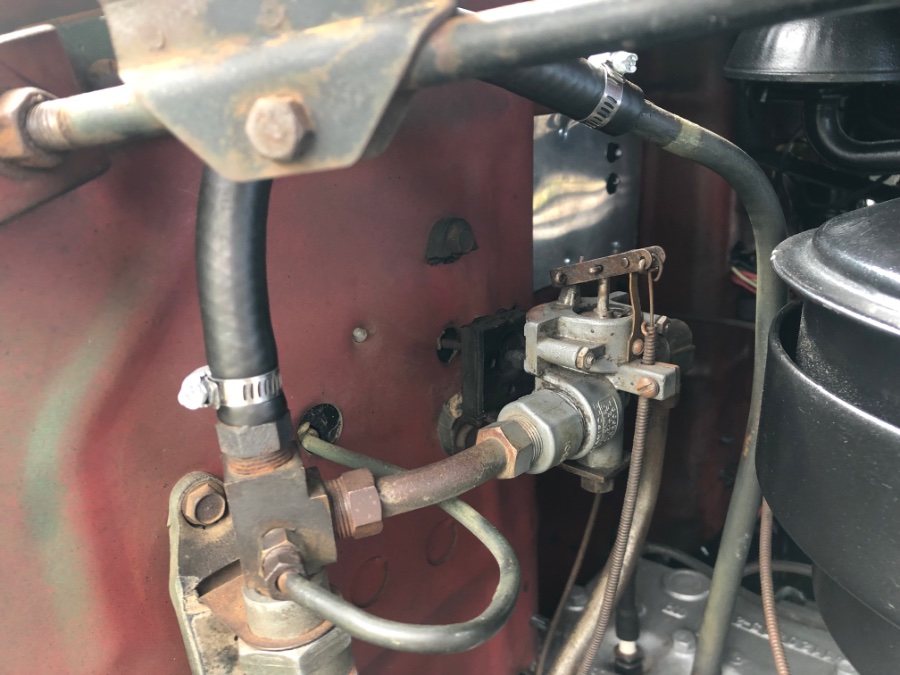
Almost have the brake restoration complete. Vehicle: 47 dodge 2 ton stake bed truck. Previously used on a citrus farm in northern US. Question: The air reservoir tank on the driver side is connected to the vacuum line that runs from the carburetor to the Hydrovac brake booster. The main line runs from the carburetor, then tees off to the reservoir back up tank, and then continues to the booster. *** Is there a need to bleed the air tank? See the bleeder valve at the bottom, as well as the secondary connection on the far right. *** The closed valve on the top of the booster - when the truck is running and we loosen that valve you hear and feel air sucking in. What is the point for that valve and does that need to be adjusted to allow air in once restoration is complete? Thank you again, Jason AutoOwners.org


-
1947 dodge 2 ton truck Hydrovac - brake booster
Built in America replied to Built in America's topic in P15-D24 Forum
Thank you for the feedback. We’re looking for a Midland booster. Turns out the farmer used what he had to get the brakes working and dished the original Midland. Our 47 1.5 ton has a midland = checked this AM. We’ll leave that one on the 1.5 ton in hopes that we can use it once we get that rolling next Fall. We’ll give the Hydrovac to a GMC owner that needs it. Now hunting for a Midland for a 2 ton. many thanks, Jason AutoOwners.org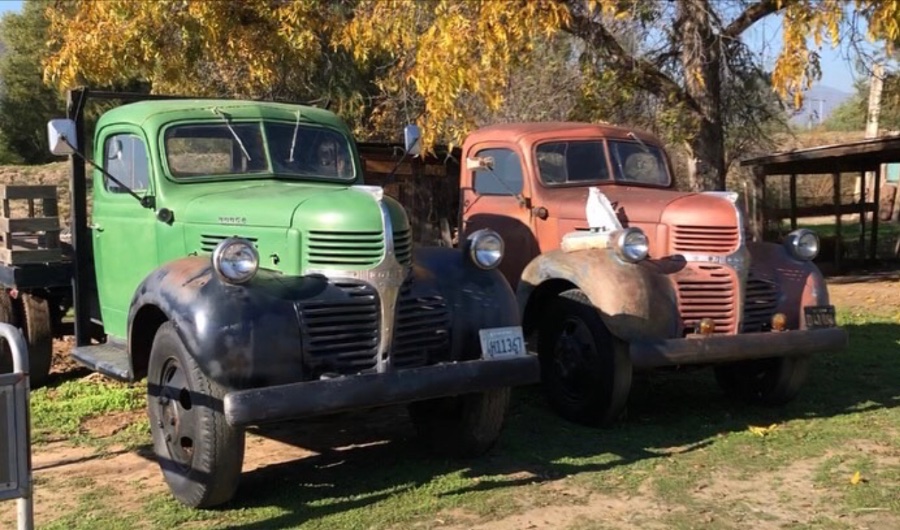

-
Many thanks! Still a few details to fine tune but it’s rolling all 2 tones down the road getting heads to turn from all those Teslas and hybrids humming around. Haha. We’ll keep you posted as we get the 47 1.5 tone ready in the Fall.

-
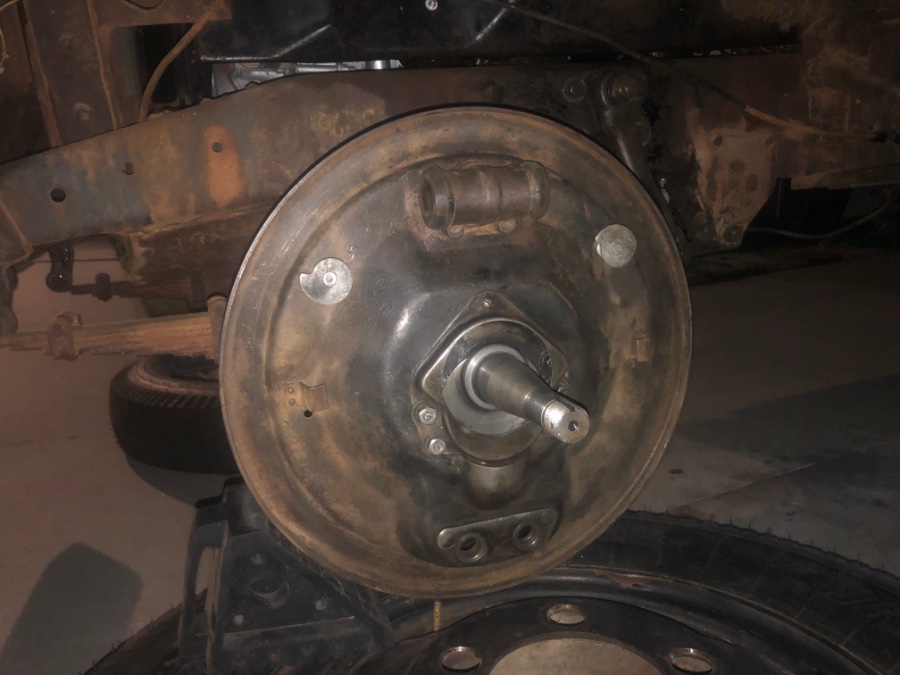
We are close to successfully fully restoring this beautiful 47 dodge 2 ton. Master cylinder restored, wheel cylinders restored, wheel cylinder pistons placed & restored, brake liners replaced, etc. We thought we properly tested our Hydrovac booster initially but brakes work at about a 75% success rate = pressing on the pedal truck comes to a rolling stop but not an immediate stop as necessary. ** We’ve checked the vacuum lines and they seem to be solid (no leaks), but will give it another check. We’ve made a major break adjustment to make sure that the shoes are properly meeting the drums, and completed a minor brake adjustment for the spacing between the brake pads and drums. Questions: 1. What is the proper method to test a Hydrovac booster when still installed? What are telltale signs that it needs a rebuild? 2. When adjusting brakes with wheel lifted off the ground how many rotations if any should the wheel make when brakes are adjusted properly? How much drag is OK. 3. Any resources for a Hydrovac booster rebuild kit, or are we better to purchase a new and donate the booster to our classic treasure chest Collection ?? Many thanks, Jason AutoOwners.org


-
1947 Dodge 2 ton 2 speed rear end
Built in America replied to Built in America's topic in Mopar Flathead Truck Forum
Circling back after while. Just want say thank you for the documents and all of your help. We finally were able to get this beautiful two-ton beast shifting into high gear real nice. Still not certain which adjustment it was that helped us and I think we might still need to make some adjustments to better the synchronize but it is running for power.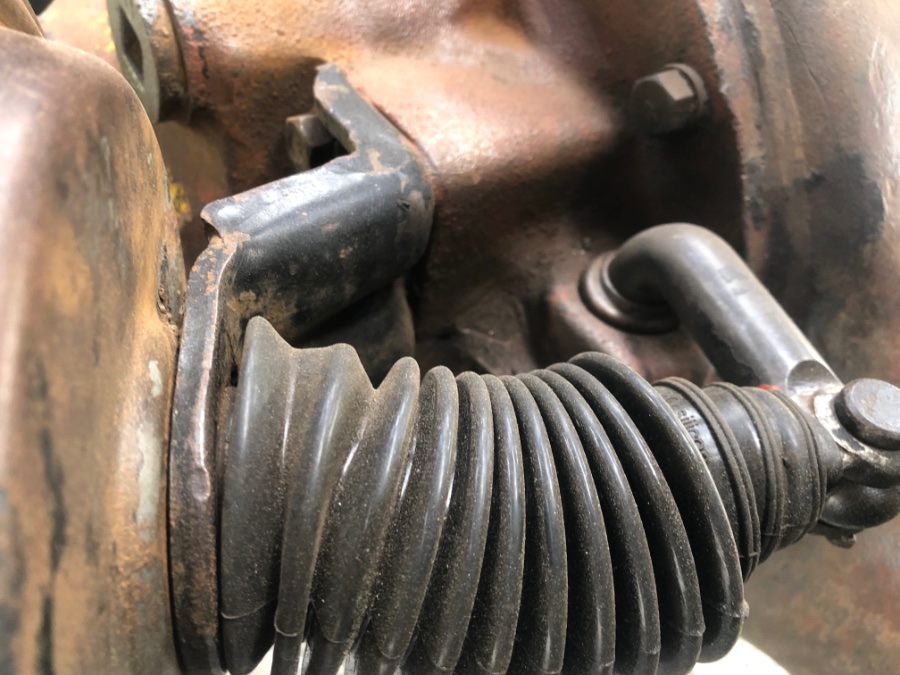


-
1947 Dodge 2 ton 2 speed rear end
Built in America replied to Built in America's topic in Mopar Flathead Truck Forum
Thank you so much. The diaphragm seems to be in great condition, the spring was decent we just gave it a good cleaning and wheeling, made some minor adjustments and now it seems like we shift into high gear real nice. Thank you so much for your tips. This beast is now on the road and running. Just fine tuning the braking system.

-
1947 Dodge 2 ton 2 speed rear end
Built in America replied to Built in America's topic in Mopar Flathead Truck Forum
Thank you again for the response. Not sure if how we responded prior got through to you but just want to give everyone an update that we finally got this beast to properly shift into high gear. Not sure exactly what triggered it might’ve been the vacuum system after we finished restoring the brake system, or could’ve been a minor adjustment that we made at the vacuum intake point just off the carburetor. -
Thank you again for your help with the previous trouble we’re having with our 41 GMC that has a Chevy small block under the hood. Hopefully you receive the response below but realized that we didn’t respond to the post properly. Rendering into the hot season here in California and I believe the mistake that we made causing the radiator to clog has been corrected by using the hot steaming method rather than having to rebuild the core or replace the radiator overall. Many thanks, jason AutoOwners.org
-
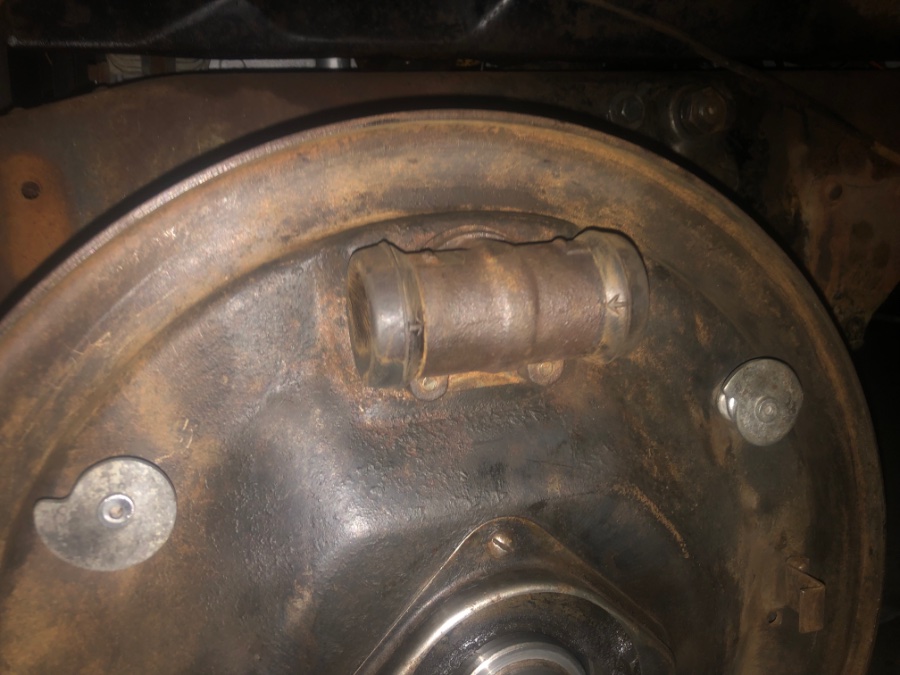
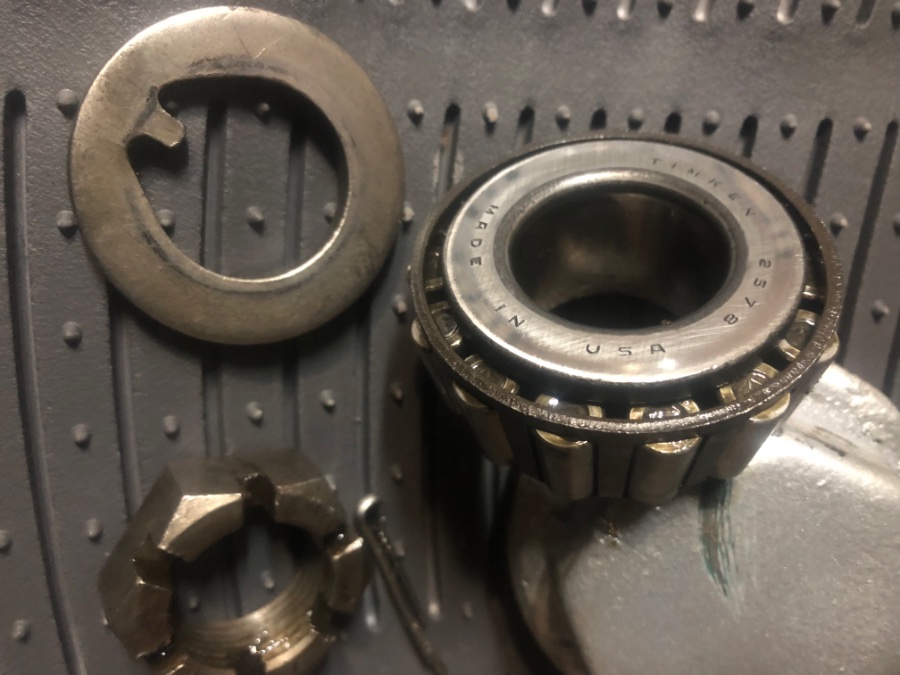
Brake rebuild is complete, other than troubleshooting through what may or may not be the Hydro vac brake booster. we’ll have to put together a video of the bearings that were packed, thankfully studs were in fantastic condition, and most components were able to be cleaned restored and reused. Drums are in fantastic shape, shoes are built like tanks, was able to find new brake liners, and Master cylinder needed minor boring. 2 months straight worth of cleaning, wire brushing, degreasing, and restoring all components. Only about 16 hours of reinstallation. *** Will place a new post to inquire about how to best test to see if the Hydrovac brake booster is operating properly, or needs a rebuild before we pull it out or replace it - thought we had a successful test initially but brakes work at about a 75% stopping rate = comes to a rolling stop but not a proper immediate stop when necessary.


- 8 replies
-
- 1
-

-
- drum brake adjustment
- brakes
- (and 4 more)
-
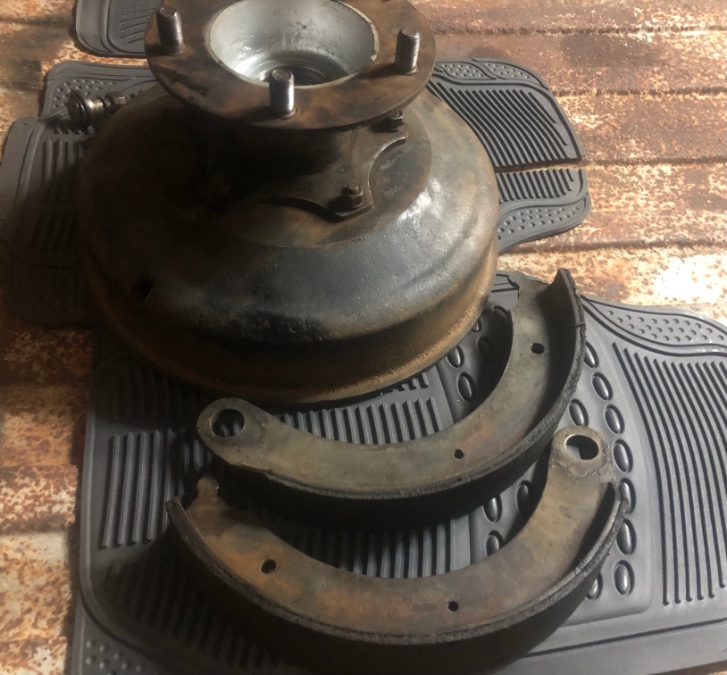
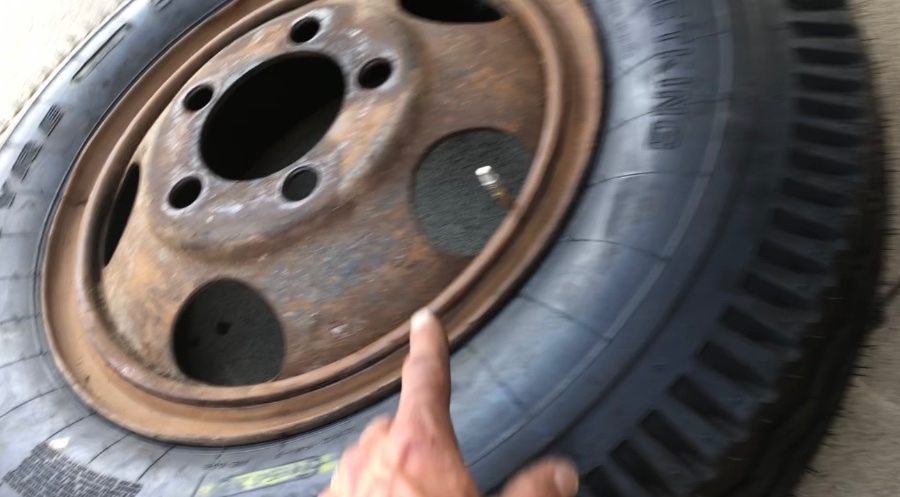
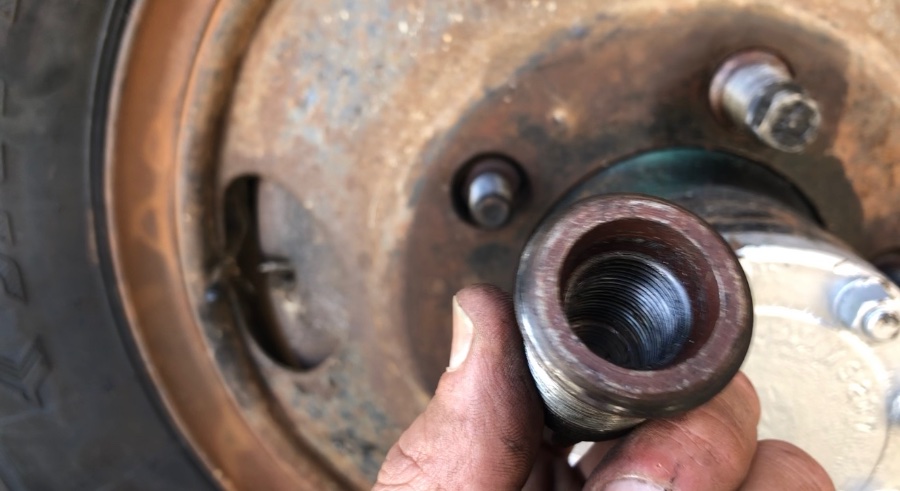
Great resources! Thank you! The pics are after we cleaned off 1/4” of clay and grease + hit the parts with a wire disc. We’ll clean further and powder coat what we can. It’s beautiful how these parts were designed and manufactured like a tank. Brake liners are worn down quite a bit (this beast hauled citrus crates for 20 years - 5,000-6,000 lbs from what the grandson of the farmer informed us). We want to keep the current shoes but reline them = having a hard time finding the right brake liners (Grizzy isn’t around I don’t believe anymore) for a 2 ton (plenty of 1/4, 1/2, 1, and 1.5 ton liners). Wheel cylinders we’re hoping to keep or restore since they look great and show no signs of leaking. We’ll see. Flex hoses for sure we’ll replace even though the current lines look ok. We’ll test the current brake lines once we get all wheel off and clean our the bleeders on each. They’re in great condition but will see what we push out of them and how they hold pressure. Our goal is to keep/restore as. Icy as we can and will keep the rest in our “treasure chest” or offer to someone that could use them on their Dodge. Yes we orders a new stud remover kit with reverse threads. Praying it works. We’ll put a torch to the studs as well to assist. Gratefully, jason AutoOwners.org

-
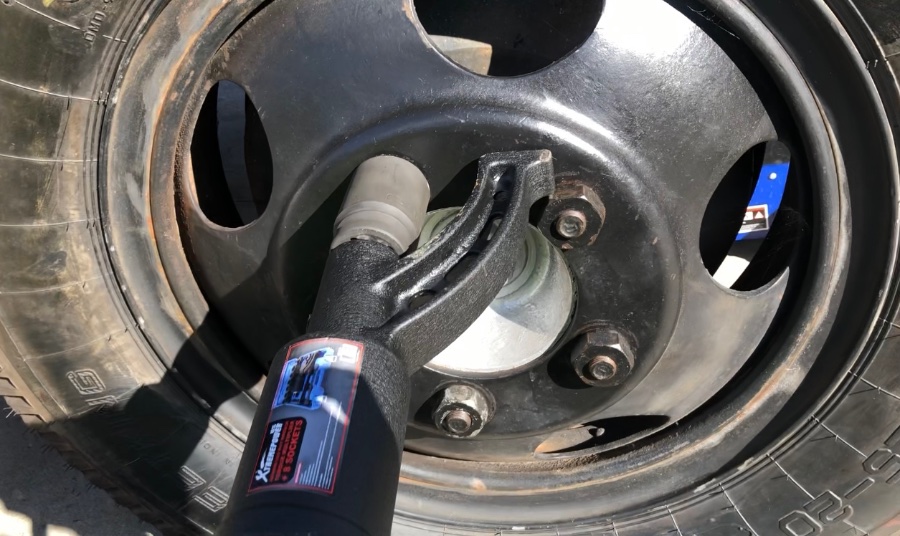
Hi Los Control. Man I can wrench for hours on end but can’t correctly send a post reply for the life of me. Hahah. I replied previously but not sure where it went. Thank you for the directions. We pulled the 6 wheels, realized 2 drums are seized up when knocking on them with a hammer, and will pull them and inspected calipers, pads, etc tomorrow. Will ask if DC Classics or another source is most ideal to pick up a whole kit (lines, shoes, pads, calipers, etc. We’ll keep the original parts in our treasure chest (unless we can keep them on the green 2 ton). I’ll be sure we get more pics tomorrow to post as we open things up. Getting the beastly wheels off was a chore. The breaker did the trick on the lugs but we still can’t get all of the the rear dually studs off so that the inside wheel can be pulled. Ha.


-

-