-
Posts
9,999 -
Joined
-
Last visited
-
Days Won
180
Content Type
Links Directory
Profiles
Articles
Forums
Downloads
Store
Gallery
Blogs
Events
Everything posted by Dodgeb4ya
-
Is it a new/rebuilt disc and pressure plate?..think that's what you posted at the beginning... If so possibly the problem is in the disc lining being slightly too thick. But try eliminating all clutch free play to zero and see if it won't grind ... You can check visually for pressure plate to disc release clearance... Remove the bell housing lower cover and have the clutch pedal held to the floor. You should be able to use your finger and easily push/move just the clutch disc around between the stationary FD driven plate and the pressure plate. If not there is not enough throw out bearing/fork movement, new pressure plate rebuild issue or too thick of rebuilt clutch disc...just some more ideas. These Fluid Drive clutchs are simple and not trouble prone. But today some of the rebuilt parts are built to the wrong specs differing from factory.
-

1948 Dodge Truck Neat old B-1-B
Dodgeb4ya replied to jameshanks's topic in Ebay, Craigslist and External Site Referrals
Excellent post on a Dodge truck...not a Ford!? -
Don't have loose clothing to get pulled in by the tire or driveline while the wheels are turning!?
-
Best way is have them re-sleeved by the best re-builder. All wheel cylinders sold new today are chinese junk. Castings are poorly sized and cast. Piston push rod machined depth can be erractic using some styles of push rods too.
-
Yes...the 1946-50 Chrysler flsthead "8" was used a lot in industrial and marine markets. The industrial and marine engines are slightly different than passenger car engines. Cranks, cams, oil pumps, manifolding, and reverse rotation, are some of the differences. Have seen a few of each.
-

1947 dodge 2 ton truck Hydrovac - brake booster
Dodgeb4ya replied to Built in America's topic in P15-D24 Forum
Wonderful looking trucks and owners who know what to do to keep them up and running the proper way!?- 3 replies
-
- hydrovac brake booster
- hydrovac
- (and 6 more)
-
The 1946-48 Chrysler straight eights sweet spot is 60-75.... The highway is the horse track for them. Unlike the six. The eights are some what lethargic until you hit 35-40...then that's where the power band starts and is good up through 70 mph +. My 1946 NewYorker 3 passenger cpe was kinda a hot rod being so light in the back end. I love driving my 48 woodie convertible on the back country two lanes. Luxury. Smooth quiet and powerful.
-
Correct as Doug&Deb posted. All the C38 1946-48 sedans came with the 251 six but used the heavy 8 cylinder chassis parts as used on the bigger model C39 8 cylinder cars. Even the huge nine passenger1941-42 T&C "Barrel Back" woodie's used the 251 engine.
-

1947 dodge 2 ton truck Hydrovac - brake booster
Dodgeb4ya replied to Built in America's topic in P15-D24 Forum
Midland single diaphram boosters were used on 1947 and up Dodge 1-1/2 to 2-1/2 ton trucks. Hydrovac's were used on GM trucks and others. I don't know anything about the Hydrovac booster. As for the Midland they work 110% when working correctly. I have driven my 2-1/2 tonner for ten years and the brakes were as good as modern truck brakes. Easily lock them up and still stop in a straight line in a cloud of smoke. As for rebuilders and other help...cannot advise on the boosters.- 3 replies
-
- 1
-

-
- hydrovac brake booster
- hydrovac
- (and 6 more)
-
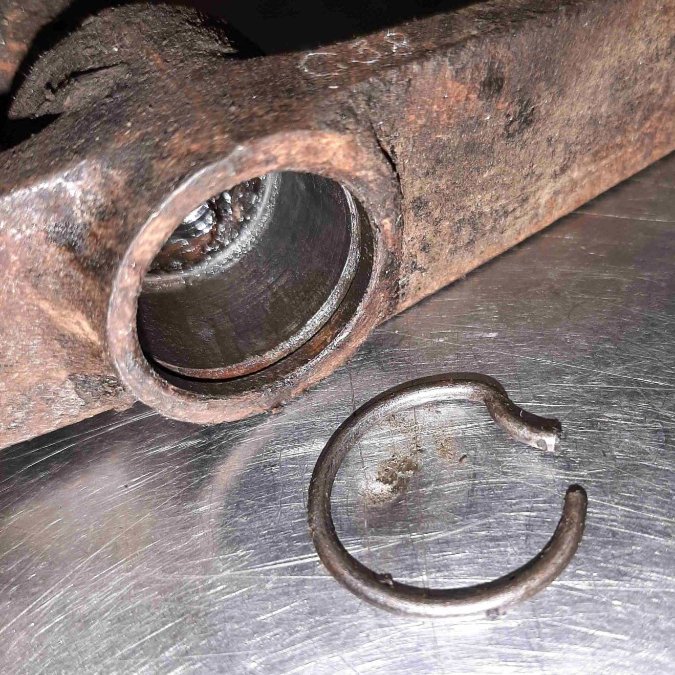
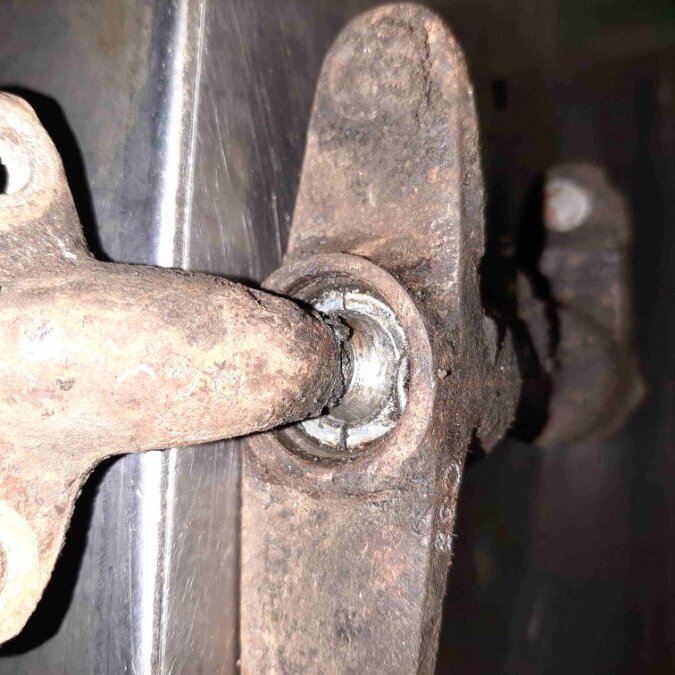
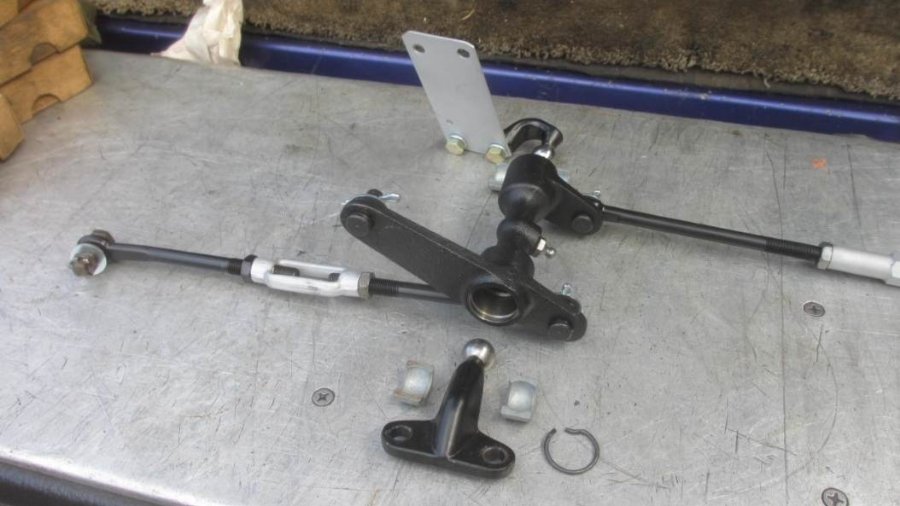
Yes....The snap ring does fit into the machined groove retaining the two bearing halves and pivot ball stud in the torque shaft.
-
-
This is a p15 assembly but basically the same. Your spring clip is probably the type with the two ears making the install of it easier...
-
Was the engine just rebuilt?
-
Pull the yoke..make sure no pitting or wear groove...install new proper seal carefully. If yoke has a groove -new speedi-sleeve required. Install as directed. No crush sleeve used in your Eaton 1350...tighten as per shop book torque specs. Of course oil the seal lip.
-
It looks great! Good job getting it back on the road. Quite a feat on such a big rig. Get out there and drive it and please post more pictures of these ventures with it too.
-
Those four upper 5/8" hex bolts abd two lower studs with the nuts are all that holds the transmission onto the bell housing. Wedge the trans with a bar against the cross member to the bottom front of the trans...should slide rearward.. Just have that trans safely supported. Don't let it hang down on the Fluid Drive coupling. I will mention this...once I had to pull a M4 yransmission out of a 1942 S10 DeSoto. It would not come out no matter what! Maybe a 1/4" at most. Ended up using a cable winch puller and two crow bars to wedge it out. One of the two pilot bushings was siezed to the input shaft and hanging up in the FD!? Have never seen that in probably over a hundred or more FD M5/M6 jobs.
-

Can't get front brake shoes to go in so drum will fit on 48 DeSoto.
Dodgeb4ya replied to MarcDeSoto's topic in P15-D24 Forum
Make sure the shoe linings are no thicker than 5/32". That's the factory new Dodge Coronet/Meadowbrook thickness. Have the linings Arc'd to fit each drum if they do not exactly fit each drum. If you don't arc them and the have gaps at the toe or heel or in the middle...oh well adjust the best you can and drive it, drive it, drive it. Them you will have re-adjust the cams every 500 miles or so as the pedal drops... As they wear in the pedal drops lower. {the non conforming linings are wearing in to fit the drums 100%.} This takes miles and miles of driving to get a high hard firm brake pedal. If the shoes are properly arc'd set the anchor bolt arrows facing to each other at the rear brakes, on the front wheel cylinders arrows face the wheel cylinder. These are the original factory arrow positions with linings fitting the drum surfaces 100%. Put the properly arc'd shoes on. Install the drums adjust the minor cams as in the book with a slight drag. Re-adjust shoes again in 500 miles. Pedal should be high and firm. If you do not arc poorly fitting shoes do the best you can adjusting them up and letting them wear in. They will wear in and the pedal will be great high and firm after a couple thousand miles. That's the way I always did it in the late 60's and 70's till I got older smarter and had all the tooling to do these Lockheed brakes. You also had the choice of std. and oversize linings back then to help get faster wear in of linings. These Lockheed brakes always were excellent if set up correctly and using asbestos linings which still ise on my old MoPars. Be careful using some of these new relined shoes off ebay...linings are made of who knows what off shore materials. -
Not necessary to remove the emergency brake assembly. Just undoloosen the 7/16" little bolts on the brake drum backing plate to open up the 4" wide access hole. You will see the cable/ with the coil spring. Unhook it from the curved actuating lever using a hook tool or screw driver. Loosen/remove the cable housing clamp bolt on the brake backing plate. This bolt and nut is also a 7/16" hex nut size. Pull the cable out of the E-brake backing plate. Done.
-

Thinking of purchasing a front suspension rebuild kit
Dodgeb4ya replied to D35 Torpedo's topic in P15-D24 Forum
Yep most new repop parts are junk sadly. Soft metal. NOS or NORS only parts that will fit right, be safe to use and last. -
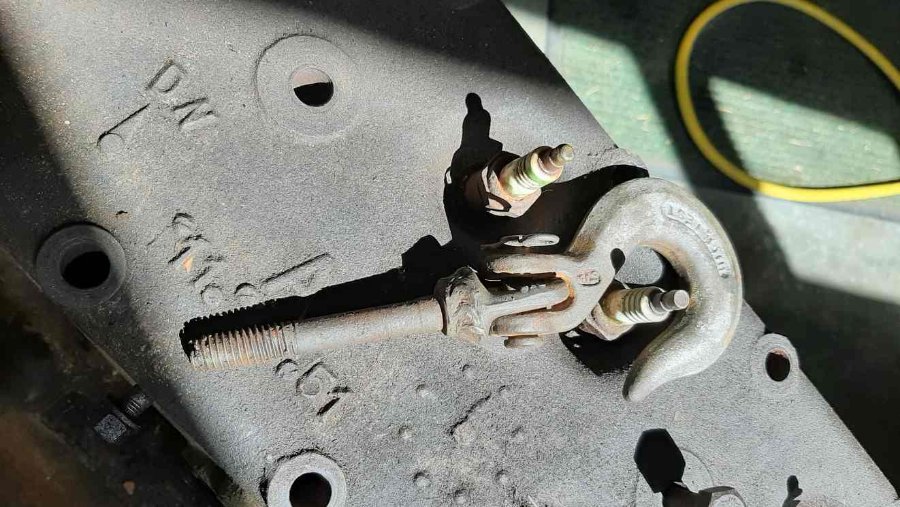
My favorite quick and easy lifting eye bolt hook to just "yank" a flathead six or eight out of junk cars and just to move them around..
-
About ten years ago Westley's Bleche Wite was bought out and taken over by ITW. Now called Westley's Bleche Wite "Black Magic" . A changed and weakend formula from the original. The prices of the old formula are around $70.00 up for a quart.
-
The leveling bars I use on the flat head sixes use two head bolts...one at the front of engine..one at the rear. IME you need to tilt the engine and FD to easily remove it. The engine needs to tilt at a fair angle on removal and install. Assemble it close to the head- short chains or "L" brackets. A picture of the typical bar... Just a recommendation....
-
First most important step as mentioned.... Take lots and lots of good quality pictures....and even more different angle pictures. Use a tilt-a-bar on your lift to angle the engine and bell housing complete with the fluid coupling out of the chassis. Do not take apart , unscrew the over center spring turn buckle...not necessary. Use a hoist on level concrete or flat asphalt. Take your time.


