


ptwothree
-
Posts
659 -
Joined
-
Last visited
-
Days Won
1
Content Type
Links Directory
Profiles
Articles
Forums
Downloads
Store
Gallery
Blogs
Events
Classifieds
Everything posted by ptwothree
-
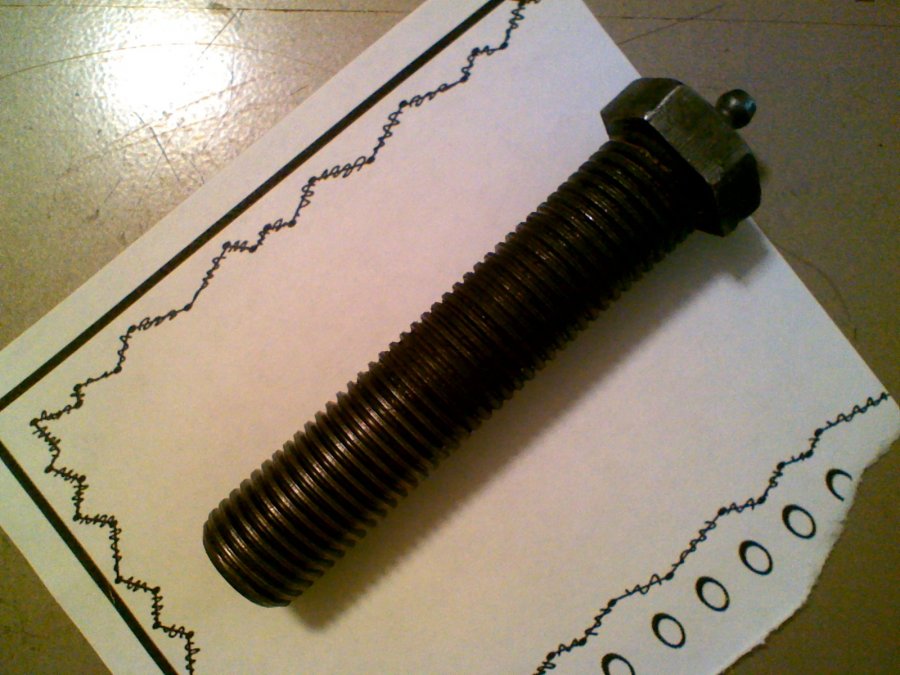
Anyone know the thread pitch on these? My thread checker shows a very loose 10 per inch. I'd like to replace the nut with a castellated nut and cotter pin.
-
Check the toe. To much toe out will cause the car to be twitchy in a straight line and can make the car over steer in turns or sweepers. Caster is built into the front suspension and is correct when the camber is set.
-
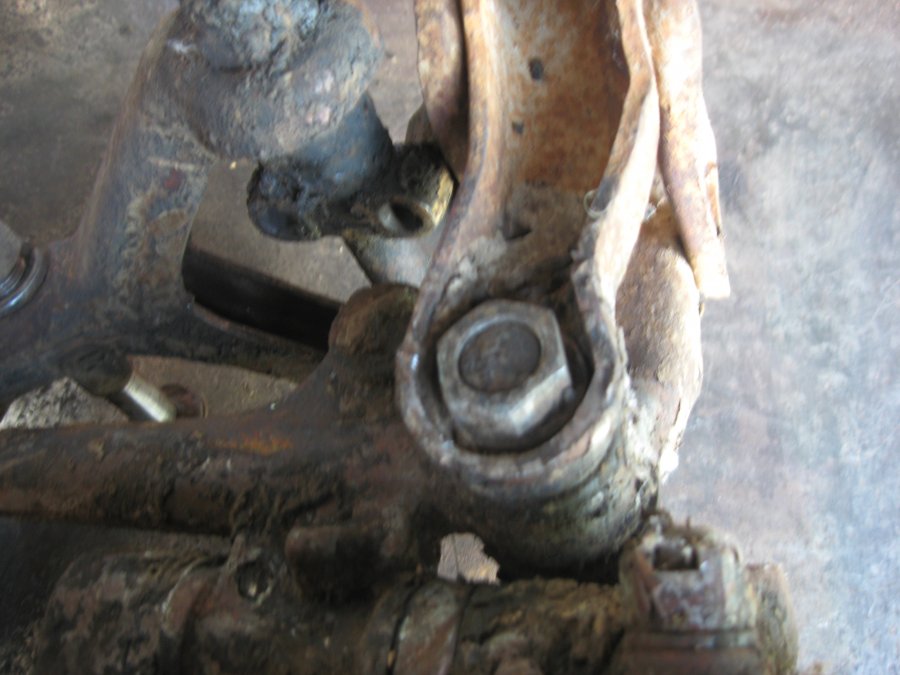
This is a friendly warning to those of you who have got into the 'old car hobby' recently.You really need to check these cars out before you hit the streets. They are 60 yrs old or so and who knows what tey have been thru or what has been done prior to your ownership. Car might look shiny and all chromey, neet as a pin. Or it could be something that was recently dragged out of a ditch that's been home for the last ....??? Do yourself and all of us a favor and go over the front and rear suspension and steering. I say this because no matter what the PO told you, you just don't know what you don't know. I am going thru the front suspension on my '52. All was ok with the left front....got to the right front and found this...... This is the nut and pin that hold the lower control arm to the spindle. The nut is finger loose in this pic. Not good. So the message here is that just because you pour some gas into the carb, fire it up and go for a cruise, doesn't mean it is safe to do so. Suspension, steering and brakes......check 'em out before they check you out.
-
You didn't mention the minor eccentric. These also should be backed off as well as the majors. Also, if your installed shoes are touching the backing plate, the drum won't go on. I pried them with a screw driver and they 'popped' into place allowing the drum to go on with room to spare.
-
Ok...So I have pt# 112324 on both parts. So the one with 5 marks should be 3/8" higher? And the pt# itself relates to what part it is and how stiff it is...? A 112323 would be a softer spring then what I have and a 112325 would be stiffer. Thanks for the help, found it in my book. Just trying to understand this spring thing!
-
Front coil spring just after the part number. This one has 5 marks the other one has 4.

-
Do you have a 2 piece or one piece hood? I think '49 was a cross over year and some '46-48 style cars were sold as '49's. If it's a one piece then the hood can stay on...just a wrestling match getting to everything sometimes.
-
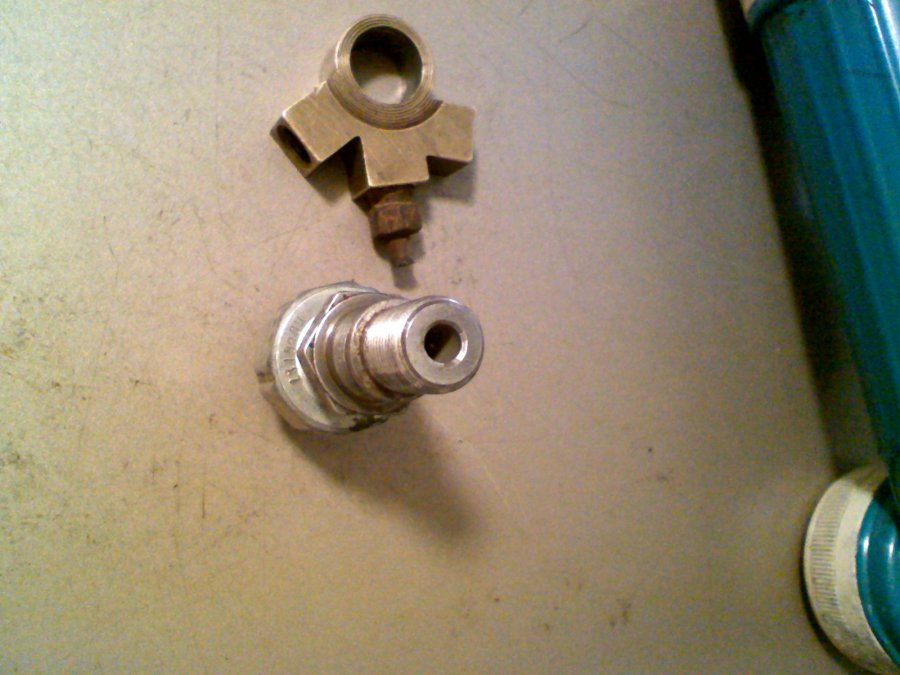
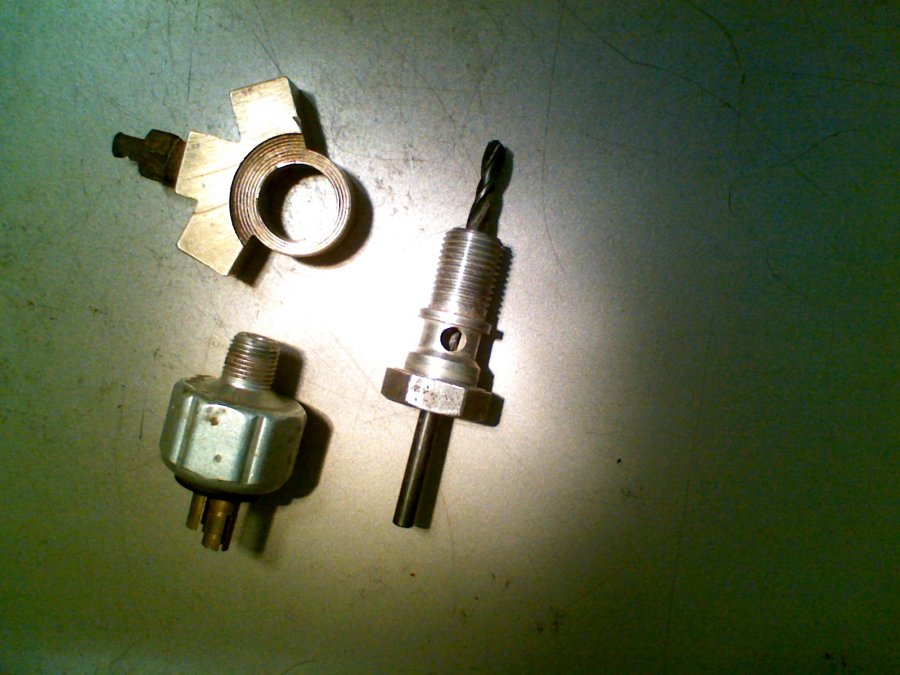
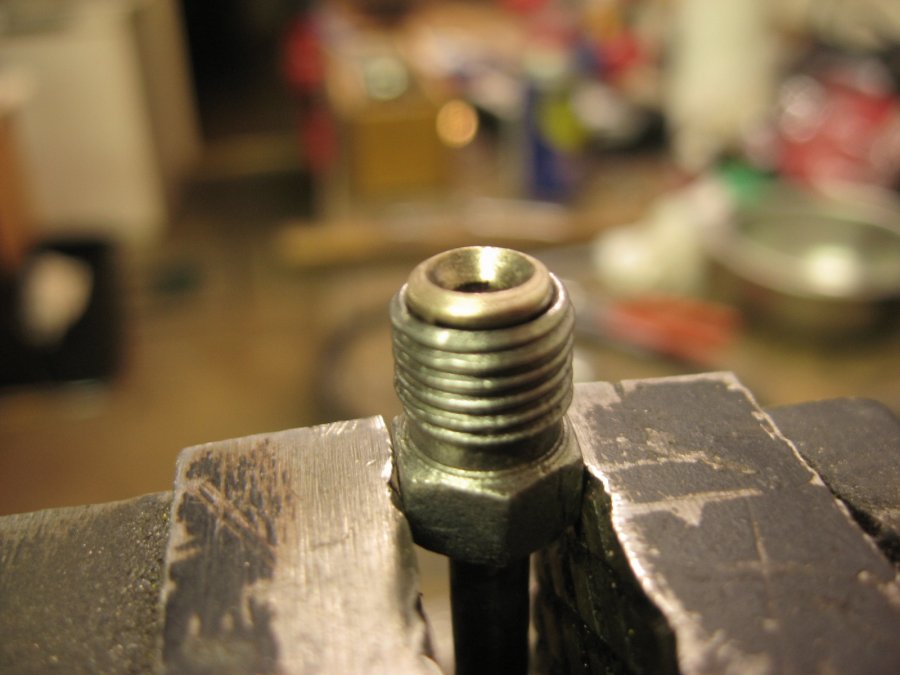
Actually, the switch is not "shoved" it threads quite nicely into the port as shown and that port is drilled all the way through and intersects with the three 3/8-24 ports. I'm thinking I might weld up the hole where the 1/2-20 end is and bolt it to the frame a few inches from where the stock 'T' for the front brake line exist.
-
I'd be more concerned with the condition of the wiring itself. No cents in putting a dime into a car that has old deteriorated wires. Stick a camera up under the dash and take a bunch of pics. Also under the hood. Anything looking iffy and you should think about a re-wire. Weather you go with stock type cloth insulation or modern day stuff just remember, it's not getting any younger.
-
51 plymouth cranbrook heater core removal
ptwothree replied to 41plymouthcookie's topic in P15-D24 Forum
Even worse then stubborn hoses is the hardware securing the heater box to the inner fender. Soak 'em good in your favorite penetrating oil. If your car has spent even a little time in or around the rust belt you will probably snap off at least one of the fasteners. I'm 2 for 2 so far. Good luck....... -
Except the block I posted is threaded for 3/8"-24 including where the pressure switch is located. The three line holes are for inverted flare fittings. The rear brake hose is 7/16-20 and would not fit this set up. I got that....My '52 has that switch and block at the left rear wheel as well. Also has the block/vent assembly on the rear axle. I'd like to use the posted block and switch at the front where the left and right lines connect. I'm rewiring so this would not only simplify that but make it easier to r&r the switch when it goes bad.
-
I just don't know how it plumbs into the brake system. Where does the 1/2"-20 go to. This has been buggin me for days. I'd like to use it to move the brake light switch to the front of the car and replace the 'T' that hooks up the master to the front brakes. Can anyone help?


-
I'll try that...I could not find a brand name...thought they might be MOPAR parts.
-
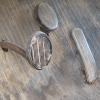
pulled off my '52 cranbrook..front shocks.


-
Good! That's what I needed to know. Thank you both. Little things like this are what make this forum the wonderful entity it is!
-
Well after a bunch of surgeries and a few other things, I have finally rounded up enough parts and have the time to put the little beastie back together. I'm in the middle of replacing the brake and fuel lines and I don't remember if the rear flex hose that connects to the 'T' on the axle housing gets a copper washer or not. Can anyone help? It's a '52 cranbrook...
-
Is this something new or has it always been hard to get reverse? If it's something new, I would check the rear motor mounts. If they have collapsed or are need of replacement, then there is another possible source of the problem. If it's always been this way then it could be bent shift rods, wallowed out holes where the rods attach, or an internal transmission problem. Btw...You should get a shop manual for this car as it will show you how to adjust shift linkage, among other things....a must have!
-
NAPA sells various length pins. I bought some that were a bit too long and used a grinder to make them the right length.
-
1949 plymouth bellhousing mount questions
ptwothree replied to nick1951ratdodge's topic in P15-D24 Forum
Plymouth will take a 230 with minimum mods and the 218 is a bolt in. Dodge will not take a 218 as the fluid drive trans and bell housing are longer then the 218 trans and bell. Driveshaft lengths vary too. There are other differences, but those are the biggies. A stick shift Dodge is gonna cost $$'s as I'm pretty sure there were no factory stick Dodges from that era '46 and up made. Maybe in Canada they had some, but I'm not sure of that. Good luck! -
If it's already converted to 12v then why not swap in a 10si alternator and eliminate the stock gennie and regulator...simplifies the wiring too.

-
Btw..If anyone has there heart set on Chinese wheel cylinders, rockauto has em for about $10 right now.
-
My experience when flaring a line is to start with a perfect 90 degree end with no deformities or burrs. If not, then it's all down hill from there. That nickle copper line is easy to flare and to bend.

-
Anal would be if you chromed or powder coated them...there may be other things as well.
-
Might sound dumb but, I've done it. Do you have a copper washer installed between the flex hose and rear junction? Front calipers and hoses.
-
Maybe somthing like this... https://www.amazon.com/uxcell-Converter-Regulator-Waterproof-Transformer/dp/B01CUA4KK8/ref=sr_1_25?ie=UTF8&qid=1493681959&sr=8-25-spons&keywords=12+to+6+volt+reducer&psc=1 Anyone have any luck with this? Mounted to a piece of aluminum near the wiper motor....
