


Tired iron
-
Posts
185 -
Joined
-
Last visited
-
Days Won
10
Content Type
Links Directory
Profiles
Articles
Forums
Downloads
Store
Gallery
Blogs
Events
Classifieds
Posts posted by Tired iron
-
-
Thanks sniper and DJK for digging up info. And here's my two cents about electric pumps. First off, I love 'em! And here's why: When one of my vehicles has been sitting for a long time, I don't have to waste precious battery capacity cranking the motor to get fuel up to and in the carb. I also put a electric switch in the supply line to the pump so that, in Autumn when I'm putting cars to sleep, I can turn off the switch and keep running the motor until it dies. This does a good job of draining the carb, reducing varnish build-up. Yes, I could use a gas additive (and I often do), but with lots of cars and equipment, and full gas tanks in each, that's lots of Stabil!
And, in regards to leaving the mechanical pump in the line, I've done that numerous times, but one thing to consider is this: if you do that and the rubber diaphram of the mechanical pump fails, you'll get raw gas going into your crankcase and diluting your oil... and not know it!
-
 2
2
-
 1
1
-
-
Do you happen to know the psi output of this pump? Lots of pumps that say they are low pressure also post numbers of 5-9 psi which, in my experience, can sometimes overpower the float and needle valve.
-
I have a 1950 meadowbrook with fluid drive and, If memory serves, when i rebuilt a non-fluid drive tranny for it, I had to swap input shafts cause one was longer than the other due to the fluid drive unit. Other than that, the conventional tranny was the same and it bolted up just fine to the fluid drive bell housing.
-
I'll steering clear of the 6 vs. 12 debate -- to each his/her own opinion -- but if you are going to convert, I found it to be much less complicated than some folks make it. I put in a one-wire 12 v alternator, swapped all bulbs to 12, new 12 V coil, and swapped polarity on the coil and ampmeter cause I wanted neg ground. I don't know if I would have converted if my car had been in good running shape, but my car was a junkyard find and the gen was shot and most of the bulbs were toast!
Now my horn is loud but works fine, my starter loves the extra juice, fuel gauge is fine, and I've got all kinds of choices for a good sound system. No converters needed. I haven't swapped the blower motor yet, but will per sniper's and others recommendations.
-
As sniper said, there's lots on your shopping list that's not really necessary and/or excessively expensive. As an example, you can get a 12 v electric fuel pump for 10-20 bucks that will work just fine...just make sure you get a low pressure one.
Steering clear of the 6 to 12 volt conversion debate (which is a hot one on this forum!), if you go 12, you absolutely want to make it neg ground--and there's no reason not to. The only things that have polarity issues are the amp meter, the ign. coil and perhaps the fuel pump and with each of those you just swap the connections to change polarity. Overdrive would have its own issues that I won't speak to here. Smarter minds than mine will chime in here on something I didn't get correct, but my point is that it is a very simple thing to do.
-
1
-
-
I recently rebuilt the 3 speed transmission in my International Scout and used the same trick with a extra lay shaft with a slight taper ground at the ends to help get it started when pushing the dummy shaft out. That plus assembly grease plus a string cradle to lift the cluster gear slightly as needed did the trick.
-
1
-
-
Looks like there's quite a bit of new and modified wiring, which is okay, but makes it harder for me to tell you exactly what to do and where things are.
Get yourself a trouble light or voltmeter, clip one side to ground and starting probing for supply voltage ("hot"). Start at the end and work backwards until you find something wrong.
So working backwards: (with ignition key on) check for hot at the terminal on the distributor ( you may need to take the distributor cap off and pry open the points to double check).
If not hot there, then follow that wire back to the next item, which will be the spak coil. Check there on both terminals. If nothing there, then trace back to the next thing, which in the original meadowbrook set up is the horn relay. The horn relay doesn't do anything for the ignition; it's just an handy spot for the ignition circuit to attach too. Find hot there. If not, then the final point is the ign key switch. Hard to get under there--helpful if you practice yoga regularly.
An additional approach will be to simply bypass a lot of those components (just to help diagose...not as a solution). Run a wire from the hot side of your battery to ignition key switch side, supply side, of your coil. Crank the motor over and, if it starts, you know that the problem is before the coil.
Now get to it! I'm off to church and will check back here later today. In the meantime, folks much wiser than I will hopefully have additional tips for you.
-
The horn relay is on the firewall right above where the steering column comes thru. About a 1" x 2" metal rectangle with lots of wires on it. True to the label, it's the relay for the horn, but it's also the connection pass thru for the coil for ignition.
The thing on the carburetor is a kick down switch the engages the over drive on the transmission whenever you stomp on the gas pedal.
And the circuit breaker monitors when too much current is flowing thru thise wires and temporarily switches off (until it cools back down). It's about the size of a little book of stick matches and is up on the backside of the dash above the ignition key switch.
-
Hi Joe,
I had to fabricate news one, but if that's not possible, I'd find a metal worker/shop and have them weld you up some stands. And, from the looks of the picture, the condition of the floor mounting holes will require either fixing the floor pan at that place, or modifying the location of the mounting holes on the stands and drilling new holes in the floor pan.
Whatever fix you choose, just make sure the holes in the floor pan line up EXACTLY with the holes in the legs because when you get that big ol heavy sofa of a front seat back in there is sooo little room for you hands to be messing around with getting the bolts in.
-
Thanks, Bob...good tip. Right now I'll wait and see if the silicone sealer keeps the rain out (whenever that is...it snowed yesterday, uffda).
-
Makes sense, Dan. I'll sneak sone good silicone clear window sealer in there and hope for the best.
-
Now that's pretty smart, Sam. I'm gonna do that as a back up.
Unfortunately, my stuck hood wasn't due to the release lever--that worked fine. It was that I had been adjusting my hood which changed the way the Christmas tree shaped bolt goes down into the ...I'll call it a striker plate. The lip edge of the tree got caught up under the edge if the striker plate hole. Coulda been bad news.
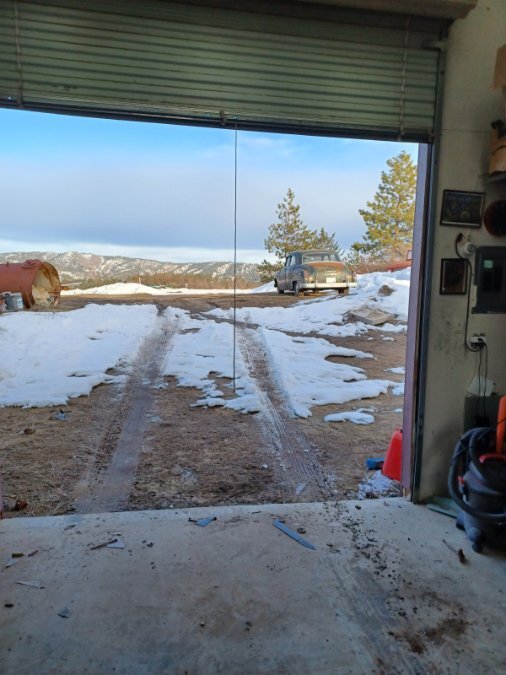
On better news, I finally got the dodge outta the shop, where she's been all winter, and into the light of day.
Basically, the car is finished and, wow, does that feel good. It has been quite the project.
-
2
-
-
I was adjusting the hood and the hood latch on my 50 dodge when...yep, i couldn't get it to unlatch! After much struggle, I got it, but, it got me to thinking: what do you do if you cant get it to open? I don't see how you can really access the striker plate etc., unless you rip out the front chrome trim.
Anyone been in that situation, and what did you do?
-
Ive got a bit of a leak at the bottom corner of my rearview window on a 1950 Dodge meadowbrook. I'd like to take off the outside chrome trim to investigate. Does this just pry off with a interference fit? Or am I opening a can of worms here?
-
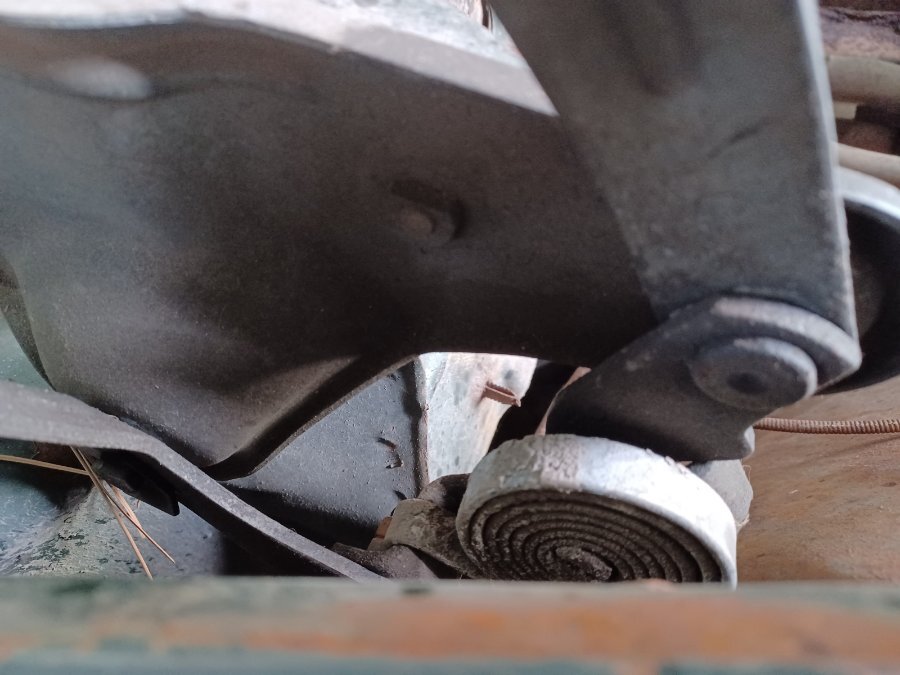
Wow, this so interesting! Apparently, there's no simple answer here: some have just the flat spring, some have just the tube spring... and some both. I talked with a fellow Meadowbrook owner. He has just the the tube spring; I have just the flat spring--and we both have a 1950 Meadowbrook.
The reason I'm stuck on this is that, at this point, I don't know if my problem is just that my flat spring is fatigued, or that I am missing the tube springs :*(
-
I'll look closer, but I didn't see any when I looked previouly. At least now I know that there is supposed to be the additional spring...getting closer to a solution here! thanks.
-
That makes sense. I guess my tube springs are just missing. Any ideas other than the 75 buck ones on ebay?
-
I'm still confused...when we use the term hood spring are we talking about the flat curled up one or the long tube spring? I see references to both. I have the pancake spring, but am I also supposed to have the tube spring as well in my 1950 Dodge Meadowbrook?
-
4 hours ago, Doug&Deb said:
My Coronet needs a prop to keep the hood open. The springs don’t hold at all anymore.
Do you have the round springs like in my picture?
-
I am confused about how my hood stays up. For starters, I don't think that this was Dodge-issue...
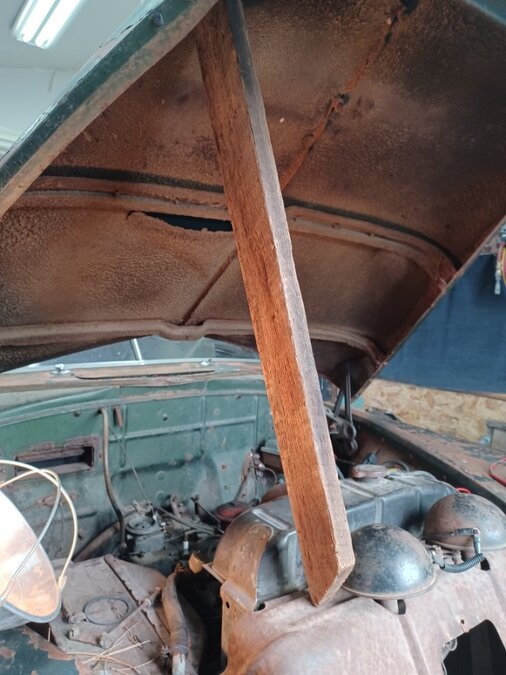
I read about these hood springs and where they go
But I don't see a place where these springs could attach to my hood hinges. My hood hinges DO have these little springs, but it doesn't seem likely that they are strong enough to keep the hood up (and they don't). Please set me straight here!
-
Thanks. As you know, having specialized tools makes a huge difference.
-
6 hours ago, soth122003 said:
Hey Tired Iron, the carpet looks great. Couple of questions though. Is the Master cylinder under the floor and does your car have the removable floor pan? If yes to the MC did you make any allowances for ease of service to it? Same with the floor pan?
Joe Lee
Hi Joe,
I took out the master (it was toast) and installed a modern 2 circuit master on the firewall. So, I covered up that old area with new metal. And thanks!
-
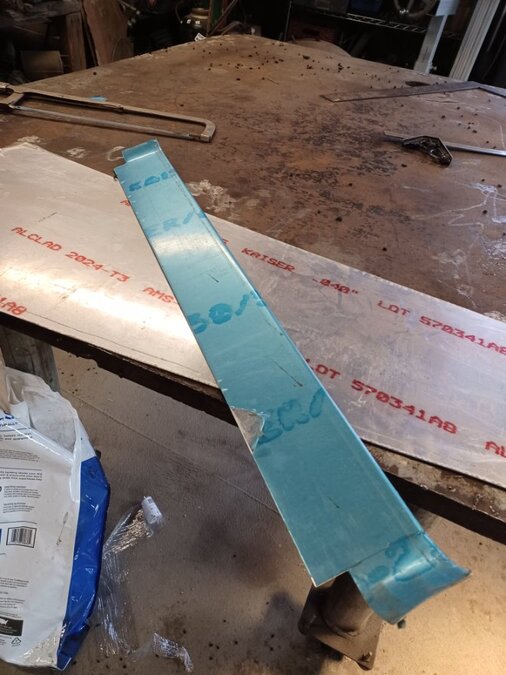
Alrighty, for those who asked about the process I used in making these...
I cut 4" wide strips of sheet aluminum, .04 gauge. I used a big floor mounted shop tool that is a combo shears, brake, and roller, but this gauge aluminum can be readily cut with a sturdy tin snips. The pieces were 28" and 35" for the back and front, respectively, if memory serves.
I then bent an almost 90 degree bend at a depth of 1". I used a press brake for this. You could also bend this by hand without this special tool, but it would take time and ingenuity with, say, a vise and sheet metal pliers. Then I trimmed the front and back ends to match the needs of the door posts and bent them up in a sweeping curve.
Then I rolled a 1/4" wide inside edge to bite down on the carpet, as well as look better.
Lastly, I rolled in two lines in parallel down the middle, both for strength as well as looks. This required the use of a bead roller and, admittedly, would be tough to replicate without that special tool.
The sills are held in place with small flathead trim screws, counter-sunk in the grooves. I didn't want to glue them in so that I can remove them if I ever need to pull up the carpet.
I appreciate the kind words. I recognize that this is not stock looking by any stretch and just wanted to record another strategy for the database of posts so that folks down the road have another option to consider.
I didn't really take pictures worthy of uploading. Here are two. The first shows the bead roller putting in the 1/4" carpet edge (I'll change the dies for rolling in the grooves).

-
12 hours ago, desoto1939 said:
Also like what you designed. Great fabrication. One suggestion, to improve the finished product I would roll the front and back ends and then seal the seam with some clear silicone seam sealer. I would make it look more stock and finished. Just my 25 cents worth of input.
Rich Hartung
Desoto1939@aol.com
That's a good idea, Rich. I hadn't thought of that
Pre-formed Brake & Fuel Lines
in P15-D24 Forum
Posted
I did my entire brake system in nicop and agree with everyone else...a learning experience, definitely, but enjoyable, satisfying and pretty cheap to do.